Attach an additional disk to Citrix ADM
Citrix Application Delivery Management (ADM) storage requirement is determined based on your Citrix ADM sizing estimation. By default, Citrix ADM provides you a storage capacity of 120 GB. If you need more than 120 GB for storing your data, you can attach an additional disk.
Note
Estimate storage requirements and attach an additional disk to the server at the time of initial deployment of Citrix ADM.
For a Citrix ADM single-server deployment, you can attach only one disk to the server in addition to the default disk.
For a Citrix ADM high availability deployment, you must attach an additional disk to each node. The size of both disks must be identical.
If you had earlier attached an external disk of lower capacity, you must remove the disk before attaching a new disk.
You can attach an additional disk of capacity greater than 2 terabytes. If necessary, the size of the disk can be lower than 2 terabytes also.
Citrix recommends using solid-state drive (SSD) technology for Citrix ADM deployments.
This document explains the following scenarios about attaching a new additional disk, creating partitions, and resizing the additional disks:
-
Attach a new additional disk
-
Launch the disk partitioning tool
-
Create partitions in the new additional disk
-
Resize the existing additional disk
-
Remove partitions on the additional disk
Attach an additional disk in a standalone Citrix ADM
Perform the following steps to attach a disk to the virtual machine:
-
Shut down the Citrix ADM virtual machine.
-
In the hypervisor, attach an additional disk of the required disk size to Citrix ADM virtual machine.
The newly attached larger disk stores the database data and Citrix ADM log files. The existing 120-gigabytes default disk is now used to store the core files, operating system log files, and so on.
-
Start the Citrix ADM virtual machine.
Citrix ADM disk partition tool
Citrix ADM now provides Citrix ADM disk partition tool, a new command line tool. The functionalities of this tool are described in detail as follows:
-
Using the tool, you can create partitions in the newly added additional disk.
-
You can also resize existing additional disk using this tool. But the existing external disk should not be greater than 2 terabytes.
Note
-
It is not possible to resize existing disks beyond 2 terabytes without losing data. This is due to a known limitation on the platform.
-
To create a storage capacity greater than 2 terabytes, you must remove the existing partitions and create partitions using this new tool.
-
-
Using this new tool, you can perform any partition action on the disk explicitly. The tool provides you with clear visibility and control over the disk and the associated data.
Note
You can only use this tool on the additional disk that you have attached to the Citrix ADM server. You cannot create partitions in the primary (default) 120-gigabytes disk using this tool.
Launch the disk partition tool
-
Open an SSH connection to the Citrix ADM by using an SSH client, such as PuTTY.
-
Log on to the Citrix ADM by using the administrator credentials.
-
Switch to the shell prompt and type:
/mps/DiskPartitionTool.py
<!--NeedCopy-->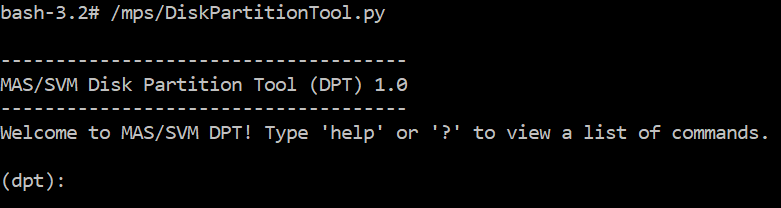
Note
For Citrix ADM in high availability deployment, you must launch the tool in both nodes and create or resize partitions after attaching disks to the respective virtual machines.
Create partitions in the new additional disk
The create command is used to create partitions whenever a new secondary disk is added. You can also use this command to create partitions on an existing secondary disk after the existing partitions are deleted using the “remove” command.

Note
There is no 2 terabytes size limitation while creating partitions with the disk partition tool. The tool can create partitions larger than 2 terabytes. When you partition the disk, a swap partition of size 32 GB is automatically added. The primary partition then uses all the remaining space on the disk.
Once the command is executed, a GUID partition table (GPT) partition scheme is created. Also a 32 GB swap partition and data partition are created to use rest of the space. A new file system is then created on the primary partition.
Note
This process can take a few seconds, and you must not interrupt the process.


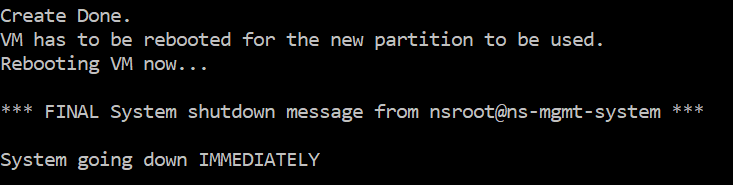
Once the create command completes, the virtual machine is automatically restarted for the new partition to get mounted.
After the restart, the new partition is mounted at /var/mps.
The swap partition added shows up as swap space in the output of the “create” command.

Note
The tool restarts the virtual machine after you have created the partition.
Resize the partitions in the existing additional disk
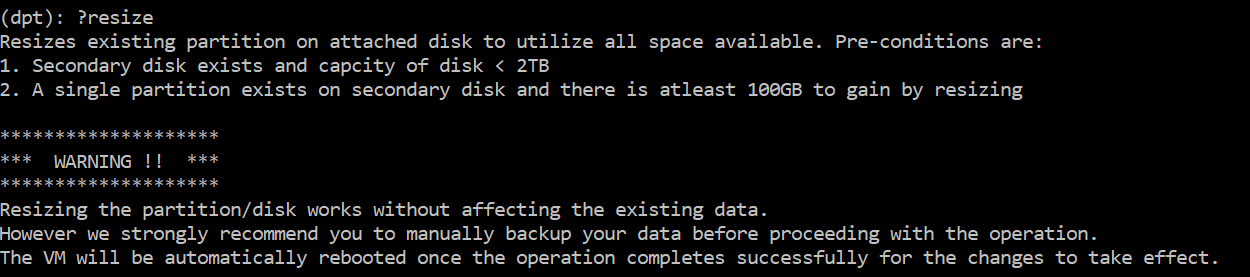
You can use the resize command to resize the attached (secondary) disk. You can resize a disk that has a master boot record (MBR) or GPT scheme. The size of the disk should be less than 2 terabytes in size to a maximum of 2 terabytes.
Note
The “resize” command is designed to function without losing any existing data. But Citrix recommends that you back up critical data in this disk to external storage before attempting the resize. Data backup is helpful in cases where the disk data can get corrupted during the resize operation.
Ensure to increase the disk space in increments of 100 GB of space while resizing the partitions. Such an incremental increase ensures that you would not have to resize more frequently.
The “resize” command checks for all preconditions and proceeds if all preconditions are met and after you have given consent to resizing. It stops the processes accessing the disk, which includes the Citrix ADM subsystems, PostgreSQL DB processes, and Citrix ADM monitor process. Once the processes are stopped, the disk is unmounted to prepare it for resizing. The resizing is done by extending the partition to occupy the complete available space and then growing the file system. If a swap partition exists on the disk, it is deleted and recreated at the end of the disk after resizing. The swap partition is discussed in the Create command section of the document.
Note
The “growing file system” process can take some to complete and take care that you do not interrupt the process while it is in progress. The tool restarts the virtual machine after you have resized the partition.

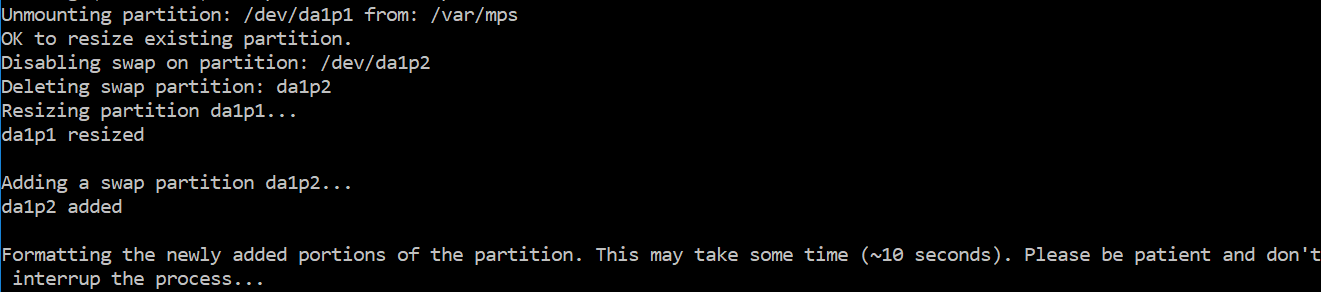
All the intermediate steps in the resize process (stopping applications, resizing disk, growing filesystem) are shown on the console. Once the process completes, the following message is seen.
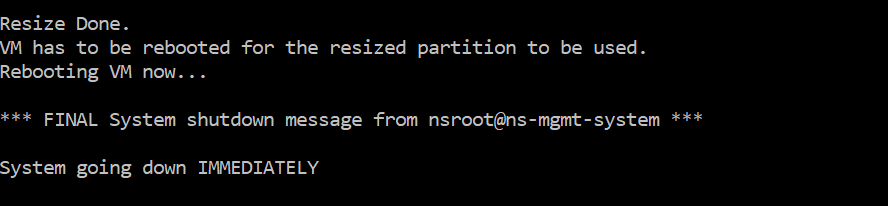
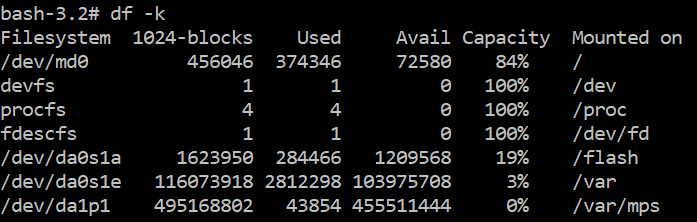
After rebooting, the increase in size can be observed using the “df” command. Here is the before and after details after you increase the size:

Remove the partitions in the additional disk
An existing partition on the secondary disk can be resized up to 2 terabytes. This is due to a known limitation on the partition. If you want a disk larger than 2 terabytes, either attach a new disk and partition it by using the disk partition tool. You can also remove the existing partition by using the remove command, and then create a partition.
Note
Removing the existing partition deletes all existing data. So, any critical data must be backed up to external storage before using this command.

Running the “remove” command asks you for confirmation and once confirmed, it stops all processes (such as ADM subsystems, PostgreSQL processes, and ADM monitor) using the secondary disk. If a swap partition exists and swap is enabled on the partition, then the swap is disabled.

When you type “y,” the command unmounts the disk and removes all partitions on the disk.
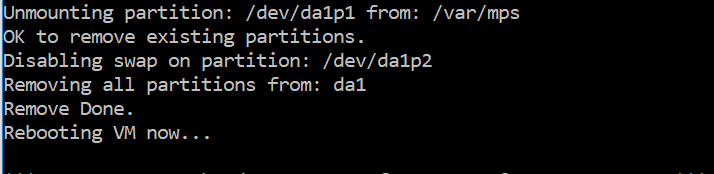
Note
The tool restarts the virtual machine after you have removed the partition.
Restart the virtual machine
When a partition is created or resized, or when a swap file is created, restart the virtual machine. The changes take effect only after restarting. For this purpose, a reboot command is provided in the tool.

You are prompted for confirmation and once confirmed, it stops all processes (such as ADM subsystems, PostgreSQL processes, and ADM monitor.) The virtual machine is then restarted.


Create a backup file of the disk data
Here are the steps to follow to backup Citrix ADM data before resizing or removing the partitions.
Note
Creating a backup file requires disk space. Citrix recommends that you ensure there is enough free disk space available (50% or more) before backup commands are executed.
-
Stop ADM.
/mps/masd stop <!--NeedCopy--> -
Stop PostgreSQL.
su -l mpspostgres /mps/scripts/pgsql/stoppgsql_smart.sh <!--NeedCopy--> -
Stop ADM Monitor.
/mps/scripts/stop_mas_monit.sh <!--NeedCopy--> -
Create tarball.
cd /var
tar cvfz /var/mps/mps_backup.tgz mps
<!--NeedCopy-->
Note
The operation takes time depending on the size of the data to be backed up.
-
Generate checksum.
md5 mps_backup.tgz > mps_backup_checksum <!--NeedCopy--> -
Remote copy the tarball and checksum.
scp <!--NeedCopy--> -
Validate the correctness of the copied tarball. Generate a checksum of the transferred file and compare with the source checksum.
-
Remove the tarball from the ADM virtual machine.
rm mps_backup.tgz  mps_backup_checksum
<!--NeedCopy-->
Additional commands
In addition to the commands listed earlier, you can also use the following commands in the tool:
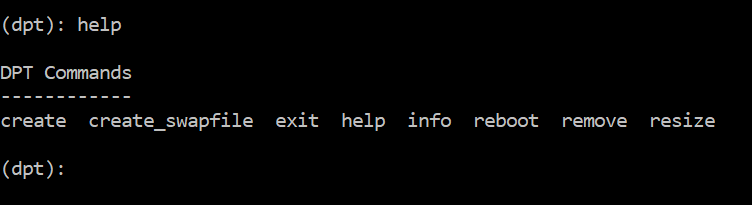
Help command:
To list the supported commands, type help or ? and press enter. To get further help on each of the command press help or ? followed by the command name and press the Enter key.
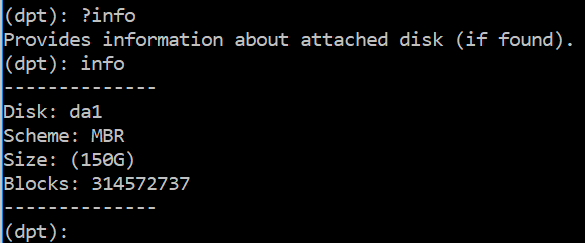
Info command:
The info command provides information about the attached secondary disk if the disk exists. The command provides the device name, the partition scheme, size in human-readable form, and the number of disk blocks. The scheme can be MBR or GPT. An MBR scheme means the disk was partitioned using an earlier version of Citrix ADM version. The MBR/GPT based partition can be resized but not beyond 2 terabytes. GPT partition scheme means that the disk was partitioned using Citrix ADM 12.1 or later.
Note
A GPT partition can be greater than 2 terabytes but when it is created. But you cannot resize the disk to a size greater than 2 terabytes after creating a disk with a smaller size. This is a known limitation of the platform.
Create_swapfile command:
The default swap partition on the primary disk of Citrix ADM is 4 GB and therefore, the default swap space is 4 GB. For the default memory configuration of Citrix ADM which is 2 GB, this swap space is sufficient. However, when you run Citrix ADM with a higher memory configuration, you need to have more swap space allocated on the disk.
Note
Swap partition is usually a dedicated partition that is created on a hard disk drive (HDD) during the installation of the operating system. Such a partition is also referred to as a swap space. Swap partition is used for virtual memory that simulates the additional main memory.
Secondary disks that were added in the earlier versions of Citrix ADM do not have a swap partition created by default. The “create_swapfile” command is meant for secondary disks created using older Citrix ADM versions which don’t have a swap partition. The command checks for the following:
-
Presence of a secondary disk
-
Disk being mounted
-
Size of the disk (at least 500 GB)
-
The existence of the swap file
The “create_swapfile” command is useful only when the memory is greater or equal to 16 GB and not when memory is low. Therefore, this command also checks for memory before proceeding with swap file creation.

If all the conditions are met, and the user consents to proceed, a 32 GB swap file is created on the secondary disk. The swap file creation process takes a few minutes to complete and take care that you do not interrupt the process while in progress. After successful completion, a restart is done for the swap file to take effect.

After reboot, the increase in swap can be observed using the top command.

Exit command:
To exit from the tool, type exit and press the Enter key.

Attach additional disks to Citrix ADM deployed in high availability
Let us consider a scenario where you have configured a pair of Citrix ADM servers in a high availability set up without any secondary disks. Also, let us consider you have added two or more Citrix ADC instances, checked and ensured all processes are running. You might want to add secondary disks to the virtual machines in this setup. In a high availability set up, you must add additional disks to both nodes as detailed in this task:
-
Assume that the Citrix ADM node names are “ADM_Primary” and “ADM_Secondary.”
-
First, run the partition tool on ADM_Secondary and then add a secondary disk. The virtual machine restarts after the disk is added.
-
Shut down the ADM_Secondary after it restarts.
-
Now run the partition tool on ADM_Primary and add a secondary disk. The virtual machine restarts after the disk is added.
Ensure that you add disks of similar capacity to both nodes. For example, if you add a disk of the capacity of 500 GB to the primary node, add a disk of 500 GB capacity to the secondary node also.
-
After the ADM_Primary restarts, check that it is the primary node.
-
Now start the ADM_Secondary node. Ensure that it has come up as the secondary node and the databases have synchronized.
-
Confirm that all data still exists.
Perform the following steps to increase the capacity of RAM on both the nodes:
-
Shutdown ADM_Secondary and increase the RAM size as required. Don’t restart the node.
-
Shutdown ADM_Primary and increase the RAM size as required.
Ensure that you increase the RAM size equally on both nodes. For example, if you increase the RAM size on the primary node to 16 GB, do the same on the secondary node as well.
-
Restart the ADM_Primary.
-
After the ADM_Primary reboots, check that it is the primary node.
-
Now start the ADM_Secondary node. After it restarts, ensure that it has come up as secondary and the DB sync is working.
-
Now confirm that all data still exists.
Note
After you add the secondary disk, the primary node takes some time to come up. Also, the entire process of adding secondary disks to both nodes and increasing RAM capacity requires both nodes to be down for some time. Consider this downtime while planning this maintenance activity.
In this article
- Attach an additional disk in a standalone Citrix ADM
- Citrix ADM disk partition tool
- Launch the disk partition tool
- Create partitions in the new additional disk
- Resize the partitions in the existing additional disk
- Remove the partitions in the additional disk
- Restart the virtual machine
- Create a backup file of the disk data
- Additional commands
- Attach additional disks to Citrix ADM deployed in high availability