-
-
Microsoft Hyper-V への Citrix SD-WAN Center のインストールと構成
This content has been machine translated dynamically.
Dieser Inhalt ist eine maschinelle Übersetzung, die dynamisch erstellt wurde. (Haftungsausschluss)
Cet article a été traduit automatiquement de manière dynamique. (Clause de non responsabilité)
Este artículo lo ha traducido una máquina de forma dinámica. (Aviso legal)
此内容已经过机器动态翻译。 放弃
このコンテンツは動的に機械翻訳されています。免責事項
이 콘텐츠는 동적으로 기계 번역되었습니다. 책임 부인
Este texto foi traduzido automaticamente. (Aviso legal)
Questo contenuto è stato tradotto dinamicamente con traduzione automatica.(Esclusione di responsabilità))
This article has been machine translated.
Dieser Artikel wurde maschinell übersetzt. (Haftungsausschluss)
Ce article a été traduit automatiquement. (Clause de non responsabilité)
Este artículo ha sido traducido automáticamente. (Aviso legal)
この記事は機械翻訳されています.免責事項
이 기사는 기계 번역되었습니다.책임 부인
Este artigo foi traduzido automaticamente.(Aviso legal)
这篇文章已经过机器翻译.放弃
Questo articolo è stato tradotto automaticamente.(Esclusione di responsabilità))
Translation failed!
Microsoft Hyper-V 上での Citrix SD-WAN™ Center のインストールと構成
Microsoft Hyper-V サーバーに Citrix SD-WAN Center 仮想マシン (VM) をインストールする前に、システム要件とインストールに記載されている必要な情報を収集します。
Hyper-V 用の SD-WAN Center ソフトウェアは、システム要件とインストールの「Citrix SD-WAN Center ソフトウェアのダウンロード」セクションに記載されているとおりにダウンロードしてください。
Hyper-V 機能と管理ツールが Windows サーバーで有効になっていることを確認してください。
Hyper-V サーバー上に SD-WAN Center VM を作成するには:
-
Hyper-V マネージャーで、Hyper-V サーバーを右クリックし、[新規] > [仮想マシン] を選択します。
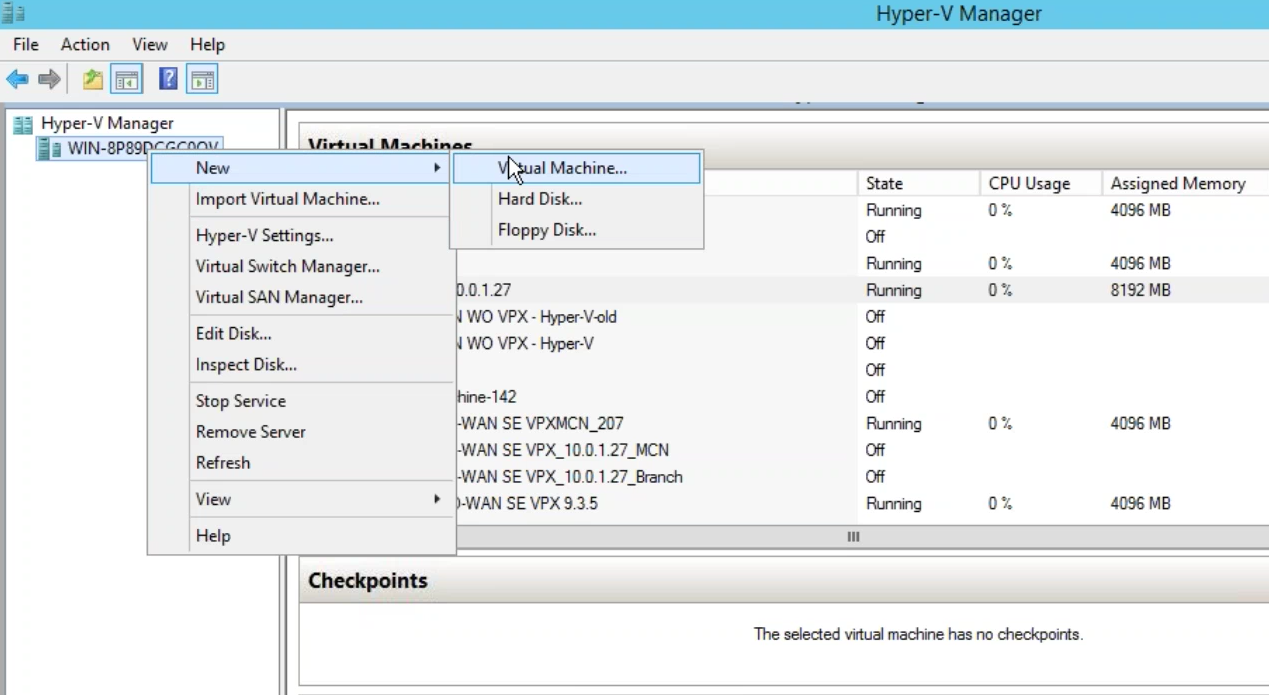
[新しい仮想マシンウィザード] が表示されます。[次へ] をクリックします。
-
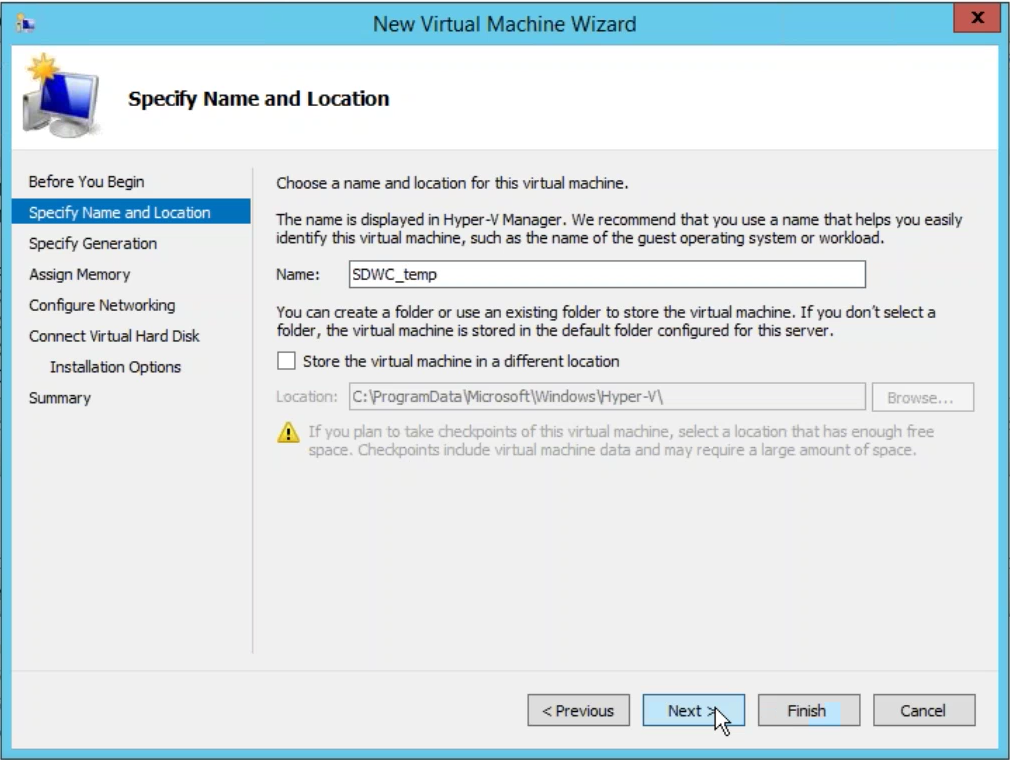
SD-WAN Center VM の名前を指定し、必要に応じて VM の保存場所を変更します。[次へ] をクリックします。
-
必要な VM 世代を選択します。[次へ] をクリックします。
-
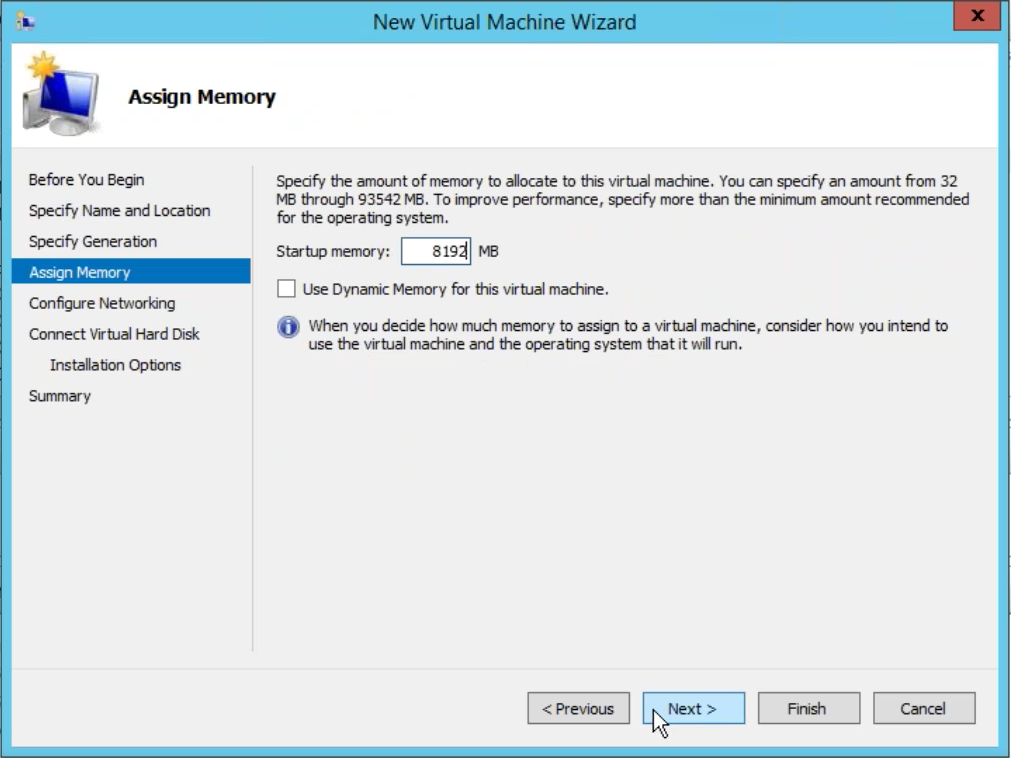
VM に 8 GB のメモリを割り当てます。[次へ] をクリックします。
注
Citrix SD-WAN Center VM は、最大 64 サイトを管理するために最低 8 GB のメモリを必要とします。メモリとサイト数のマッピングの詳細については、システム要件とインストールを参照してください。
-
VM のネットワークアダプターで使用する仮想スイッチを選択します。[次へ] をクリックします。
-
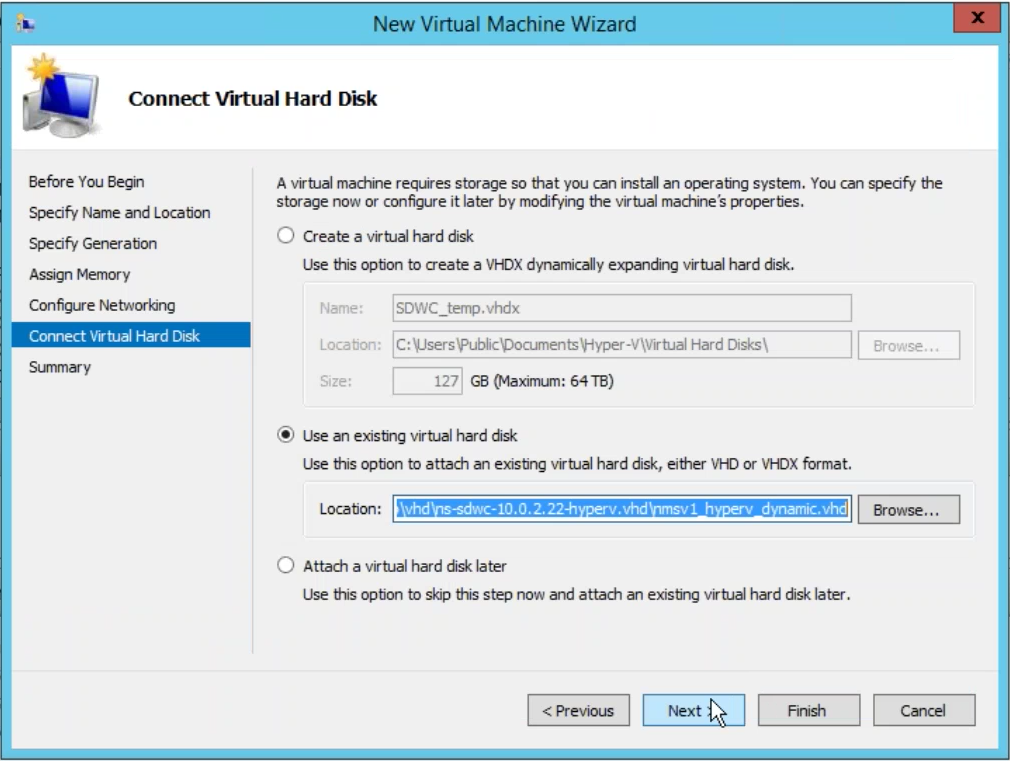
[既存の仮想ハードディスクを使用] を選択し、ダウンロードした SD-WAN Center VHD ファイルを参照して選択します。[次へ] をクリックします。
-
VM の概要を確認し、必要に応じて設定を変更します。変更しない場合は、[完了] をクリックします。SD-WAN Center VM が作成され、[仮想マシン] セクションに表示されます。
-
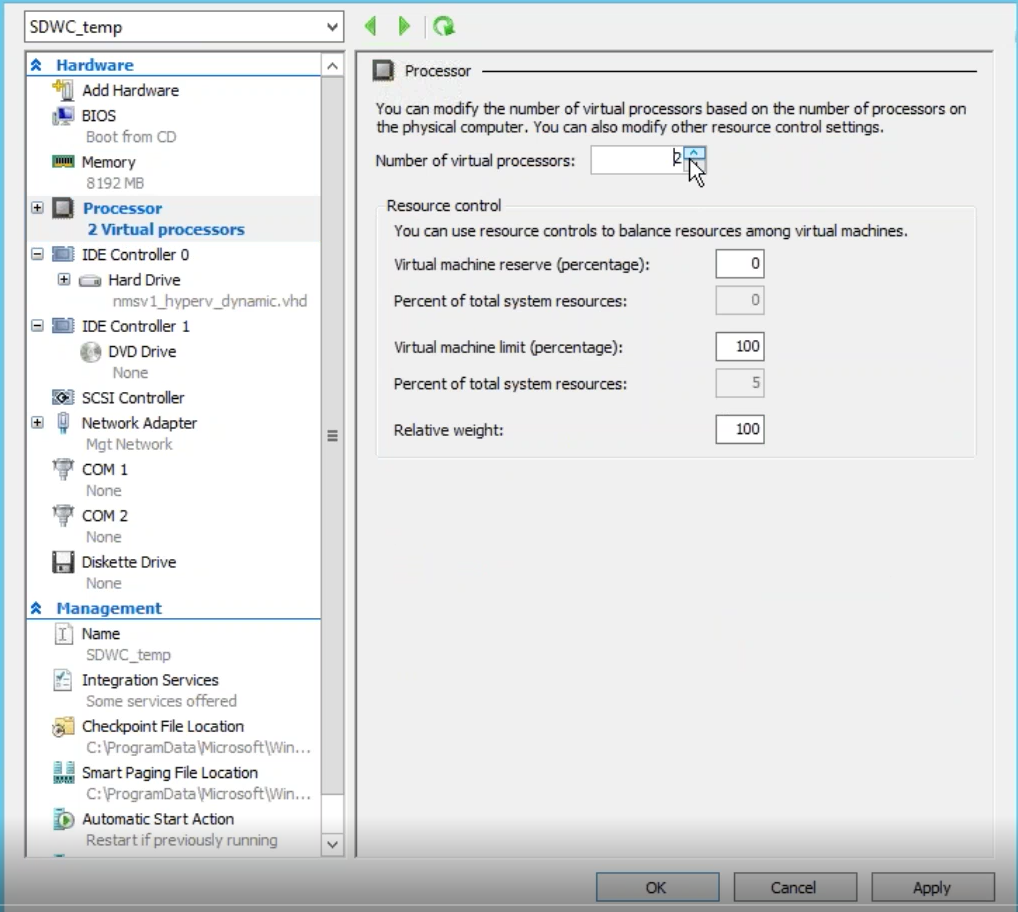
SD-WAN Center VM を右クリックし、[設定] を選択します。仮想プロセッサの数を 4 に設定し、[適用] をクリックします。
-
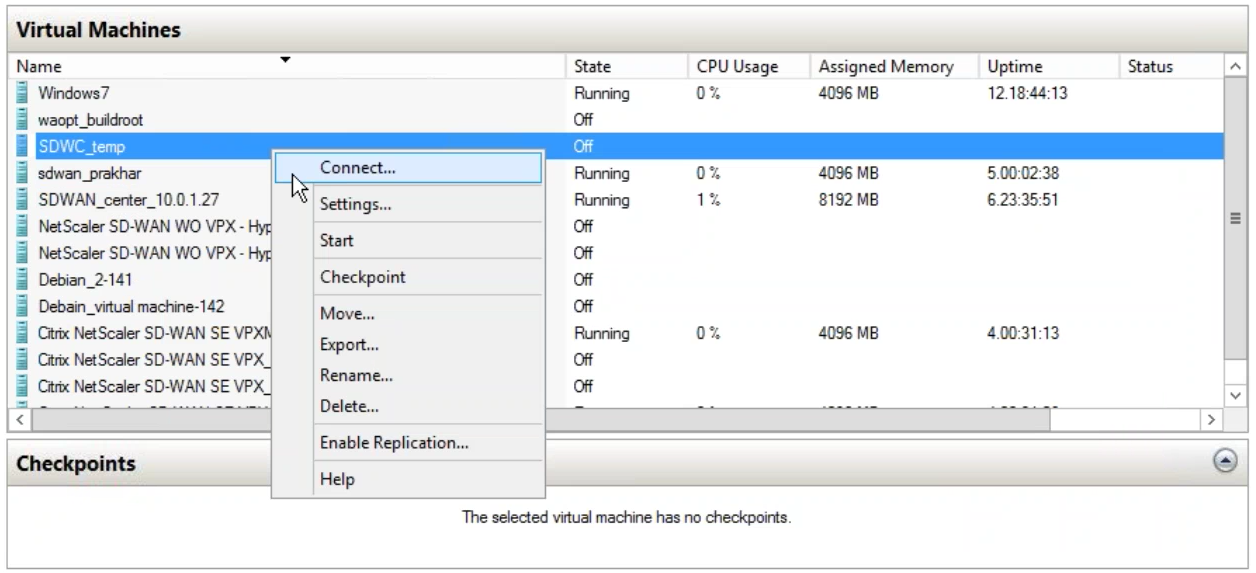
SD-WAN Center VM を右クリックし、[接続] をクリックします。
-
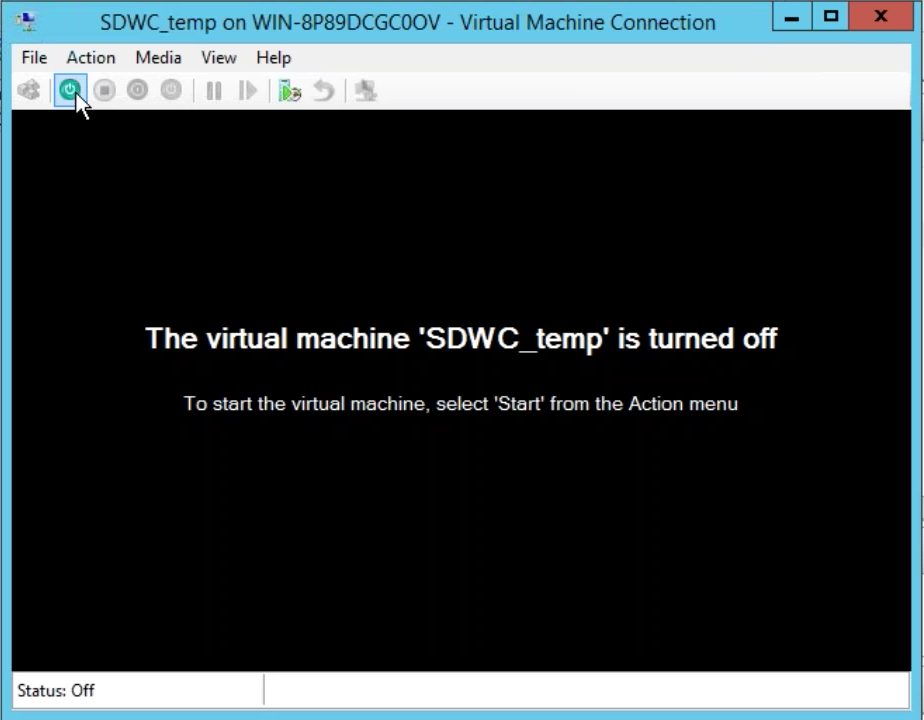
[開始] ボタンをクリックします。
注
初回インストールには、構成した CPU と RAM の数に応じて最大 50 分かかる場合があります。
-
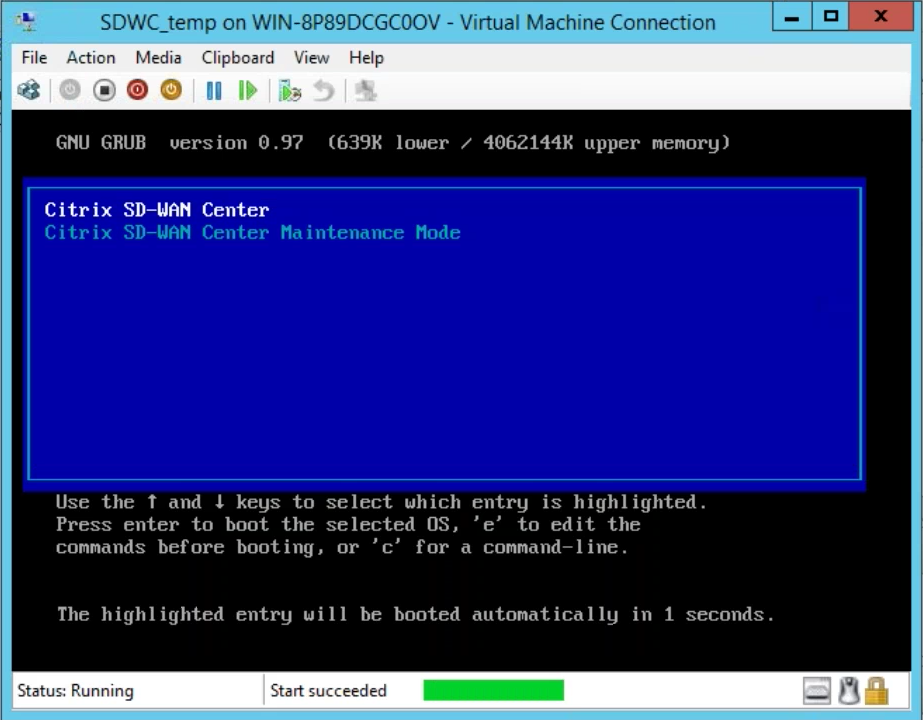
VM が起動したら、Citrix SD-WAN Center を選択し、Enter キーを押します。
-
VM にログインします。新しい SD-WAN Center VM のデフォルトのログイン資格情報は次のとおりです。
ログイン: admin
パスワード: password
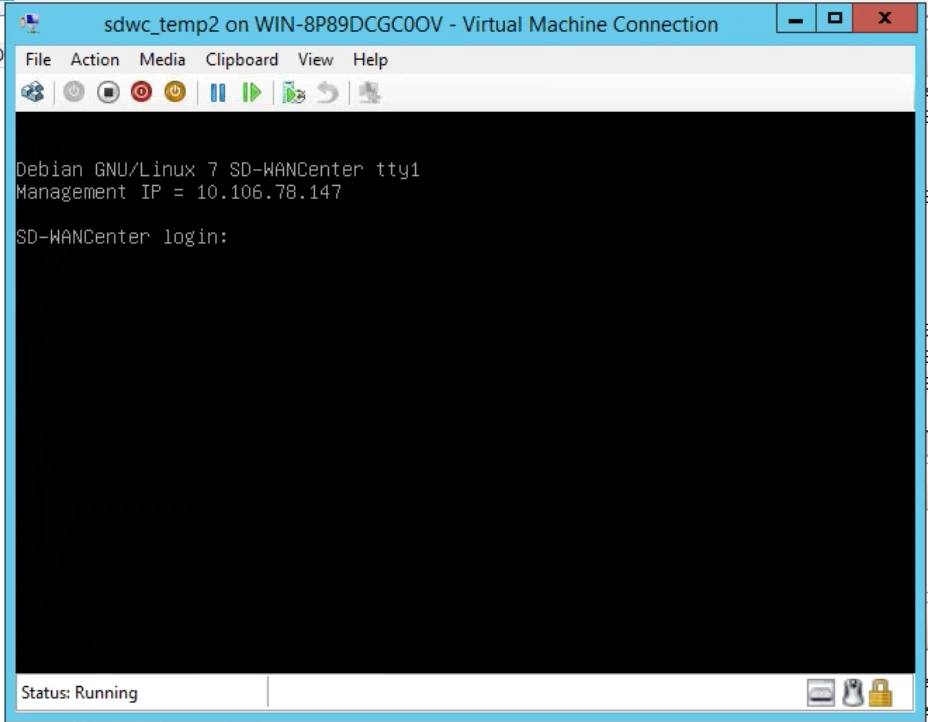
管理 IP アドレスがコンソールに表示されます。この IP を使用して SD-WAN Center の Web インターフェイスにアクセスします。
注
SD-WAN ネットワークで DHCP が構成されていない場合は、静的 IP アドレスを手動で入力する必要があります。
静的 IP アドレスを管理 IP アドレスとして構成するには:
-
VM にログインします。新しい SD-WAN Center VM のデフォルトのログイン資格情報は次のとおりです。
ログイン: admin
パスワード: password
-
コンソールで、CLI コマンド
management_ipを入力します。 -
コマンド
set interface <ipaddress> <subnetmask> <gateway>を入力し、管理 IP を構成します。
管理 IP を使用して Citrix SD-WAN Center の Web インターフェイスにアクセスします。
共有
共有
This Preview product documentation is Cloud Software Group Confidential.
You agree to hold this documentation confidential pursuant to the terms of your Cloud Software Group Beta/Tech Preview Agreement.
The development, release and timing of any features or functionality described in the Preview documentation remains at our sole discretion and are subject to change without notice or consultation.
The documentation is for informational purposes only and is not a commitment, promise or legal obligation to deliver any material, code or functionality and should not be relied upon in making Cloud Software Group product purchase decisions.
If you do not agree, select I DO NOT AGREE to exit.