-
-
-
すべてのデフォルトStyleBook を非表示にする
-
This content has been machine translated dynamically.
Dieser Inhalt ist eine maschinelle Übersetzung, die dynamisch erstellt wurde. (Haftungsausschluss)
Cet article a été traduit automatiquement de manière dynamique. (Clause de non responsabilité)
Este artículo lo ha traducido una máquina de forma dinámica. (Aviso legal)
此内容已经过机器动态翻译。 放弃
このコンテンツは動的に機械翻訳されています。免責事項
이 콘텐츠는 동적으로 기계 번역되었습니다. 책임 부인
Este texto foi traduzido automaticamente. (Aviso legal)
Questo contenuto è stato tradotto dinamicamente con traduzione automatica.(Esclusione di responsabilità))
This article has been machine translated.
Dieser Artikel wurde maschinell übersetzt. (Haftungsausschluss)
Ce article a été traduit automatiquement. (Clause de non responsabilité)
Este artículo ha sido traducido automáticamente. (Aviso legal)
この記事は機械翻訳されています.免責事項
이 기사는 기계 번역되었습니다.책임 부인
Este artigo foi traduzido automaticamente.(Aviso legal)
这篇文章已经过机器翻译.放弃
Questo articolo è stato tradotto automaticamente.(Esclusione di responsabilità))
Translation failed!
すべてのデフォルトStyleBookの非表示
NetScaler® ADMは、NetScaler ADMフォルダシステムに存在するすべてのStyleBookを一覧表示します。StyleBookのリストには、プライベートとパブリックの両方になり得るデフォルトStyleBookとカスタムStyleBookが含まれます。管理者として、すべてのデフォルトStyleBookを非表示にしたい場合があります。ユーザーが、あなたまたはユーザーによって作成されたカスタムStyleBookのみを表示およびアクセスできるようにすることができます。
NetScaler ADMを使用すると、カスタムStyleBookを表示し、NetScaler ADMに付属するすべてのデフォルトStyleBookを非表示にできます。すべてのデフォルトStyleBookを非表示にできる新しいGUIオプションが提供されています。
すべてのデフォルトStyleBookの非表示:
-
NetScaler ADMで、Applications > Configurations > Settings の順に移動します。
-
Settingsページには、デフォルトStyleBookがユーザーに表示されるかどうかに関する情報が表示されます。
-
デフォルトStyleBookを非表示にするには、右上にある編集アイコンをクリックします。
-
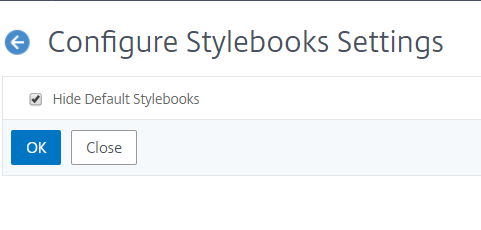
Configure StyleBook Settingsページで、Hide Default StyleBooksオプションを選択します。
-
OKをクリックします。
RBAC機能を使用してページを非表示にすることを選択していない場合、Configure StyleBook Settingsページは引き続きユーザーに表示されます。ユーザーは、デフォルトStyleBookを再表示するオプションをまだ持っている可能性があります。
Configure StyleBook Settingsページを非表示にするには、ポリシーを作成し、そのポリシーをデフォルトStyleBookを表示すべきではないユーザーに割り当てる必要があります。
RBACポリシーの作成:
-
NetScaler ADMで、Account > User Administration > Access Policies の順に移動します。
-
Addをクリックしてポリシーを作成します。
-
ポリシー名を入力します。
-
Permissionsセクションで、All > Applications > Configuration > Settings が選択されていないことを確認し、OKをクリックします。
ポリシーを作成した後、ロールを作成し、各ロールを1つ以上のポリシーにバインドし、ロールをユーザーグループに割り当てる必要があります。ポリシーをユーザーに関連付ける方法の詳細については、ロールベースのアクセス制御の構成を参照してください。
共有
共有
This Preview product documentation is Cloud Software Group Confidential.
You agree to hold this documentation confidential pursuant to the terms of your Cloud Software Group Beta/Tech Preview Agreement.
The development, release and timing of any features or functionality described in the Preview documentation remains at our sole discretion and are subject to change without notice or consultation.
The documentation is for informational purposes only and is not a commitment, promise or legal obligation to deliver any material, code or functionality and should not be relied upon in making Cloud Software Group product purchase decisions.
If you do not agree, select I DO NOT AGREE to exit.