
Manual provisioning of NetScaler VPX instance on OpenStack
In a few enterprise networks, NetScaler VPX instances cannot connect to NetScaler license Server to automatically download the licenses, for security reasons. In such a scenario, you need to manually deploy NetScaler VPX instances on OpenStack platform. Using the license access code received by you from Citrix, download the appropriate NetScaler VPX license and save it on your local system.
To Manually Provision NetScaler VPX Instance on OpenStack:
-
Install the NetScaler Driver Software and Register NetScaler Application Delivery Management (ADM) on OpenStack
-
In NetScaler ADM, navigate to Orchestration \> Cloud Orchestration \> OpenStack.
-
Click Configure OpenStack Settings. In Configure OpenStack Settings page, you can set the parameters to configure OpenStack in NetScaler® ADM. You have two options here - Default and Customized.
-
Select Default, if the OpenStack services are running on default ports.
-
-
Navigate to Orchestration \> Cloud Orchestration \> OpenStack, and click Deployment Settings.
-
Management Network - select the management network on OpenStack, to which the auto-provisioned NetScaler VPX is connected.
-
Profile Name - select the profile from the drop-down list. The NetScaler ADM uses the password contained in this profile to configure new auto-provisioned NetScaler VPX instances.
-
NetScaler VPX Image in Glance - select the NetScaler VPX image available in the OpenStack Glance that is used to create a NetScaler VPX instance. The drop-down list will display only those images that are present on OpenStack Glance.
-
-
In NetScaler ADM, navigate to Orchestration \> Cloud Orchestration \> OpenStack \> Service Packages, and then click Add.
-
On the Service Package page specify the following parameters:
-
Name - name for the service package. For example, enter SVC-PKG-GOLD.
-
NetScaler Instance Allocation - select Dedicated or Partitioned as the type of instance allocation defined in the service package.
-
NetScaler Instance Provisioning - select Create Instance OnDemand to create NetScaler instances during the configuration itself.
-
Auto Provision Platform - select OpenStack Compute. By default, NetScaler VPX will be selected as the instance type.
-
Assign OpenStack Tenants/Placement Policies - section, under OpenStack Tenants, click Add, and select the tenant.
-
Click Continue, and then click Done.
-
-
Navigate to System \> System Administration \> Change System Settings and select http from the drop-down list.
-
Navigate to Infrastructure > Instances > NetScaler VPX.
-
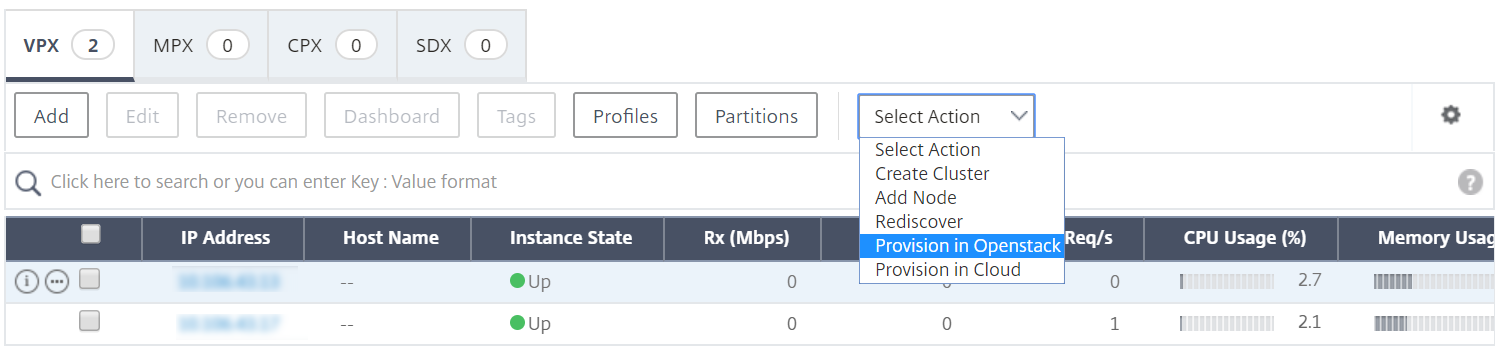
In NetScaler VPX page, click Admin drop-down list and select Provision Device.
-
On the Device Provisioning page, enter the name of the device, and select the service package that you created in the previous step.
-
Click OK.
-
-
Navigate to Orchestration \> Cloud Orchestration \> OpenStack \> Requests tab. Select the request and click Tasks to view the tasks. When the status of the task changes to Finished, it means that the NetScaler VPX is provisioned in NetScaler ADM.
-
Navigate to Infrastructure > Instances \> NetScaler VPX to check that the NetScaler VPX instance appears in NetScaler VPX page.
-
Click the NetScaler VPX instance. When the NetScaler VPX instance opens in your browser window, log on to the instance. Navigate to Configuration \> System \> Licenses, and manually add the new license. For more information on how to add new license, see NetScaler Licensing Overview.
-
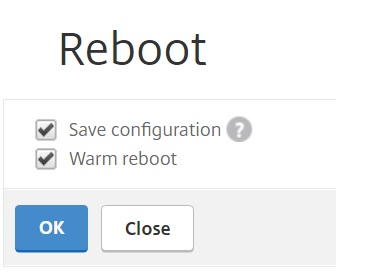
Restart the NetScaler VPX instance.
-
After a few minutes, you can log on to OpenStack and in System \> Instances, you can see that the NetScaler VPX instance is deployed on OpenStack.
-
LBaaS V2 API implementations are performed through Neutron LBaaS commands. Connect to any Neutron client and run the configuration tasks. For more information on how to run configuration commands, see Configuring LBaaS V2 using Command Line.