Provision NetScaler VPX instances on VMware ESX
You can use NetScaler Console to automate a NetScaler VPX instance deployment and management in VMware ESX. When you use NetScaler Console to provision a NetScaler VPX instance on VMware ESX, the instance is readily available to manage in the NetScaler Console GUI.
The NetScaler Console uses NetScaler templates of the already deployed instances to provision a new instance in VMware ESX. It stores the datacenter of the VMware vCenter where the required VMware ESX server details are present in a site. Also, it uses cloud access profile to access the VMware vCenter and deploy the VPX on the VMware ESX.
Prerequisites
Before you provision a NetScaler VPX instance in VMware ESX, ensure to complete the following:
-
Install a supported VMware ESXi version (6.0, 6.5, and 6.7).
-
Install VMware Client on a management workstation that meets the minimum system requirements.
-
Create permissions for NetScaler Console to access VMware vCenter.
Convert NetScaler VPX files into templates
The NetScaler Console uses the NetScaler template in ESX converted by a NetScaler VPX file. Perform the following steps to convert VPX files into templates.
-
Deploy a NetScaler VPX instance on VMware using the NetScaler setup files.
For the first time, use NetScaler setup files to deploy the VPX instance. For more information, see Install NetScaler VPX instance on VMware.
-
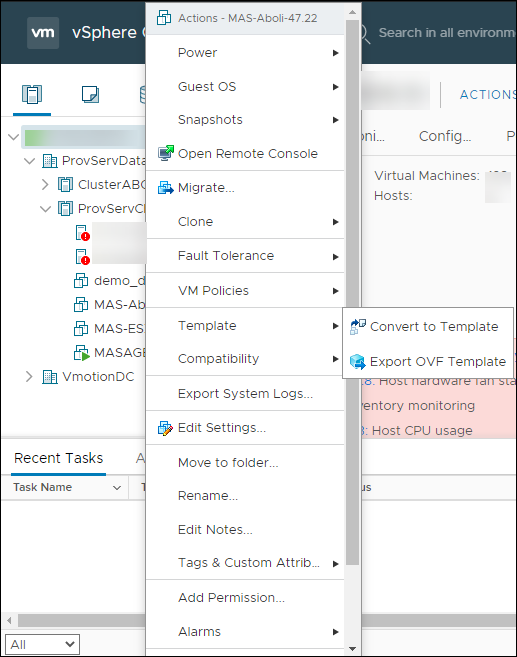
Right-click the deployed VM and select Template.
-
Click Convert to Template.
Create permissions for NetScaler Console to access VMware vCenter
To enable NetScaler Console for provisioning and management in VMware vCenter, follow these steps:
- Create a custom role with privileges
- Login to VMware vCenter and navigate to the Roles section.
- Create a custom role tailored for NetScaler Console.
-
Assign the following privileges:
Datastore.AllocateSpace
Resource.AssignVMToPool
VirtualMachine.Config.AdvancedConfig
VirtualMachine.Inventory.CreateFromExisting
VirtualMachine.Inventory.Delete
VirtualMachine.Interact.PowerOff
VirtualMachine.Interact.PowerOn
VirtualMachine.Provisioning.DeployTemplate
<!--NeedCopy-->
- Create a user
- Once the role is defined, navigate to the Users and Groups section.
- Create a user for NetScaler Console to access the VMware vCenter.
- Provide a password for the newly created user.
- Associate the role with the user
- Navigate to the Global Permissions section and associate the custom role with the user.
- This association provides privileges for NetScaler Console to perform necessary actions on VMware vCenter.
Note:
The listed privileges are the minimum requirements for NetScaler Console to access the VMware vCenter. Creating a user with limited privileges is optional. If any user has privileges that include a superset of the specified privileges, the user can provide those credentials instead.
For more information about configuring user roles with privileges in VMware vCenter, see Configure User access.
Create a site in NetScaler Console
Create a site in NetScaler Console and add the VMware ESX details.
-
In NetScaler Console, navigate to Infrastructure > Instances > Sites.
-
Click Add.
-
In the Select Cloud pane,
-
Select Data Center as a Site type.
-
Choose VMware vCenter from the Type list.
-
Click Next.
-
-
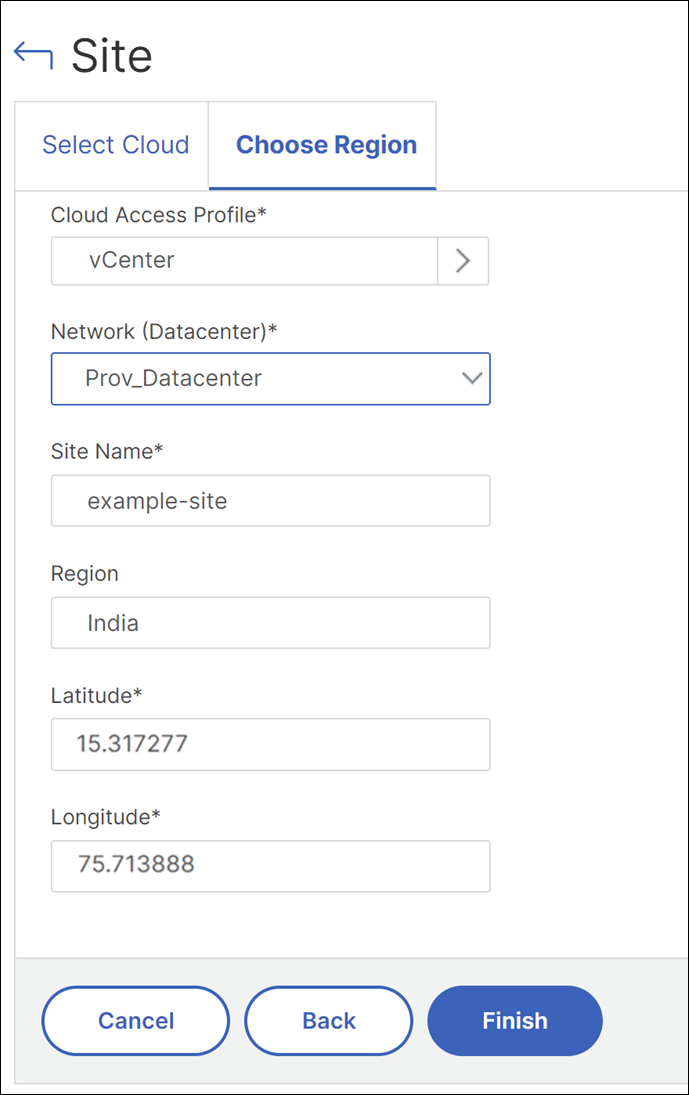
In the Choose Region pane,
-
In the Cloud Access Profile pane, select the profile created for your VMware ESX. If there are no profiles, create a profile.
-
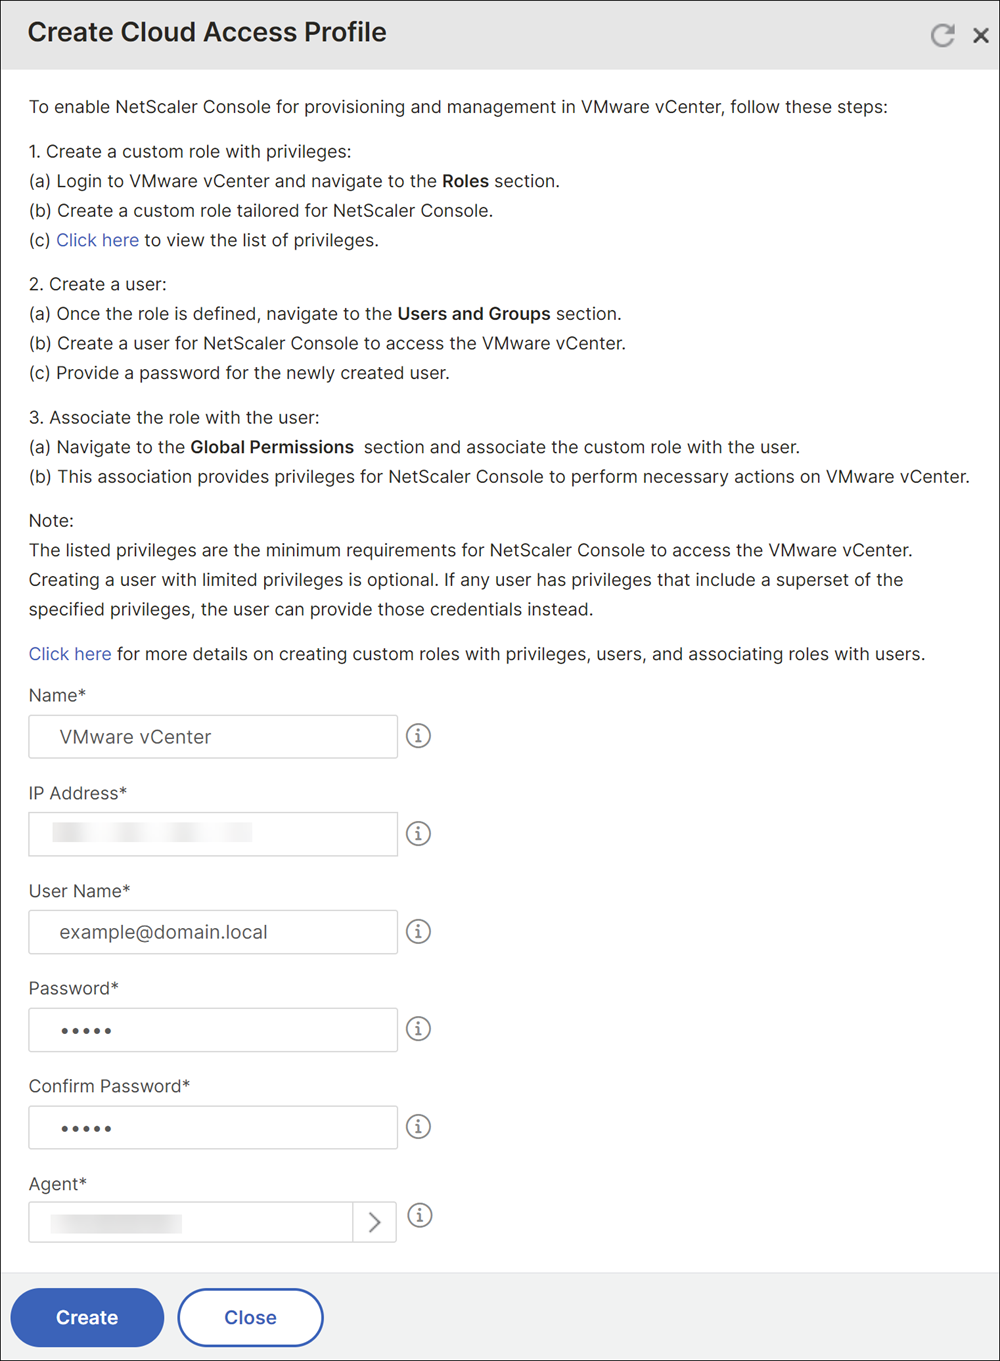
To create a cloud access profile, click Add and specify the following:
-
Name – Specify a name to identify your cloud access profile in NetScaler Console.
-
IP address – Specify the IP address of the VMware vCenter.
-
Username – Specify the user name to access the VMware vCenter.
-
Password – Specify the password to access the VMware vCenter and confirm the password.
-
Agent - Select the agent registered with NetScaler Console.
-
-
In Network (Datacenter), select the data center where you have the NetScaler VPX templates.
-
Specify the Site Name.
-
Specify the Region, Latitude, and Longitude to identify the geo-location of your data center.
-
Click Finish.
-
Provision NetScaler VPX instance on VMware ESX
Use the site that you have associated with your VMware ESX to provision the NetScaler VPX instances.
Note:
Currently, the NetScaler Console supports only to provision standalone NetScaler instances.
-
In NetScaler Console, navigate to Infrastructure > Instances > NetScaler.
-
In the VPX tab, click Provision.
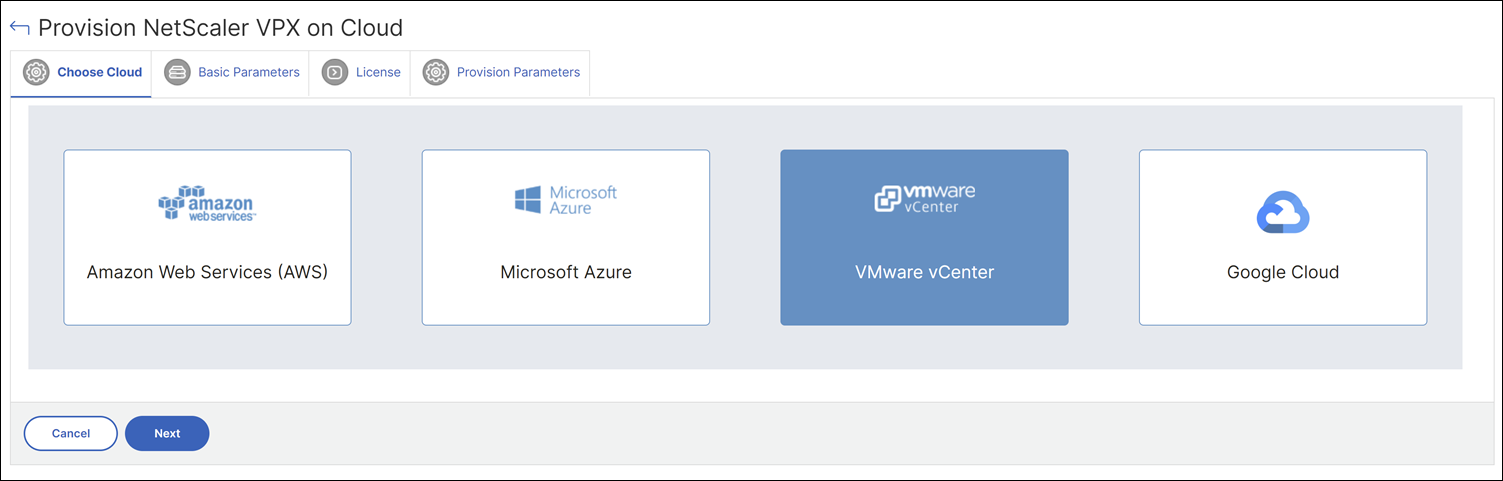
This option displays the Provision NetScaler VPX on Cloud page.
-
In the Choose Cloud tab, select VMware vCenter and click Next.
-
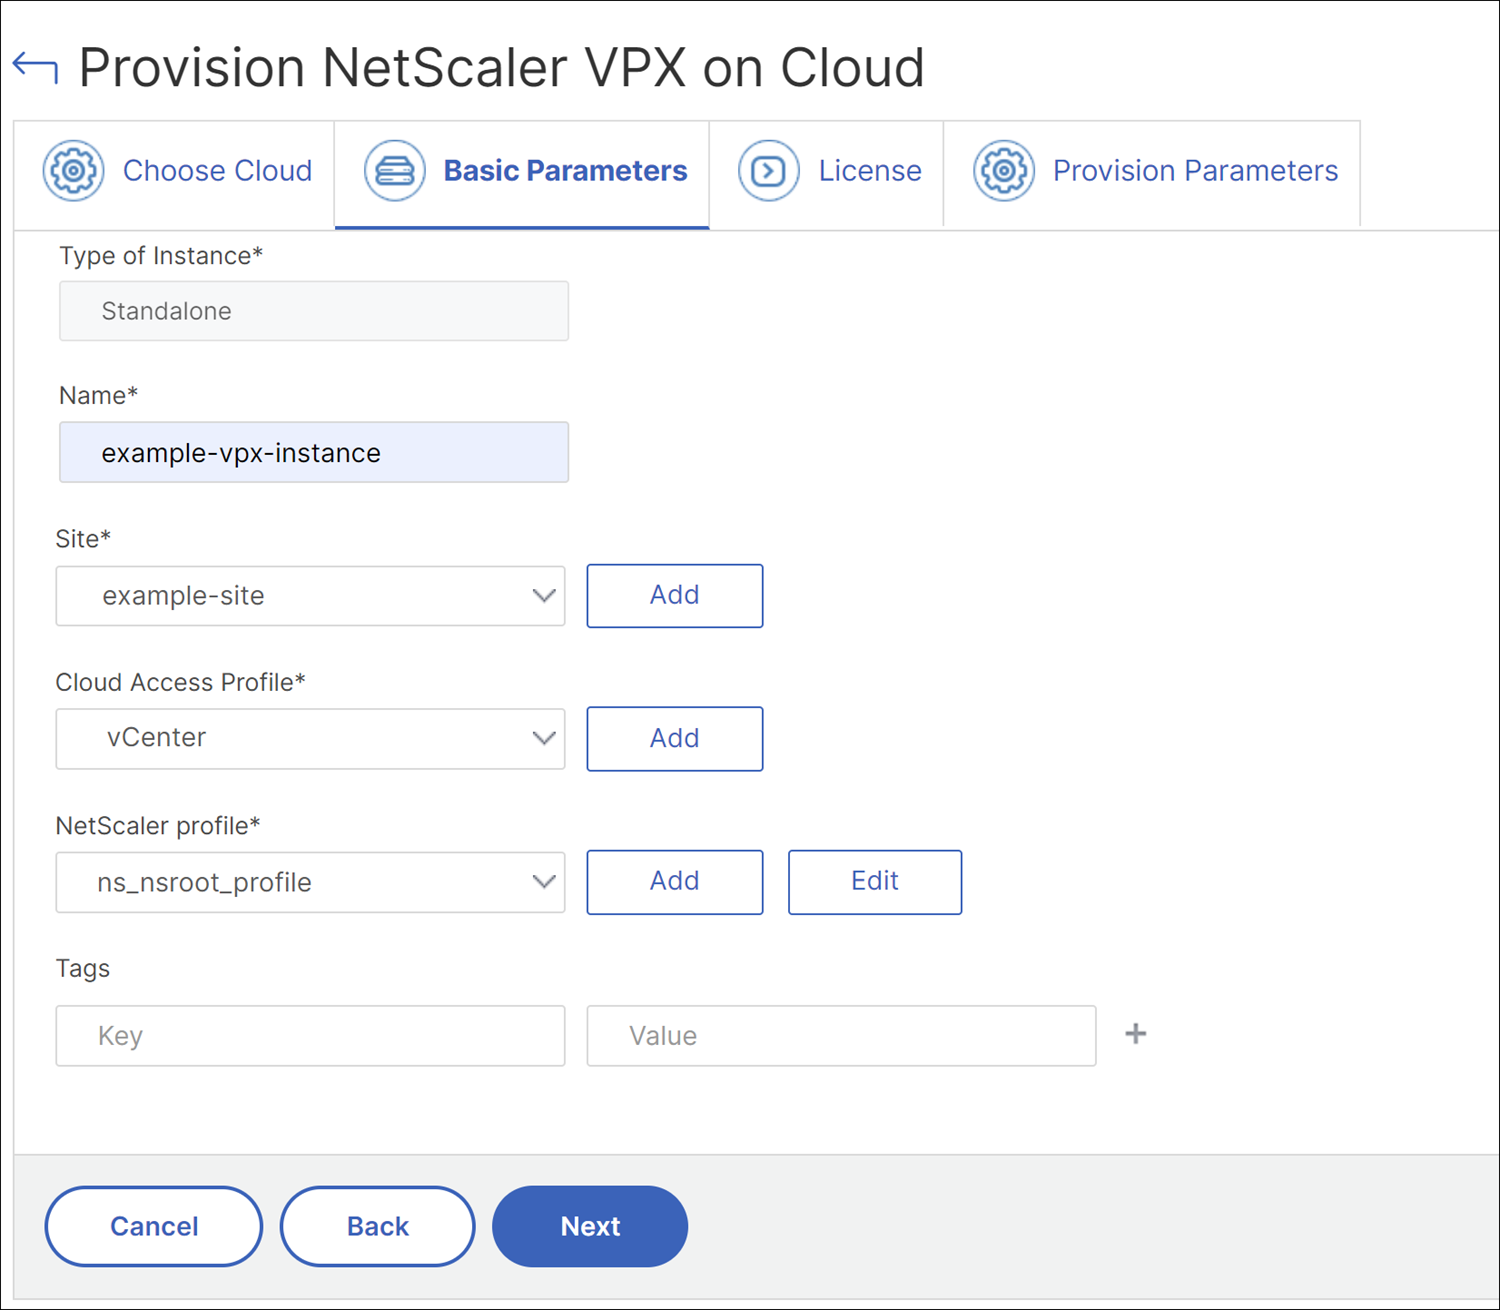
In the Basic Parameters tab, specify the following:
-
Name – Specify the name of an instance.
-
Site – Select the site that you have created earlier.
-
Cloud Access Profile – Select the cloud access profile created during site creation.
-
NetScaler profile – Select the NetScaler profile to provide authentication.
-
-
Click Next.
-
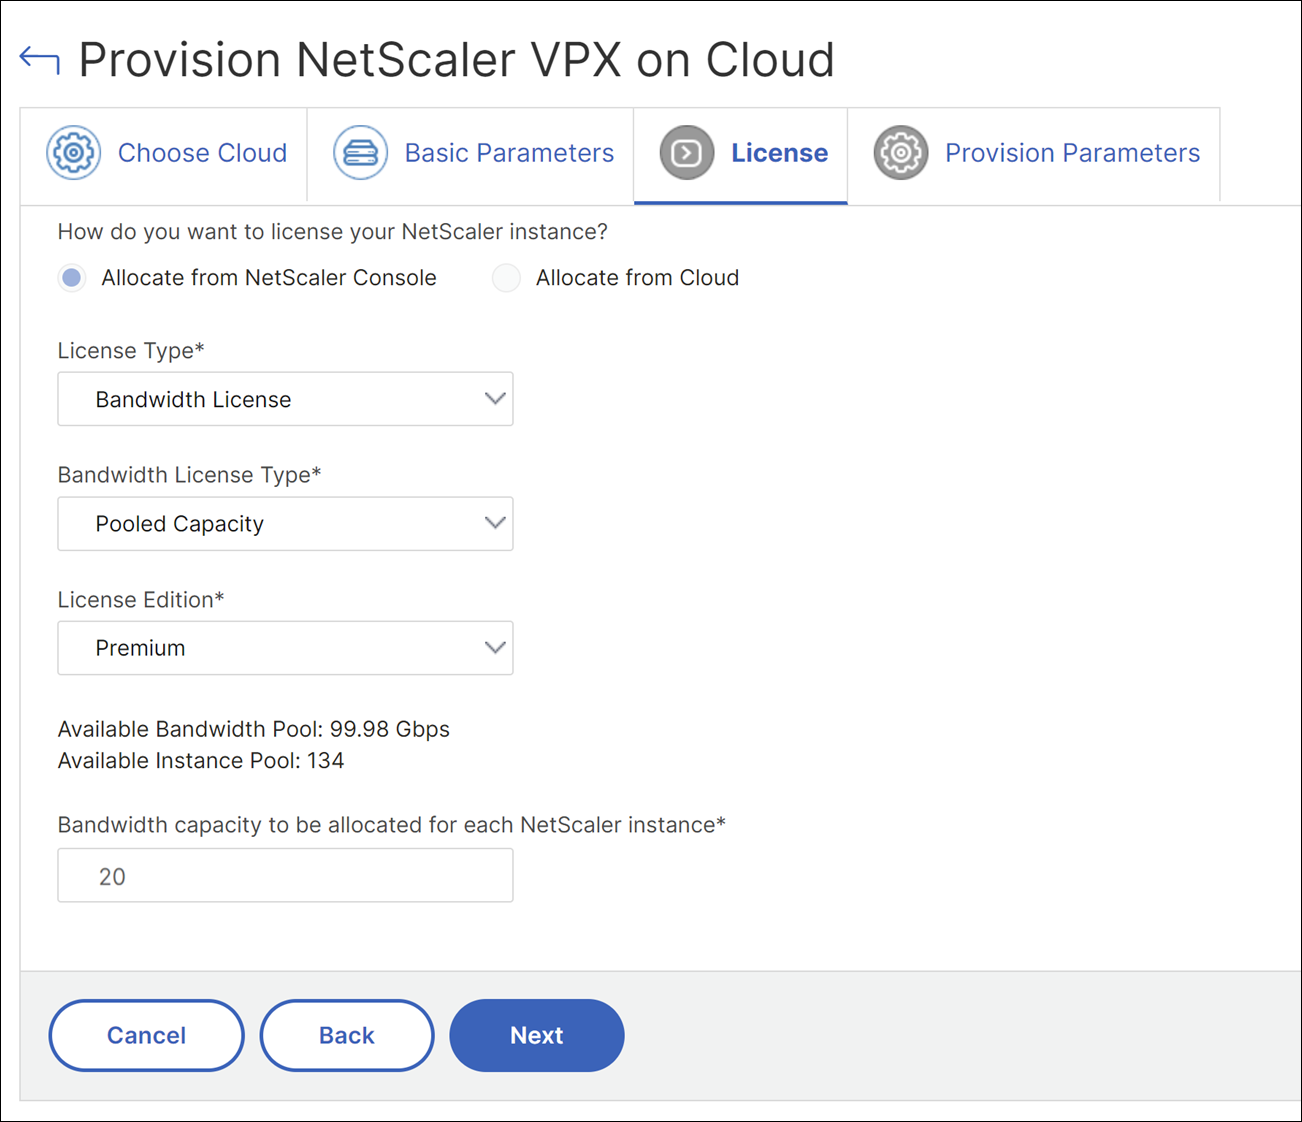
In the License tab, the Allocate from Cloud option is automatically selected and uses the NetScaler product licenses available in the VMware vCenter. The VPX instance you want to provision uses licenses from the VMware vCenter.
-
License Type – Select the license type as bandwidth or virtual CPU licenses.
-
For bandwidth license type, you can select one of the following options from the Bandwidth License Type list:
-
Pooled Capacity - Specify the capacity to allocate to an instance in the Bandwidth capacity to be allocated for each NetScaler instance.
From the common pool, the NetScaler instance checks out one instance license and only as much bandwidth is specified.
-
VPX Licenses - When a NetScaler VPX instance is provisioned, the instance checks out the license from the NetScaler Console.
-
-
Virtual CPU Licenses: The provisioned NetScaler VPX instance checks out licenses depending on the number of CPUs running in the instance.
Note:
When the provisioned VPX instances are removed or destroyed, the applied licenses return to the NetScaler Console license pool. These licenses can be reused to provision new VPX instances.
-
-
License Edition – Select the license edition from the list.
NetScaler Console uses the specified edition to provision the VPX instances.
-
-
Click Next.
-
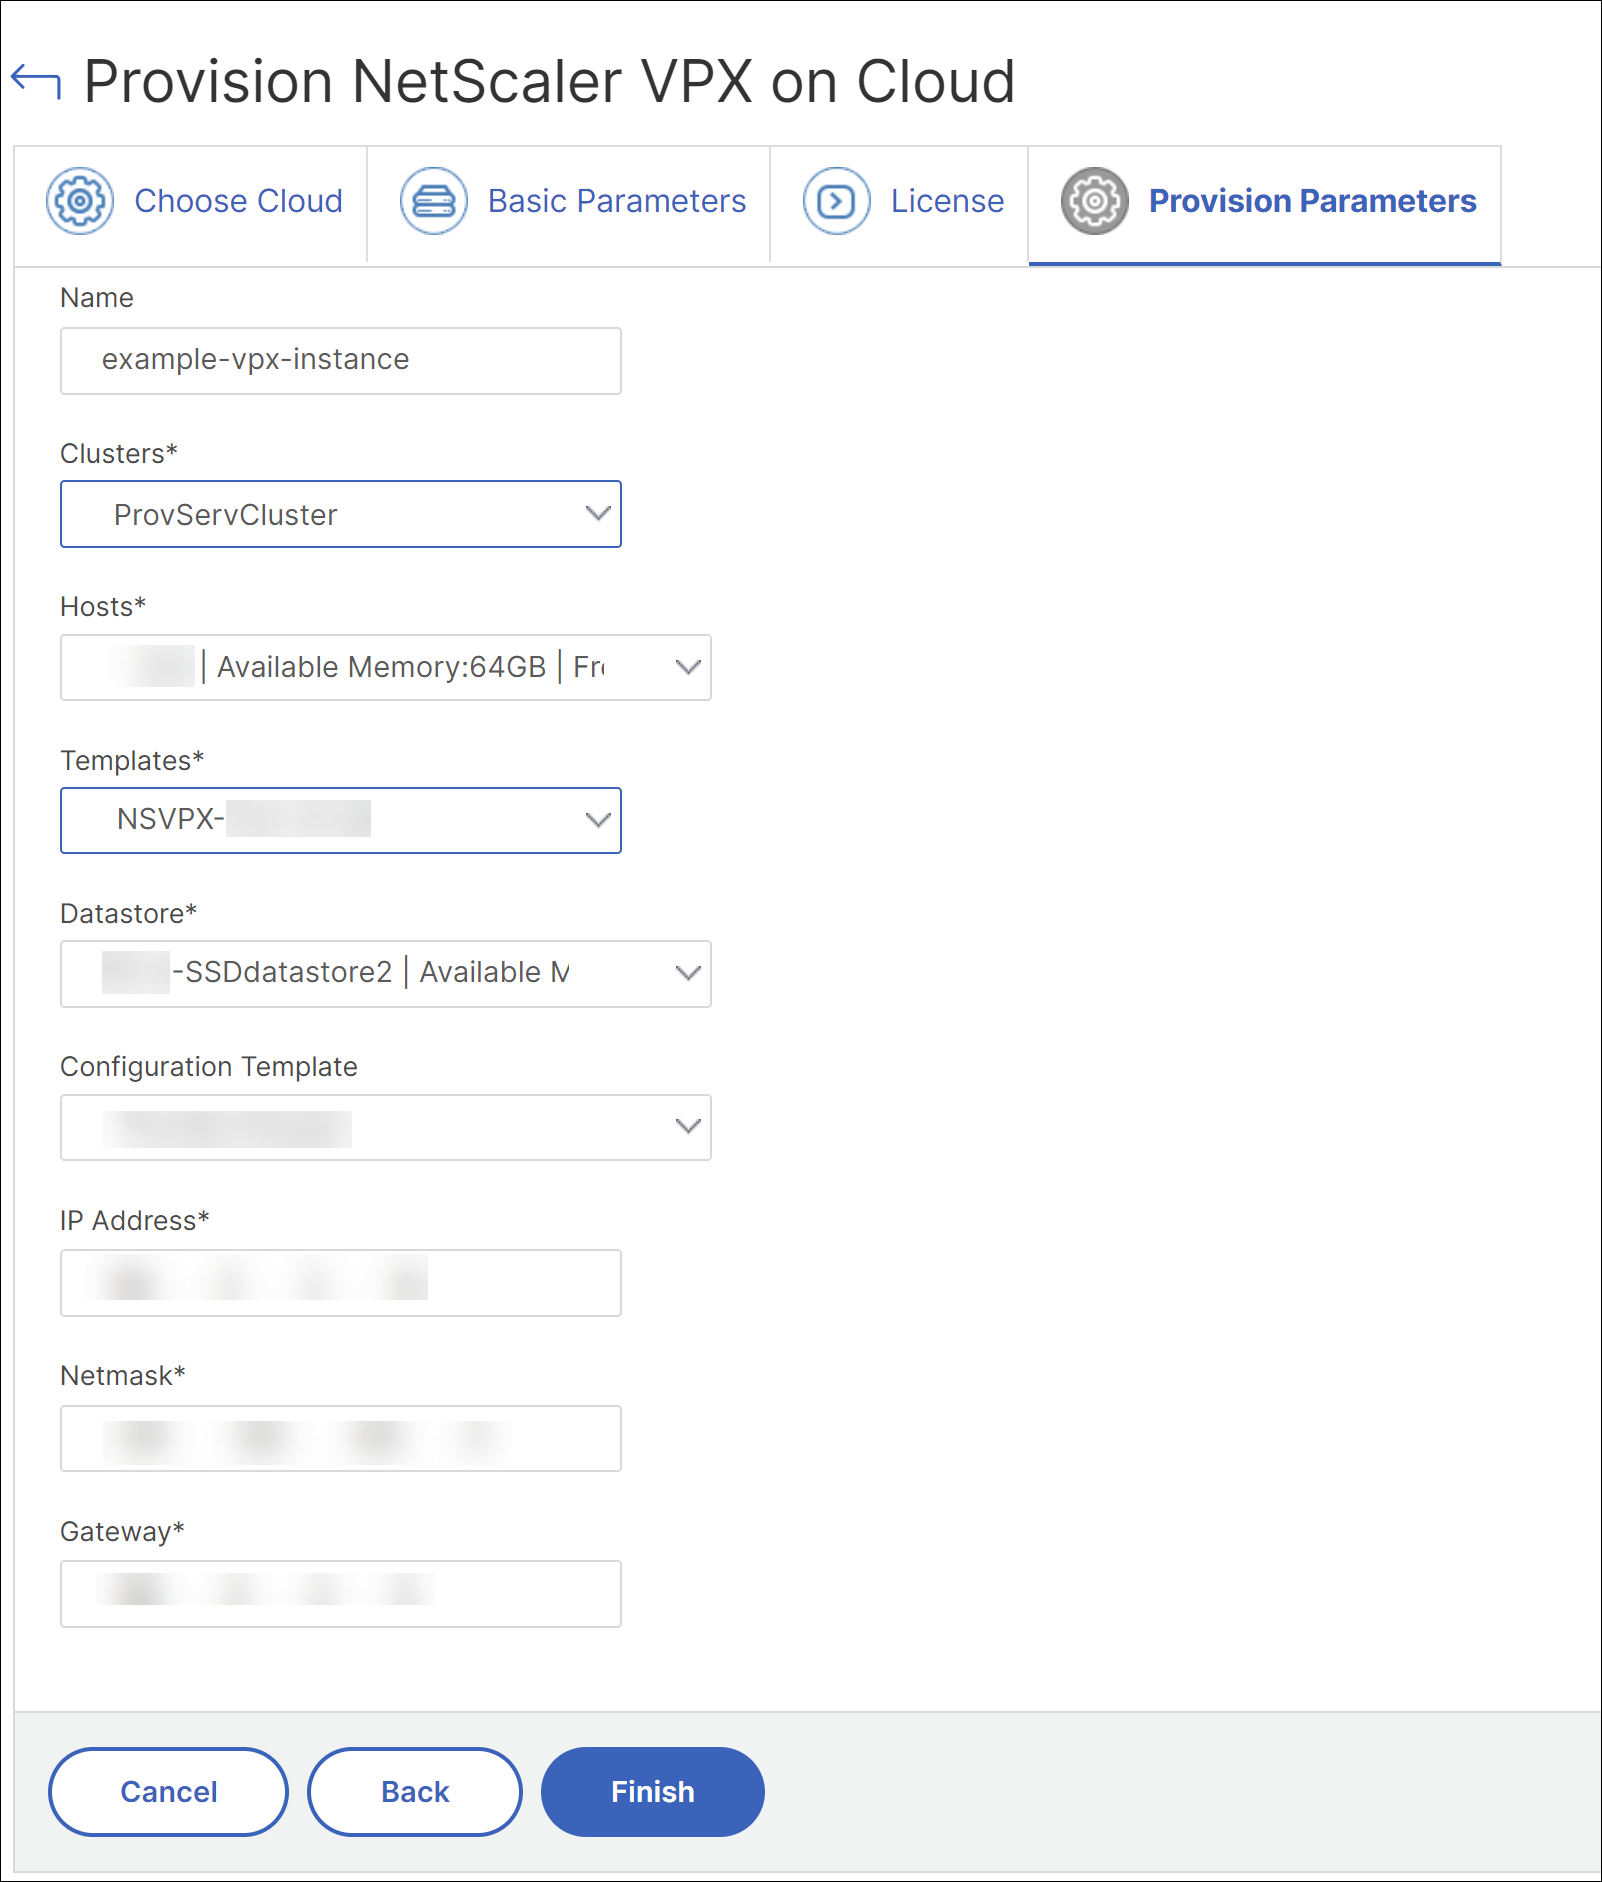
In the Provision Parameters tab, specify the following details:
-
Clusters – Select the cluster where you want to provision an instance.
-
Hosts – Select the required host from the list.
-
Templates – Select the template from the list that you want to apply to an instance.
-
Datastore – Select the datastore from the list.
-
Configuration Template - Select the configuration template from the list.
-
IP address – Specify an IP address to an instance.
-
Net mask – Specify a net mask to an instance.
-
Gateway – Specify a gateway to an instance.
-
-
Click Finish to provision a VPX instance.