Configure multiple IP addresses for a Citrix® ADC VPX standalone instance
This section explains how to configure a standalone Citrix ADC VPX instance with multiple IP addresses, in Azure Resource Manager (ARM). The VPX instance can have one or more NIC attached to it, and each NIC can have one or more static or dynamic public and private IP addresses assigned to it. You can assign multiple IP addresses as NSIP, VIP, SNIP, and so on.
For more information, see the Azure documentation Assign multiple IP addresses to virtual machines using the Azure portal.
If you want to use PowerShell commands, see Configuring multiple IP addresses for a Citrix ADC VPX instance in standalone mode by using PowerShell commands.
Use case
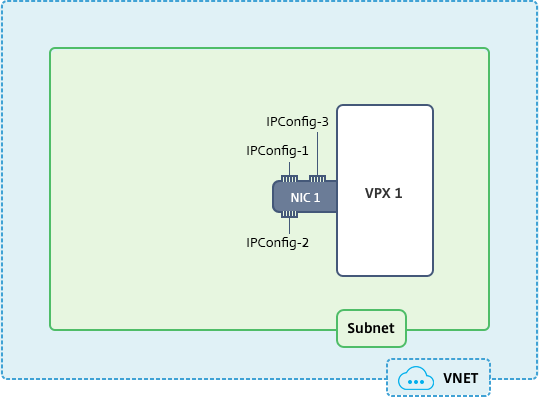
In this use case, a standalone Citrix ADC VPX appliance is configured with a single NIC that is connected to a virtual network (VNET). The NIC is associated with three IP configurations (ipconfig), each servers a different purpose - as shown in the table.
| IPconfig | Assocaited with | Purpose |
|---|---|---|
| ipconfig1 | Static public IP address; static private IP address | Serves management traffic |
| ipconfig2 | Static public IP address; static private address | Serves client-side traffic |
| ipconfig3 | Static private IP address | Communicates with back-end servers |
Note:
IPConfig-3 is not associated with any public IP address.
Diagram: Topology
Here is the visual representation of the use case.
Note:
In a multi-NIC, multi-IP Azure Citrix ADC VPX deployment, the private IP associated with the primary (first) IPConfig of the primary (first) NIC is automatically added as the management NSIP of the appliance. The remaining private IP addresses associated with IPConfigs need to be added in the VPX instance as a VIP or SNIP by using the “add ns ip” command, according to your requirement.
Before you begin
Before you begin, create a VPX instance by following the steps given at this link:
Configure a Citrix ADC VPX standalone instance
For this use case, the NSDoc0330VM VPX instance is created.
Procedure to configure multiple IP addresses for a Citrix ADC VPX instance in standalone mode.
For configuring multiple IP addresses for a Citrix ADC VPX appliance in standalone mode:
- Add IP addresses to the VM
- Configure Citrix ADC -owned IP addresses
Step 1: Add IP addresses to the VM
1. In the portal, click More services > type virtual machines in the filter box, and then click Virtual machines.
2. In the Virtual machines blade, click the VM you want to add IP addresses to. Click Network interfaces in the virtual machine blade that appears, and then select the network interface.
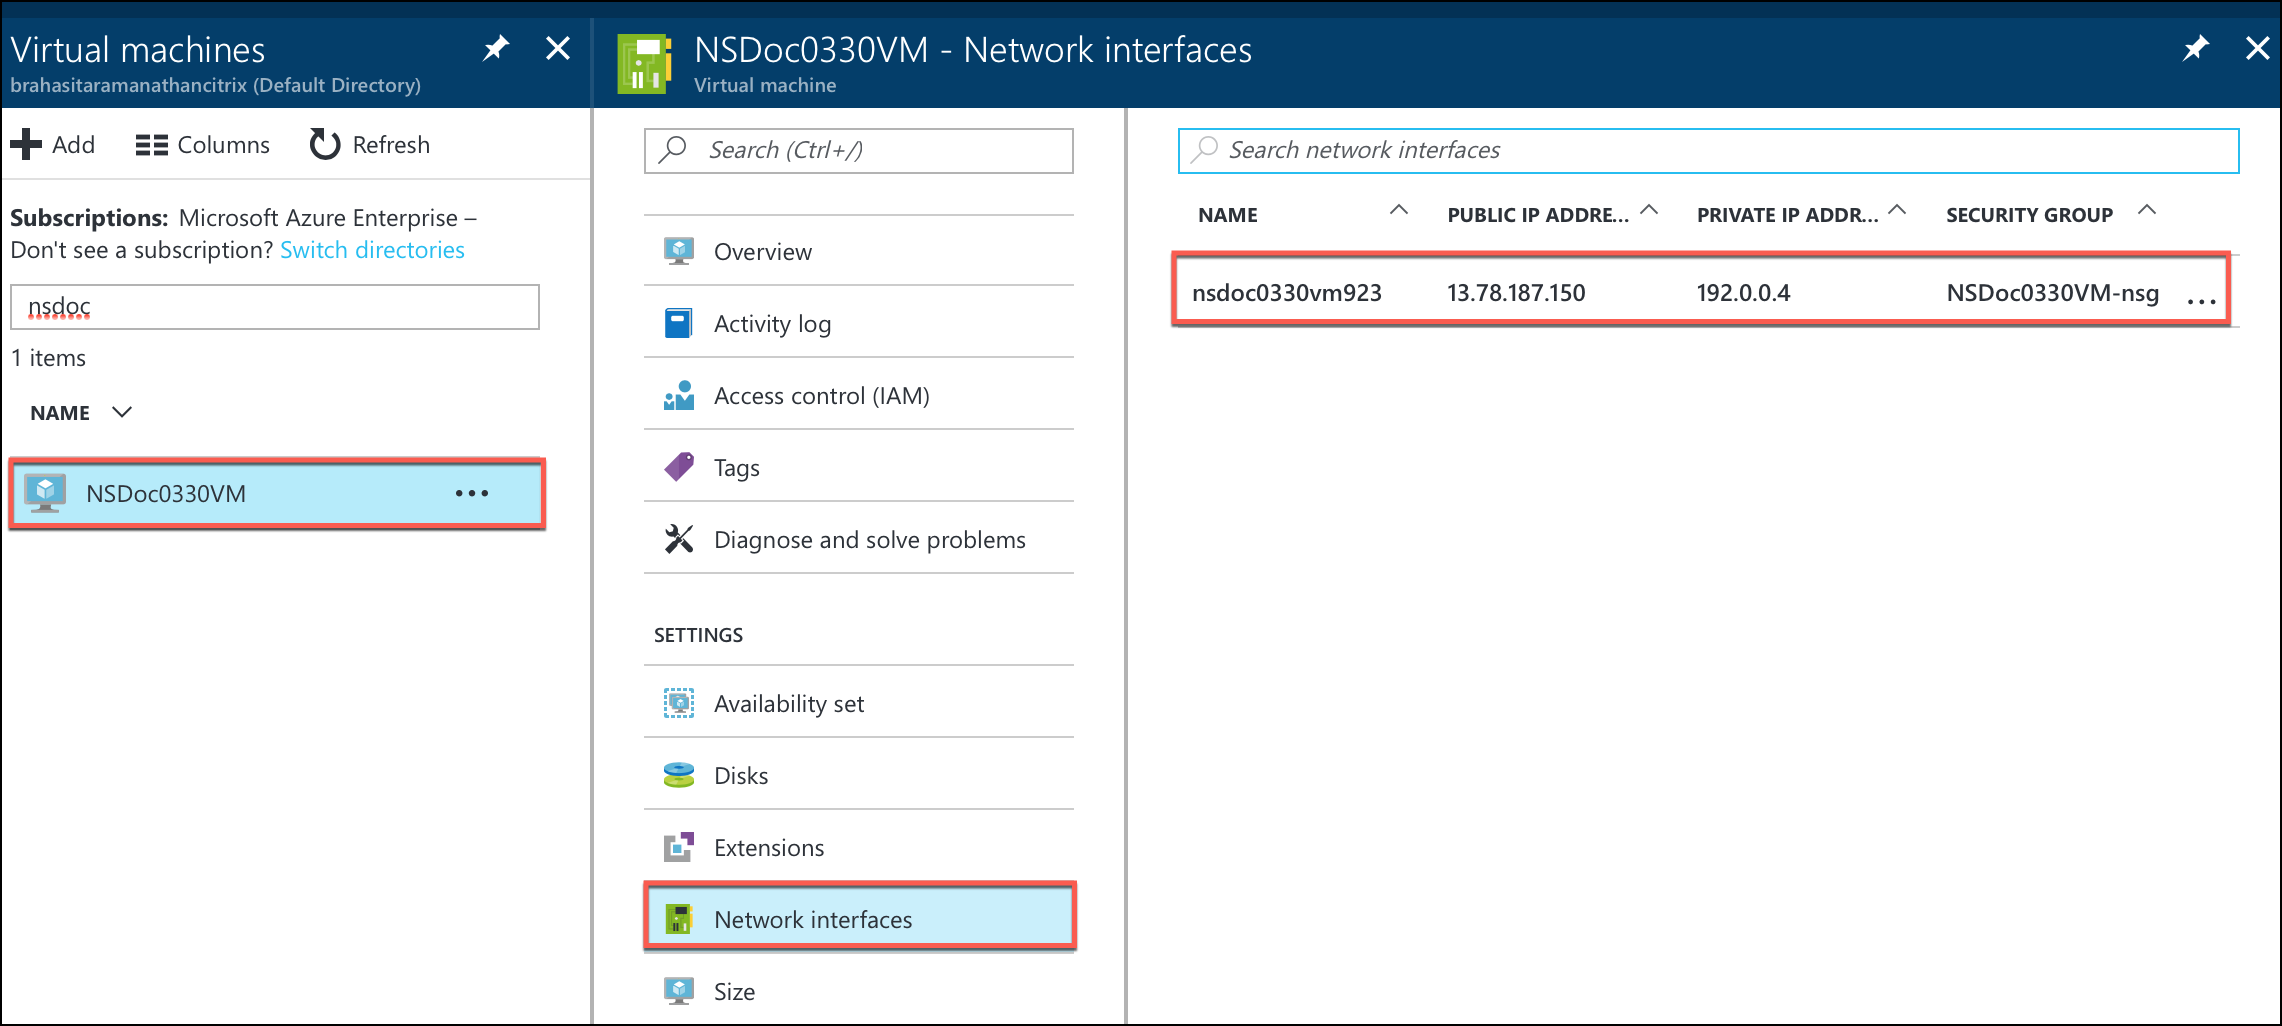
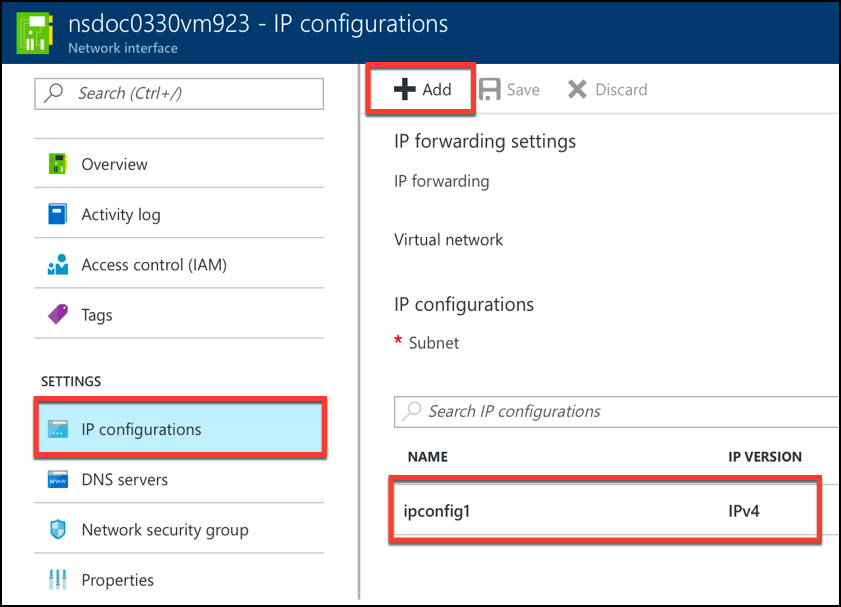
In the blade that appears for the NIC you selected, click IP configurations. The existing IP configuration that was assigned when you created the VM, ipconfig1, is displayed. For this use case, make sure the IP addresses associated with ipconfig1 are static. Next, create two more IP configurations: ipconfig2 (VIP) and ipconfig3 (SNIP).
To create additional ipconfigs, create Add.
In the Add IP configuration window, enter a Name, specify allocation method as Static, enter an IP address (192.0.0.5 for this use case), and enable Public IP address.
Note:
Before adding a static private IP address, check for IP address availability and make sure the IP address belongs to the same subnet to which the NIC is attached.
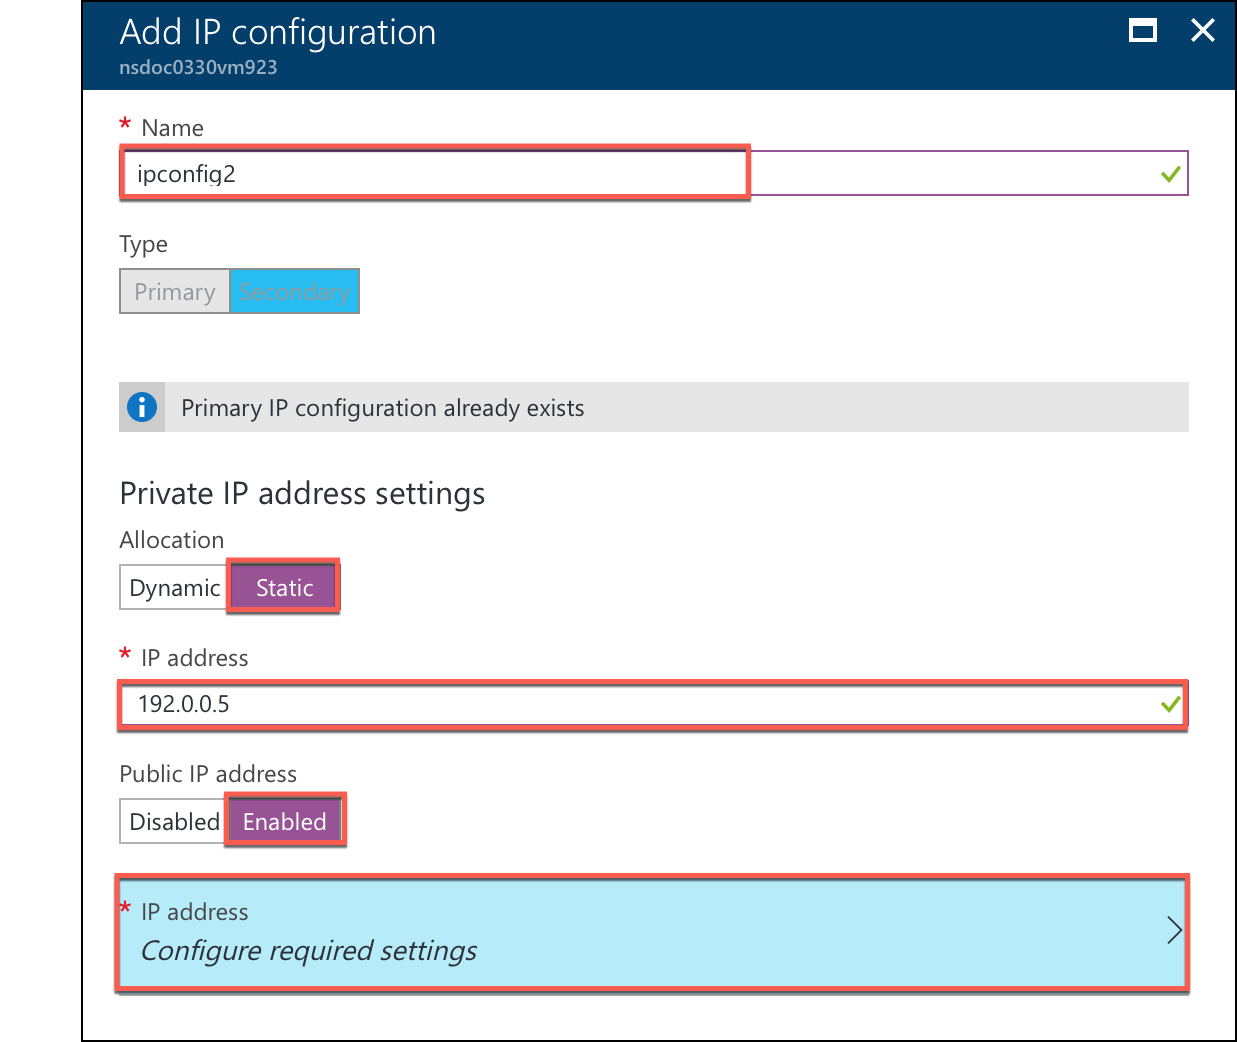
Next, click Configure required settings to create a static public IP addresss for ipconfig2.
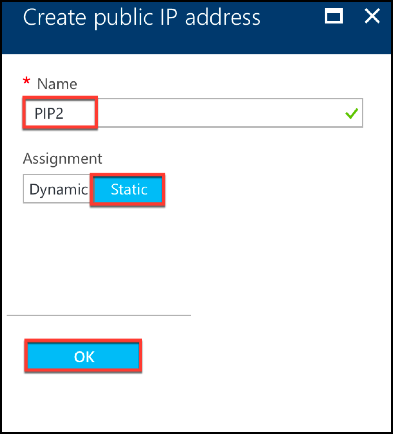
By default, public IPs are dynamic. To make sure that the VM always uses the same public IP address, create a static Public IP.
In the Create public IP address blade, add a Name, under Assignment click Static. And then click OK.
Note:
Even when you set the allocation method to static, you cannot specify the actual IP address assigned to the public IP resource. Instead, it gets allocated from a pool of available IP addresses in the Azure location the resource is created in.
Follow the steps to add one more IP configuration for ipconfig3. Public IP is not mandatory.

Step 2: Configure Citrix ADC-owned IP addresses
Configure the Citrix ADC-owned IP addresses by using the GUI or the command “add ns ip.” For more information, see Configuring Citrix ADC-Owned IP Addresses.
You’ve now configured multiple IP addresses for a Citrix ADC VPX instance in standalone mode.