通过 nFactor 身份验证在第三个因素中为组提取配置用户名和两个密码
以下部分介绍了通过 nFactor 身份验证在第三个因素中进行组提取的用户名和两个密码的用例。
用户名和两个密码以第三个因素进行组提取
假设管理员将第一个身份验证因素配置为具有用户名和两个密码字段的用例。第二个因素是直通(此因素没有登录页面),它使用第一个因素中的用户名和第二个密码。第三个身份验证因素是通过,并且配置为使用第一个因素中的用户名进行组提取。
-
访问流量管理虚拟服务器后,您将被重定向到登录页面。
-
客户端提交一个用户名和两个密码。例如,user1、pass1 和 pass2。
-
根据 user1 和 pass1 的本地策略评估第一个因素。评估成功,下一个因素已通过,在这种情况下,策略为“label1”。
-
策略标签指定第二个因素是使用 RADIUS 策略传递的。直通架构意味着 Citrix ADC 设备不会返回客户端进行任何进一步的输入。Citrix ADC 设备只是使用它已经拥有的信息。在这种情况下,它是 user1 和 pass2。然后隐式评估第二个因素。成功评估后,通过下一个因素(在这种情况下为策略“label2”。)
-
策略标签指定第三个因素通过为组提取配置的 LDAP 策略进行传递。Citrix ADC 设备隐式使用第一个因素中的用户名。
-
身份验证服务器返回 cookie 和响应,将客户端的浏览器重定向回流量管理虚拟服务器,请求的内容所在。如果登录失败,客户端的浏览器将显示原始登录页面,以便客户端可以重试。
<?xml version="1.0" encoding="UTF-8"?>
 <AuthenticateResponse xmlns="http://citrix.com/authentication/response/1"› <Status>success</Status>
 <Result>more-info</Result>
 <StateContext></StateContext>
 <AuthenticationRequirements>
 <PostBack>/nf/auth/doAuthentication.do</PostBack>
 <CancelPostBack>/Citrix/Authentication/ExplicitForms/CancelAuthenticate</CancelPost8ack>
 <CancelButtonText>Cancel</CancelButtonText>
 <Requirements> <Requirement><Credentia1><ID>logingID><SaveID>ExplicitForms-UsernamegSaveID><Type>username</Type></Credential><Label><Text>User name</Text><Type>p lain</Type></Label><Input><AssistiveText>Please supply either domain\username or user@fully. qualified.d main</AssistiveText><Text><Secret>false</Secret><ReadOnly>false</ReadOnly><InitialValue>S{http.req.user.name}</InitialValue><Constrain t>.+</Constraint></Text></Input></Requirenent> <Requirement><Credentia1><ID>passwd</ID><SaveID>ExplicitForms-Password</SaveID><Type>password</Type></Credential><Label><Text>Password:</Text><Type> plaingType></Label><Input><Text><Secret>true</Secret><ReadOnly>falsegReadOnly><InitialVa lue></InitialValue><Constraint>.+</Constraint></Text></Input></Requirement> <Requirement><Credentia1><Type>none</Type></Credential><Label><Text>Second factor</Text><Type>confirmation</Type></Label><Input /></Requirement> <Requirement><Credentia1><ID>login8tn</ID><Type>none</Type></Credential><Label><Type>none</Type></Label><Input><Button>Log On</Button></Input></Requ irement>
 </Requirements>
 </AuthenticationRequirements>
 </AuthenticateResponse>
使用 CLI 执行以下操作
-
配置流量管理和验证虚拟服务器。
add lb vserver lbvs1 HTTP 10.217.28.152 80 -AuthenticationHost auth1.nsi-test.com -Authentication ONadd authentication vserver avn SSL 10.217.28.154 443 -AuthenticationDomain dep.sqltest.net
-
配置第一个因素。
add authentication loginSchema login1 -authenticationSchema login-2passwd.xmladd authentication loginSchemaPolicy login1 -rule true -action login1
-
配置第二个因素。
add authentication loginSchema login2 -authenticationSchema noschemaadd authentication policylabel label1 -loginSchema login2
-
配置第三个因素。
add authentication loginSchema login_pass -authenticationSchema noschemaadd authentication policylabel label2 -loginSchema login_pass
-
配置本地、RADIUS 和 LDAP 因素。
add authentication Policy localpolicy -rule true -action LOCALadd authentication ldapAction ldapact -serverIP 10.217.201.84 -ldapBase "cn=users,dc=dep,dc=sqltest,dc=net" -ldapBindDn Administrator@dep.sqltest.net -ldapBindDnPassword 8f7e6642195bc181f734cbc1bd18dfaf03bf9835abda7c045f7a964ceb58d4c9 -encrypted -encryptmethod ENCMTHD_3 -ldapLoginName sAMAccountName -groupAttrName memberOf -subAttributeName CN -ssoNameAttribute userprincipalnameadd authentication Policy ldappolicy -rule true -action ldapactadd authentication radiusAction radius -serverIP 10.217.22.20 -radKey a740d6a0aeb3288fa0a6fbe932d329acddd8f448ecb4a3038daa87b36599fd16 -encrypted -encryptmethod ENCMTHD_3 -radNASip ENABLED -radNASid NS28.50 -radAttributeType 11 -ipAttributeType 8add authentication Policy radiuspolicy -rule true -action radius
-
绑定策略。
bind authentication vserver avn -policy login1 -priority 10 -gotoPriorityExpression ENDbind authentication vserver avn -policy localpolicy -priority 2 -nextFactor label1 -gotoPriorityExpression NEXTbind authentication policylabel label1 -policyName radiuspolicy -priority 1 -gotoPriorityExpression NEXT -nextFactor label2bind authentication policylabel label2 -policyName ldappolicy -priority 10 -gotoPriorityExpression NEXT
注意
也可以通过 Citrix ADC 版本 13.0 及更高版本中提供的 nFactor 可视化工具创建安装程序。

使用 nFactor 可视化工具进行配置
-
导航到 Security(安全)> AAA-Application Traffic(AAA - 应用程序流量)> nFactor Visualizer(nFactor 可视化工具)> nFactor Flows(nFactor 流程),然后单击 Add(添加)。
-
单击 + 以添加 nFactor 流。
-
添加一个因素。您输入的名称为 nFactor 流的名称。单击 Create(创建)。
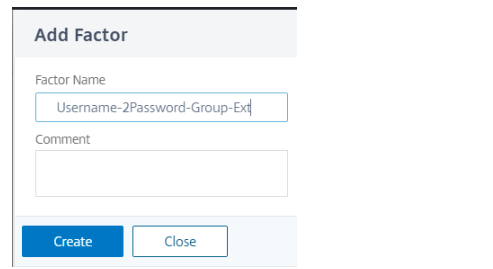
-
单击 添加架构 为第一个因素添加登录架构。您可以创建身份验证登录架构或从列表中选择现有的身份验证登录架构。单击确定。
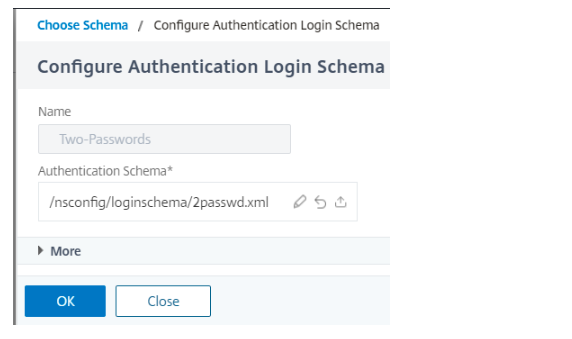
-
单击 Add Policy(添加策略)添加第一个因素身份验证策略。可以创建身份验证策略或从列表中选择现有身份验证策略。
-
按照以下步骤创建本地策略。
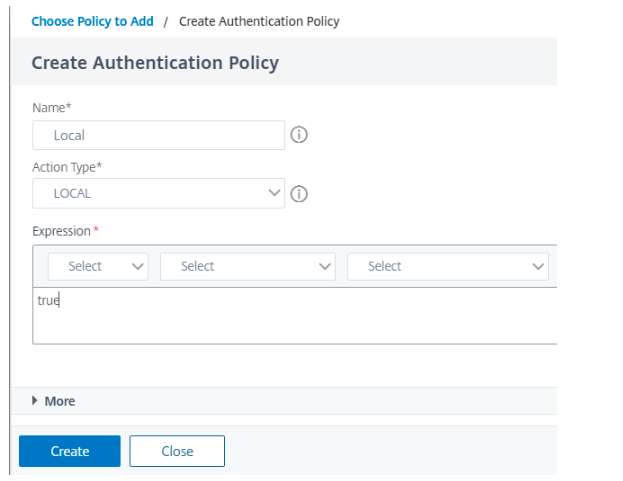
-
单击绿色的 + 图标添加第二个因素。
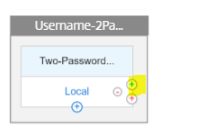
-
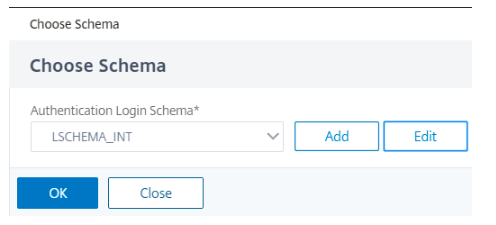
单击 添加架构 为第二个因素添加登录架构。您可以创建身份验证登录架构或从列表中选择现有的身份验证登录架构。单击确定。
-
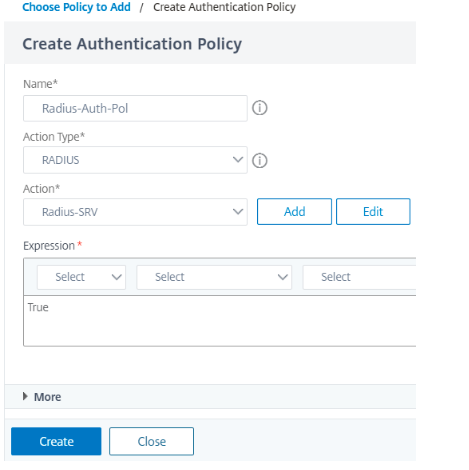
单击 Add Policy(添加策略)以创建策略。单击 Create(创建),然后单击 Add(添加)。
注意:
如果未创建 RADIUS 操作,请参阅 配置 RADIUS 身份验证
-
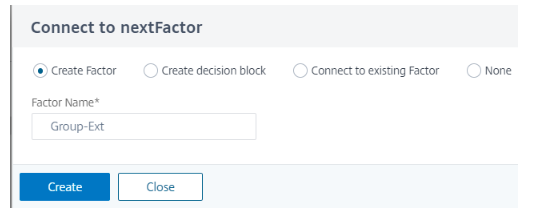
单击绿色 + 以添加第三个因素,然后单击创建。
-
单击 添加架构 为第二个因素添加登录架构。您可以创建身份验证登录架构或从列表中选择现有的身份验证登录架构。单击确定。
-
单击 Add Policy(添加策略)以创建策略。单击 Create(创建),然后单击 Add(添加)。
-
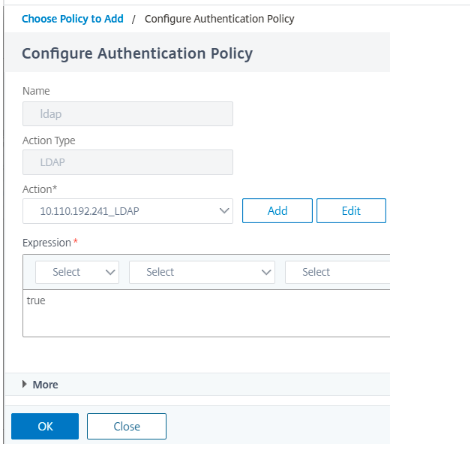
如果添加了 LDAP 操作,请选择相同的操作。如果没有,请按照知识库文章创建一个,也因为您只执行提取,请确保在 LDAP 操作上禁用身份验证。有关详细信息,请参阅 如何在没有身份验证的情况下通过 NetScaler 使用 LDAP 进行组
-
在 配置身份验证策略 上添加 LDAP 策略,然后单击 确定。
-
单击 Done(完成)。选择 nFactor flow,然后单击 绑定到身份验证服务器 选项,然后从列表中选择身份验证、授权和审核虚拟服务器。