Deploy a standalone NetScaler BLX™ instance on AWS
This topic describes the procedure for creating an EC2 Linux instance on AWS and then installing BLX on the Linux instance.
Before you start your deployment, read the following topics:
Deployment steps
Perform the following steps:
- Create an EC2 Linux instance
- Download NetScaler® BLX
- Install NetScaler BLX
- Configure BLX
- Start NetScaler BLX
- Access NetScaler BLX
- Licensing
Create an EC2 Linux instance
Perform the following steps to create an EC2 Linux instance on AWS using AWS web console.
-
Create a key pair
Amazon EC2 uses a key pair to encrypt and decrypt login information. To log on to your instance, you must create a key pair, specify the name of the key pair when you launch the instance, and provide the private key when you connect to the instance.
When you review and launch an instance by using the AWS Launch Instance wizard, you are prompted to use an existing key pair or create a new key pair. For more information about how to create a key pair, see Amazon EC2 Key Pairs.
-
Create a VPC
A NetScaler VPC instance is deployed inside an AWS VPC. A VPC allows you to define the virtual network dedicated to your AWS account. For more information about AWS VPC, see Getting Started With Amazon VPC.
While creating a VPC for your Linux instance, keep the following points in mind.
- Use the VPC with a Single Public Subnet Only option to create an AWS VPC in an AWS availability zone.
- Citrix recommends that you create at least three subnets. All subnets must be in the same availability zone.
- One subnet for management traffic. You place the management IP(NSIP) on this subnet. By default elastic network interface (ENI) eth0 is used for management IP.
- One or more subnets for client-access (user-to-NetScaler BLX) traffic, through which clients connect to one or more virtual IP (VIP) addresses assigned to NetScaler load balancing virtual servers.
- One or more subnets for server-access (BLX-to-server) traffic, through which your servers connect to BLX-owned subnet IP (SNIP) addresses.
-
Add subnets
When using the VPC wizard, it creates only one subnet. Depending on your requirements, you may want to create more subnets. For more information on how to create additional subnets, see Adding a Subnet to Your VPC.
-
Create security groups and security rules
To control inbound and outbound traffic, create security groups and add rules to the groups. For more information on how to create groups and add rules, see Security Groups for Your VPC.
The EC2 wizard provides default security groups for Linux instances, which AWS Marketplace generates. However, you can create more security groups based on your requirements.
You must open the following ports for SSH, HTTP, and HTTPS access in the security group.
Access Type Port number SSH 22 HTTP 80 HTTPS 443 -
Add route tables
Route table contains a set of rules, called routes that are used to determine where network traffic is directed. Each subnet in your VPC must be associated with a route table. For more information about how to create a route table, see Route Tables.
-
Create an internet gateway
An internet gateway serves two purposes: to provide a target in your VPC route tables for internet-routable traffic and to do network address translation (NAT) for instances that have been assigned public IPv4 addresses.
Create an internet gateway for internet traffic. For more information about how to create an Internet Gateway, see the section Attaching an Internet Gateway.
-
Create a Linux instance by using the AWS EC2 service
-
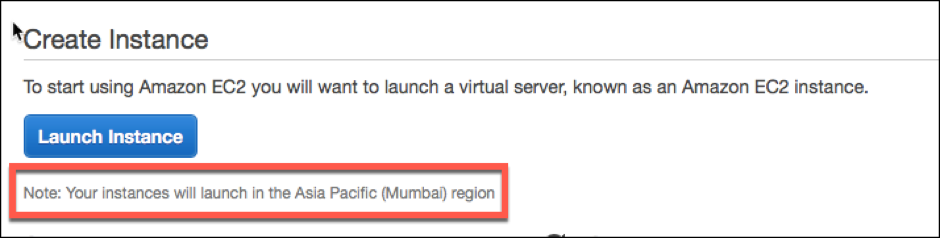
From the AWS dashboard, go to Compute > EC2 > Launch Instance > AWS Marketplace.
Before you click Launch Instance, ensure that your region is correct by checking the note that appears under Launch Instance.
- In the Search AWS Marketplace bar, search with the keyword Linux.
- Select the AMI that you want to deploy and then click Select.
The Launch Instance wizard starts. Follow the wizard to create an instance. The wizard prompts you to:
- Choose Instance Type
- Configure Instance
- Add Storage
- Add Tags
- Configure Security Group
- Review

-
-
Create and attach more network interfaces
Create two more network interfaces for VIP and SNIP. For more information about how to create more network interfaces, see the Creating a Network Interface section.
After you’ve created the network interfaces, you must attach them to the Linux instance. Before attaching the interface, shut down the Linux instance, attach the interface, and power on the instance. For more information about how to attach network interfaces, see the Attaching a Network Interface When Launching an Instance section.
-
Allocate and associate elastic IP address
If you assign a public IP address to an EC2 instance, it remains assigned only until the instance is stopped. After that, the address is released back to the pool. When you restart the instance, a new public IP address is assigned.
In contrast, an elastic IP (EIP) address remains assigned until the address is disassociated from an instance.
To allocate and associate an elastic IP for the management NIC, see Allocate an Elastic IP Address.
These steps complete the procedure to create a Linux instance on AWS. It can take a few minutes for the instance to be ready. Check that your instance has passed its status checks. You can view this information in the Status Checks column on the Instances page.
-
Connect to the Linux instance
After you’ve created the Linux instance, you can connect to the instance from the AWS management console.
- Select the Linux instance and click Connect.
- Follow the instructions given on the Connect to Your Instance page.
Download NetScaler BLX
Download the BLX package on the Linux AMI. For more information, see Download NetScaler BLX.
Install NetScaler BLX
- To install BLX on a Debian-based Linux host, see Install NetScaler BLX on a Debian-based Linux host.
- To install BLX on an RPM-based Linux host, see Install NetScaler BLX on an RPM-based Linux host.
Configure BLX
After you install BLX, edit the configuration file to bring up BLX. For more information, see Configure NetScaler BLX.
Start NetScaler BLX
After you edit the blx.conf file, start BLX. For more information, see Start NetScaler BLX.
Access NetScaler BLX
You can access BLX by using one of the following methods:
- NetScaler CLI
- NetScaler GUI
- NetScaler NITRO REST APIs
For more information, see Access NetScaler BLX.
Licensing
NetScaler offers a wide range of product editions and licensing models to meet your organization’s requirements. For more information, see NetScaler BLX licensing.