Configure LDAP authentication on NetScaler for management purposes
You can configure user logon to NetScaler using the Active Directory credentials (user name and password) for management purposes (superuser, read-only, network privileges and all others).
Prerequisites
- Windows Active Directory domain controller servers
- A dedicated domain group for NetScaler® administrators
- NetScaler Gateway 10.1 and later versions
The following figures illustrate the LDAP authentication on NetScaler.
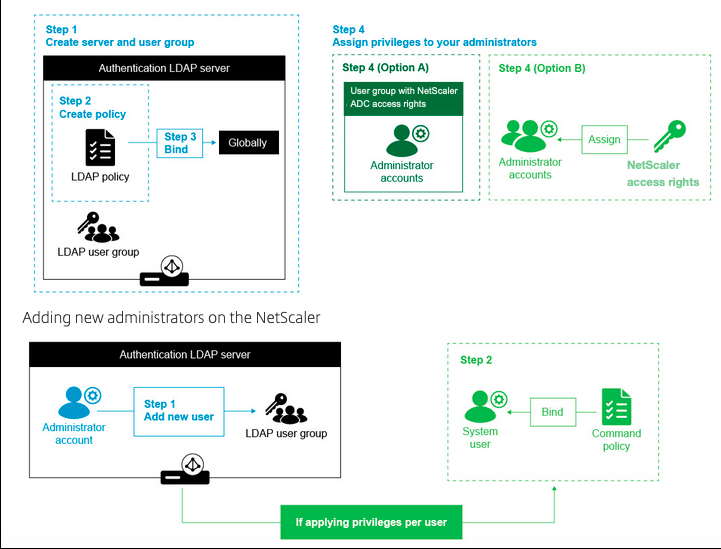
High level configuration steps
- Create an LDAP server.
- Create an LDAP policy.
- Bind the LDAP policy.
- Assign privileges to your administrators by one of the following ways:
- Apply privileges on a group.
- Apply privileges individually for each user.
Create an authentication LDAP server
- Navigate to System > Authentication > Basic Policies > LDAP.
- Click the Servers tab and then click Add.
- Complete the configuration, and then click Create.
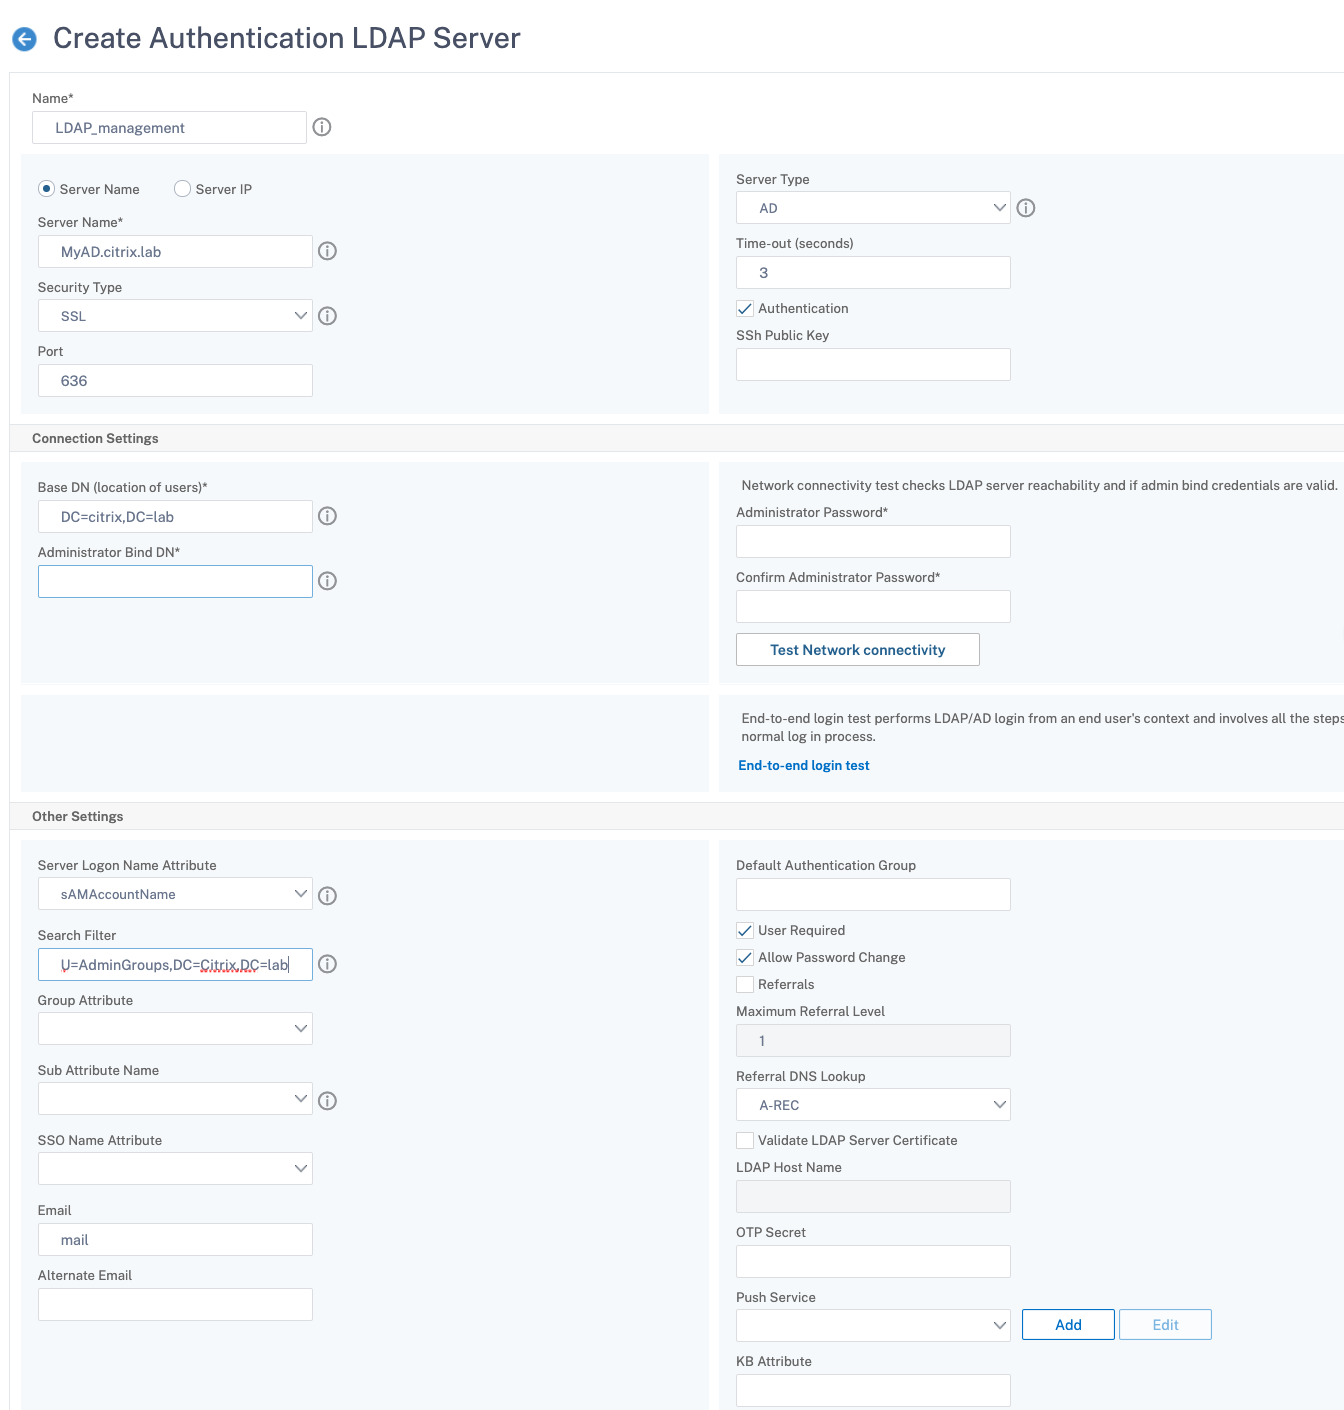
Note:
In this example, access to NetScaler is restricted by using a Search Filter to authenticate based on user group membership. The value used for this example is - &(memberof=CN=NSG_Admin,OU=AdminGroups,DC=Citrix,DC=lab)
Create an LDAP Policy
- Navigate to System > Authentication > Advanced Policies > Policy.
- Click Add.
- Enter a name for the policy and select the server that you created in the previous steps.
- In the Expression text field, enter the appropriate expression, and then click Create.
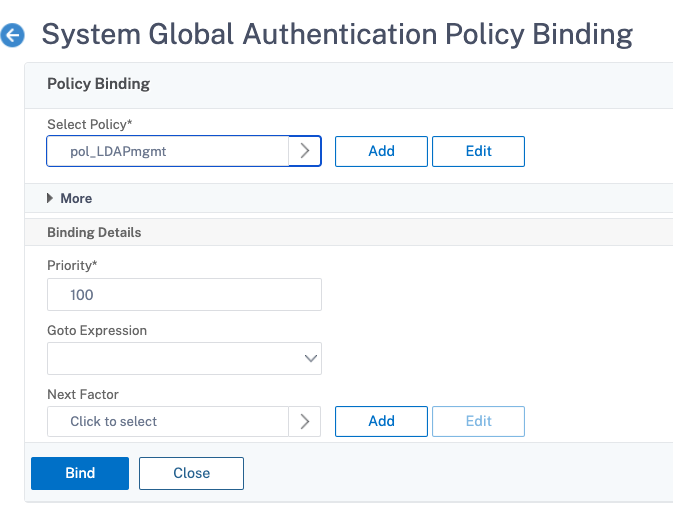
Bind the LDAP policy globally
- Navigate to System > Authentication > Advanced Policies > Policy.
- In the Authentication Policies page, click Global Bindings.
- Select the policy that you created (in this example, pol_LDAPmgmt).
- Choose a priority accordingly (the lower the number, the higher the priority).
- Click Bind and then Done. A green checkmark appears in the Globally Bound column.
Assign privileges to your administrators
You can choose one of the following two options.
- Apply privileges on a group: Add a group in NetScaler and assign the same access rights for each user who is a member of this group.
- Apply privileges individually for each user: Create each user administrator account and assign rights for each of them.
Apply privileges on a group
When you apply privileges to a group, users in the Active Directory group specified in the Search Filter (for example, NSG_Admin) can access the NetScaler Management interface. These users receive a superuser command policy.
- Navigate to System > User Administration > Groups.
- Click Add, enter the details as per the requirement, and then click Create.
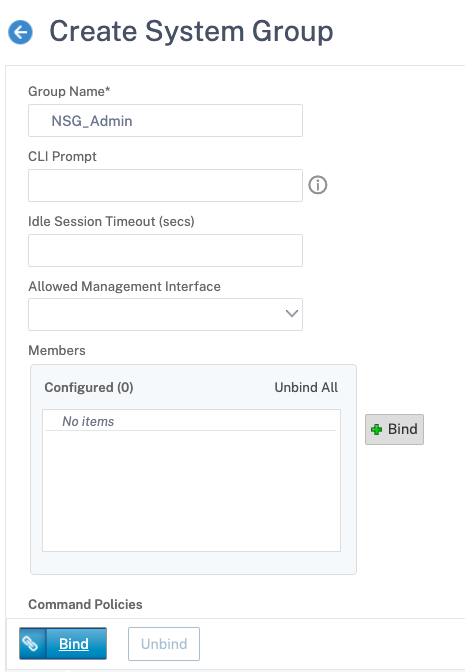
You have defined the Active Directory group for the users and the command policy level for their account during login. You can add new administrator users to the LDAP group you configured on the search filter.
Note:
The group name must match the Active Directory record.
Apply privileges individually for each user
In this scenario, users who are member of your Active Directory group configured in the search filter (in this example, NSG_Admin) can connect to the NetScaler management interface but do not have any privileges until you create the specific user on NetScaler and bind the command policy to it.
- Navigate to System > User Administration > Users.
- Click Add.
-
Enter the details as per the requirement.
Note: Make sure to select Enable External Authentication.
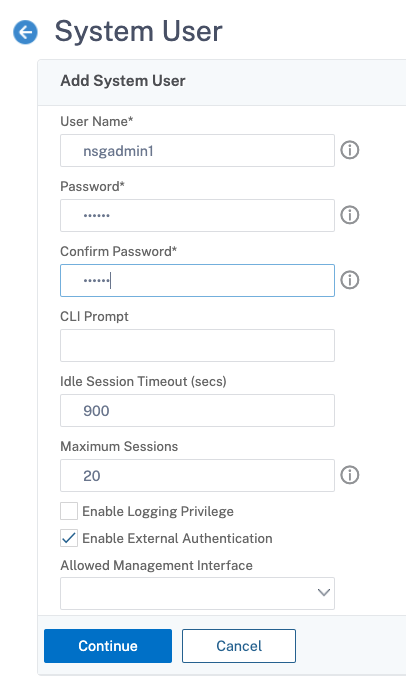
- Click Continue.
You have defined the Active Directory user and the command policy level that must be associated to the account when logging in.
Note:
- The user name must match the existing user’s Active Directory record.
- When you add a user to the NetScaler for external authentication, you must provide a password, if the external authentication is not available. For the external authentication to work properly, the internal password must not be the same as the user account LDAP password.
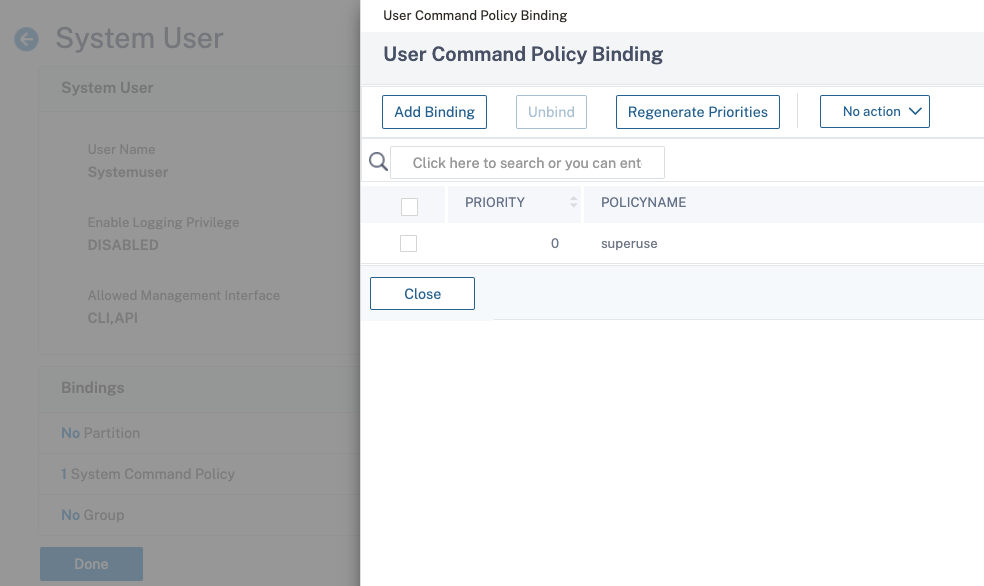
Add command policy to the user
- Navigate to System > User Administration > Users.
- Select the user that you created, and then click Edit.
- In Bindings, click System Command Policy.
- Select the correct command policy to apply to your user.
- Click Bind and then click Close.
To add more administrators;
- Add the administrator users to the LDAP group you configured on the search filter.
- Create the system user in NetScaler and assign the correct command policy.
To configure LDAP authentication on NetScaler for management purposes by using the CLI
Use the following commands as a reference to configure logon for a group with superuser privileges on NetScaler CLI.
-
Create an LDAP server.
add authentication ldapAction LDAP_mgmt -serverIP myAD.citrix.lab -serverPort 636 -ldapBase "DC=citrix,DC=lab" -ldapBindDn readonly@citrix.lab -ldapBindDnPassword -ldapLoginName sAMAccountName -searchFilter "&(memberof=CN=NSG_Admin,OU=AdminGroups,DC=citrix,DC=lab)" -groupAttrName memberOf <!--NeedCopy--> -
Create an LDAP policy.
We recommend that you use advanced authentication policies instead of classic policies, as classic policies are deprecated.
Advanced authentication policy:
add authentication policy pol_LDAPmgmt -rule true -action LDAP_mgmt
<!--NeedCopy-->
Classic authentication policy:
add authentication ldapPolicy pol_LDAPmgmt ns_true LDAP_mgmt <!--NeedCopy--> -
Bind the LDAP policy.
bind system global pol_LDAPmgmt -priority 110 <!--NeedCopy--> -
Assign privileges to your administrators.
-
To apply privileges on the group, use the following command:
add system group NSG_Admin bind system group NSG_Admin -policyName superuser 100 <!--NeedCopy--> -
To apply privileges individually for each user, use the following command:
 add system user admyoa
 bind system user admyoa superuser 100
 <!--NeedCopy-->
-