Configure certificate authentication as the first factor and LDAP as the second factor in NetScaler nFactor authentication
The following section describes the use case of certificate authentication in the first factor followed by LDAP in the second factor. Else, the LDAP and OTP, if a user certificate is not present in the first factor.
Use Case: Certificate authentication as the first factor followed by LDAP as the next factor
Assume a use case where, admins configure certificate authentication in the first factor. And if the certificate is present, then configure LDAP authentication in the next factor. If the user certificate is not present, configure LDAP and OTP.
-
Once you access the traffic management virtual server, you are redirected to the login page.
-
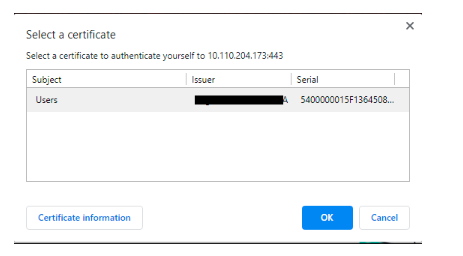
If the user certificate is present in the client device, you are displayed with the following screen.
-
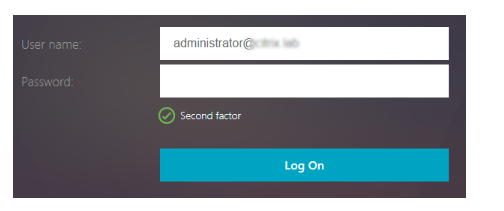
After the user certificate is submitted, authentication proceeds to the next factor. This factor is configured as LDAP.
-
If a user certificate is not present in the first factor, then proceed to LDAP and OTP. You have two options to achieve.
-
LDAP and OTP as separate login pages with user name prefilled from LDAP factor.
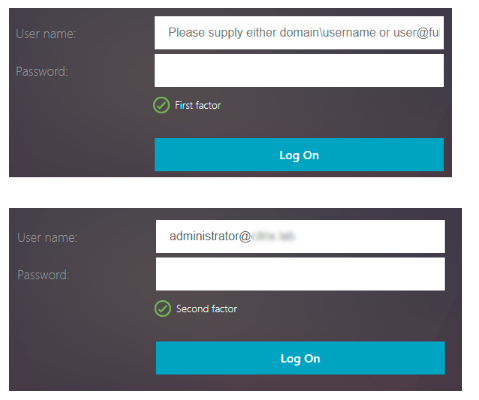 The user name value is prefilled using the expression ${http.req.user.name}, which extracts the user name from the first factor. Other fields such as, labels for user name and password can also be customized.
 -
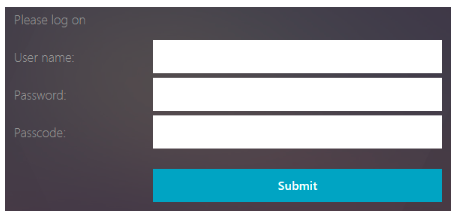
Dual authentication page containing two password fields. The example used for this specific representation is displayed.
-
Note
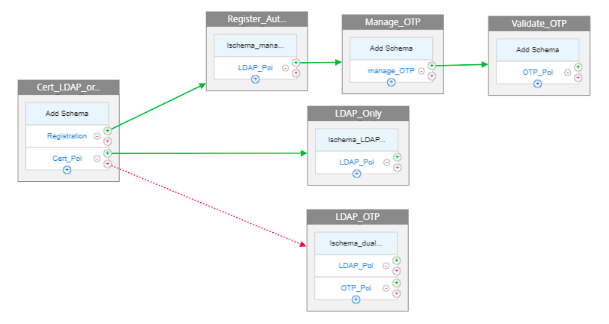
The setup can also be created through the nFactor Visualizer available in NetScaler version 13.0 and later.
Perform the following by using the CLI
-
Configure authentication virtual server.
add authentication vserver auth_vserver SSL 10.217.28.152 443

 add lb vserver lbvs1 HTTP 10.217.28.152 80 -AuthenticationHost auth1.nsi-test.com -Authentication ON

bind ssl vserver auth_vserver -certkeyName gateway.angiras.lab -
Bind the root certificate to the virtual server and enable Client Auth.
bind ssl vserver auth_vserver -certkeyName Root_Cert -CA -ocspCheck Optional

set ssl vserver auth_vserver -clientAuth ENABLED -clientCert Optional -
Configure authentication action and policies.
-
LDAP authentication
add authentication ldapAction LDAP_Action -serverIP XX.XX.XX.XX -ldapBase "dc=citrix,dc=lab" -ldapBindDn administrator@citrix.lab -ldapBindDnPassword 97526a31c6e2e380f7b3a7e5aa53dc498c5b25e9b84e856b438b1c61624b5aad -encrypted -encryptmethod ENCMTHD_3 -ldapLoginName sAMAccountName -groupAttrName memberOf -subAttributeName cn`

add authentication Policy LDAP_Pol -rule true -action LDAP_Action`-
Device management
add authentication ldapAction OTP_manage_Act -serverIP XX.XX.XX.XX -ldapBase "dc=citrix,dc=lab" -ldapBindDn administrator@citrix.lab -ldapBindDnPassword 3e10c1df11a9cab239cff2c9305743da76068600a0c4359603abde04f28676ae -encrypted -encryptmethod ENCMTHD_3 -ldapLoginName sAMAccountName -groupAttrName memberOf -subAttributeName cn -authentication DISABLED -OTPSecret userParameters

add authentication Policy manage_OTP -rule TRUE -action OTP_manage_Act-
OTP validation
add authentication ldapAction LDAP_OTP_Act -serverIP XX.XX.XX.XX -ldapBase "dc=citrix,dc=lab" -ldapBindDn administrator@citrix.lab -ldapBindDnPassword e79a8ebf93fdb7e7438f44c076350c6ec9ad1269ef0528d55640c7c86d3490dc -encrypted -encryptmethod ENCMTHD_3 -ldapLoginName sAMAccountName -searchFilter "userParameters>=#@" -groupAttrName memberOf -subAttributeName cn -authentication DISABLED -OTPSecret userParameters

add authentication Policy OTP_Pol -rule true -action LDAP_OTP_Act-
Certificate authentication
add authentication certAction Certificate_Profile -twoFactor ON -userNameField SubjectAltName:PrincipalName
add authentication policy Cert_Pol -rule true -action Certificate_Profile`-
Policy without authentication for dual authentication when a certificate authentication fails or certificate does not exist.
add authentication Policy Cert_Pol_NOAUTH_ -rule true -action NO_AUTHN -
-
Configure the policy label and schema for the second factor.
-
Device management
add authentication policylabel manage_otp_label -loginSchema LSCHEMA_INT

bind authentication policylabel manage_otp_label -policyName manage_OTP -priority 100 -gotoPriorityExpression END-
LDAP authentication after successful certificate authentication
add authentication loginSchema lschema_LDAP_Only -authenticationSchema "/nsconfig/loginschema/LoginSchema/PrefilUserFromExpr.xml"

 add authentication policylabel LDAP_Only -loginSchema lschema_LDAP_Only

bind authentication policylabel LDAP_Only -policyName LDAP_Pol -priority 100 -gotoPriorityExpression END-
Dual authentication when certification is not present or certificate authentication fails
add authentication loginSchema lschema_dual_auth -authenticationSchema "/nsconfig/loginschema/LoginSchema/DualAuth.xml"

 add authentication policylabel Dual_Auth_Label -loginSchema lschema_dual_auth

 bind authentication policylabel Dual_Auth_Label -policyName LDAP_Pol -priority 100 -gotoPriorityExpression END

bind authentication policylabel Dual_Auth_Label -policyName OTP_Pol -priority 110 -gotoPriorityExpression END -
-
Bind the policies created in the preceding steps.
bind authentication vserver auth_vserver -policy Manage_OTP -priority 100 -nextFactor manage_otp_label -gotoPriorityExpression NEXT

 bind authentication vserver auth_vserver -policy Cert_Pol -priority 110 -nextFactor LDAP_Only -gotoPriorityExpression NEXT

 bind authentication vserver auth_vserver -policy Cert_Pol_NOAUTH_ -priority 120 -nextFactor Dual_Auth_Label -gotoPriorityExpression NEXT
Configuring by using the nFactor Visualizer
-
Navigate to Security > AAA-Application Traffic > nFactor Visualizer > nFactor Flows and click Add.
-
Click + to add the nFactor flow.
-
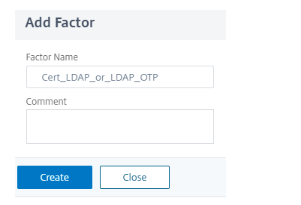
Add a factor. The name that you enter is the name of the nFactor flow. Click Create.
-
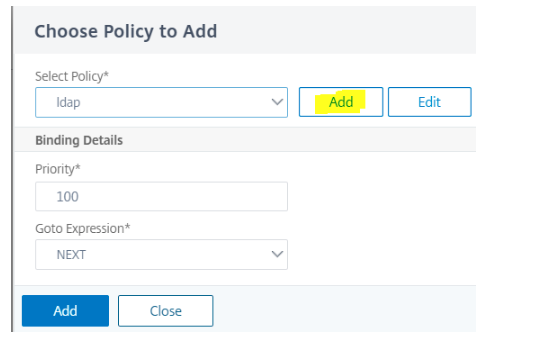
Click Add Policy to add the first factor authentication policy. You can create an authentication policy or select an existing authentication policy from the list.
-
Add a policy for registration check. Action in this case would be NO_AUTHN.
-
In the Expression Field, type
HTTP.REQ.COOKIE.VALUE("NSC_TASS").EQ("manageotp")and click Create.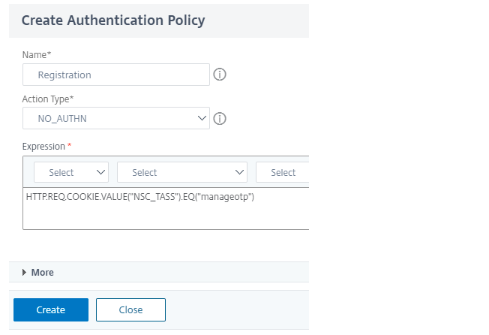
-
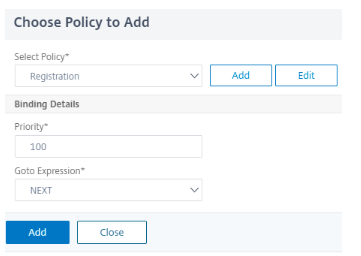
Click Add Policy to create a policy. Click Create and click Add.
-
Click green + to add the next factor for LDAP authentication before managing the devices.
-
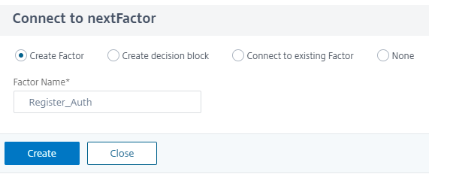
Select Create Factor and type in a name for this factor and click Create.
-
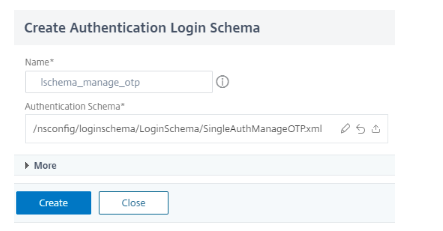
Click Add Schema and then add to create a schema to manage devices.
-
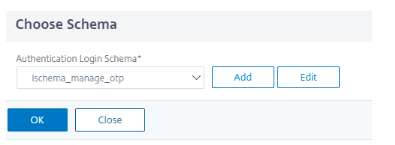
Choose the schema that is created in the preceding step and click Add to create it.
-
Click Add Policy and select LDAP Authentication Policy for initial LDAP authentication.NoteFor more information, see To configure LDAP authentication by using the configuration utility.
-
Follow steps 9 and 10 to create another factor to register the device.
-
No schema is needed in this factor. Click Add Policy to add the policy for device registration. (Policy created in CLI Configuration step 4 point b).
-
Create another factor following step 9 and 10 to test the registered devices.
-
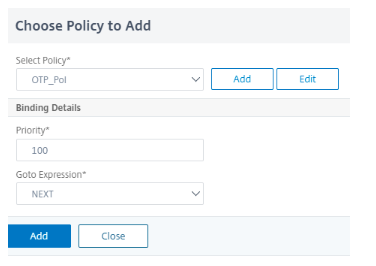
Click Add Policy to add Authentication Policy (Policy created in CLI Configuration step 4 point c).
-
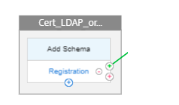
Click green + under the Registration Policy to add a Policy for certificate authentication.
-
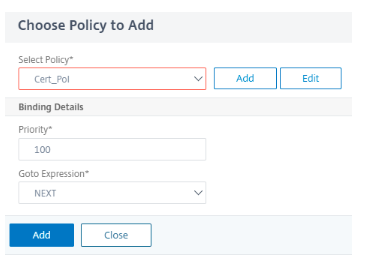
Click Add to add the Cert Policy.
 NoteFor more information on client certificate authentication, see How Do I Enable SSL Client Certificate Authentication on NetScaler.
 -
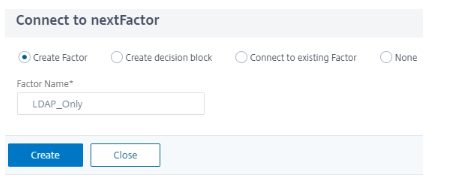
Click the green sign next to the Cert Policy to create the next factor for LDAP authentication.
-
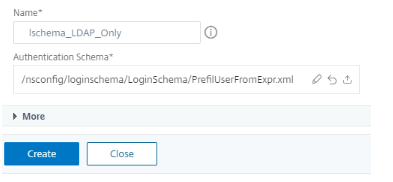
Click Add Schema to add the login schema for prefilled user name, single authentication.
-
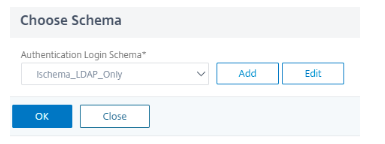
Choose the schema created and click OK.
-
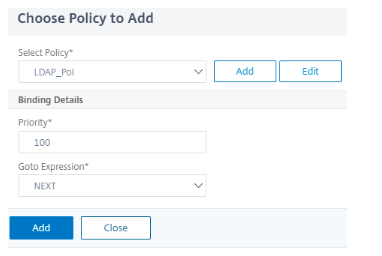
Click Add Policy and add LDAP authentication.
-
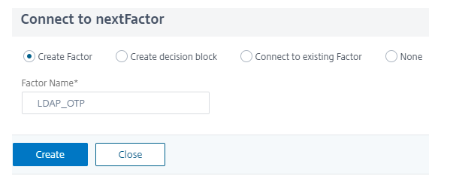
Click red + next to Certificate Policy to add the next factor for the failure case. The failure case is for when the certificate authentication fails or if there is no certificate on the device.
-
Select Create Factor and type a Factor Name.
-
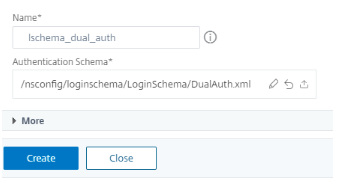
Click Add Schema to add a dual authentication schema.
-
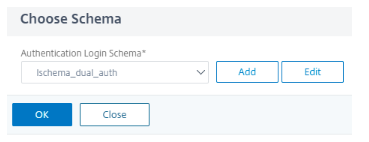
Choose the created schema and click OK.
-
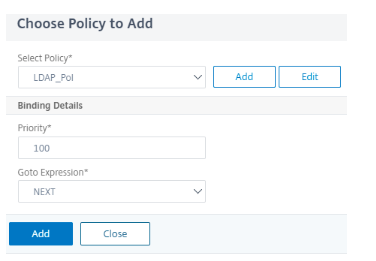
Click Add Policy and add LDAP authentication.
-
Select the authentication policy to validate OTP and click OK
-
Click Done to save the configuration.
-
Select the nFactor Flow created and bind it to an authentication, authorization, and auditing virtual server. Click Bind to Authentication Server and Click Create.
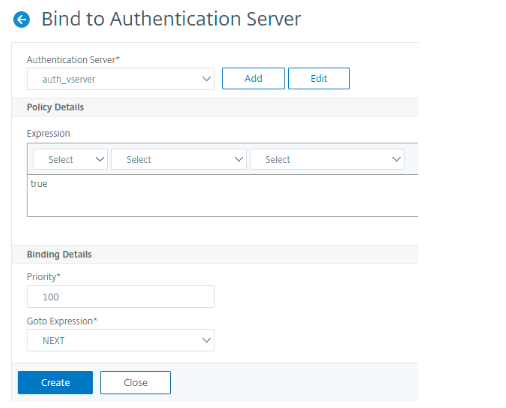 NoteYou can bind and unbind the nFactor using the nFactor Flows page through Show Bindings option only.
Unbind the nFactor flow
-
On the nFactor Flows page, click Show Bindings from the hamburger icon.
-
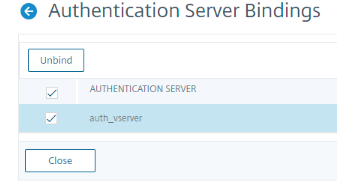
On the Authentication Server Bindings page, select the authentication server to unbind and click Unbind. Click Close.