Configure nFactor for NetScaler Gateway with WebAuth in first factor and LDAP with password change in second factor
The following high-level steps are involved in configuring nFactor for NetScaler Gateway with WebAuth in first factor and LDAP with password change in the second factor.
-
Configure an authentication virtual server with zero IP. It is not mandatory to have a certificate bind to authentication virtual server.
-
Configure an authentication profile with the authentication virtual server name.
-
Configure a VPN virtual server.
-
Set the authentication profile on this VPN virtual server.
-
Configure a WebAuth action and policy.
-
Configure LDAP action and policy.
-
Configure a login schema action for LDAP factor.
-
Configure a policy label for LDAP factor using the login schema action for LDAP factor.
-
Bind LDAP policy to the LDAP policy label.
-
Bind WebAuth policy to the authentication virtual server with an LDAP policy label as the next factor.
How it works
-
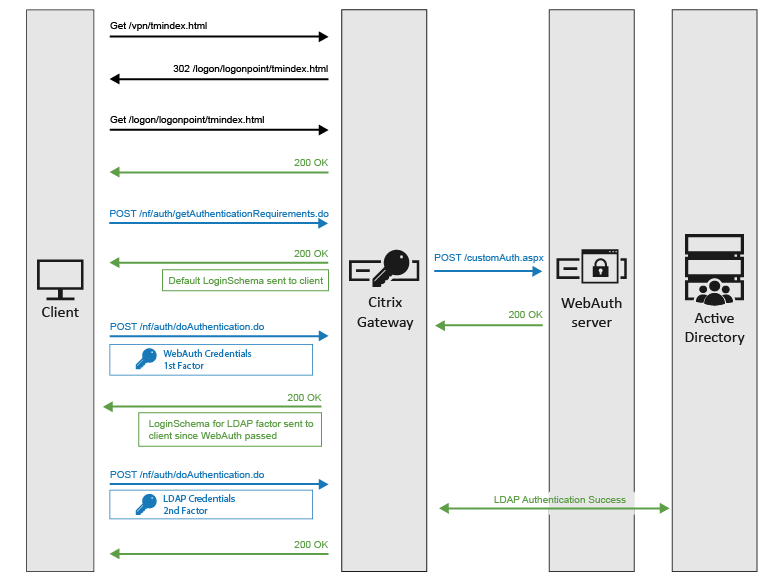
User enters the NetScaler Gateway FQDN in browser and is redirected to the /logon/logonpoint/tmindex.html page.
-
This page displays the login schema that is bound to an authentication virtual server. If there is no login schema bound to an authentication virtual server (like in our configuration), then a default schema is displayed.
-
The user enters the credentials for the first factor, which in this case is WebAuth.
-
NetScaler Gateway checks the WebAuth action and contacts the WebAuth server. It sends HTTP request mentioned in the parameter fullReqExpr to WebAuth server. If the webAuth server’s response satisfies the expression mentioned in successRule parameter of WebAuth action, then this policy passes.
-
Now NetScaler Gateway moves to the second factor. It checks the configuration of Policy label LDAP_factor that is bound as next factor. Since there is a loginSchema mentioned in this policy label, NetScaler Gateway sends that XML schema to the Client.
-
The client receives the schema and enters the LDAP credentials for second factor authentication.
-
NetScaler Gateway tries to reach the LDAP server and validates if the client credentials are correct. If they are correct, authentication phase completes and user logs in to the configured VPN mode.
The following figure displays an nFactor authentication sequence in which the first factor is WebAuth and second factor is LDAP.
Configuration by using the CLI
-
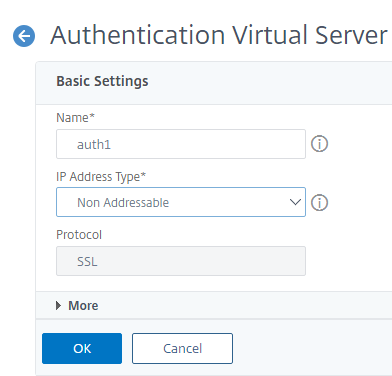
Configure an authentication virtual server.
add authentication vserver auth1 ssl
<!--NeedCopy-->
In the GUI, navigate to Security > AAA - Application traffic > Virtual Server and click Add.
-
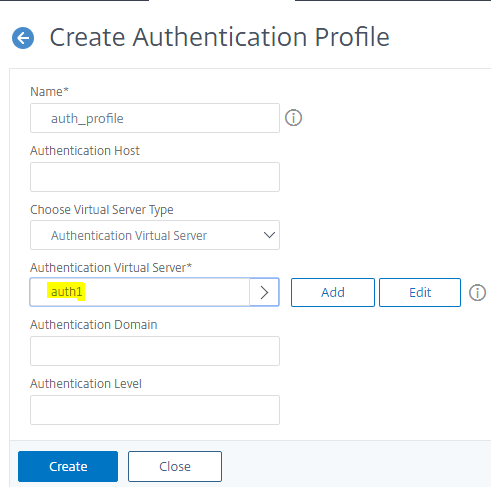
Configure an authentication profile.
add authnProfile auth_profile –authnVsname auth1
<!--NeedCopy-->
In the GUI, navigate to Security > AAA - Application traffic > Authentication profile and click Add.
-
Configure a VPN virtual server.
add vpn vserver vpn1 ssl 10.1.1.1 443

add ssl certkey ckp –cert test.cer –key test.key

bind ssl vserver vpn1 –certKey ckp
<!--NeedCopy-->
Navigate to NetScaler Gateway > Virtual Server and click Add.
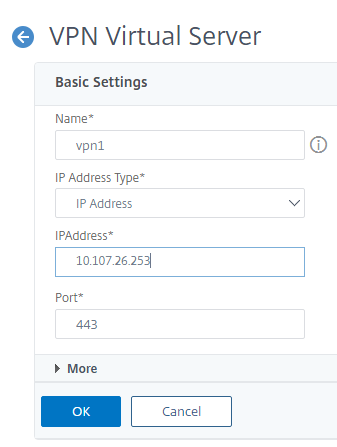
Once the VPN virtual server is created, bind the certificate on the same.
Set the authentication Profile on the VPN virtual server
set vpn vserver vpn1 –authnProfile auth_profile
<!--NeedCopy-->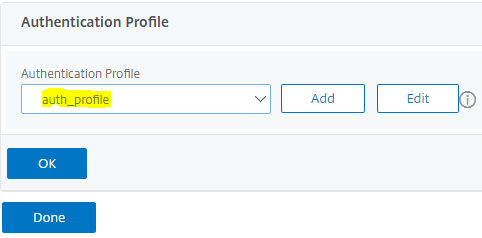
-
Configure a WebAuth action and Policy.
Navigate to Appexpert > Expression > Advanced Expression.
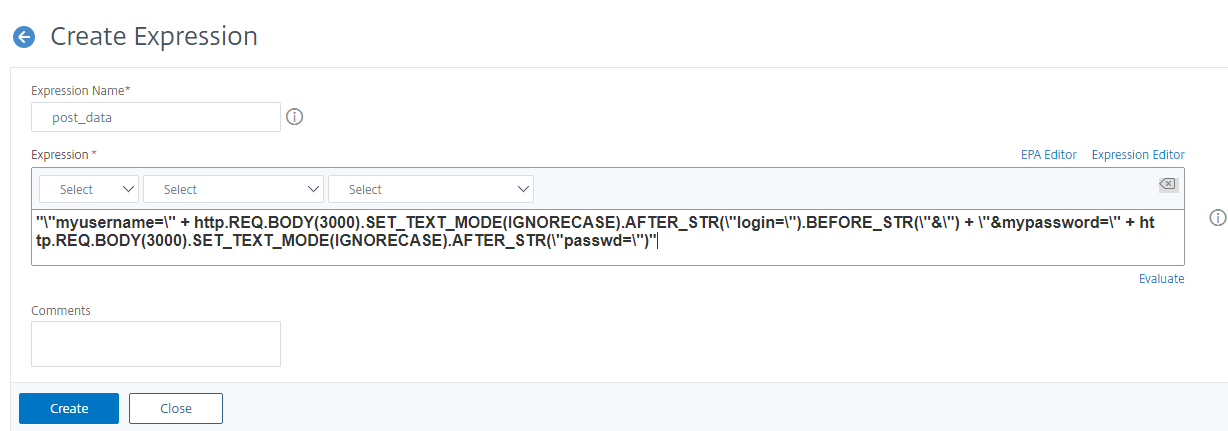
add policy expression post_data "\"myusername=\" +

http.REQ.BODY(3000).SET_TEXT_MODE(IGNORECASE).AFTER_STR(\"login=\").BEFORE_STR(\"&\") + \"&mypassword=\" +

http.REQ.BODY(3000).SET_TEXT_MODE(IGNORECASE).AFTER_STR(\"passwd=\")"
<!--NeedCopy-->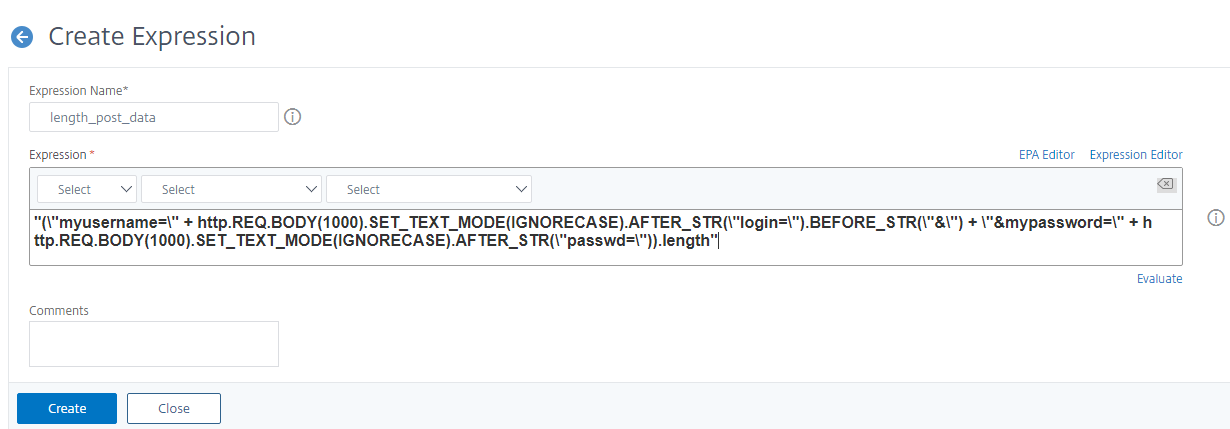
add policy expression length_post_data "(\"myusername=\" +

http.REQ.BODY(1000).SET_TEXT_MODE(IGNORECASE).AFTER_STR(\"login=\").BEFORE_STR(\"&\") + \"&mypassword=\" +

\http.REQ.BODY(1000).SET_TEXT_MODE(IGNORECASE).AFTER_STR(\"passwd=\")).length"
<!--NeedCopy-->
Nfactor configuration by using the CLI:
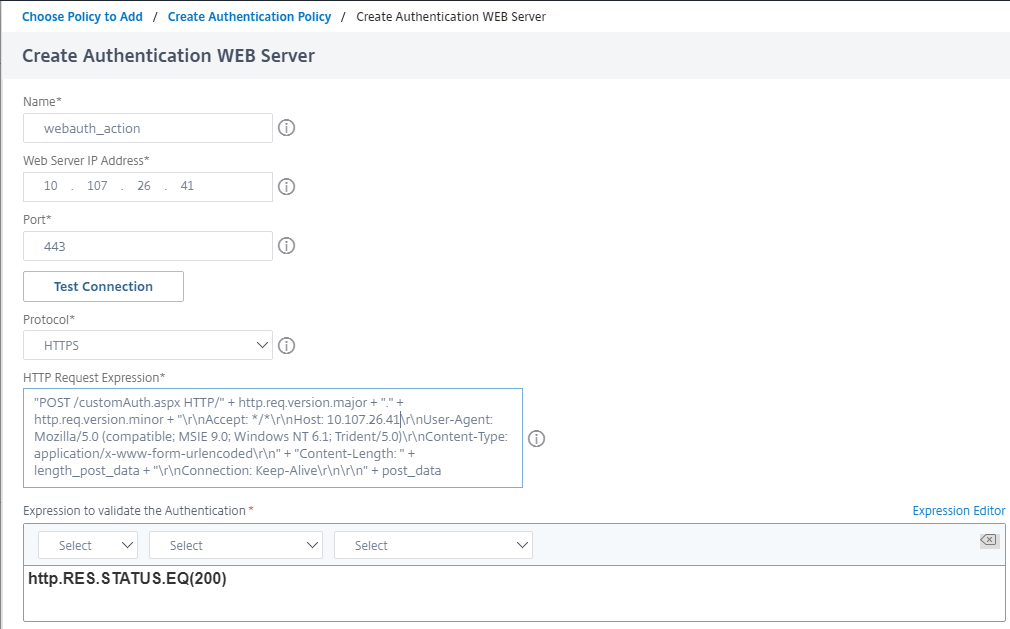
add authentication webAuthAction webAuth_action -serverIP 10.102.39.132 -serverPort 443 -fullReqExpr q{"POST /customAuth.aspx HTTP/" + http.req.version.major + "." + http.req.version.minor + "\r\nAccept: */*\r\nHost: 10.102.39.132\r\nUser-Agent: Mozilla/5.0 (compatible; MSIE 9.0; Windows NT 6.1; Trident/5.0)\r\nContent-Type: application/x-www-form-urlencoded\r\n" + "Content-Length: " + length_post_data + "\r\nConnection: Keep-Alive\r\n\r\n" + post_data} -scheme https -successRule "http.RES.STATUS.EQ(200)"

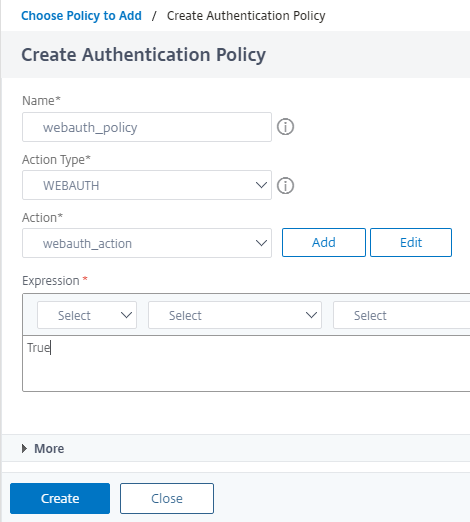
add authentication policy webAuth_policy –rule TRUE –action webAuth_action
<!--NeedCopy-->
The webAuth action configured previously uses two policy expressions. One policy expression (post_data) creates the POST body. The other (length_post_data) calculates the length of the POST body, which is used to populate the Content-Length header in the POST request.
The policy expression that creates the POST body parses the login request and extracts the user name and password entered by the user. It then creates the POST body in the format that the WebAuth server expects, using the user name password extracted from the login request.
Finally the WebAuth action creates the below request, which is sent to the WebAuth server.
POST /customAuth.aspx HTTP/1.1 Accept: */* Host: 10.102.39.132 Accept-Language: en-US User-Agent: Mozilla/5.0 (compatible; MSIE 9.0; Windows NT 6.1; Trident/5.0) Content-Type: application/x-www-form-urlencoded Content-Length:43 Connection: Keep-Alive myusername=test_user&mypassword=test_passwd <!--NeedCopy--> -
Configure LDAP Action and Policy for password change.
add authentication ldapAction ldap_action -serverIP 10.102.39.133 -serverPort 636 -secType SSL -ldapBase "dc=domain,dc=com" -ldapBindDn administrator -ldapBindDnPassword password -ldapLoginName samAccountName -passwdChange ENABLED
add authentication policy ldap_policy –rule TRUE –action ldap_action
<!--NeedCopy-->
The LDAP action is configured with –passwdChange ENABLED, which enables the user initiated change password after VPN login.
-
Configure a LoginSchema action for LDAP factor.
add authentication loginSchema LDAP_schema -authenticationSchema /nsconfig/loginschema/LoginSchema/SingleAuth.xml
<!--NeedCopy-->
The LDAP factor requires a user name and a password from the end user. The Login form displayed to the end user must depict a user name and password field.
NetScaler has a few default LoginSchema XMLs which are present at /nsconfig/ loginschema/LoginSchema location on the NetScaler shell. You can use one of the default LoginSchema XMLs present in the previous location.
-
Configure a policy label for LDAP factor using the LoginSchema action for LDAP factor:
add authentication policylabel LDAP_factor -loginSchema LDAP_schema <!--NeedCopy--> -
Bind LDAP Policy to the LDAP policy label.
bind authentication policylabel LDAP_factor –policyName ldap_policy –priority 10 <!--NeedCopy--> -
Bind WebAuth policy to authentication virtual server with an LDAP policy label as next factor.
bind authentication vserver auth1 –policy webAuth_policy –nextFactor LDAP_factor –priority 10
<!--NeedCopy-->
The preceding nFactor configuration can also be done using nFactor visualizer in NetScaler that is available starting from 13.0 firmware version.
Configuration by using the nFactor Visualizer

The first factor here is Webauth followed by LDAP with password change option being enabled.
-
Navigate to Security > AAA-Application Traffic > nFactor Visualizer > nFactor Flow and click Add.
-
Click + sign to add the nFactor flow.
-
Add a factor. This name that you enter for this factor is the name of the nFactor flow.
-
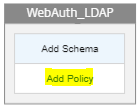
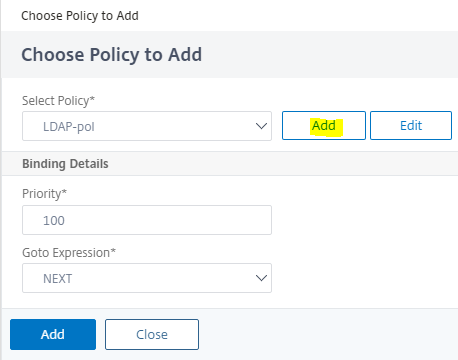
Click Add Policy to add the Webauth policy and Webauth action/server.
-
Click the green + sign to add the next Factor that is LDAP authentication with password change option enabled.
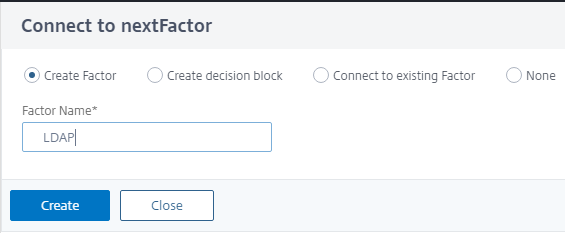
-
Click Add Schema to add the login schema for LDAP authentication.
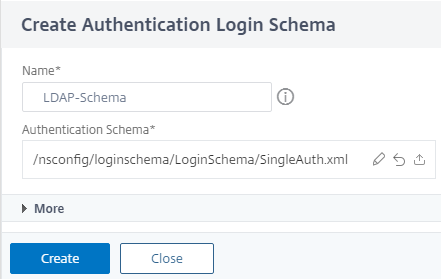
-
Click Add Policy to add the LDAP authentication policy and LDAP action/server.
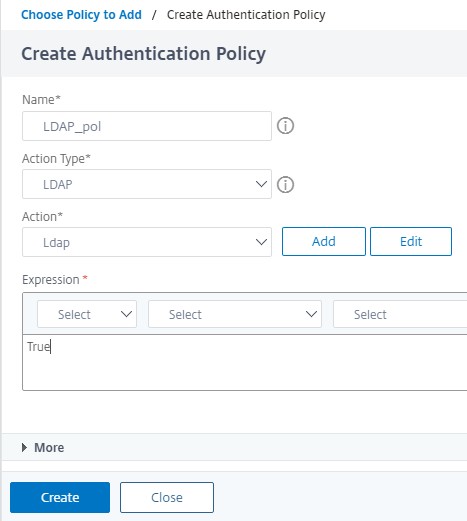
To create LDAP action/server, refer to the article https://support.citrix.com/article/CTX219939.
-
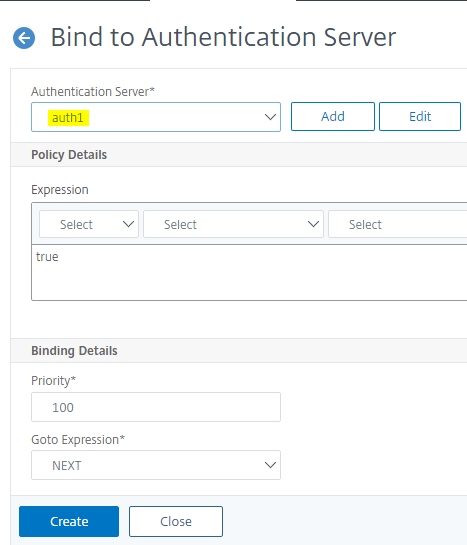
Once both the factors are configured, you must bind the flow to the authentication, authorization, and auditing virtual server.
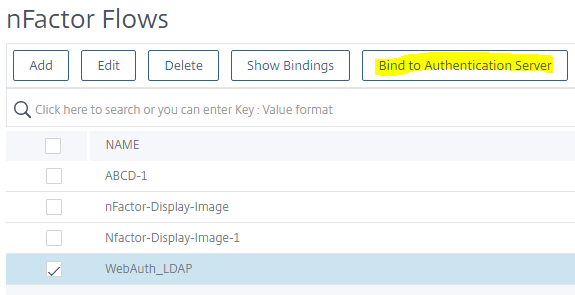
Debugging – Logs and counters
The logs are seen after a successful login with WebAuth and LDAP. To see most of the following logs, set the audit log level to ALL, so that it displays the debug logs also.
set audit syslogparams –loglevel ALL
<!--NeedCopy-->
Note: The timestamps are removed from the logs for brevity.
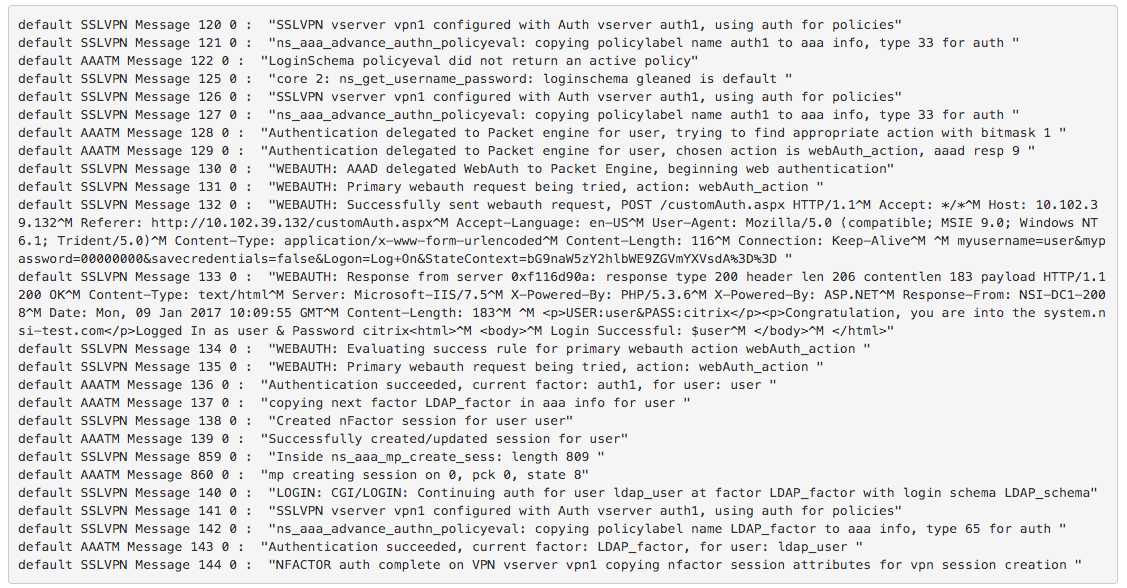
The following counters are incremented after a successful login with WebAuth and LDAP.
- pcp_hits authn(webAuth_policy)
- aaa_tot_webauth_primary_auth
- aaa_tot_webauth_prim_auth_success
- aaa_tot_webauth_prim_succ_check_thru
- pcp_hits authn(webAuth_policy)
- pcp_hits authn(ldap_policy)
- aaa_auth_succ