Use the master configuration template
Using a master configuration template is a flexible option for creating and deploying a master configuration on multiple NetScaler instances.
As an administrator, you might want to make configuration changes and save licenses, certificates, and other files on a NetScaler instance. You can save the new configuration as a master configuration template (.conf file).
To save your master configuration template from a NetScaler instance, you can do one of the following:
- At the command prompt, enter save ns config. The configuration is saved in the instance’s FLASH memory in the /nsconfig/ns.conf file.
- From the NetScaler instance’s GUI, navigate to Diagnostics > View Configuration. Choose the kind of configuration you’d like to save. For example, if you want to save the saved configuration of your NetScaler instance, select Saved configuration. Click the Save text to a file link to save the ‘ns.conf’ file to your local machine.
When you deploy the master configuration template by using the ‘DeployMasterConfiguration’ configuration template while creating a job, you can customize it further for each specific NetScaler instance by adding more commands, modifying existing commands, and providing different variable values in the input file.
For example, as an administrator you may want to upload certificate keys to your NetScaler instances in addition ns.conf file and deploy the master configuration on them as well.
Important
You cannot run a configuration job using the DeployMasterConfiguration template on NetScaler CPX instances, NetScaler instances configured in a cluster, or on partitioned NetScaler instances.
To create a configuration job using the Master Config configuration template on NetScaler Console:
-
In NetScaler Console, navigate to Infrastructure > Configuration > Configuration Jobs, and then click Create Job.
-
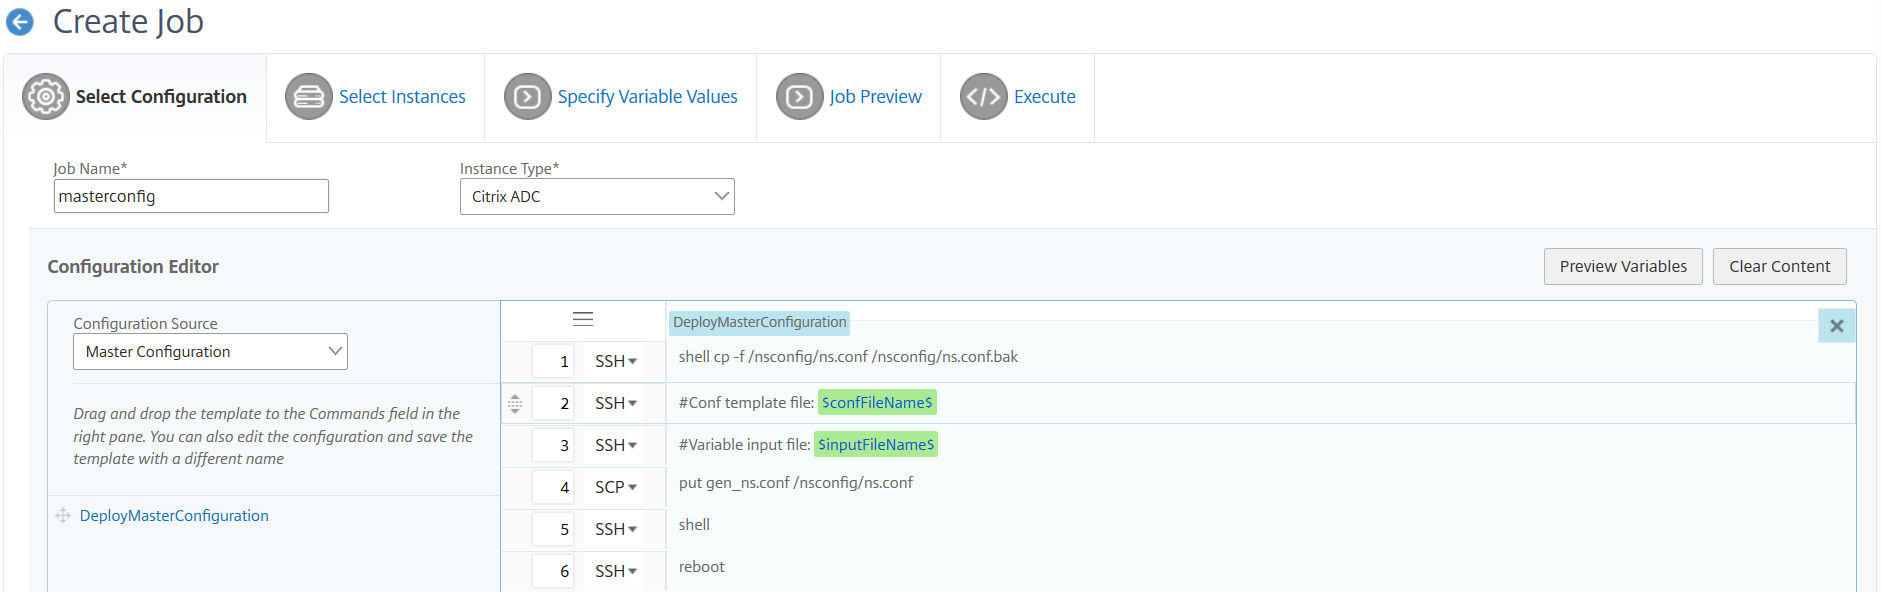
On the Create Job page, on the Select Configuration tab, specify the Job Name and select the Instance Type from the drop-down list.
-
Select Master Configuration from the Configuration Source drop-down list. Drag the DeployMasterConfiguration template’s commands to the right pane. You can add, modify, or delete commands in the right pane as well. Click Next.
Note
You can add put commands to add input files to your template. In our example, we must upload certificate and key files in addition to the configuration template file and variable input files.
-
You can review all the variables that you have defined while creating or editing a configuration job in a single consolidated view.
-
Do one of the following to view all the variables in a single consolidated view:
-
While creating a configuration job, navigate to Infrastructure > Configuration Jobs, select Create Job. On the Create Job page, you can review all the variables that you have added while creating the configuration job.
-
While editing a configuration job, navigate to Infrastructure > Configuration > Configuration Jobs, select the Job Name and click Edit. On the Configure Job page, you can review all the variables that were added while creating the configuration job.
-
-
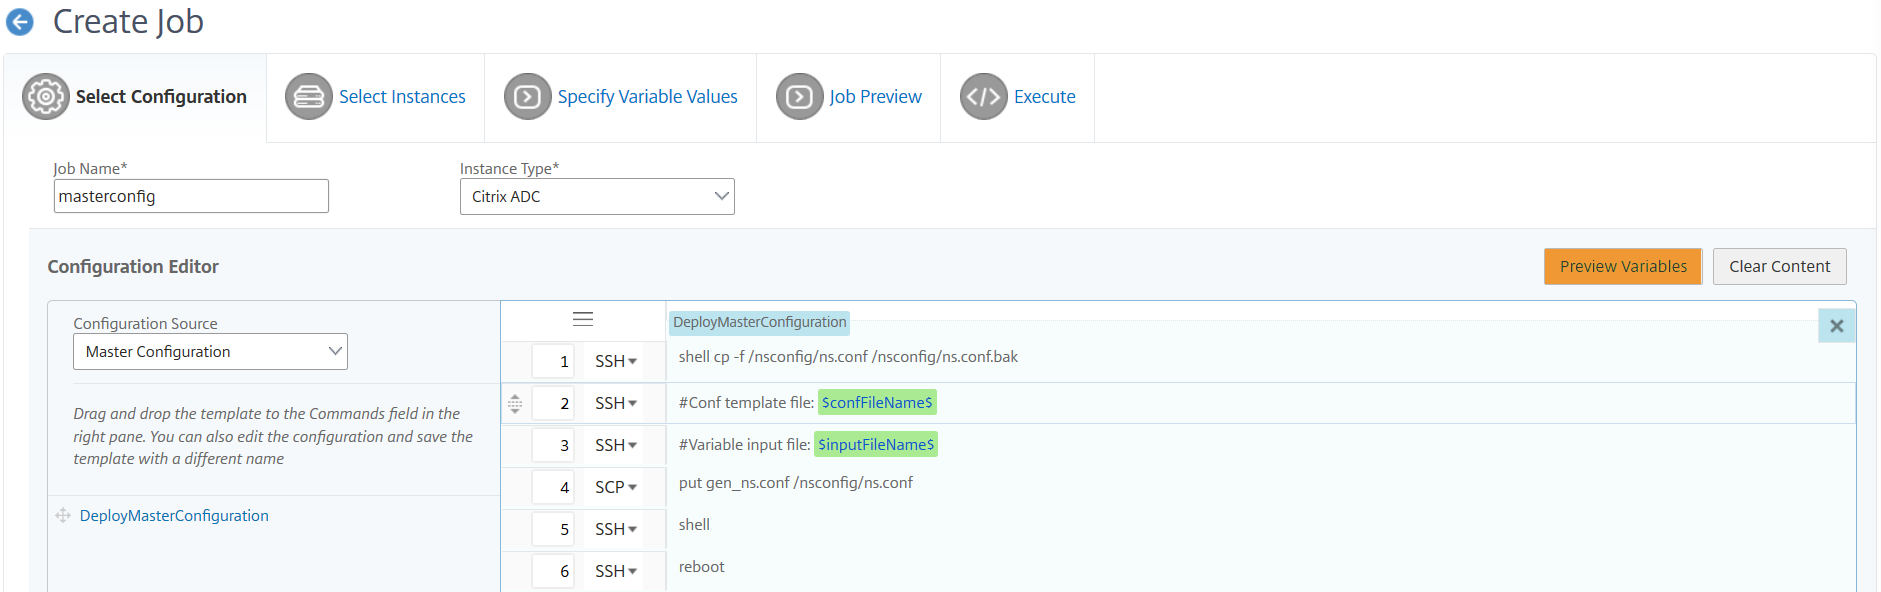
You can then click the Preview Variables tab to preview the variables in a single consolidated view that you have defined while creating or editing a configuration job.
-
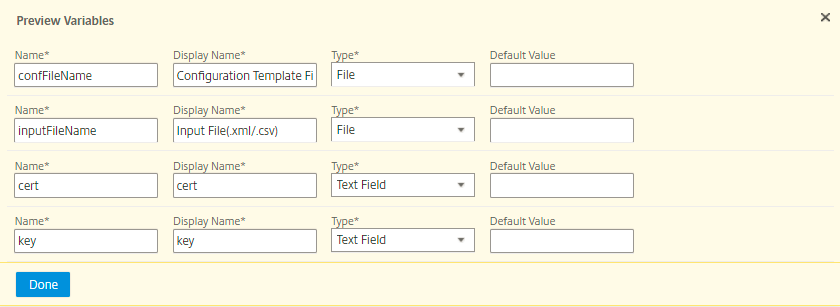
A new pop-up window appears and displays all the parameters of variables such as Name, Display Name, Type, and default value in a tabular format. You can also edit and modify these parameters. Click the Done button after you have edited or modified any of the parameters.
-
Select the instances on which you want to run the configuration job, and then click Next.
-
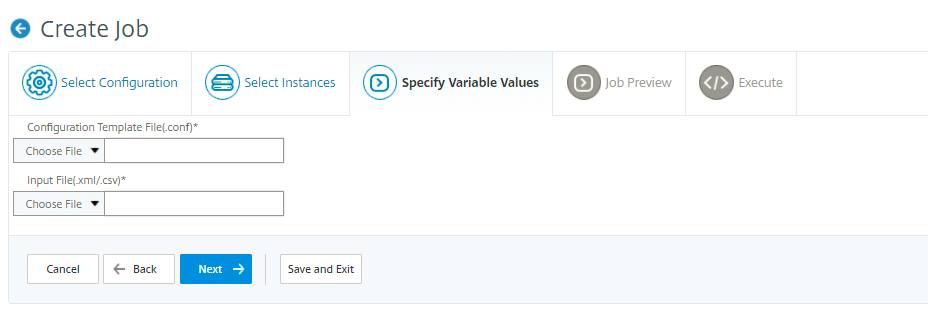
On the Specify Variable Values tab, upload the following:
- Configuration Template File (.conf) - Upload the .conf file that you extracted from a NetScaler instance.
- Upload the Input File (.xml/csv) - Upload the input file with values for the variables you have defined in your commands.
A sample xml file is provided here for your usage. Ensure that the xml files contain the details corresponding to the NetScaler instances that you are using.
<?xml version="1.0" encoding="UTF-8" ?>

<properties>

<!--

Provide inputs for all the parameters defined in the master config file.

-  global. This tag contains all the common parameters and value.

-  devicegroup. This tag contains all the instance group specific parameters and values.

If the same parameters are defined in global and instance tags, the instance specific parameters value will take precedence over the instance group. The instance group specific parameters value will take precedence over global parameters in the execution.

-  name. This attribute represents the name of the instance group.

-  device. This tag contains all the instance specific parameters and value.

If the same parameters are defined in global and instance tags, the instance specific parameters value will take precedence in the execution.

-  name. This attribute represents the IP Address of the instance. Host name is not supported for the attibute.

HA pair should be represented as <primaryip>-<secondaryip>. Example 10.102.2.1-10.102.2.2

In the template file, the parameter name must be specified within the dollar sign,Example: $NSIP$, $CC_Trap_Dest$ and parameters names are case sensitive.
-->

<global>

</global>
<devicegroup name="BLR_DEVS">
</devicegroup>
<device name="10.106.101.209">
<param name="IP" value="10.106.101.209"/>
</device>

<!-- HA PAIR-->
<!--<device name="10.102.43.154-10.102.43.155">
<param name="NSIP" value="10.102.43.154"/>
<param name="HostName" value="NS43HA"/>
<param name="LBSERVER" value="haserver43http"/>
<param name="SNMPTrapDest" value="10.102.43.130"/>
</device>-->
</properties>

<!--NeedCopy-->
A sample csv file is provided here for your usage.
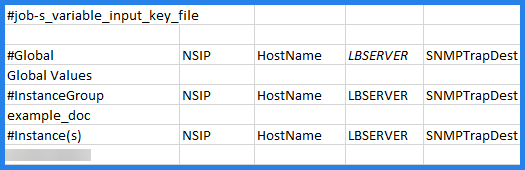
#job-s_variable_input_key_file ,,,,
,,,,
#Global,NSIP,HostName,LBSERVER,SNMPTrapDest
Global Values,,,,
#InstanceGroup,NSIP,HostName,LBSERVER,SNMPTrapDest
example_doc,,,,
#Instance(s),NSIP,HostName,LBSERVER,SNMPTrapDest
10.xx.xx.xx,,,,
<!--NeedCopy-->
The same file is displayed in Microsoft excel:
-
Click Next.
The input files containing the variables values are persisted (with the same file name) in the configuration jobs. You can view and edit these input files that you have used and uploaded earlier while creating or editing the configuration jobs.
To view the run configuration jobs while creating a configuration job, navigate to Network > Configuration Jobs, and click Create Job. In the Create Job page. On the Specify Variable Values tab, select the Common Variable Values for all Instances option to view the uploaded files. To edit the input files, download the input file and then edit and upload the files (keeping the same file name).
To view the already run configuration jobs while editing a configuration job, navigate to Network > Configuration Jobs, select the Job Name and click Edit. In the Configure Job page, on the Specify Variable Values tab, select the Common Variable Values for all Instances option to view the uploaded files. To edit the input files, download the input file and then edit and upload the files (keeping the same file name).
-
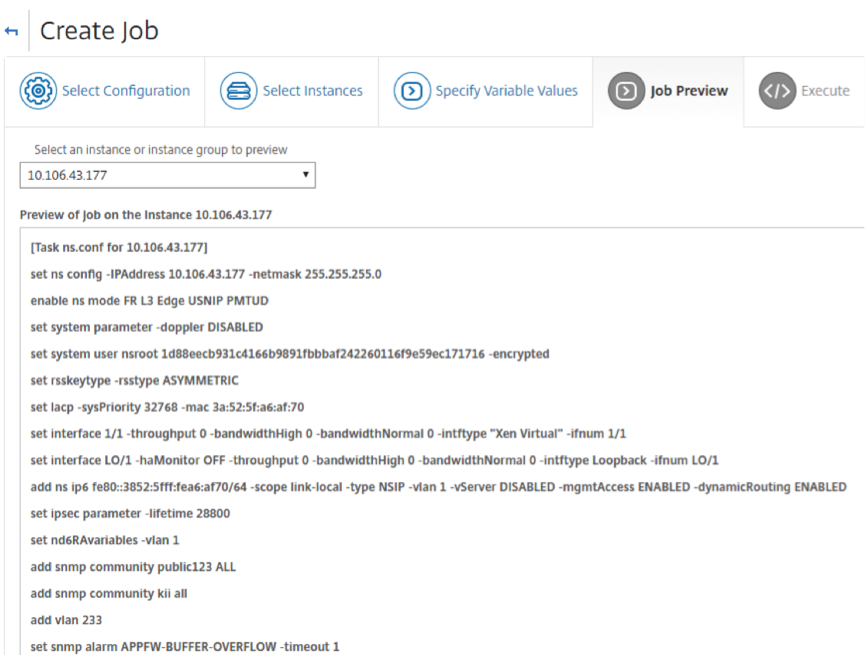
On the Job Preview tab, you can evaluate and verify the commands to be run on each instance or instance group, and then click Next.
-
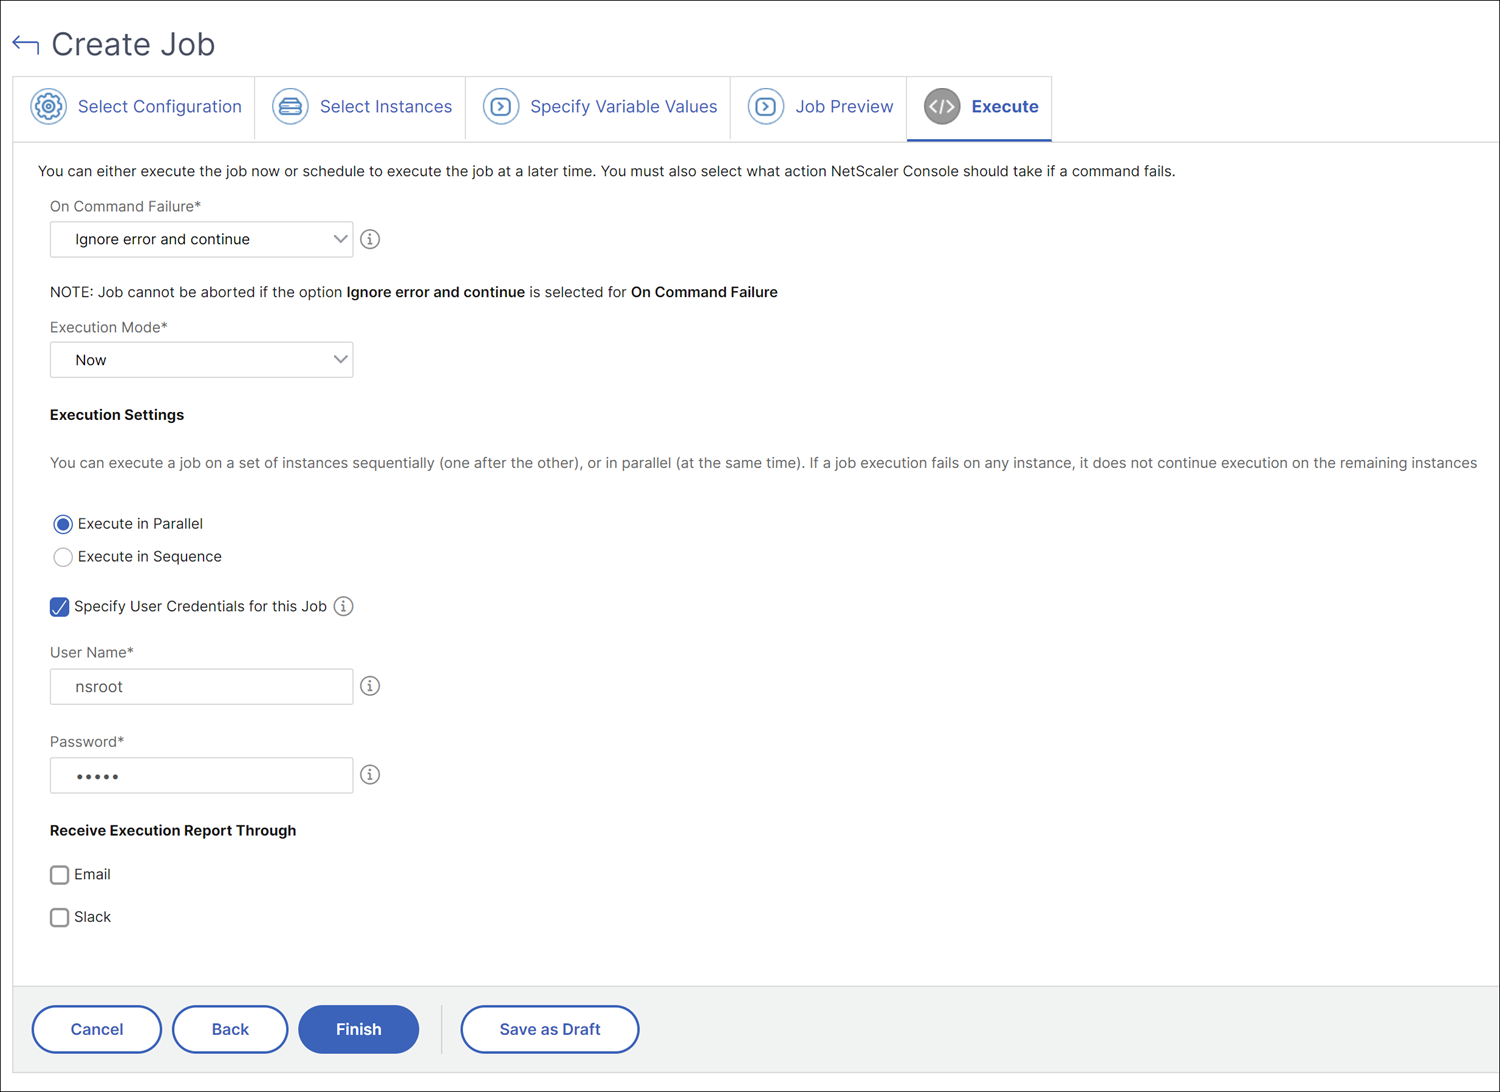
On the Execute tab, you can choose to run your job now or schedule it to be run later. You can also choose what action NetScaler Console must take if the command fails.
You can also choose to allow authorized users to run jobs on your managed instances, and you can choose whether to send an email notification regarding the success or failure of the job, along with other details.
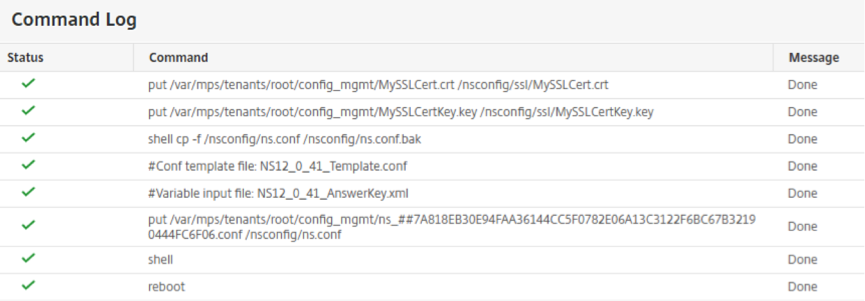
After running your job, you can see the job details by navigating to Infrastructure > Configuration > Configuration Jobs and select the job you just configured. Click Details and then, click Execution Summary to see the details of your job. Click the instance to see the Command Logs to see the commands run on the job.