Microsoft ADFS proxy StyleBook
Microsoft ADFS proxy plays a significant role by giving single sign-on access for both internal federation-enabled resources and cloud resources. One such example of cloud resources is Office 365. The purpose of the ADFS proxy server is to receive and forward requests to ADFS servers that are not accessible from the internet. ADFS proxy is a reverse proxy and typically resides in your organization’s perimeter network (DMZ). The ADFS proxy plays a critical role in remote user connectivity and application access.
NetScaler has the precise technology to enable secure connectivity, authentication, and handling of federated identity. Using NetScaler as ADFS proxy avoids the need to deploy an extra component in the DMZ.
The Microsoft ADFS Proxy StyleBook in NetScaler Console allows you to configure an ADFS proxy server on a NetScaler instance.
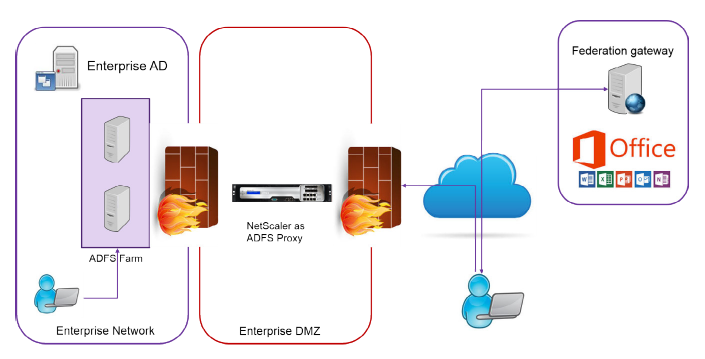
The following image shows the deployment of a NetScaler instance as an ADFS proxy server in the enterprise DMZ.
Benefits of using NetScaler as ADFS proxy
- Caters to both load balancing and ADFS proxy needs
- Supports both internal and external user access scenarios
- Supports rich methods for pre-authentication
- Provides a single sign-on experience for users
- Supports both active and passive protocols
- Examples of active protocol apps are – Microsoft Outlook, Microsoft Skype for Business
- Examples of passive protocol apps are –Microsoft Outlook web app, web browsers
- Hardened device for DMZ-based deployment
- Adds value by using additional core NetScaler features
- Content Switching
- SSL offload
- Rewrite
- Security (NetScaler AAA)
For active protocol-based scenarios, you can connect to Office 365 and provide your credentials. Microsoft Federation Gateway contacts the ADFS service (through ADFS Proxy) on behalf of the active protocol client. The gateway then submits the credentials using basic authentication (401). NetScaler handles the client authentication before access to ADFS service. Post authentication, the ADFS service provides a SAML token to the Federation Gateway. The Federation Gateway, in turn, submits the token to Office 365 to provide client access.
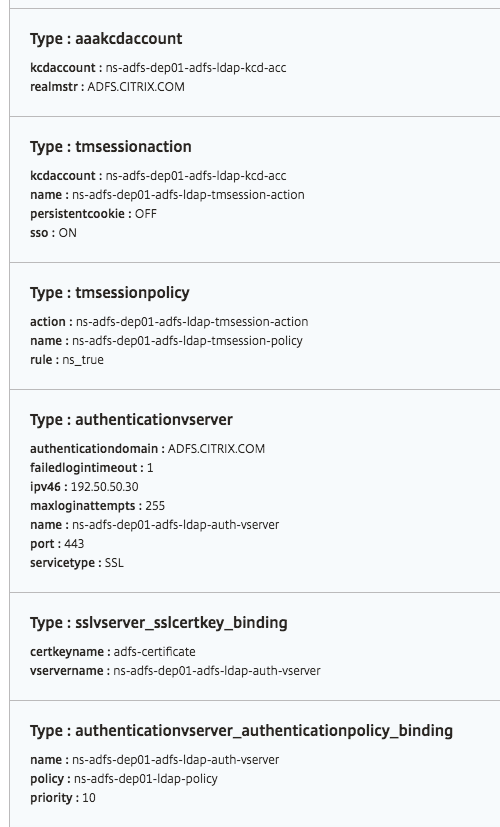
For passive clients, the ADFS Proxy StyleBook creates Kerberos Constrained Delegation (KCD) user account. The KCD account is necessary for Kerberos SSO authentication to connect to the ADFS servers. The StyleBook also generates an LDAP policy and a session policy. These policies are later bound to the NetScaler AAA virtual server that handles the authentication for passive clients.
The StyleBook can also ensure that the DNS servers on the NetScaler are configured for ADFS.
The configuration section below describes how to set up NetScaler for handling both active and passive protocol-based client authentication.
Configuration details
The table below lists the minimum required software versions for this integration to be deployed successfully.
| Product | Minimum Required Version |
|---|---|
| NetScaler | 11.0, Advanced/Premium License |
The following instructions assume that you have already created the appropriate external and internal DNS entries.
Deploying Microsoft ADFS proxy StyleBook configurations from NetScaler Console
The following instructions assist you when implementing the Microsoft ADFS proxy StyleBook in your business network.
To deploy Microsoft ADFS proxy StyleBook
-
In NetScaler Console, navigate to Applications > StyleBooks. The StyleBooks page displays all the StyleBooks available for your use in NetScaler Console.
-
Scroll down and find the Microsoft ADFS proxy StyleBook. Click Create Configuration. The StyleBook opens as a user interface page on which you can type the values for all the parameters defined in this StyleBook.
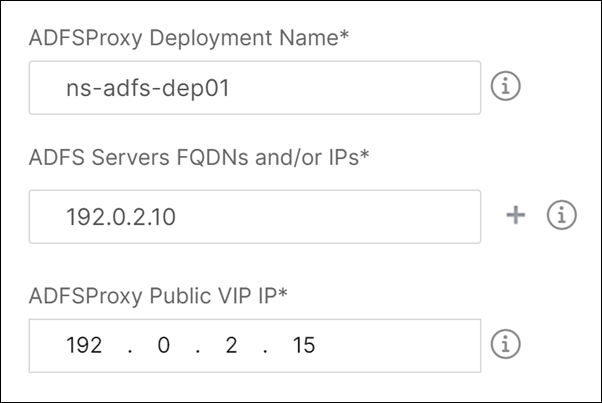
- Type values for the following parameters:
- ADFS Proxy Deployment Name. Select a name for the ADFS proxy configuration deployed in your network.
- ADFS Servers FQDNs or IPs. Type the IP addresses or FQDNs (domain names) of all ADFS servers in the network.
- ADFS Proxy Public VIP IP. Type the public virtual IP address on the NetScaler that performs as an ADFS proxy server.
-
In the ADFS Proxy Certificates section, type the details of the SSL certificate and the certificate key.
This SSL certificate is bound to all the virtual servers created on the NetScaler instance.
Select the respective files from your local storage folder. You can also type in the private key password to load encrypted private keys in .pem format.
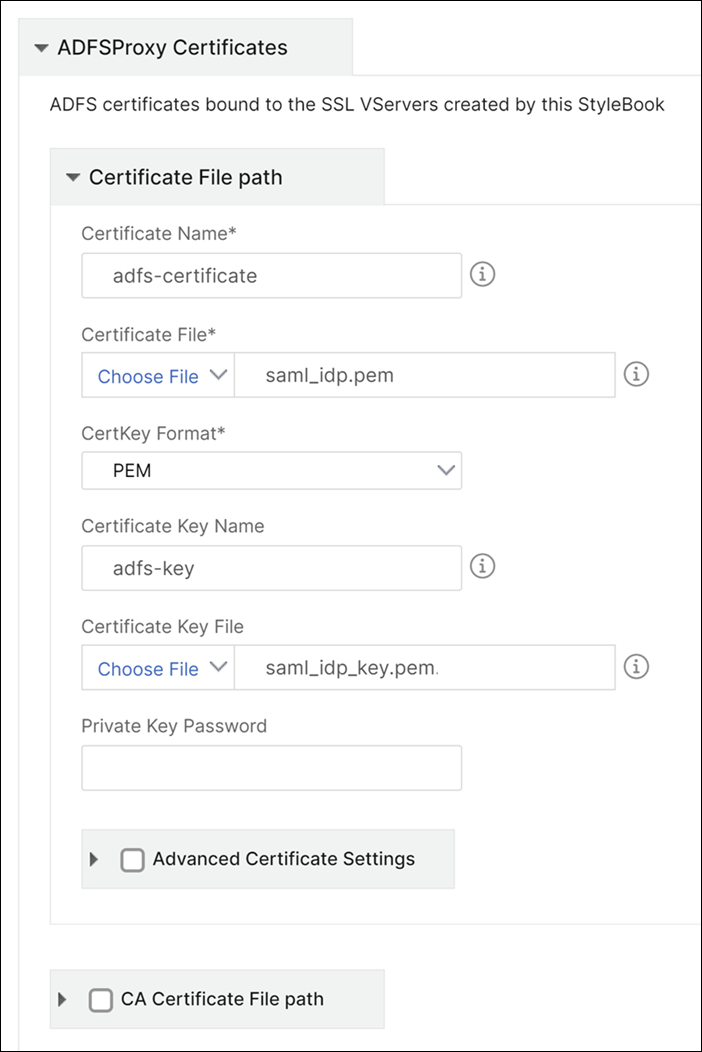
You can also enable Advanced Certificate Settings check box. Here you can type details such as certificate expiry notification period, enable, or disable the certificate expiry monitor.
-
Optionally, you can select SSL CA Certificate check box if the SSL certificate requires a CA public certificate to be installed on NetScaler. Ensure that you select Is a CA Certificate in the Advanced Certificate Settings section.
-
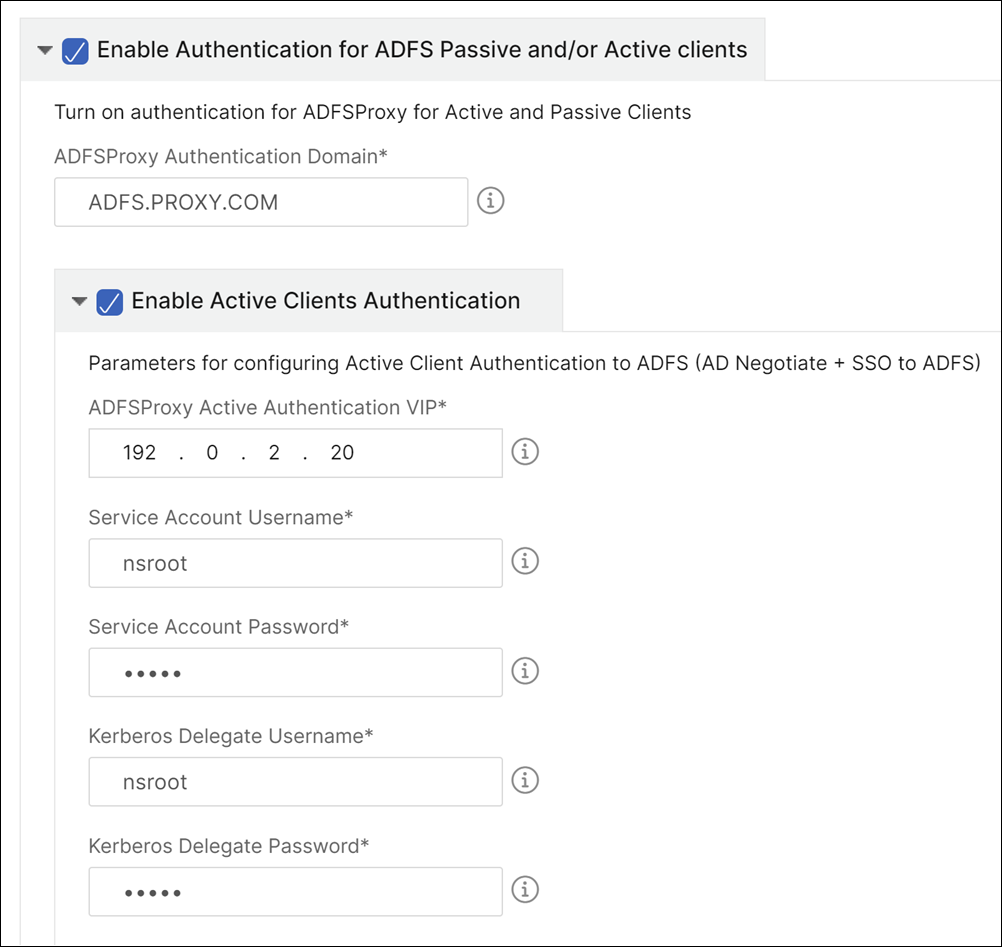
Enable authentication for active and passive clients. Type the DNS Domain Name used in Active Directory for user authentication. You can then configure authentication either for active or passive clients, or both.
-
Type the following details to enable authentication for active clients:
Note
It is optional to configure support for active clients.
-
ADFS Proxy Active Authentication VIP. Type the virtual IP address of the virtual authentication server on the NetScaler instance where the active clients are redirected for authentication.
-
Service Account Username. Type the service account user name used by NetScaler to authenticate your users to the active directory.
-
Service Account Password. Type the password used by NetScaler to authenticate your users to the active directory.
-
-
Configure authentication for passive clients by enabling the corresponding option and configuring the LDAP settings.
Note
It is optional to configure support for passive clients.
Type the following details to enable authentication for passive clients:
-
LDAP (Active Directory) Base. Type the base domain name for the domain in which the user accounts reside within the active directory (AD) to allow authentication. For example, dc=netscaler®,dc=com
-
LDAP (Active Directory) Bind DN. Add a domain account (using an email address for ease of configuration) that has privileges to browse the AD tree. For example, cn=Manager,dc=netscaler,dc=com
-
LDAP (Active Directory) Bind DN Password. Type the password of the domain account for authentication.
A few other fields that you must type in the values in this section are as follows:
-
LDAP Server (Active Directory) IP. Type the IP address of the active directory server for AD authentication to work correctly.
-
LDAP Server FQDN name. Type the FQDN name of the active directory server. FQDN name is optional. Provide the IP address as in step 1 or the FQDN name.
-
LDAP Server Active Directory port. By default, the TCP and UDP ports for LDAP protocol are 389, whereas the TCP port for Secure LDAP is 636.
-
LDAP (Active Directory) login username. Type the username as “sAMAccountName.”
-
ADFS Proxy Passive Authentication VIP. Type the IP address of the ADFS proxy virtual server for passive clients.
Note
The fields marked with “*” are mandatory.

-
-
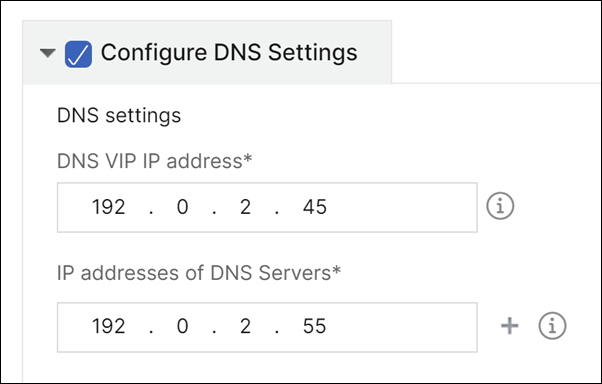
Optionally, you can also configure a DNS VIP for your DNS servers.
-
Click Target Instances and select the NetScaler instances to deploy this Microsoft ADFS proxy configuration. Click Create to create the configuration and deploy the configuration on the selected NetScaler instances.
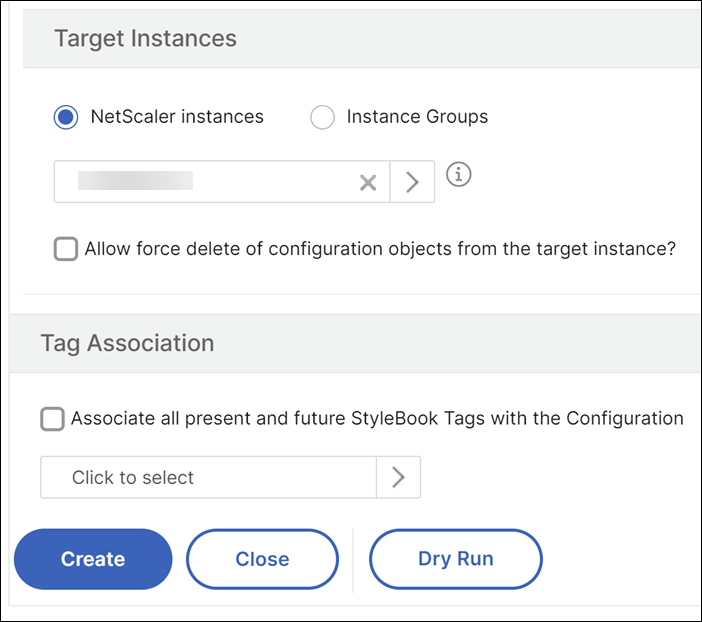
Note
We recommend that before executing the actual configuration, you select Dry Run. You can first view the configuration objects that are created on the target NetScaler instances by the StyleBook. You can then click Create to deploy the configuration on the selected instances.
Objects created
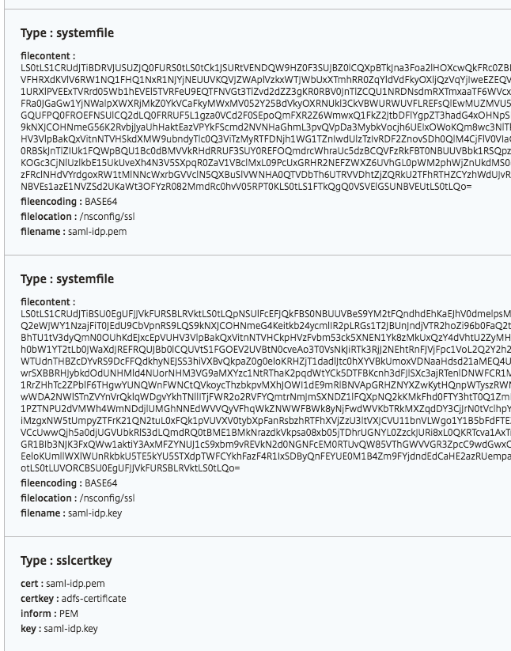
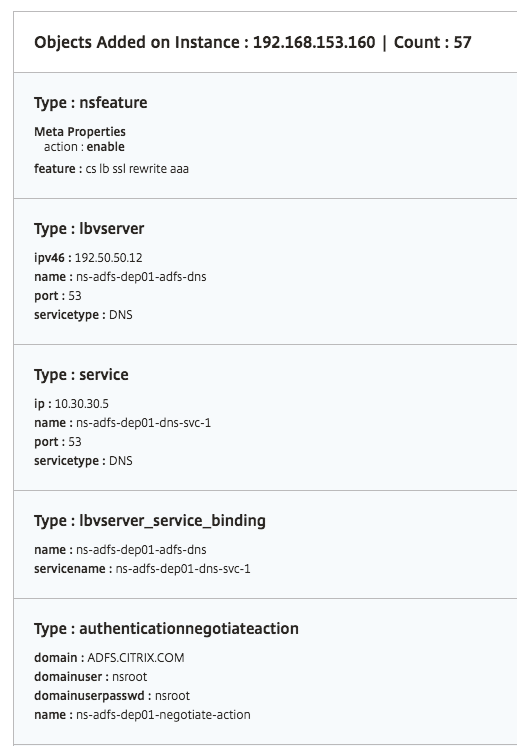
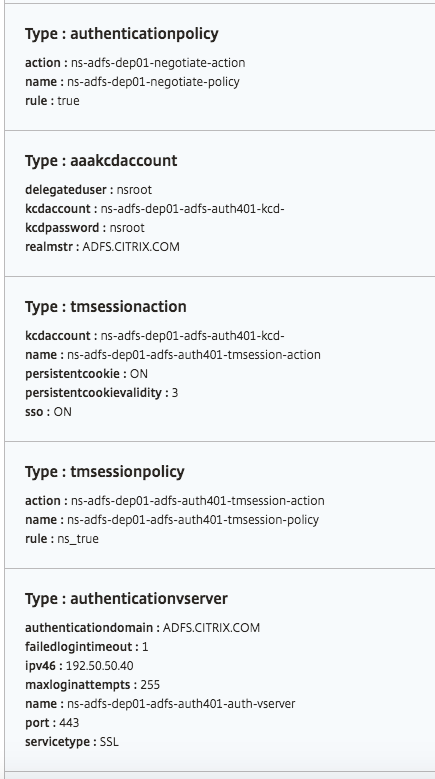
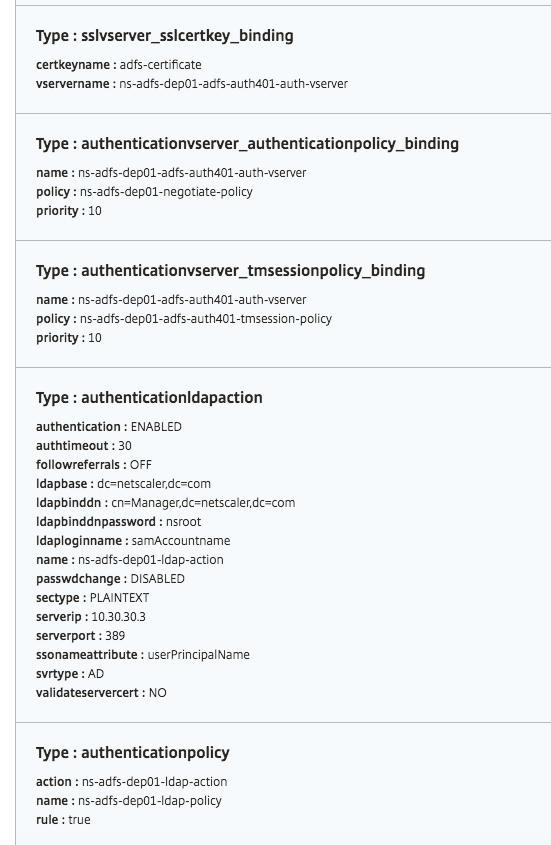
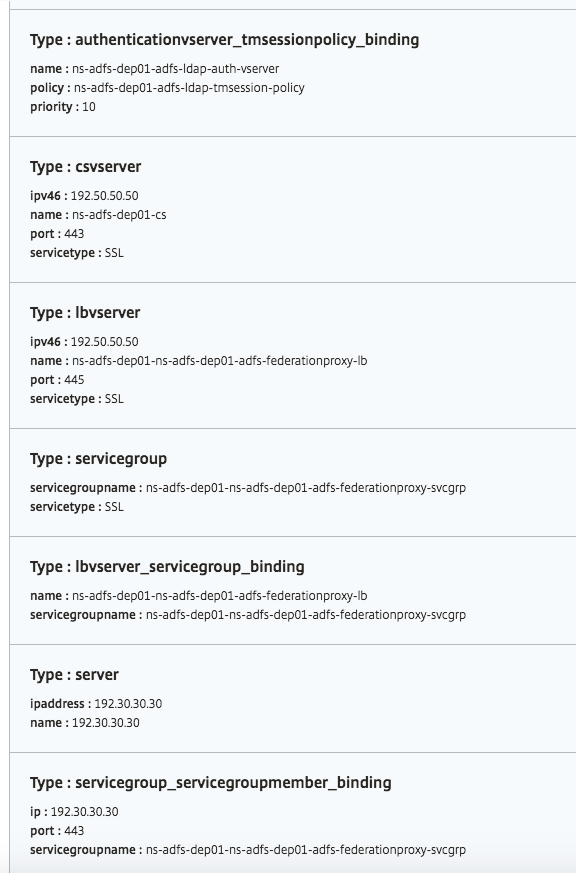
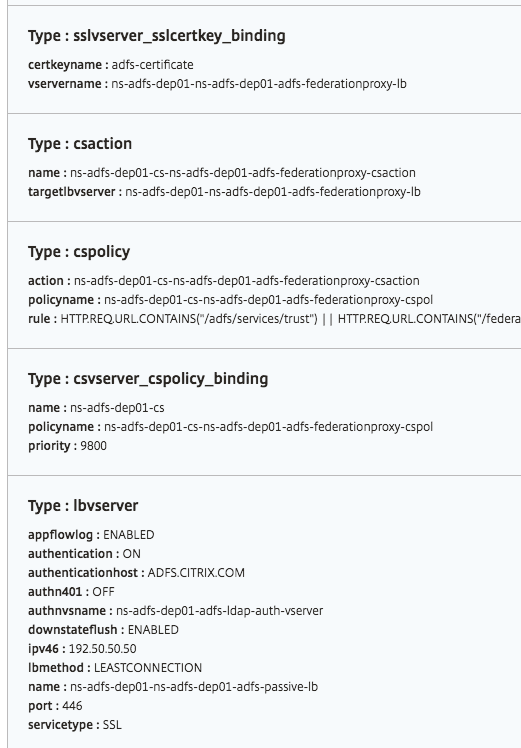
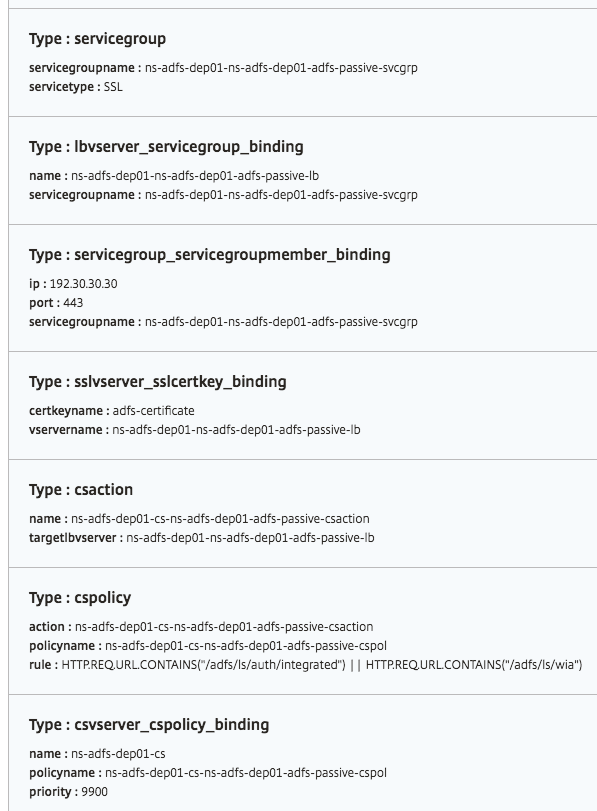
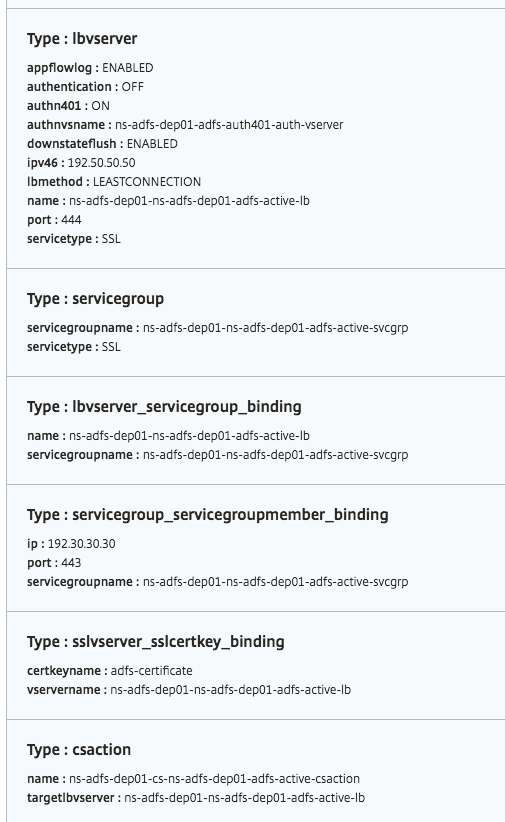
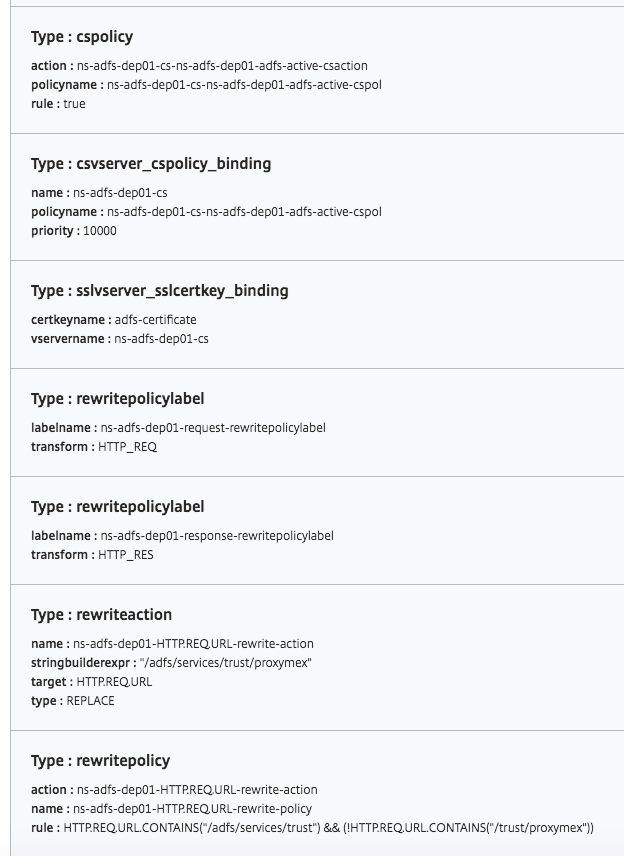
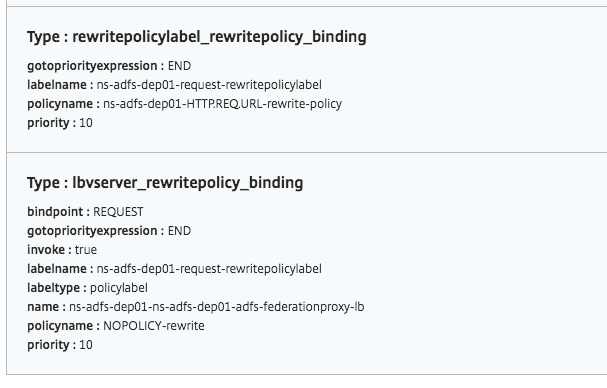
Several configuration objects are created when the ADFS proxy configuration is deployed on the NetScaler instance. The following image displays the list of objects created.
