Migrate NetScaler® application configuration using StyleBooks Configuration Builder
The StyleBooks Configuration Builder is used to create an application configuration StyleBook from an existing NetScaler configuration. This feature also automates the application configuration migration from one NetScaler instance to another instance.
Using Configuration Builder you can streamline the process of creating a customized StyleBook, making it easy even if you lack a deep understanding of StyleBook grammar and constructs. Otherwise, familiarity with StyleBook grammar and constructs is required to create a StyleBook.
The Configuration Builder also creates a config pack in which the configuration from one NetScaler instance can be duplicated to another NetScaler instance. The initial configuration source can be one of the following:
-
A NetScaler instance: Specify the instance where the application configuration that you want to duplicate is available.
The Configuration Builder converts the NetScaler configuration to a StyleBook and config pack even if you do not specify the target instance. You can later use this config pack to migrate the NetScaler configuration to other NetScaler instances.
-
A set of CLI Commands: Paste the configuration from
ns.conforApplication config. -
Upload configuraton file: Upload a configuration from your local machine.
The Configuration Builder identifies the list of distinct applications embedded in the source configuration. When you select the application configuration of your interest, the Configuration Builder extracts the set of CLI commands for the selected application. These CLI commands are extracted from the source configuration. Also it identifies the deployment and configuration attributes that might require your input.
-
Application deployment information - You can view and edit the IP address and port of the virtual servers, services, service group members from the original configuration. You can also view and edit the state and ARP of a virtual server.
-
Configuration attributes - These attributes can be passwords or certificates specified in the source configuration.
After specifying the necessary information, start migrating or duplicating the application configuration on a target NetScaler instance.

After you complete the application creation and migration, a config pack is created in NetScaler Console along with its corresponding StyleBook. This config pack represents the application configuration on the target NetScaler instance. To view the created config pack, navigate to Applications > StyleBooks > Configurations.
Sharing configuration entities between migrated configurations
You can reuse configuration entities when migrating configurations using the Config Migration utility. Subsequent migrations successfully reuse existing configuration entities. Previously, the migration of configurations failed with an error Resource already exists when migrating two configurations that shared some configuration entities. This option streamlines the migration workflow by allowing the reuse of configuration entities in scenarios where they are used across multiple configurations.
Supported NetScaler Features
The StyleBook Configuration Builder recognizes and supports the following NetScaler features in the source configuration:
- Analytics
- AppFlow®
- Application Level Quality of Experience configuration (AppQoE)
- Authentication & Authorization
- Audit
- Bot Management
- Cache Redirecting
- Content Switching
- DNS
- Frontend Optimization
- HTTP Compression
- Integrated caching
- Load Balancing
- Monitoring
- QUIC protocol
- Rate Limiting
- Responder
- Rewrite
- SSL Offloading
- SpillOver
- Traffic Management
- URL Transformation
- Web Application Firewall (WAF)
Create a StyleBook to migrate the NetScaler application configuration
The following procedure is to create a StyleBook that migrates the NetScaler application migration in NetScaler Console:
-
Navigate to Applications > Configuration > Config Packs.
-
Click Migrate NetScaler Configuration.
-
Click Get Started.
-
In Specify Configuration, choose one of the following configuration sources:
-
Import from a NetScaler:
- Source NetScaler Instance - Select a NetScaler instance from which you want to migrate or duplicate the application configuration. Click OK.
-
Import using CLI Commands - Paste the configuration from a configuration file.
-
Upload configuration file - Click Browse to select a configuration file from your local machine.
Target Instance - Select either a NetScaler instance or an Autoscale group to which you want to migrate or duplicate the application configuration. Click OK.
Click Next.
-
-
In Advanced Policy Configuration, depending on your configuration, the following scenarios result:
- All existing classic policies in the configuration are converted to advanced policies successfully without errors. Review the updated configuration and select the acknowledgment. Click Next.
- All existing classic policies in the configuration are converted to advanced policies successfully with errors. Review and fix the errors. Click Previous.
- If there are no classic policies, the configuration isn’t updated. Click OK to continue.
-
In Define Application,
-
In Application Name, specify the name of the application.
-
Select the virtual servers that you want to migrate.
-
Click Next.
-
-
In Application Configuration, review the commands for the application. These commands are specific to the selected application configuration.
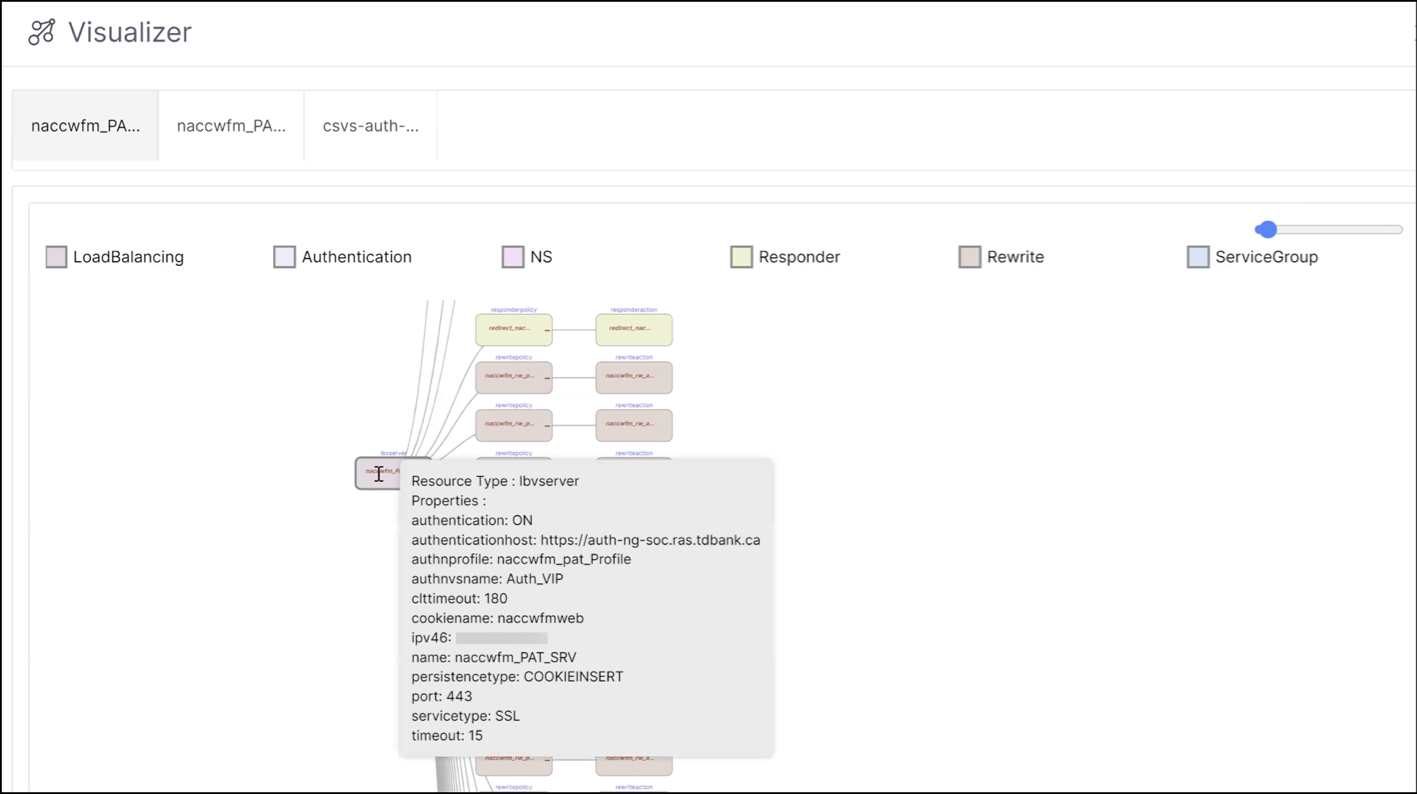
Enable Visualizer to view the application configurations and their associated entities. The Visualizer allows you to view how different components are connected and helps you in your understanding and decision-making during the migration process.

With the Visualizer, you can:
- View the hierarchy of the actions and policies associated with a server
- Hover over a server to get detailed descriptions of the server including policies and actions bound to a server
- Zoom in and zoom out the view using the zoom slider
- Collapse or expand the hierarchy clicking the minus(-) or plus(+) symbol on an entity
Click Next.
-
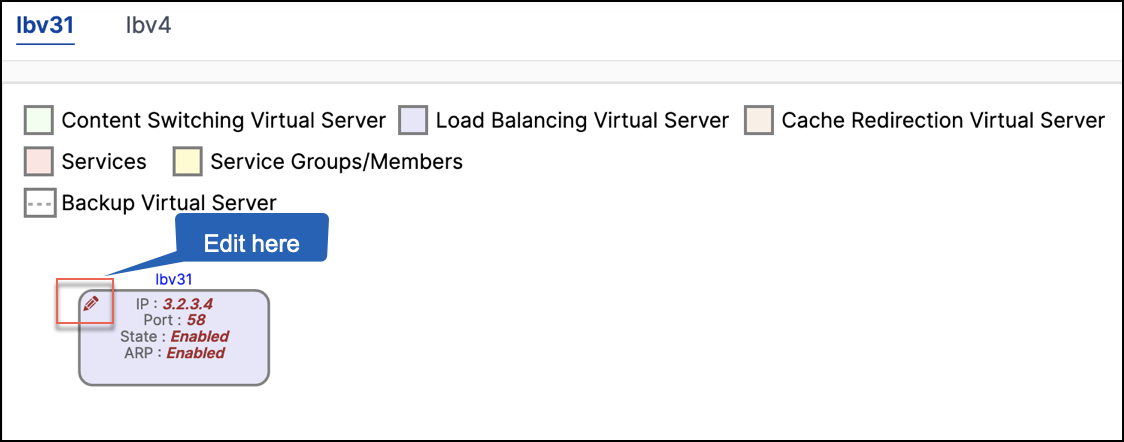
In Application Deployment Info, you can view and edit the IP address, port, state and ARP of the virtual servers, services, and service group members.

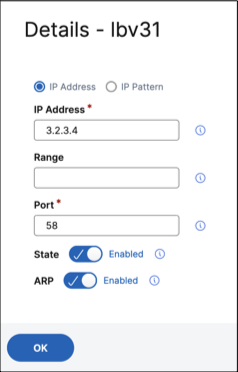
In the Details page, you can edit the IP address, port, state, and ARP status of the NSIP entity.

Note:
- The state of the NSIP entity for the virtual server IP determines the initial state of the ARP.
- If the NSIP entity for the virtual server IP is already configured on the target NetScaler, you can’t modify the ARP status of the virtual server.
- Modifying the ARP state for a virtual server changes the ARP state for all virtual server with the same IP address. Modifying the state of the virtual server only affects the associated virtual server.
- ARP isn’t applicable for IP pattern-based virtual servers.
- If the NSIP state for the virtual server IP is disabled in the source configuration, ARP is also automatically disabled, and you can’t modify ARP.
The Application Deployment Info tab does not appear if the source and target instances are the same.
-
In Authentication/Networking Deployment Info, you can view and edit the attributes of the authentication servers and net profiles, if available.
- In Authentication Deployment Info, select the required authentication server and edit the IP address, server IP, server name, and port number of the servers.
-
In NetProfile Info, select the required net profile and edit the NetProfile and IPSET details.
Note:
The NSIP address changes made at this step are considered for final migration and configurations in the previous steps are updated to reflect the changes.
-
In Resource Files/Secrets, upload the certificates and keys to decrypt passwords and certificates. Click Next.
-
In Global Configuration, view the differences in the global configuration settings between the source and target. Review the configuration to be applied on target and select the acknowledgment. Click Next.
-
In Migrate, view the StyleBook details. Click Migrate.
Note:
By default, NetScaler Console manages the config pack created when migrating applications or virtual servers to NetScaler. Clear the Manage the configuration through NetScaler Console checkbox if you do not want to associate a confipack with the resulting configuration.
-
In Unsupported Configuration, view any missed or unsupported configurations. To migrate these configurations successfully, you must apply the missed or unsupported configurations separately on the target instance. Click Next.
Limitations
-
The named expressions and
responderhtmlpagesmentioned in the source instance aren’t identified. Make sure to configure the named expressions andresponderhtmlpageson the target instance before migration. -
If the source has a configuration for
servicegroupand monitor binding as follows:bind serviceGroup <Name> <Port> -monitorName <Monitor_Name>The following error appears:
 CLI Command conversion failed: 100 - No such command [{ "errorcode": 1090, "message": "No such argument [XXX]", "severity": "ERROR" }]
 <!--NeedCopy-->
This error occurs because NetScaler saves the binding between Service Group and Monitor in an invalid format. This issue is fixed from NetScaler 12.1.52.15 build.