Schedule a job for configuring export of metrics from NetScaler to Prometheus
Using the NSConfigurePrometheusAnalyticsProfile template, you can either use the default schema or custom schema with modified parameters, and run the job to all managed instances.
Prerequisite
Ensure that the managed NetScalers are in 13.1 build 39-27 or later.
To schedule a job:
-
In NetScaler Console, navigate to Infrastructure > Configuration > Configuration Jobs, and then click Create Job.
-
On the Create Job page, specify a name for the job, and select NetScaler® from the Instance Type list.
-
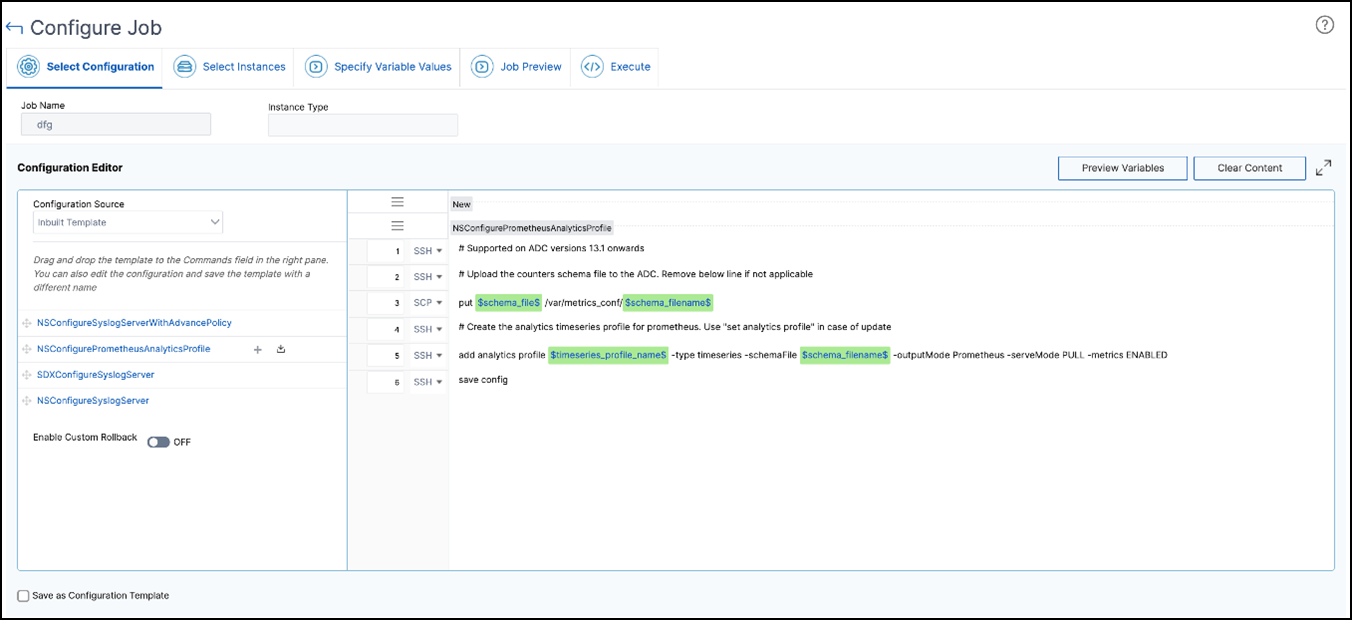
Select Inbuilt Template from the Configuration Source list. Drag the NSConfigurePrometheusAnalyticsProfile command to the right pane, and then click Next. You can also click + to add the template.

-
If you want to proceed with the default schema:
-
Remove step 3 (
put $Schema_file /var/metrics.conf/$schema_filename$). Place the mouse pointer at step 3 and:-
In Windows, use Control + A and Delete.
-
In Mac, use Command + A and Delete.
-
-
After deleting, click Next.
-
On the Select Instances tab, click Add Instances, select the instances on which you want to run the job, and then click Next.
-
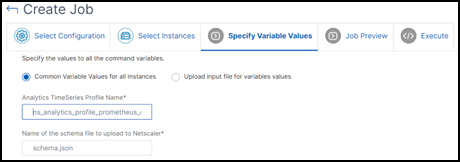
On the Specify Variable Values tab, select Common Variable values for all instances.
-
Analytics TimeSeries Profile Name - Specify the analytics profile name. For more information, see
https://docs.netscaler.com/en-us/citrix-adc/current-release/ns-ag-appflow-intro-wrapper-con/ns-ag-appflow-config-tsk.html#configure-the-metrics-collector. -
Name of the schema file to upload to Netscaler - Retain this file name as
schema.jsonthat is the default file.
-
-
Proceed further from Step 6.
-
-
If you want to proceed with custom schema counter:
-
Select Inbuilt Template from the Configuration Source list. Drag the
NSConfigurePrometheusAnalyticsProfilecommand to the right pane and click Next. You can also click + to add the template. -
On the Select Instances tab, click Add Instances, select the instances on which you want to run the job, and then click Next.
-
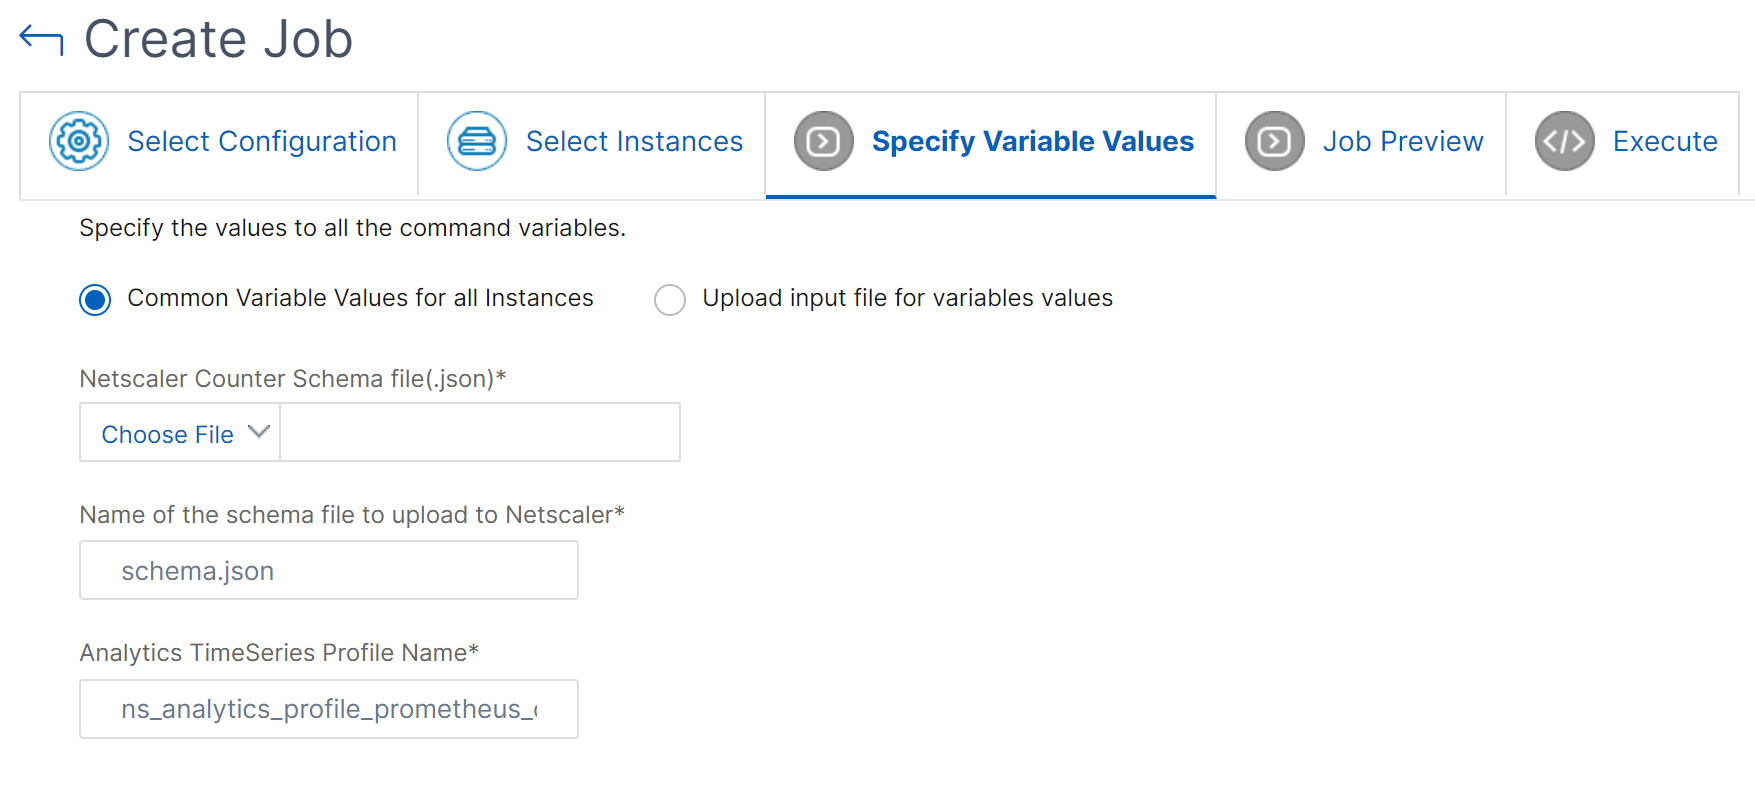
On the Specify Variable Values tab, select Common Variable values for all instances.
-
Netscaler Counter Schema file(.json) - Select the schema file that you have modified with the parameters. In NetScaler, a reference file
reference_schema.jsonwith all supported counters is available under the path/var/metrics_conf/.
You can use an FTP client to copy the file in your local, edit the required parameters, save, and then upload it.

-
Name of the schema file to upload to Netscaler - Specify the schema file name that you want to upload to NetScaler.
-
Analytics TimeSeries Profile Name - Specify the analytics profile name. For more information, see
https://docs.netscaler.com/en-us/citrix-adc/current-release/ns-ag-appflow-intro-wrapper-con/ns-ag-appflow-config-tsk.html#configure-the-metrics-collector.
-
-
-
On the Job Preview tab, you can evaluate and verify the commands to be run on each instance or instance group.
-
Click Next.
-
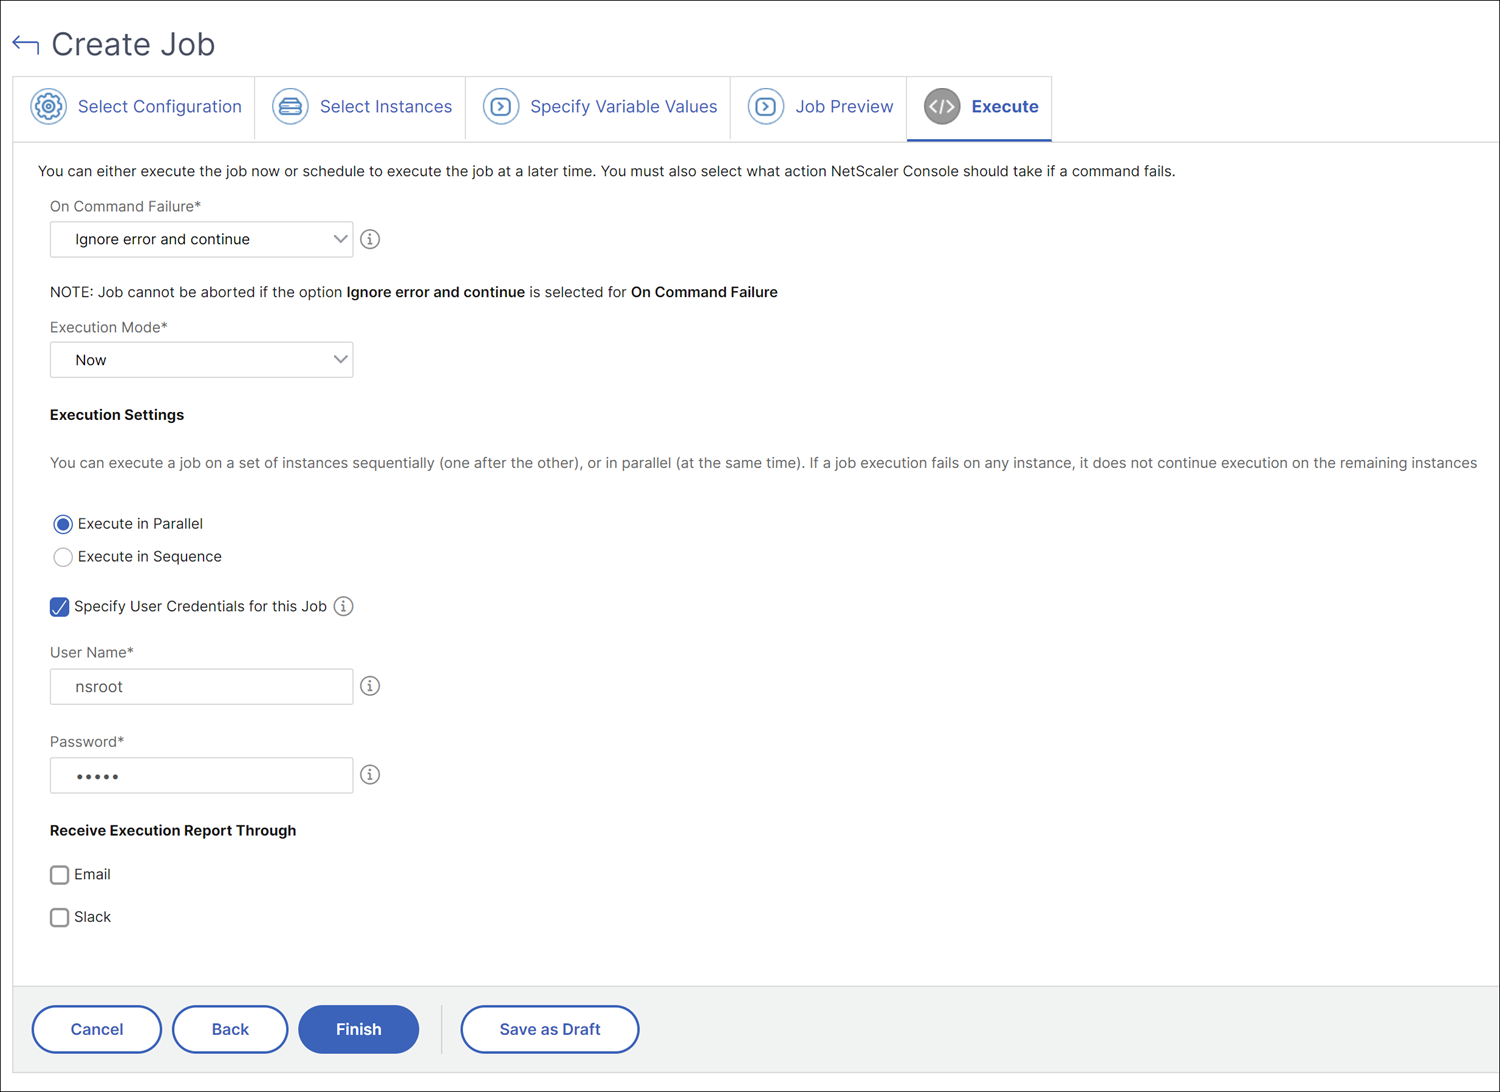
On the Execute tab, set the following conditions:
-
On Command Failure - If a command fails, you can either choose to ignore the errors and continue to run the job or stop further execution of the job. Choose the action that you want to run from the drop-down list.
-
Execution Mode - You can either run the job now or schedule to run the job later. If you want to schedule the job later, you must specify the execution frequency settings for that job. Choose the schedule you want the job to follow from the drop-down list.
-
-
You can also run a job on a set of instances sequentially or in parallel by selecting the required method under Execution Settings. If a job execution fails on any instance, it does not continue on the remaining instances.
You can also choose to allow authorized users to run jobs on your managed instances, and you can choose whether to send notifications regarding the success or failure of the job, along with other details.
-
Click Finish.
