Configure a high-availability setup with Azure external and internal load balancers simultaneously
The high availability pair on Azure supports both external and internal load balancers simultaneously.
You have the following two options to configure a high availability pair using both Azure external and internal load balancers:
- Using two LB virtual servers on the NetScaler appliance.
- Using one LB virtual server and an IP set. The single LB virtual server serves traffic to multiple IPs, which are defined by the IPset.
Perform the following steps to configure a high availability pair on Azure using both the external and internal load balancers simultaneously:
For Steps 1 and 2, use the Azure portal. For Steps 3 and 4, use the NetScaler VPX GUI or the CLI.
Step 1. Configure an Azure load balancer, either an external load balancer or an internal load balancer.
For more information on configuring high-availability setup with Azure external load balancers, see Configure a high-availability setup with multiple IP addresses and NIC.
For more information on configuring high-availability setup with Azure internal load balancers, see Configure HA-INC nodes by using the NetScaler high availability template with Azure ILB.
Step 2. Create an extra load balancer (ILB) in your resource group. In Step 1, if you have created an external load balancer, you now create an internal load balancer and conversely.
-
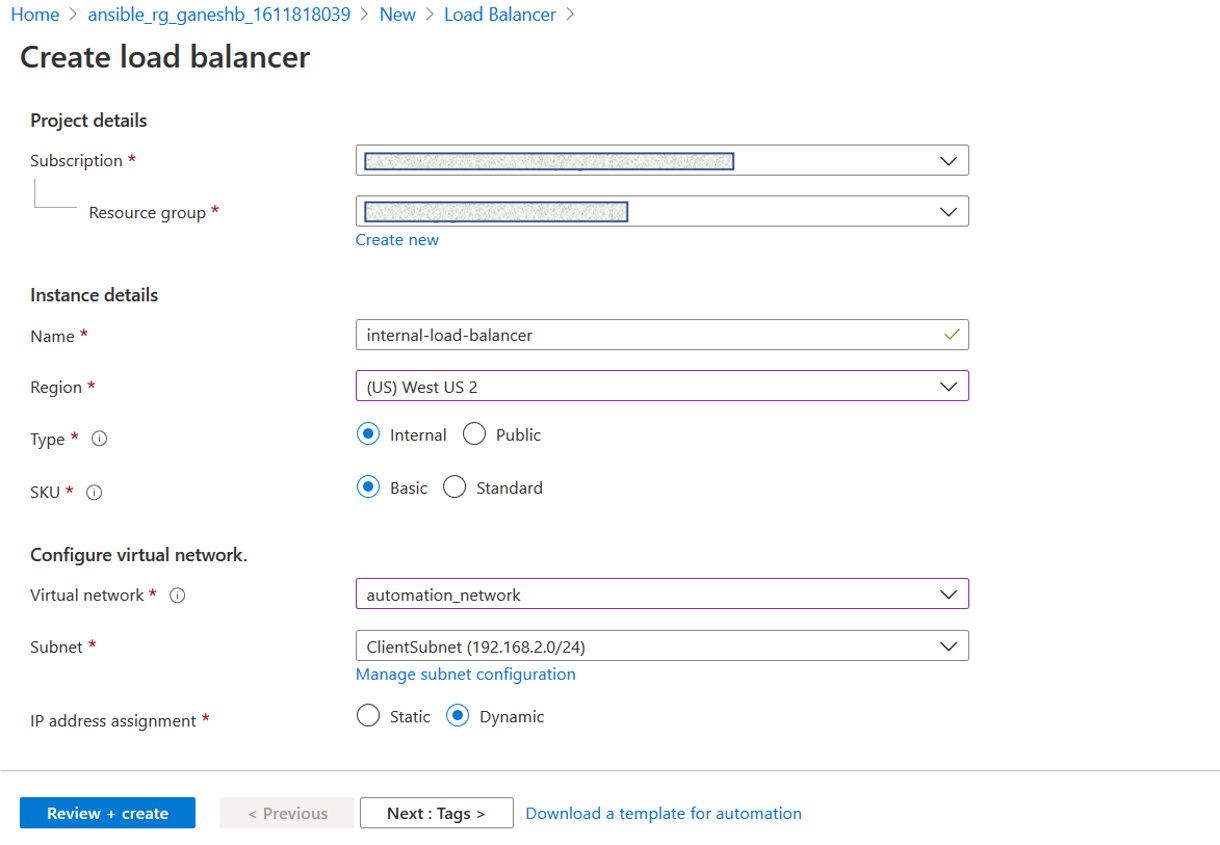
To create an internal load balancer, choose the load balancer type as Internal. For the Subnet field, you must choose your NetScaler client subnet. You can choose to provide a static IP address in that subnet, provided there are no conflicts. Otherwise, choose the dynamic IP address.

-
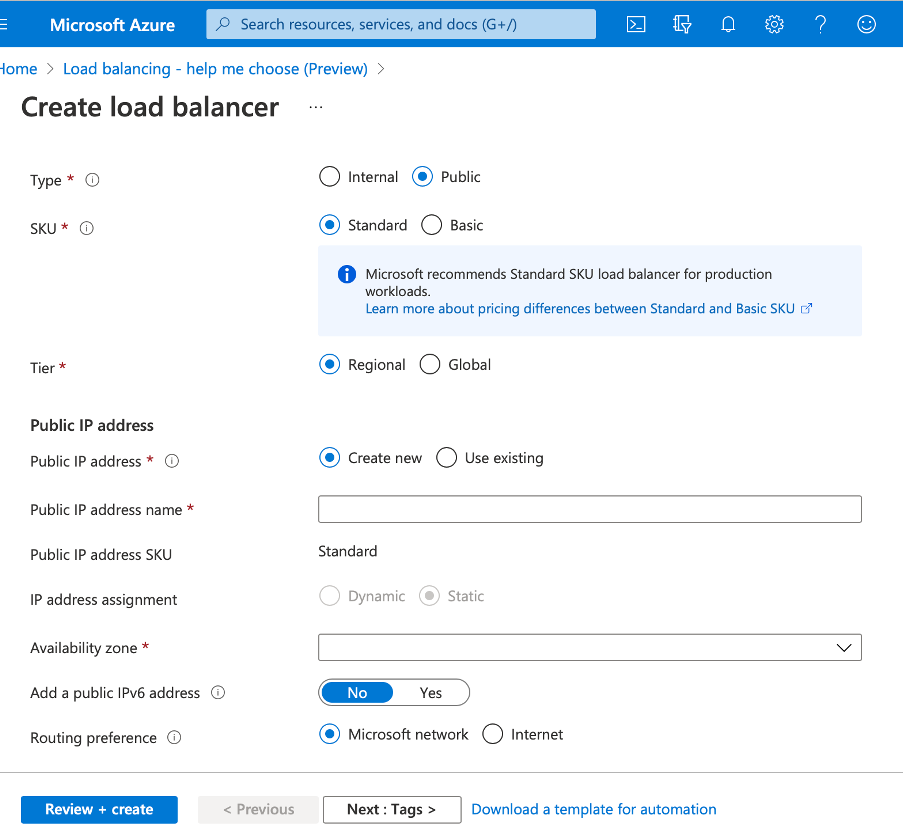
To create an external load balancer, choose the load balancer type as Public and create the public IP address here.

-
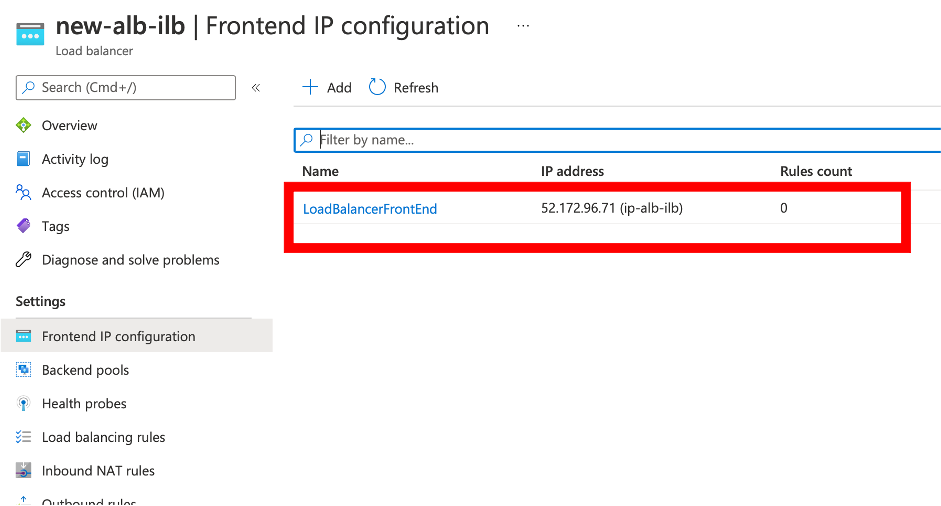
After you have created the Azure Load Balancer, navigate to Frontend IP configuration and note down the IP address shown here. You must use this IP address while creating the ADC load balancing virtual server as in Step 3.

- In the Azure Load Balancer configuration page, the ARM template deployment helps create the LB rule, back-end pools, and health probes.
- Add the high availability pair client NICs to the backend pool for the ILB.
- Create a health probe (TCP, 9000 port)
- Create two load balancing rules:
- One LB rule for HTTP traffic (webapp use case) on port 80. The rule must also use the backend port 80. Select the created backend pool and the health probe. Floating IP must be enabled.
- Another LB rule for HTTPS or CVAD traffic on port 443. The process is the same as the HTTP traffic.
Step 3. On the primary node of NetScaler appliance, create a load balancing virtual server for ILB.
-
Add a load balancing virtual server.
add lb vserver <name> <serviceType> [<ILB Frontend IP address>] [<port>]
<!--NeedCopy-->
Example:
add lb vserver vserver_name HTTP 52.172.96.71 80
<!--NeedCopy-->
Note:
Use the load balancer frontend IP address, which is associated with the additional Load balancer that you create in Step 2.
-
Bind a service to a load balancing virtual server.
bind lb vserver <name> <serviceName>
<!--NeedCopy-->
Example:
bind lb vserver Vserver-LB-1 Service-HTTP-1
<!--NeedCopy-->
For more information, see Set up basic load balancing
Step 4: As an alternative to Step 3, you can create a load balancing virtual server for ILB using IPsets.
-
Add an IP address of type virtual server IP (VIP).
add nsip <ILB Frontend IP address> -type <type>
<!--NeedCopy-->
Example:
add nsip 52.172.96.71 -type vip <!--NeedCopy--> -
Add an IPset on both primary and secondary nodes.
add ipset <name>
<!--NeedCopy-->
Example:
add ipset ipset1 <!--NeedCopy--> -
Bind IP addresses to the IP set.
bind ipset <name> <ILB Frontend IP address>
<!--NeedCopy-->
Example:
bind ipset ipset1 52.172.96.71 <!--NeedCopy--> -
Set the existing LB virtual server to use the IPset.
set lb vserver <vserver name> -ipset <ipset name>
<!--NeedCopy-->
Example:
set lb vserver vserver_name -ipset ipset1
<!--NeedCopy-->
For more information, see Configure a multi-IP virtual server.