Create non-nsroot users in admin profile
The nsroot user is the default administrative account in NetScaler with the highest level of access and control. The nsroot users can perform any action within the system, including modifying system settings, configuring networking, managing licenses, setting up security policies, and accessing logs.
From NetScaler release 14.1-43x, you can create and manage non-nsroot users in the admin profiles using the NetScaler SDX Management Service. The non-nsroot users are accounts with restricted access. The administrators assign roles with predefined permissions to the non-nsroot users based on what they need to do in the system. A user can be granted specific permissions, like monitoring traffic or managing configurations, without full administrative rights.
This enhancement provides flexibility in handling administrative tasks by allowing non-nsroot users to perform specific admin tasks. It improves the admin profile management, reduces the need for frequent password changes, and enhances the overall user management experience.
Enable SDX to use non-nsroot users in admin profiles
The following procedure summarizes the key steps for managing non-nsroot users in the admin profiles.
- Log on to NetScaler SDX.
- Create an admin profile with a non-nsroot username.
-
Create a NetScaler instance and assign the nsroot admin profile.
Note:
NetScaler instance creation is allowed only with the nsroot user profile.
- Edit the NetScaler instance and assign a non-nsroot admin profile
- Log in to the NetScaler instance created in the previous step using the nsroot user.
- Bind a system command policy to assign the required permissions.
- Save the configurations.
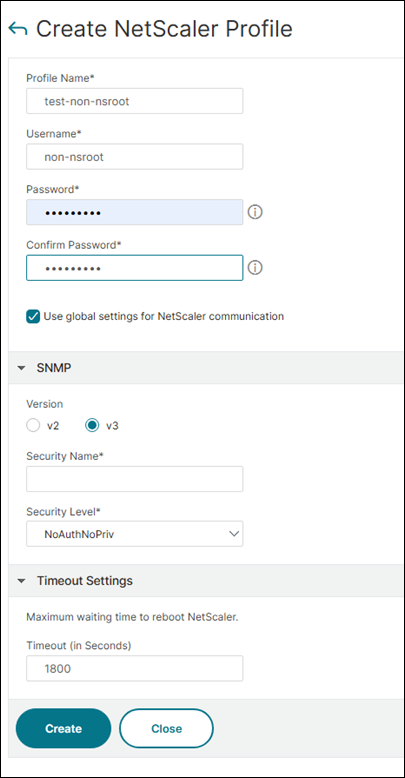
Create an admin profile with non-nsroot users
- Navigate to NetScaler® > Admin Profiles.
- Click Add to open the Create NetScaler Profile page.
- In the Username field, enter a non-nsroot name.
-
Update other fields as necessary and click Create.
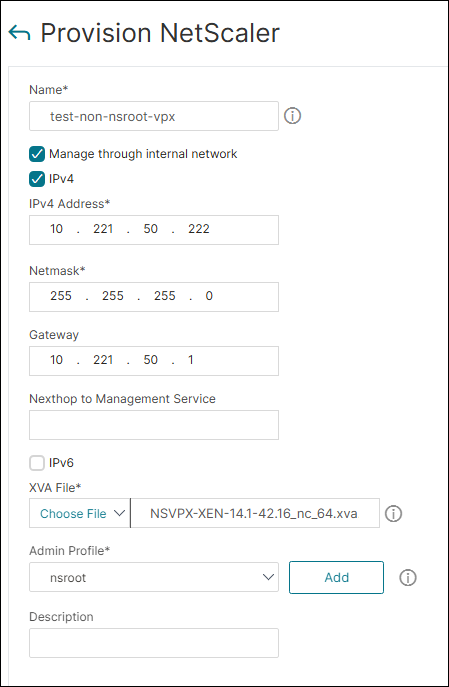
Create a NetScaler instance using the Management Service
- Navigate to NetScaler > Instances.
- Click Add to open the Provision NetScaler page.
- Assign the nsroot admin profile.
-
Fill the required fields and click Done.
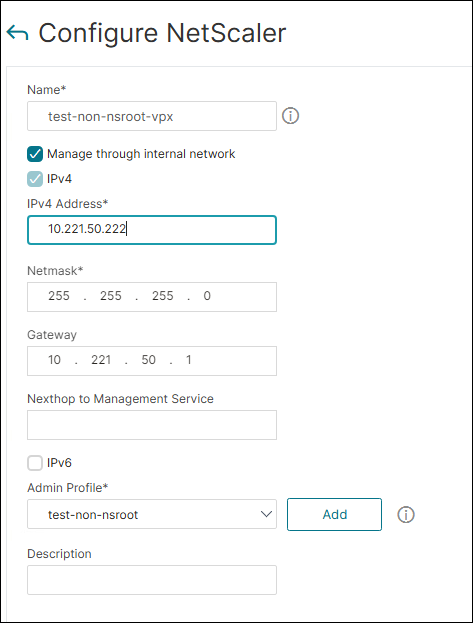
Edit the NetScaler instance to assign a non-nsroot admin profile
- Navigate to NetScaler > Instances.
- Select a NetScaler instance and Click Edit to open the Configure NetScaler page.
- Assign the non-nsroot admin profile that you have already created.
-
Fill the required fields and click Done.
Bind a system command policy to the NetScaler instance
- Log in to the NetScaler instance that you have created through the Management service.
- Navigate to System > User Administration > Users.
-
Click Add to open the System User page.
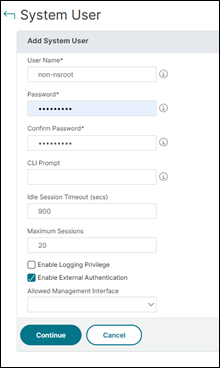
- Enter the required details and click Continue.
- In the System User page, go to Bindings > System Command Policy.
- In the User Command Policy Binding window, select the desired policy and click Bind.
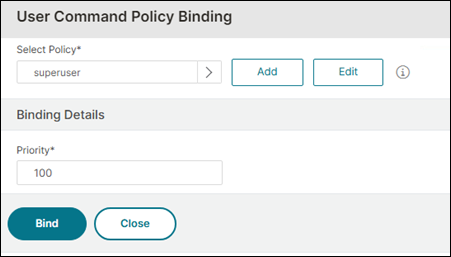
- Click Save after binding the policy.
Guidelines for using non-nsroot users with a NetScaler instance
- NetScaler instance can only be created using the nsroot user profile.
- Non-nsroot profiles can only be assigned while editing the NetScaler instance, not while creating it.
- If you do not assign a command policy to a non-nsroot profile, the NetScaler instance enters an “out of service” state. Assign an appropriate command policy to restore it.
- Non-nsroot profiles can be switched if the system command policy is set to
superuser. If not, switching is not possible. The profile can always be switched to the nsroot user profile.