
Configuring a NetScaler Gateway application on the Azure portal
The following section lists steps to configure a NetScaler Gateway application on the Azure portal.
Prerequisites
-
Azure global admin credentials
-
Intune licensing is enabled
-
For Intune Integration you must create a NetScaler Gateway application on the Azure portal.
-
Once the NetScaler Gateway application is created, configure the OAuth policy on NetScaler Gateway using the following application specific information:
-
Client ID / Application ID
-
Client Secret / Application Key
-
Microsoft Entra Tenant ID
-
-
NetScaler Gateway uses the app client id and client secret to communicate with Azure and check for NAC compliance.
To create a NetScaler Gateway app on Azure
-
Log in to portal.azure.com
-
Click Microsoft Entra ID.
-
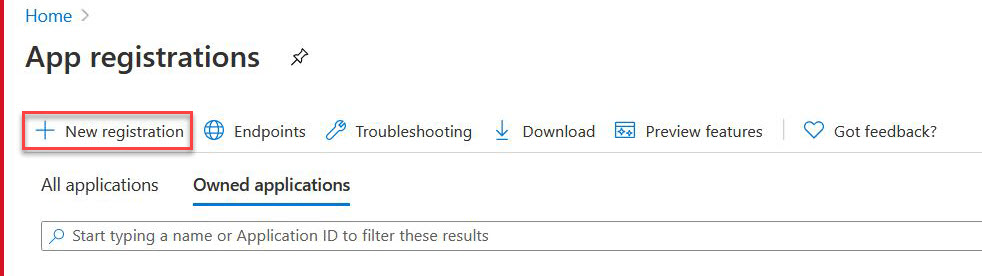
Click App registrations and click New registration.
-
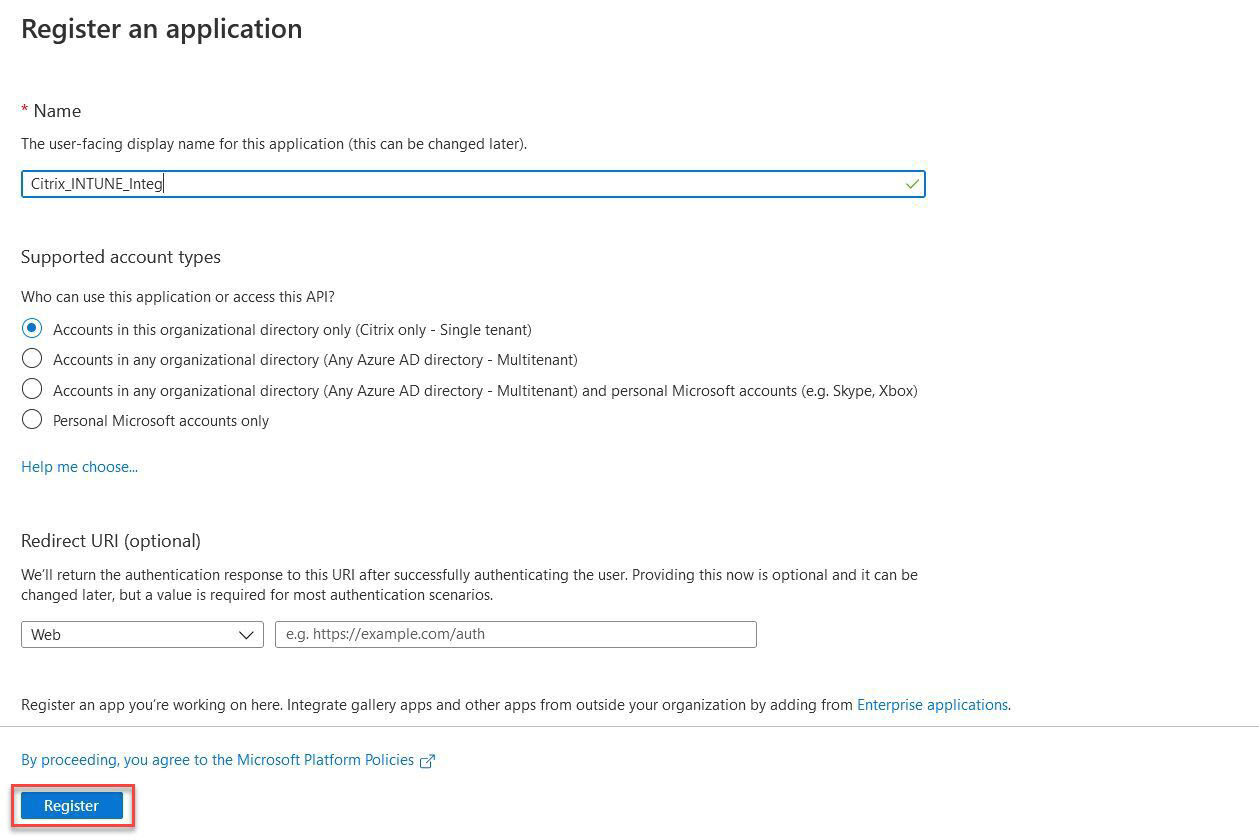
On the Register an application page, enter an app name and click Register.
-
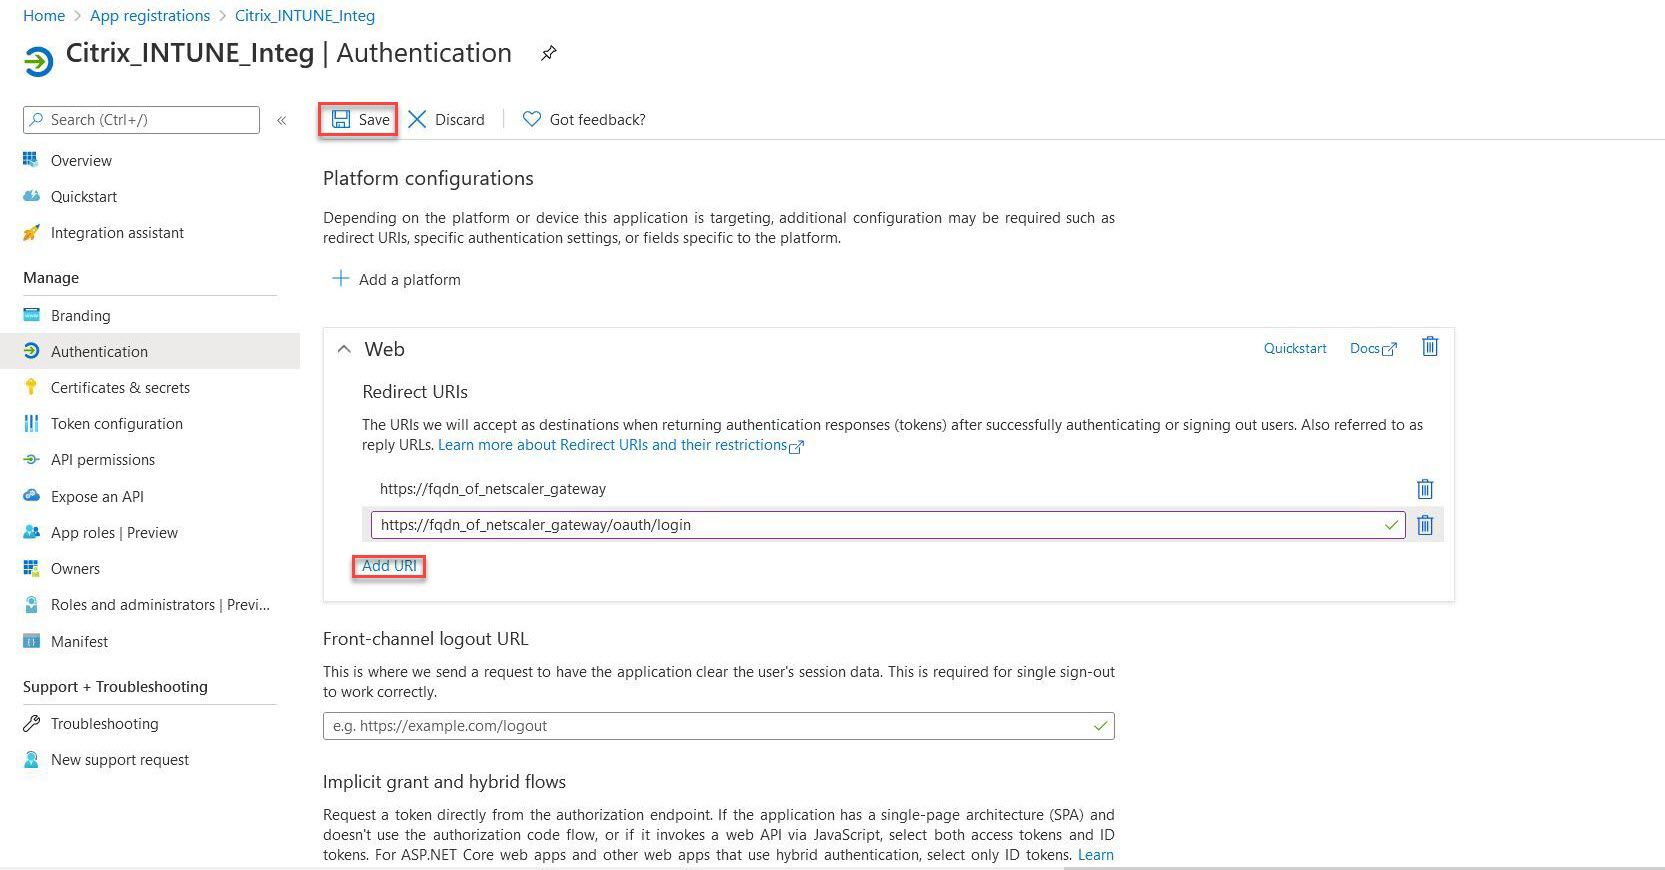
Navigate to Authentication, click Add URI, enter FDQN for NetScaler Gateway, and click Save.
-
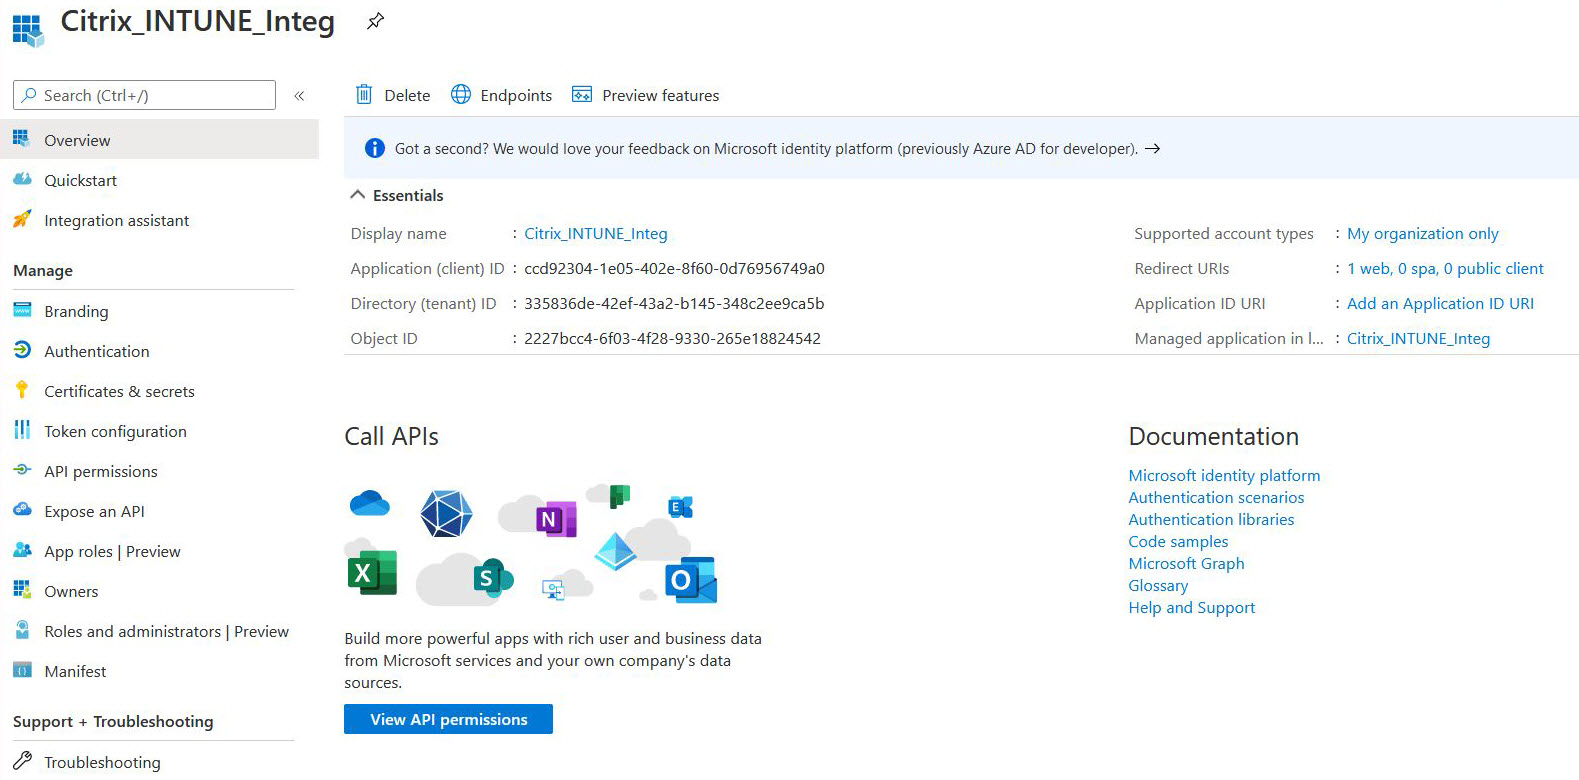
Navigate to the Overview page to get Client ID, Tenant ID, and Object ID.
-
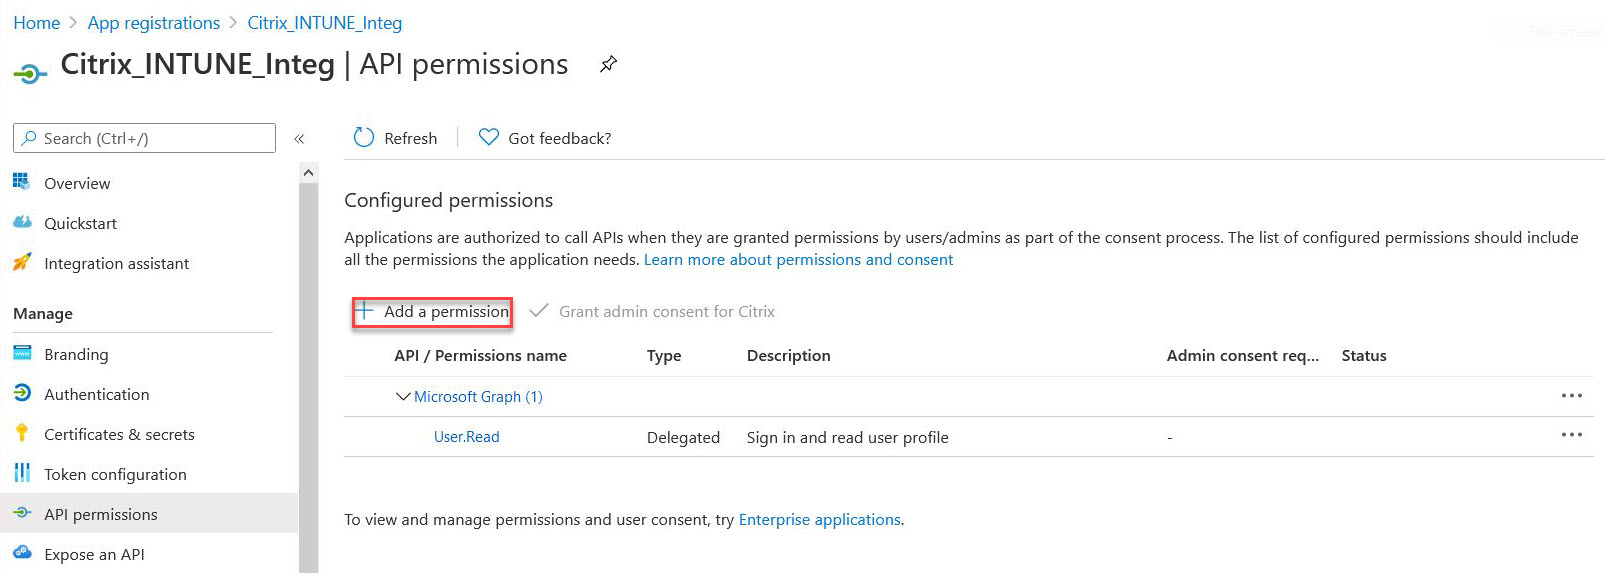
Navigate to API permissions and click Add a permission.
 Note:All Microsoft Entra ID applications that call the
https://login.microsoftonline.com,https://graph.microsoft.com, orhttps://graph.windows.netservice endpoints require the API permission to be assigned for the gateway to be able to call the NAC API. The available API Permissions are:-
Application.Read.All
-
Application.ReadWrite.All
-
Application.OwnedBy
-
Directory.Read.All
The preferred permission is Application.Read.All.For more details, see<https://techcommunity.microsoft.com/t5/intune-customer-success/support-tip-intune-service-discovery-api-endpoint-will-require/ba-p/2428040> -
-
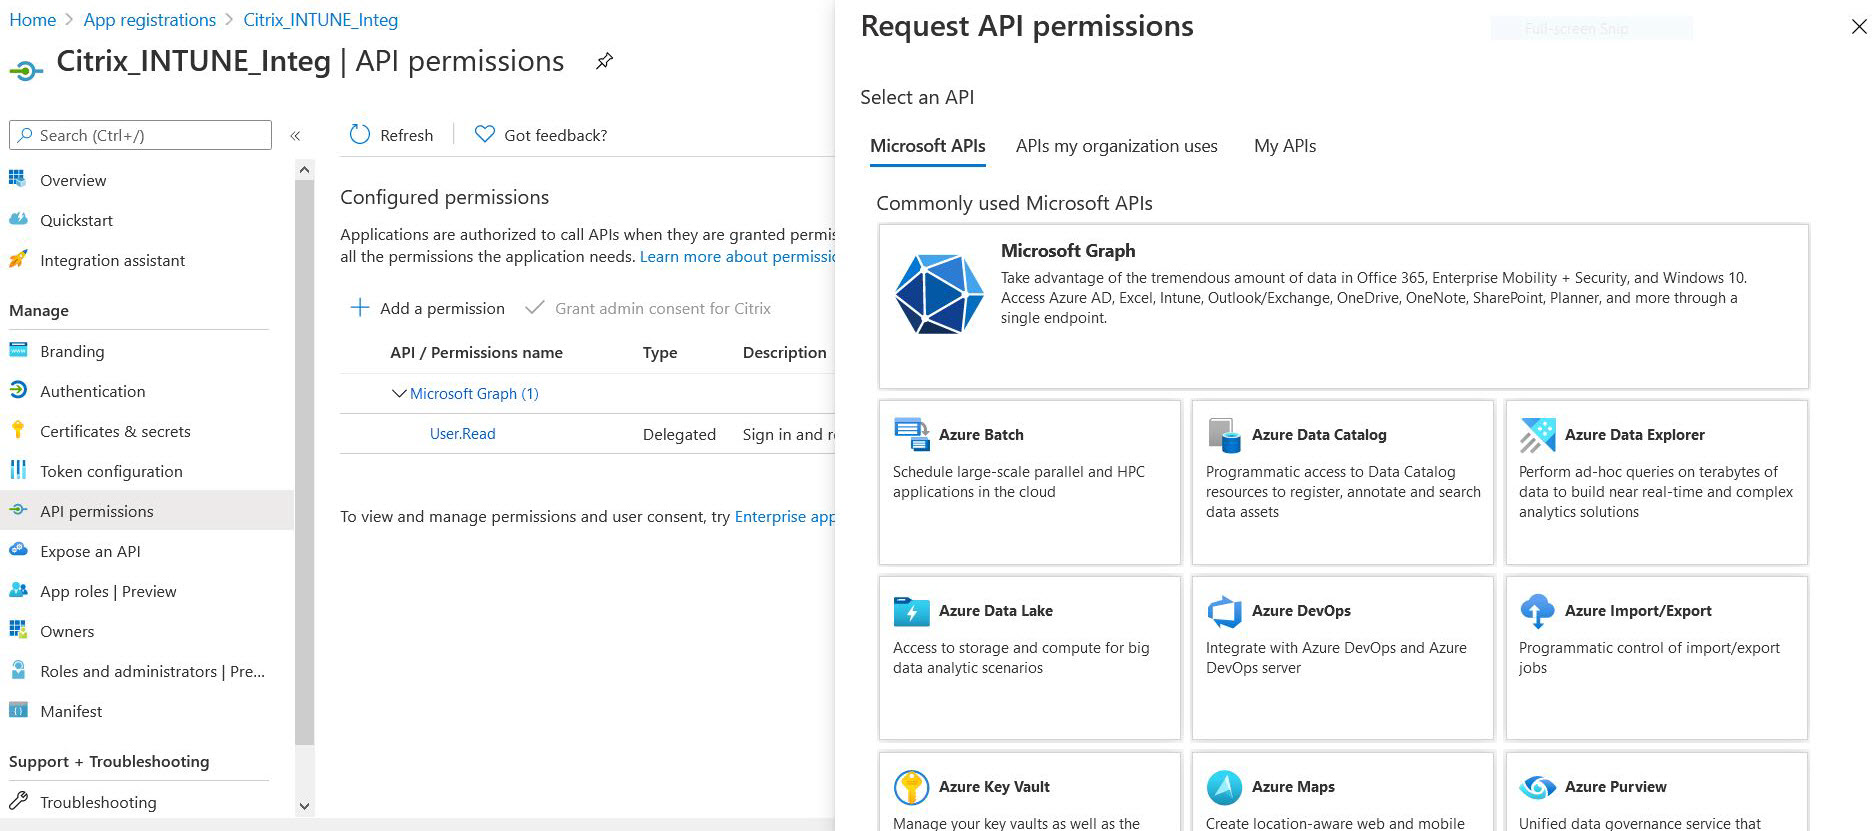
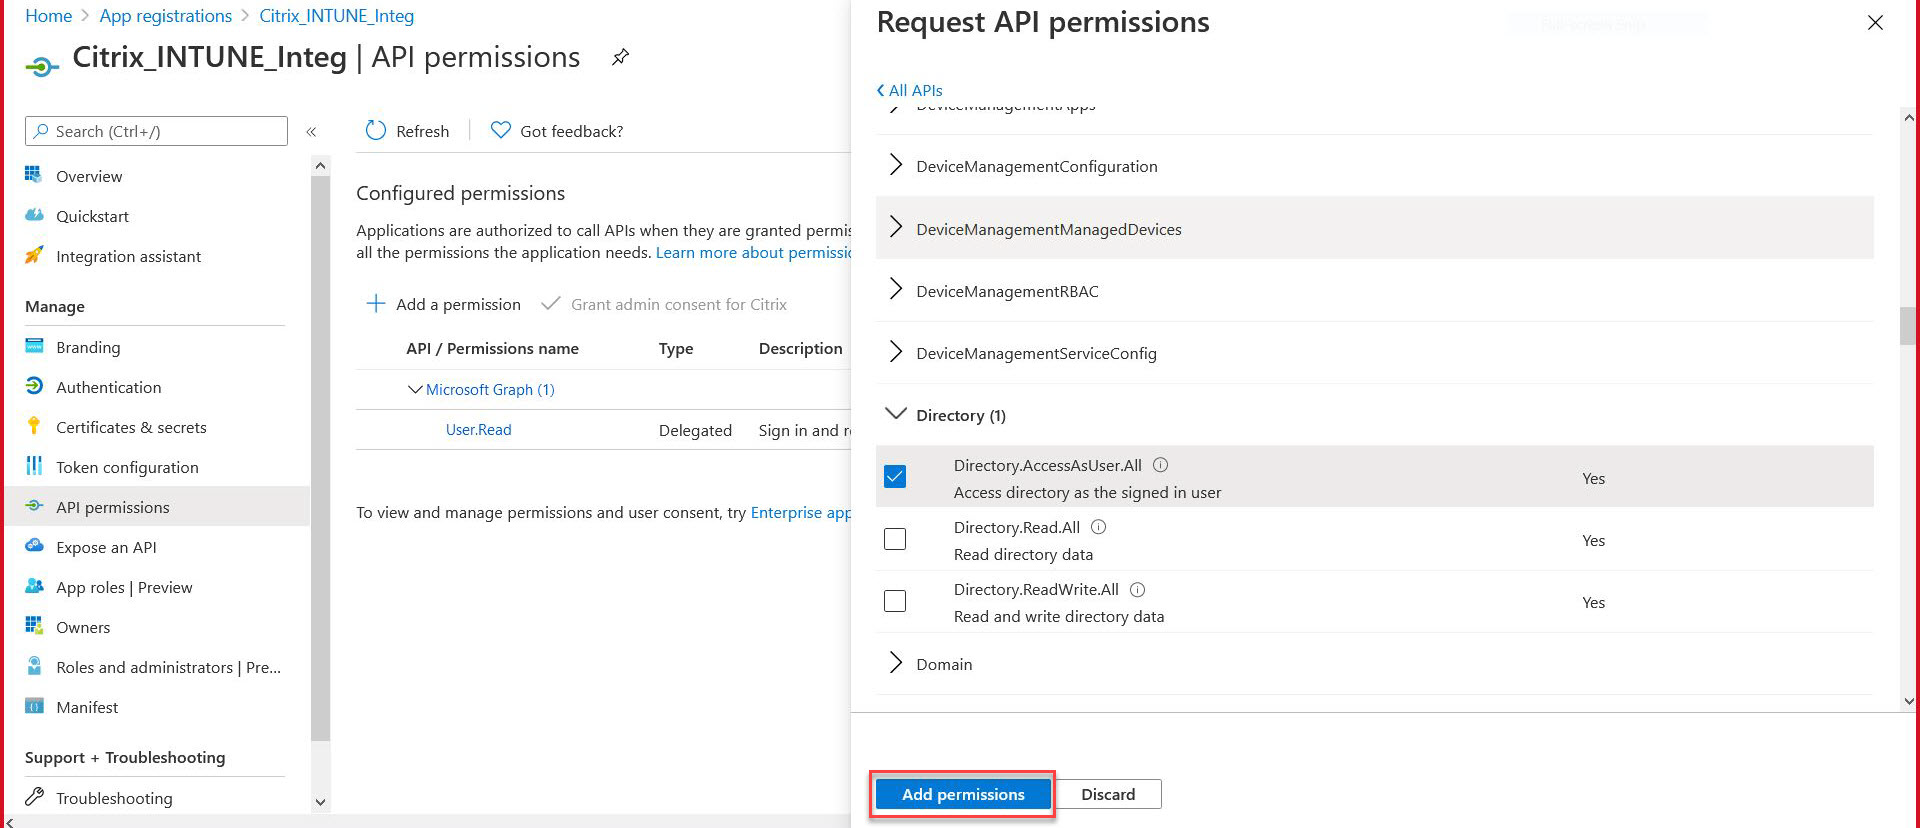
Click the Microsoft Graph tile to configure API permissions for Microsoft Graph.
-
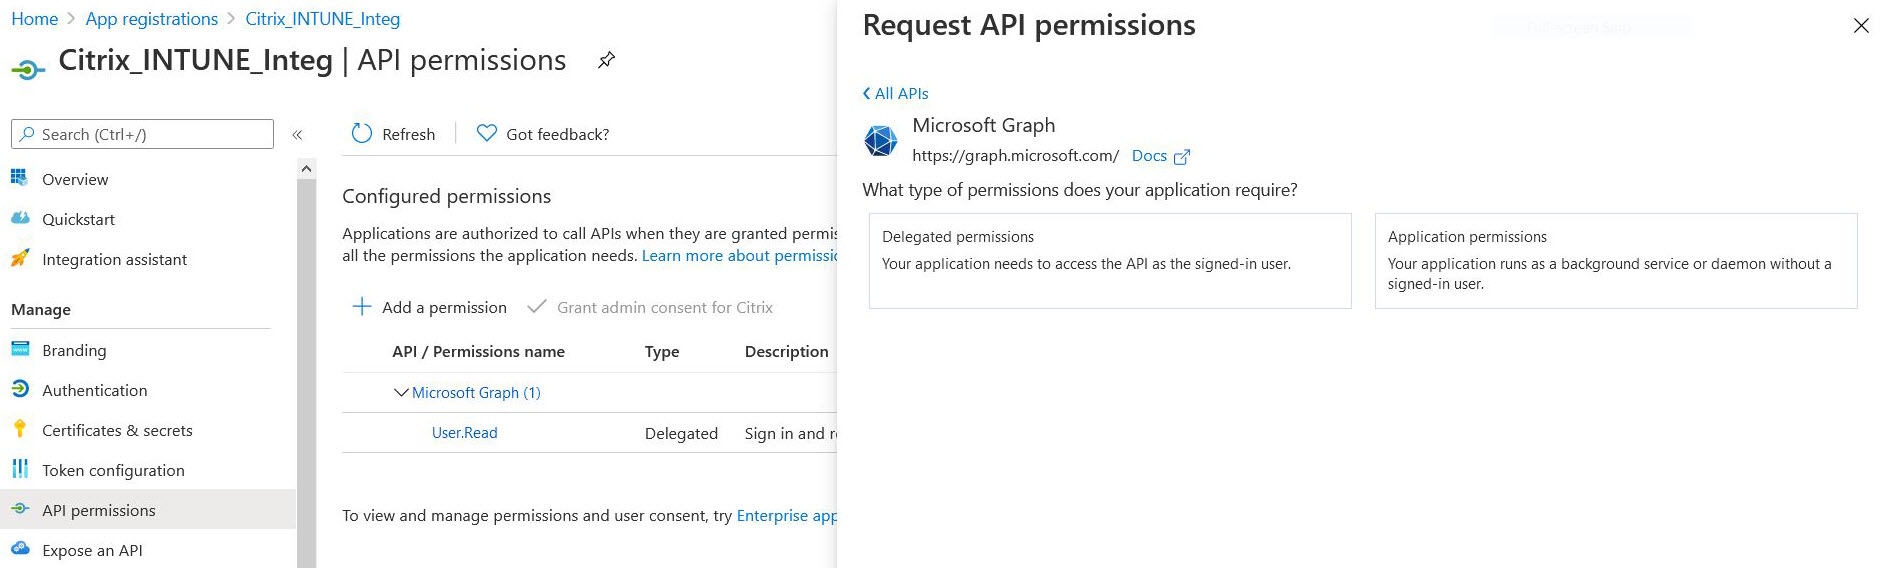
Click the Delegated permissions tile.
-
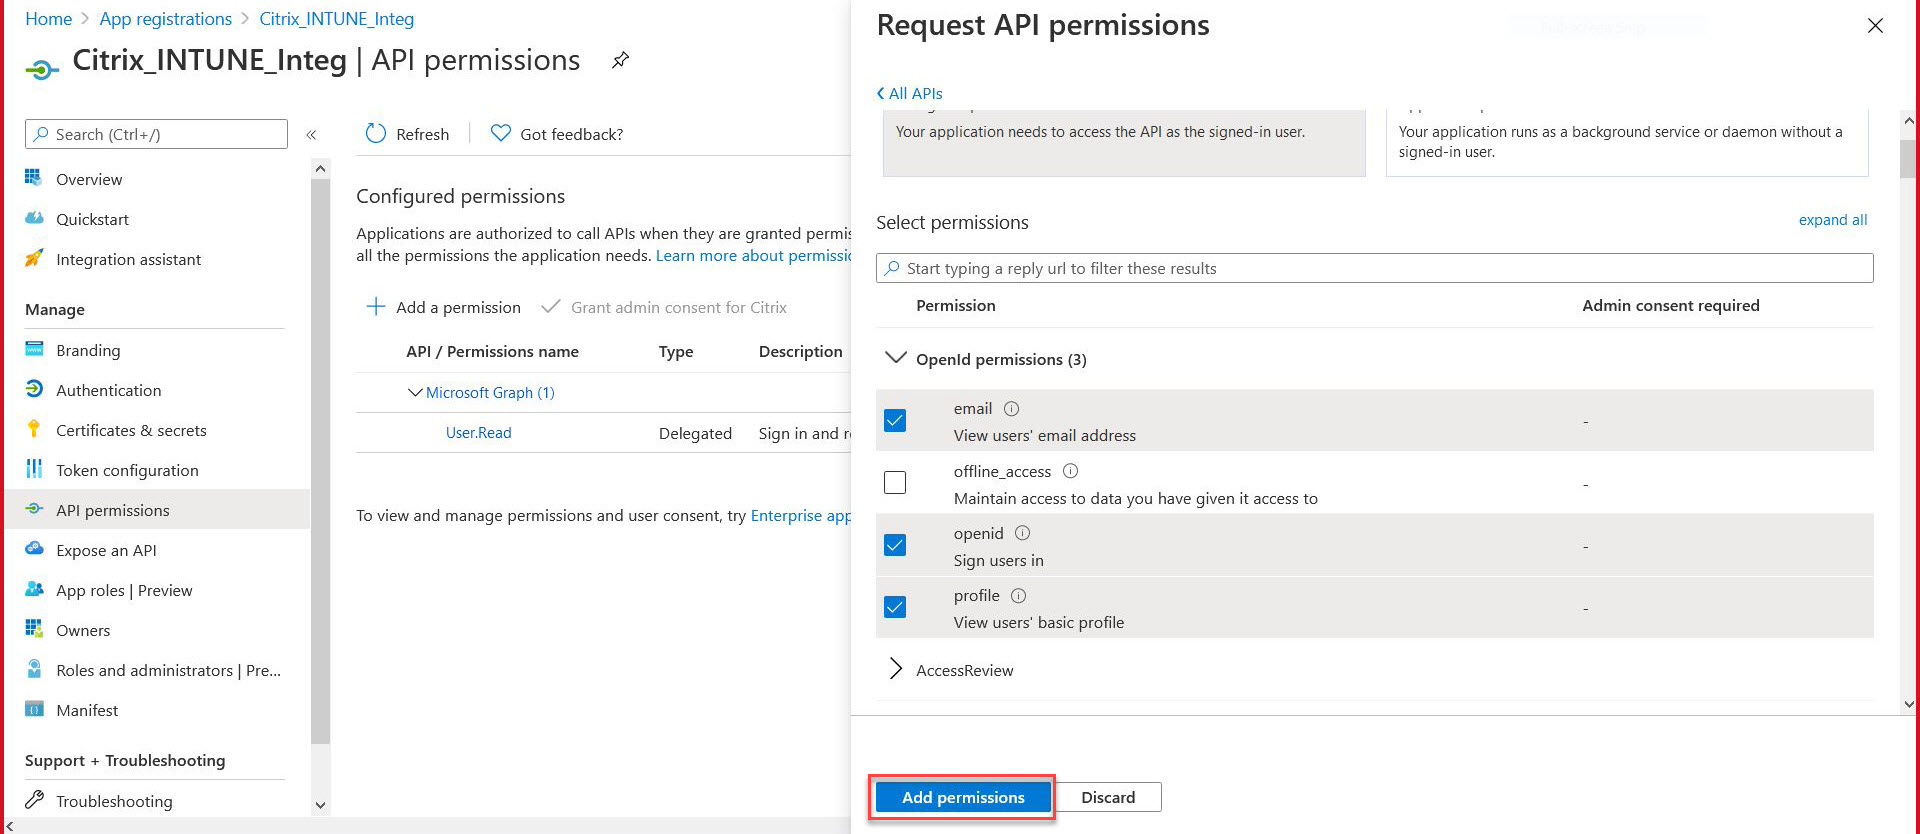
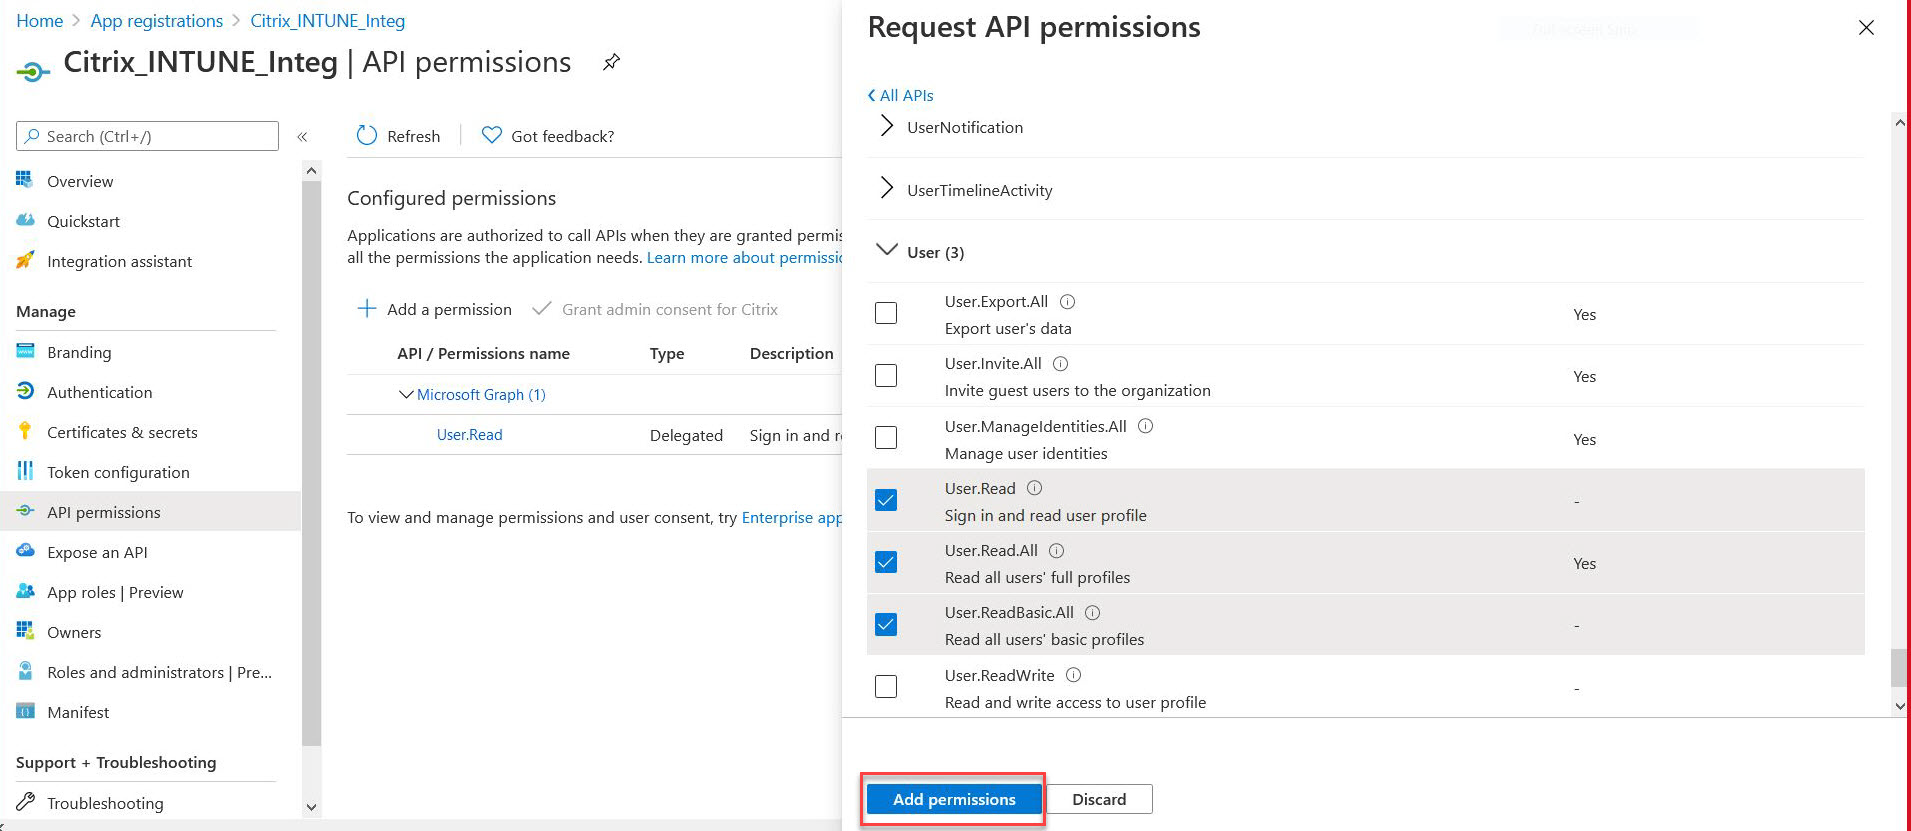
Select the following permissions and click Add permissions.
-
Email
-
openid -
Profile
-
Directory.AccessAsUser.All
-
User.Read
-
User.Read.All
-
User.ReadBasic.All
 Permissions for Intune NAC check:All Microsoft Entra ID applications that call the
https://login.microsoftonline.com,https://graph.microsoft.com, orhttps://graph.windows.netservice endpoints require the API permission to be assigned for the gateway to be able to call the NAC API. The available API Permissions are:-
Application.Read.All
-
Application.ReadWrite.All
-
Application.OwnedBy
-
Directory.Read.All
The preferred permission is Application.Read.All.For more details, see<https://techcommunity.microsoft.com/t5/intune-customer-success/support-tip-intune-service-discovery-api-endpoint-will-require/ba-p/2428040>Note:If a customer is only using the Intune Action for NAC check, then the only permission required is Application.Read.All in Microsoft Graph. -
-
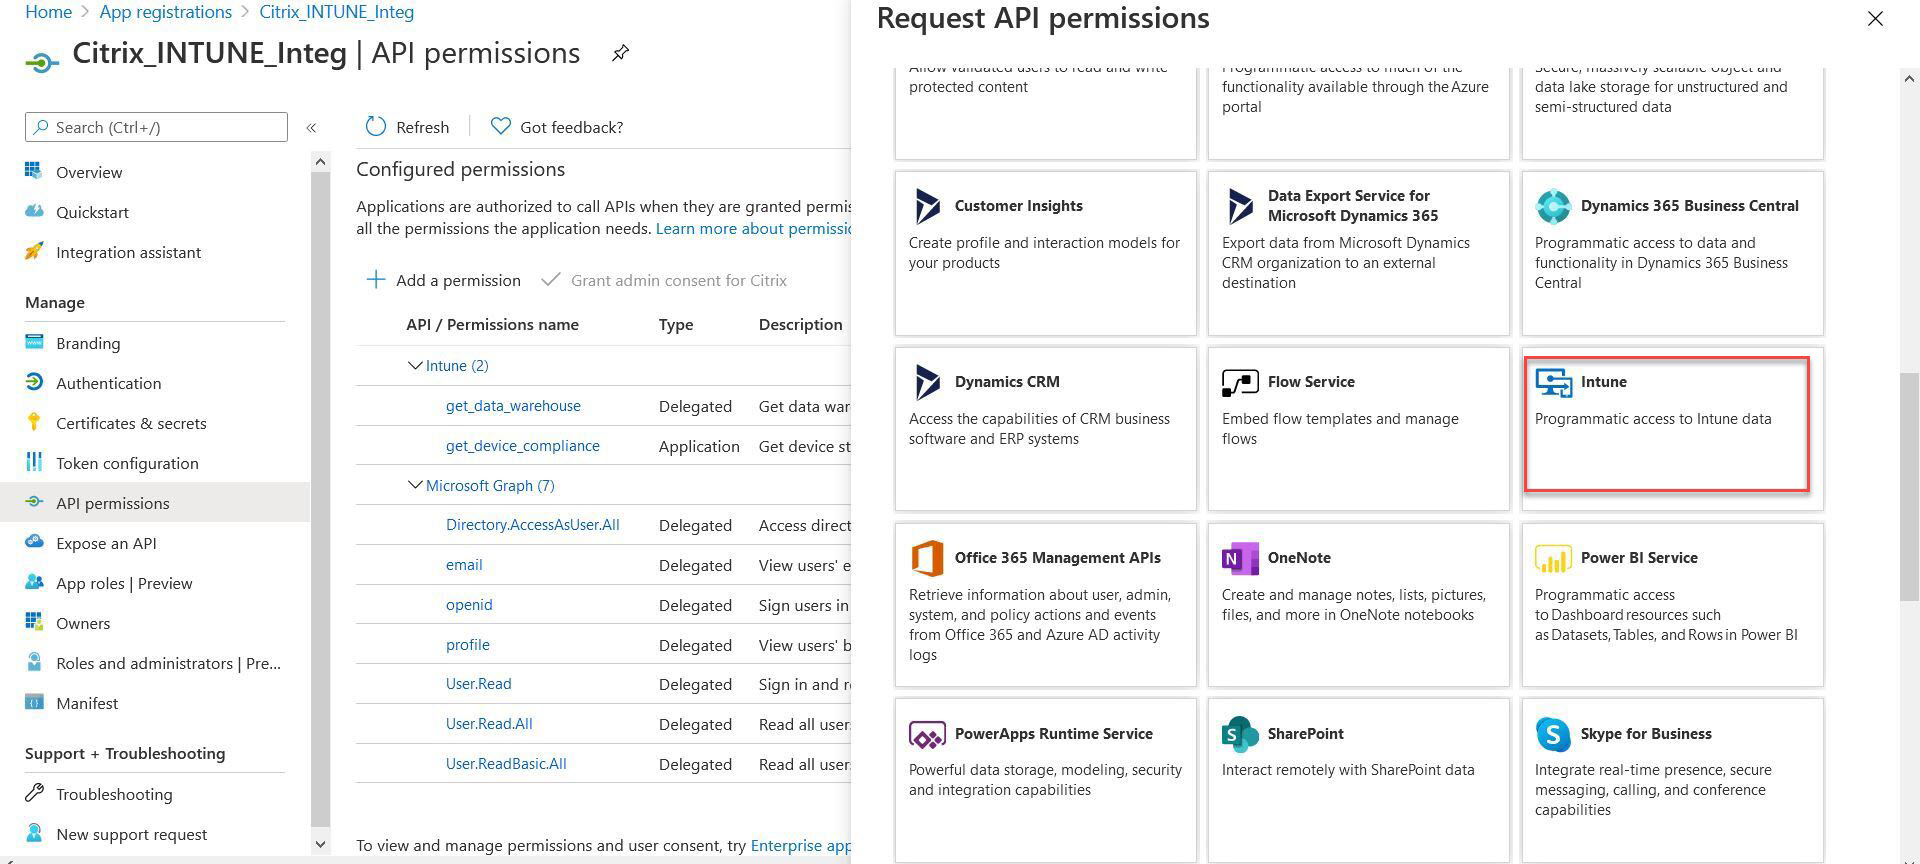
Click the Intune tile to configure API permissions for Intune.
-
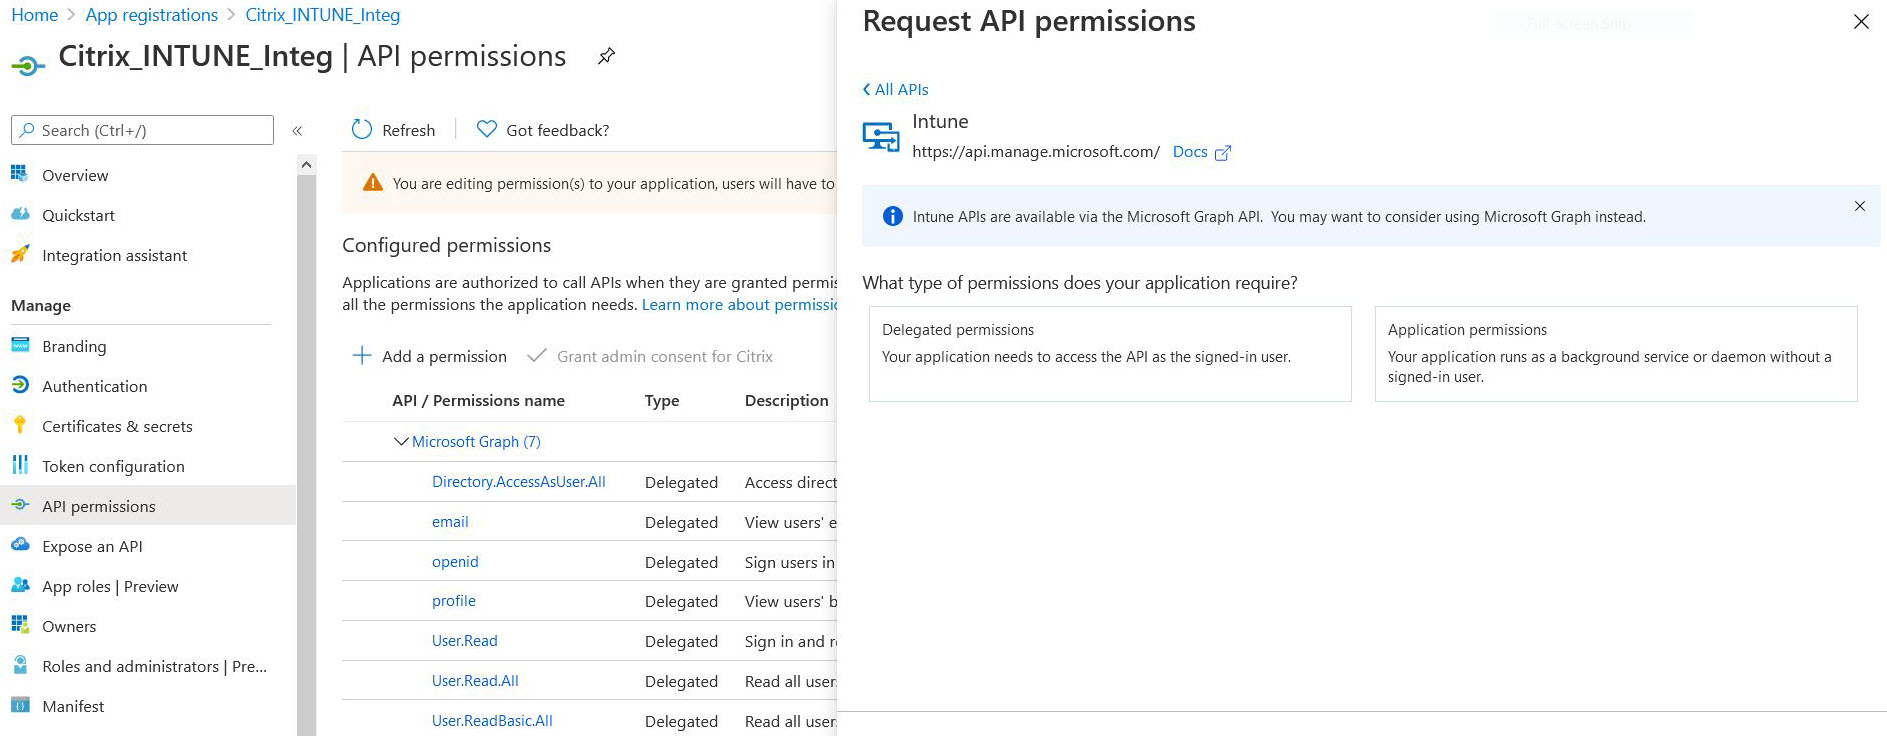
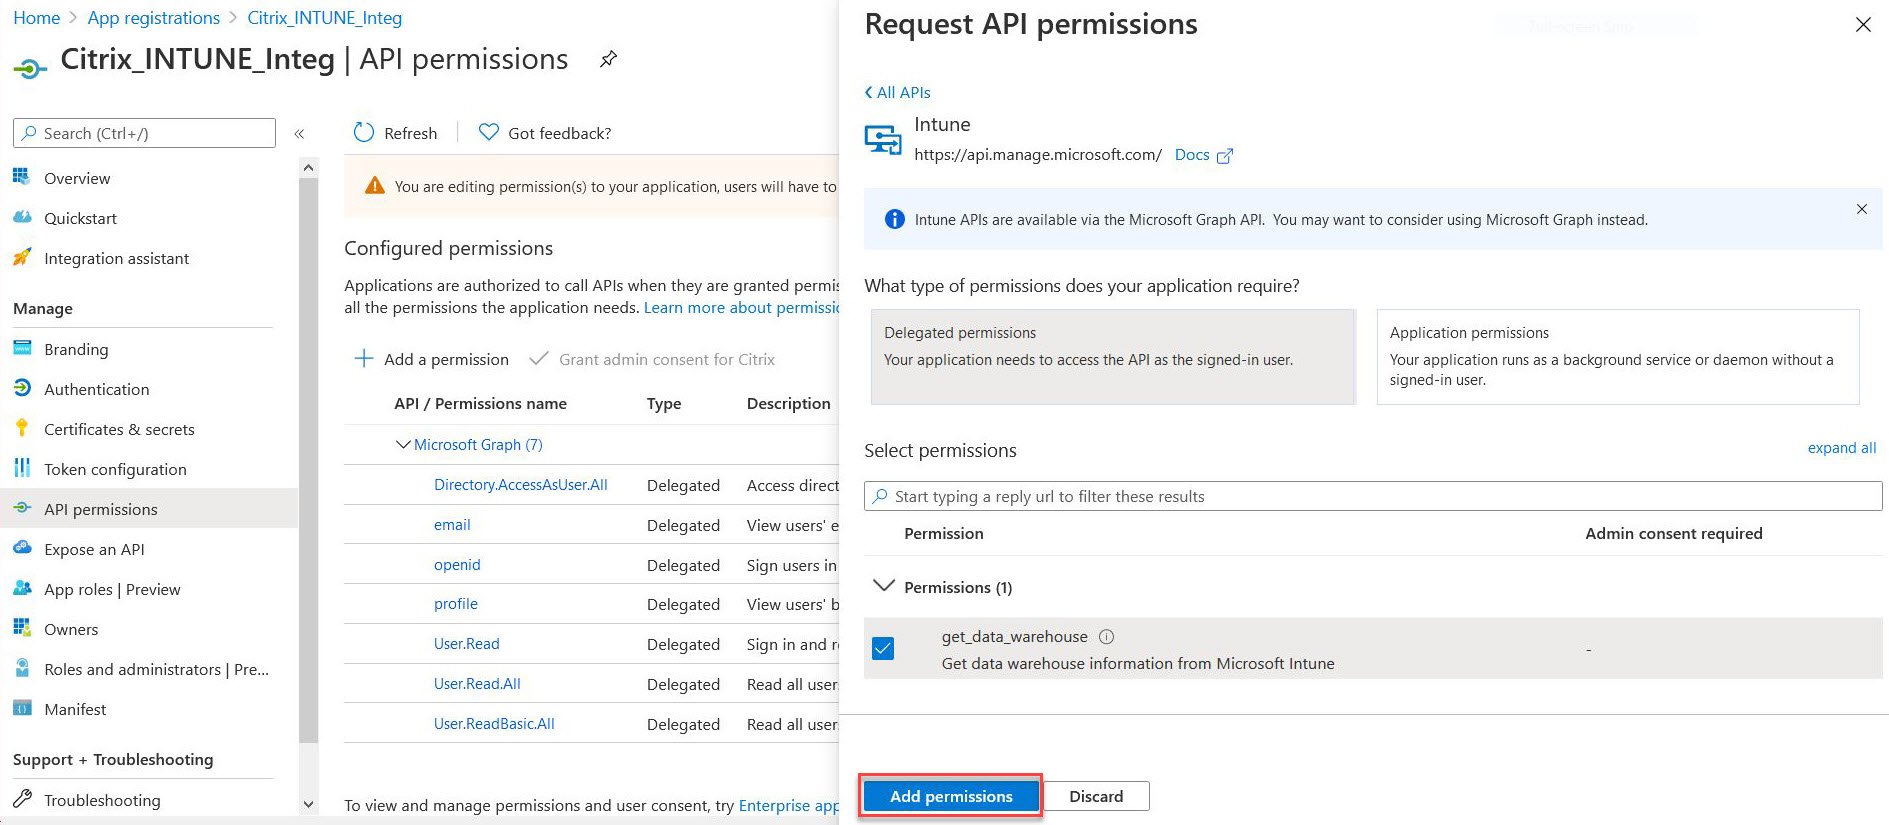
Click the Application permissions tile and the Delegated permissions tile to add permissions for Get_device_compliance and Get_data_warehouse respectively.
-
Select the following permissions, and click Add permissions.
-
Get_device_compliance - Application permissions
-
Get_data_warehouse - Delegated permissions
Note:For the Intune NAC check, the only permission required is Get_device_compliance.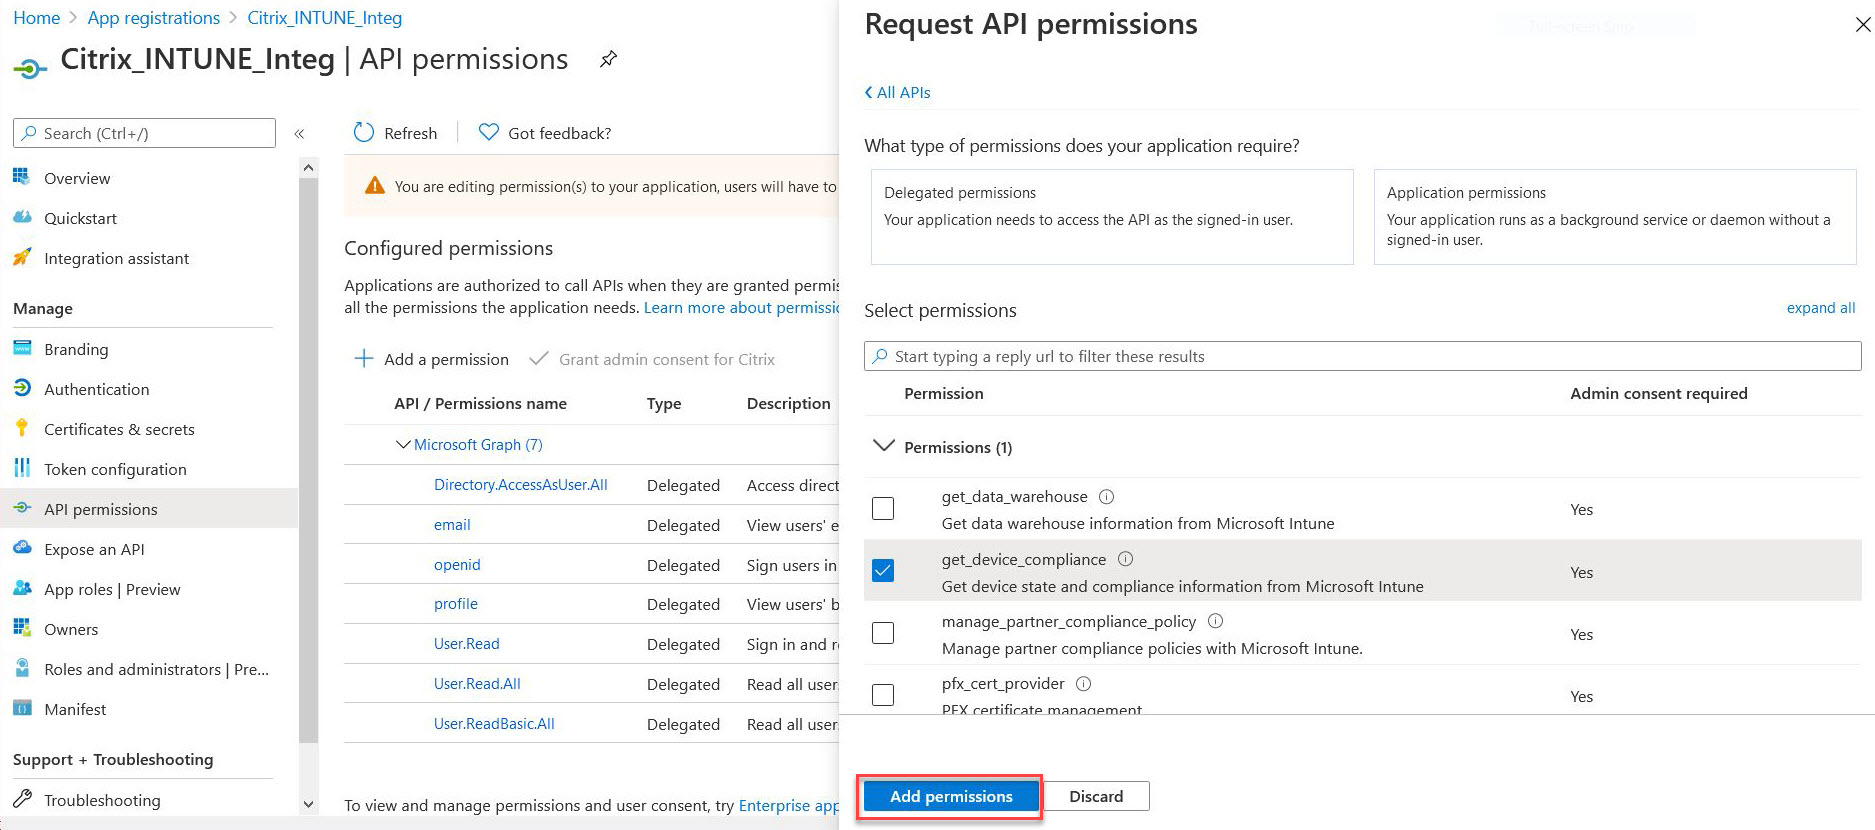
-
-
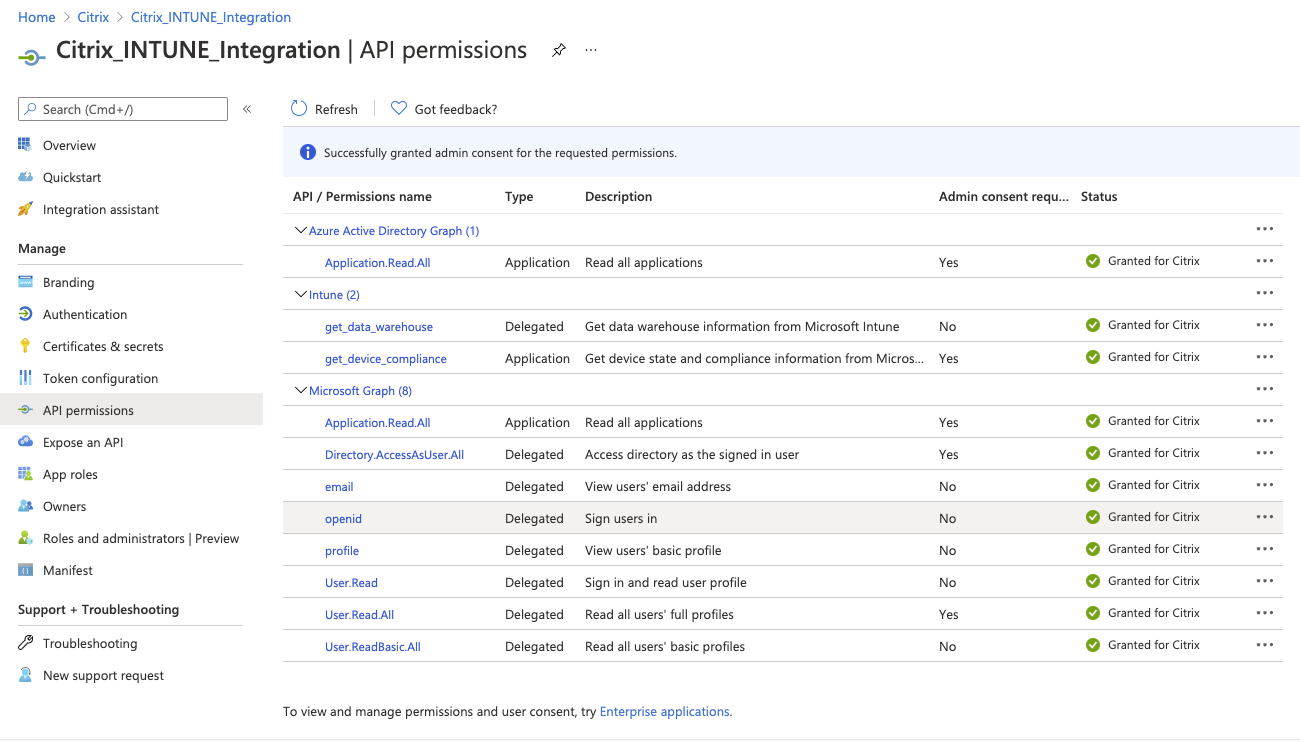
The following page lists the configured API permissions.
-
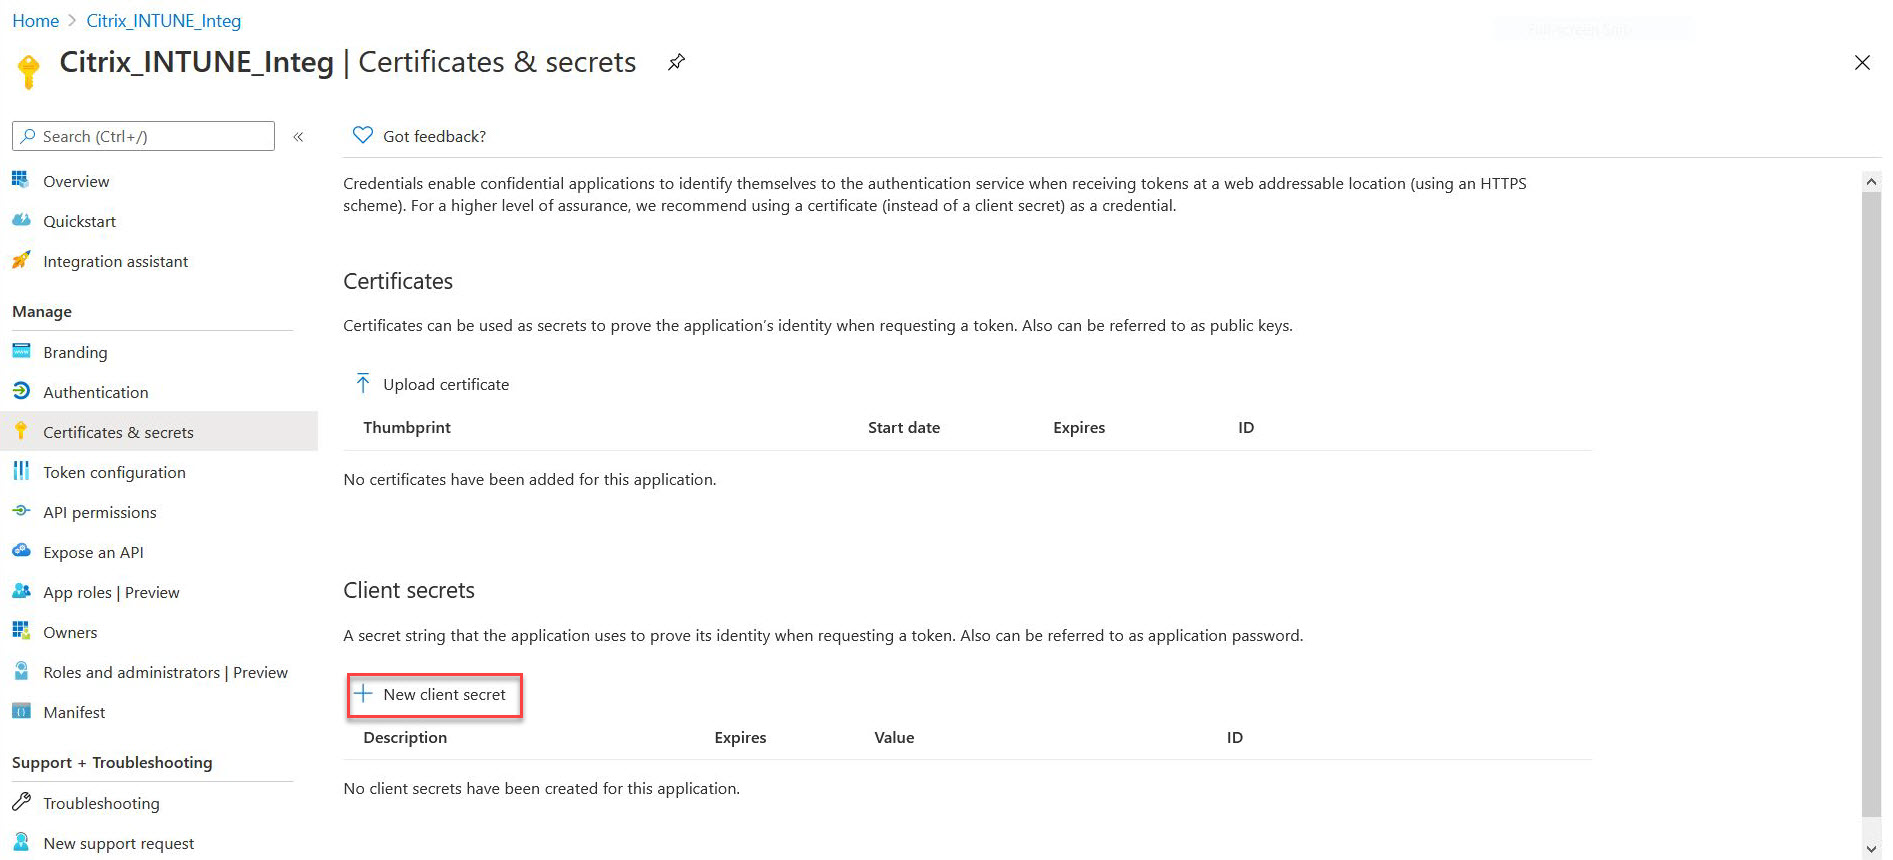
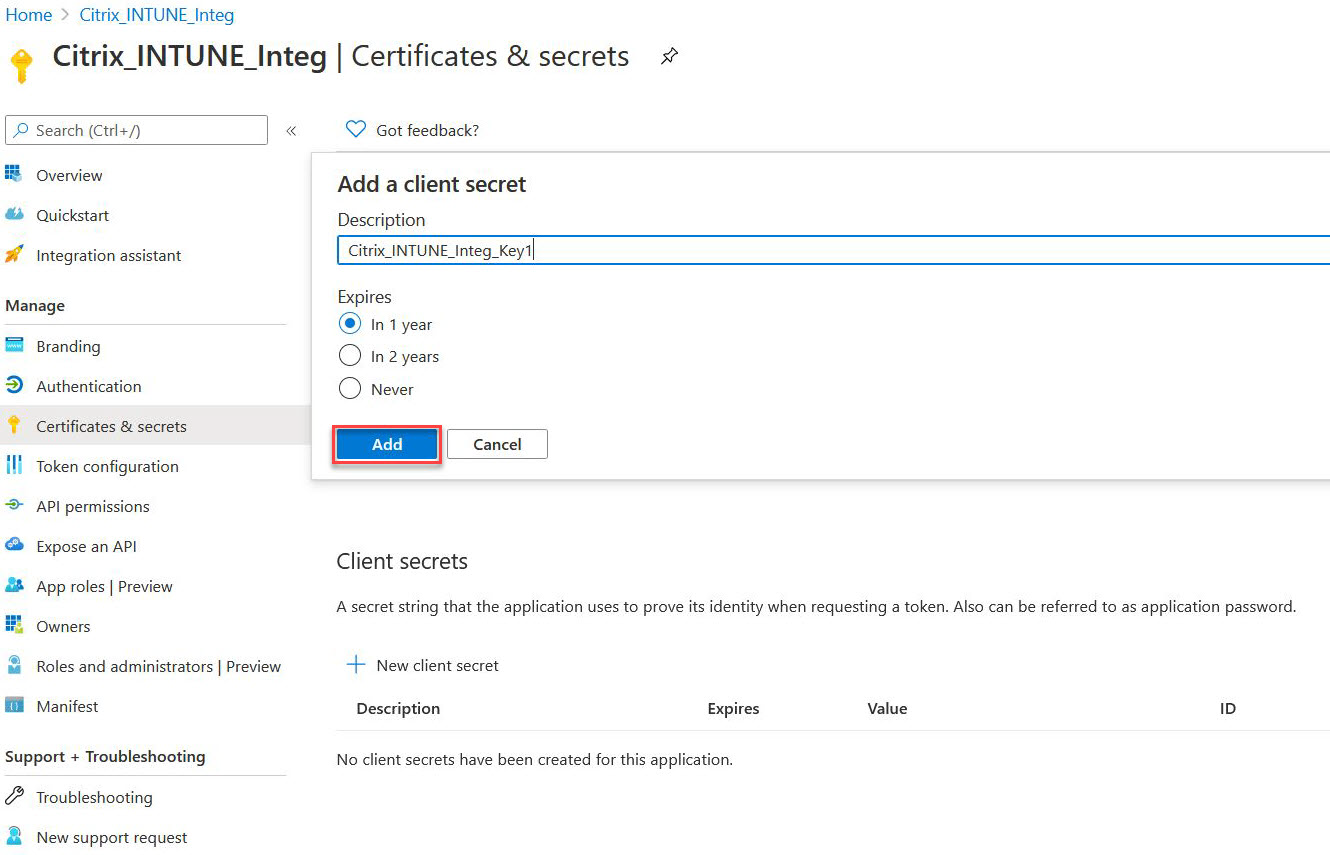
Navigate to Certificates & secrets and click New client secret.
-
Under the Add a client secret page, enter a description, select expiry, and click Add.
-
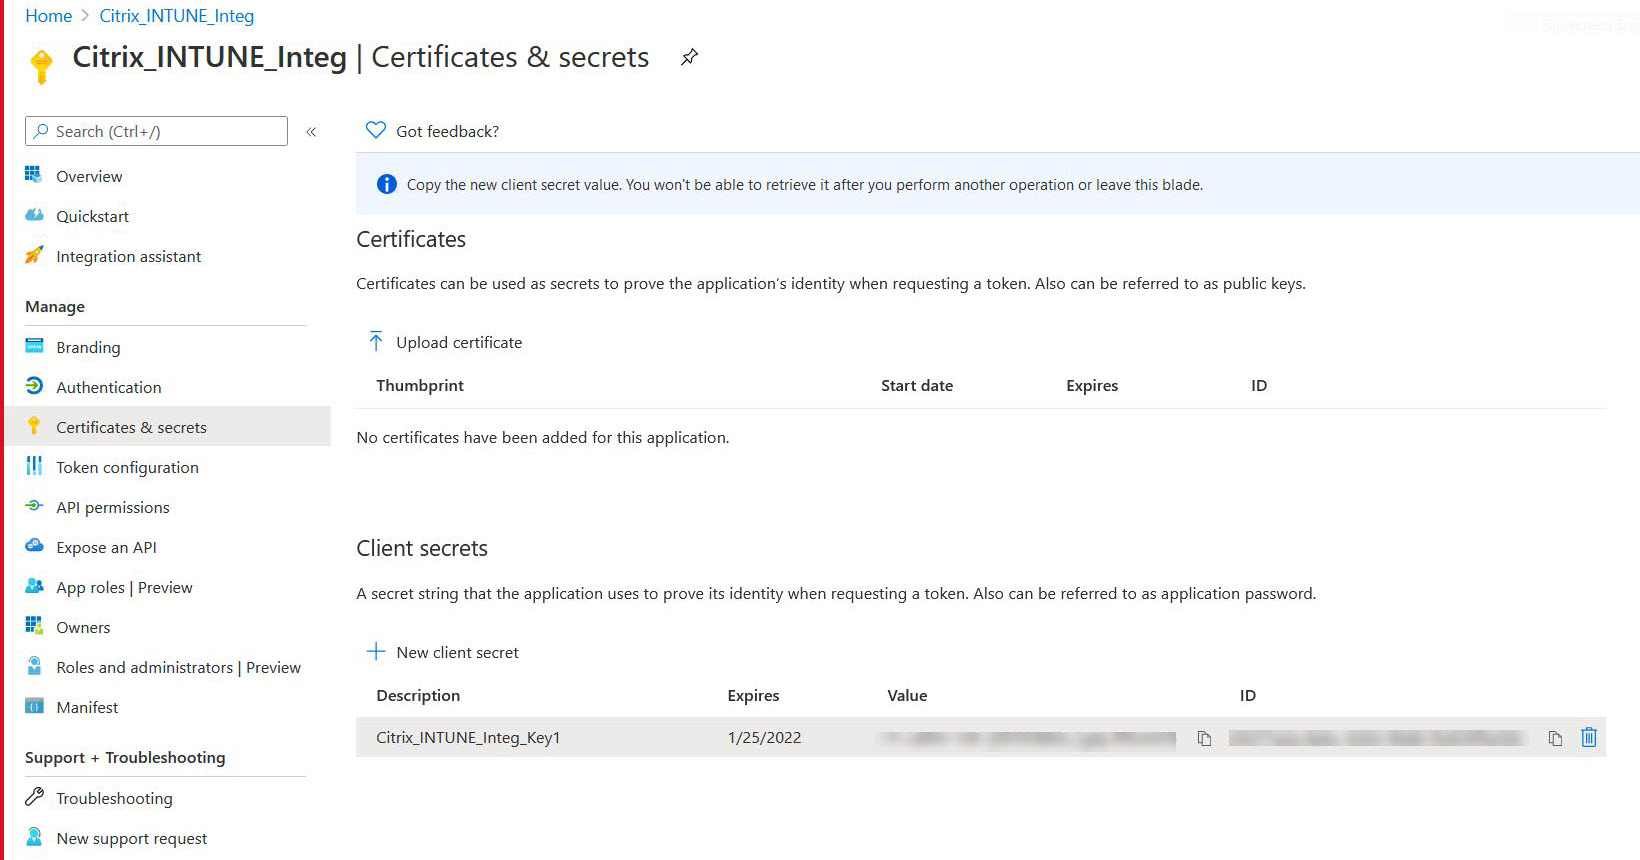
The following screen shows the configured client secret.NoteThe client secret is displayed only once when it is generated. Copy the displayed client secret locally. Use the same client secret along with the client ID associated with the newly registered app while configuring the OAuth action on the NetScaler Gateway appliance for Intune.
The application configuration on the Azure portal is now complete.