User interface for SD-WAN 110-SE appliance
A new User Interface (UI) is introduced for SD-WAN appliances - applicable only for SD-WAN 110 devices for 11.1.1 release. The new UI is built using the latest UI technologies.
The new UI design improves the security, has an improved look and feel, it is more performant, secure, and responsive. But the new UI has retained the flow and page layout of each feature from the legacy UI. The new UI is only applicable for the customers who are using SD-WAN 110 appliance.
Note
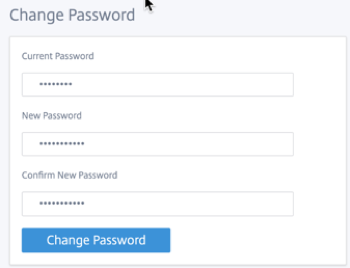
The New UI can only be accessed by the default admin user (admin). It is mandatory to change the default admin user account password while provisioning the SD-WAN appliance. The default password is the serial number of the SD-WAN 110 device and is mandated to change on first time after logon to device.
The legacy UI is maintained for backward compatibility and is deprecated. The legacy UI can be accessed using the URL https: // < ip-address >/cgi-bin/login.cgi. The user name and password for the user admin remains the same across both (new/legacy) user interfaces, and first time login procedures can be done using either interface. Additional users will be supported in future versions of new UI.
Citrix SD-WAN™ new user interface
The new UI can be accessed using Google Chrome (version 81), Mozilla Firefox, Microsoft Edge (version 81+), and Legacy Microsoft Edge (version 44+) browsers.
NOTE
Microsoft Internet Explorer, Apple Safari, and other browsers are not supported.
To access the new UI page, perform the following:
- Open a new browser tab and navigate to https: // < management-ip > to access the new UI on SD-WAN 110 appliance.
Note
In the scenario where the In-band management is enabled, the interface IP address can be provided in < management-ip > to access the new UI. The In-band management can be enabled on multiple trusted interfaces that are enabled to be used for IP services. You can access the UI using the management IP and in-band virtual IPs.
- The user name field is read-only and is defaulted to admin. Provide the password and click Sign In.
The Citrix SD-WAN user interface page appears.
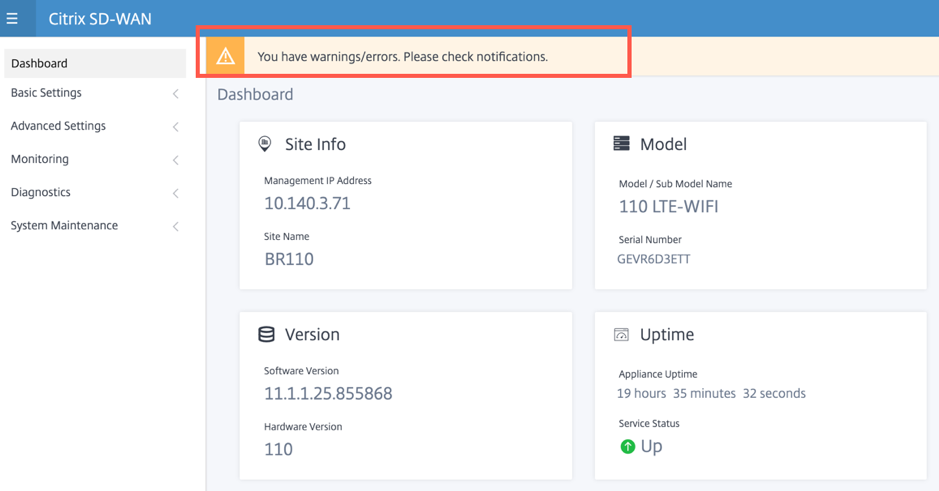
Once you have successfully logged in, you can see the navigation panel is on the left side. Also, you can see a notifications banner on the dashboard if there are any warnings or errors.
Navigation
The left navigation sidebar can be hidden or made visible on click of the hamburger icon. The hamburger icon on the top left corner provides links to the dashboard, basic/advanced settings, monitoring, and management related options.
![]()
Menu bar
The user menu on the top right corner displays the logged-on user details. You can open the legacy user interface in a new browser tab by clicking the Open Legacy SD-WAN UI option. Click the bell icon for any notifications.
![]()
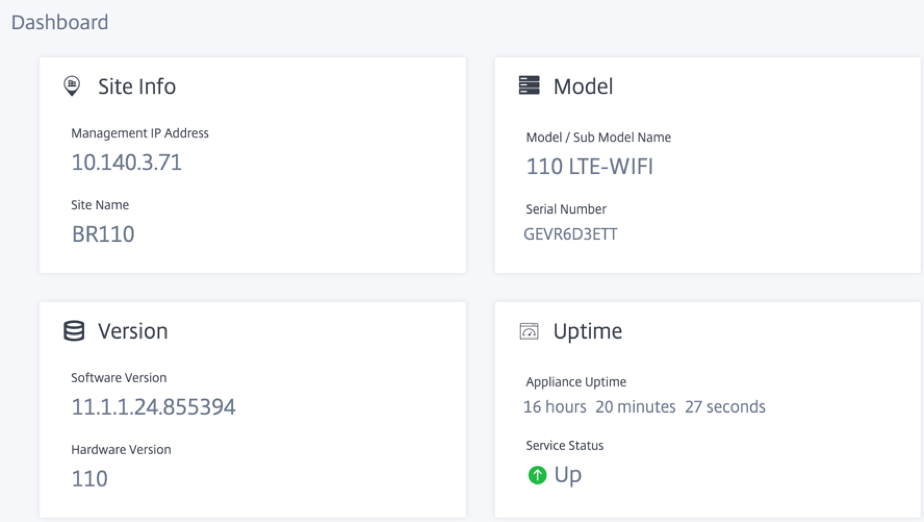
Dashboard
The Dashboard page displays the following basic information of SD-WAN 110 appliance as a tile view:
- Site – Displays the site information with Management IP Address and Site Name
- Model – Displays the Model/Sub Model Name and Serial Number
- Version – Displays Software and Hardware version
- Uptime - Displays Appliance Uptime and Citrix® Virtual WAN Service Status
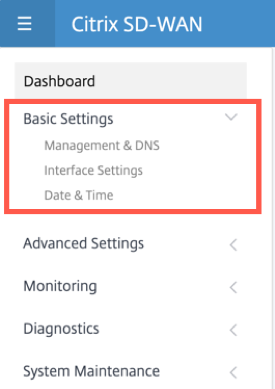
Basic settings
The SD-WAN appliance Basic Settings include the following entities configuration. The new UI provides a separate page for configuring each entity individually.
- Management and DNS
- Interface Settings
- Date and Time
Management and DNS
From the Management and DNS page, you can configure the management interface IP address and DNS settings. For more information, see Configure Management IP Address.
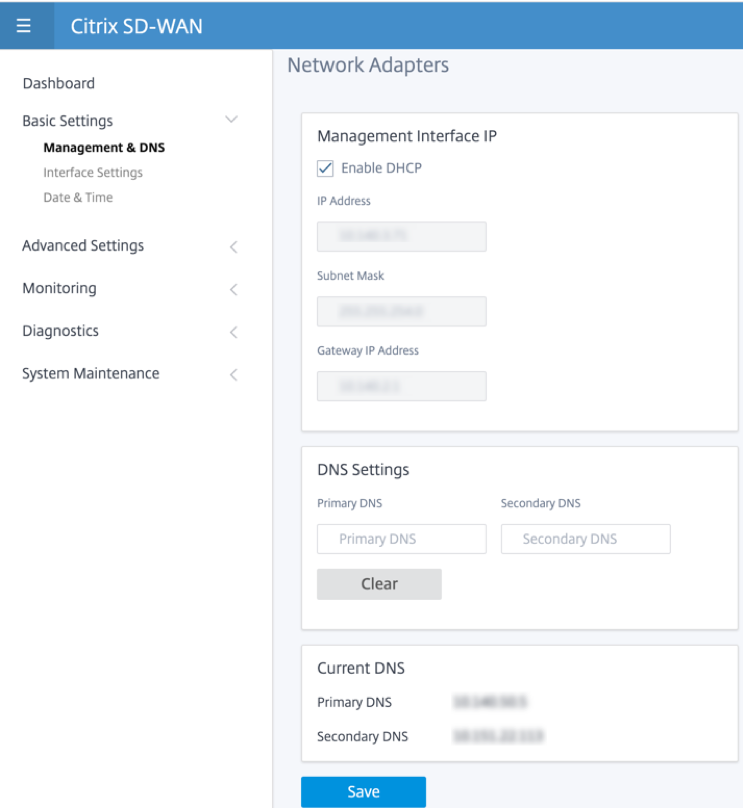
Enter the IP address, Subnet mask, and Gateway IP address for the appliance that you want to configure. Under the DNS Settings section, provide the primary and secondary DNS server detail and click Save.
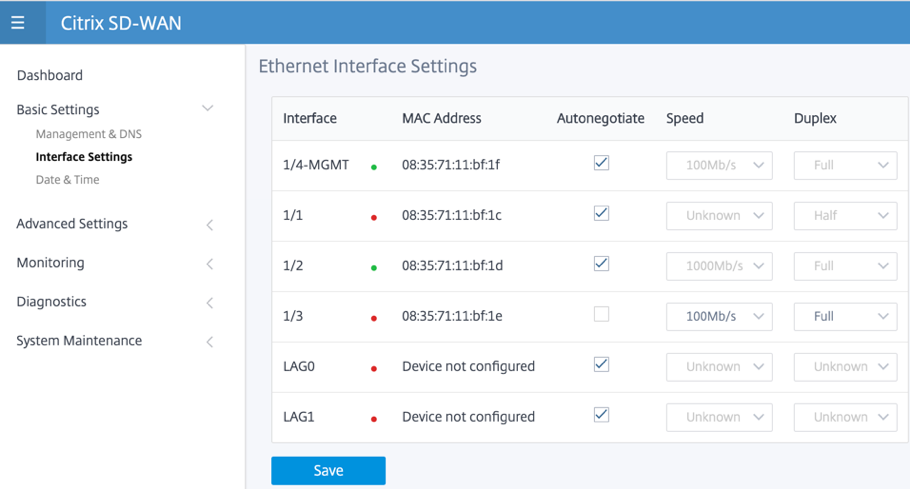
Interface settings
The Interface Settings page displays the Ethernet port configuration data. The ports that are down are indicated as a red dot against the MAC address.
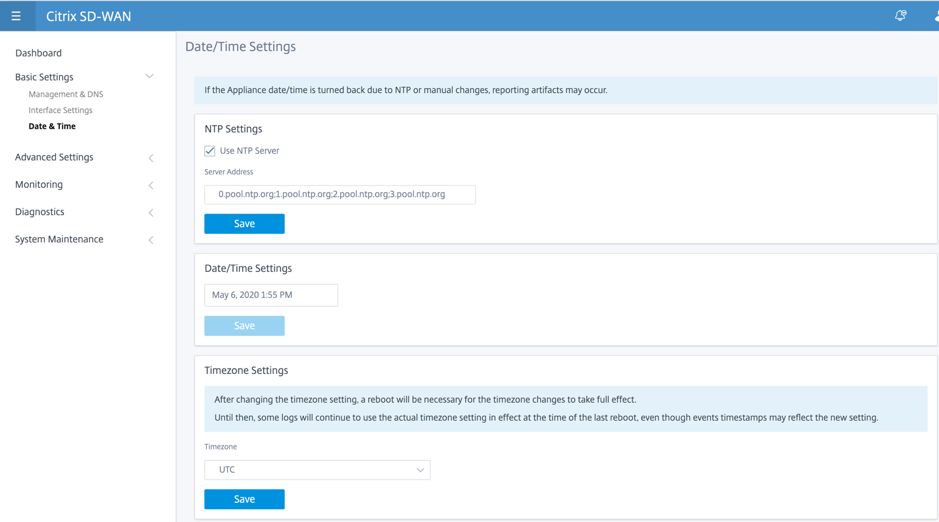
Date and Time
From the Date and Time settings page, you must set the date and time on the appliance. For more information, see Set date and time.
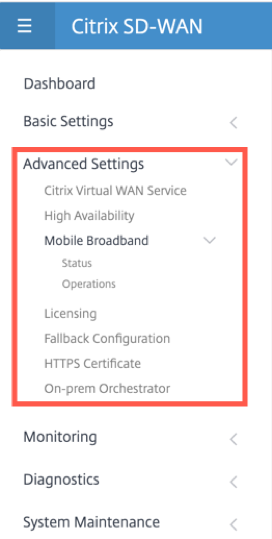
Advanced settings
The SD-WAN appliance Advanced Settings include the following entities configuration.
- Citrix Virtual WAN Service
- High Availability
- Mobile Broadband
- Licensing
- Fallback Configuration
- HTTPS Certificate
- On-prem Orchestrator
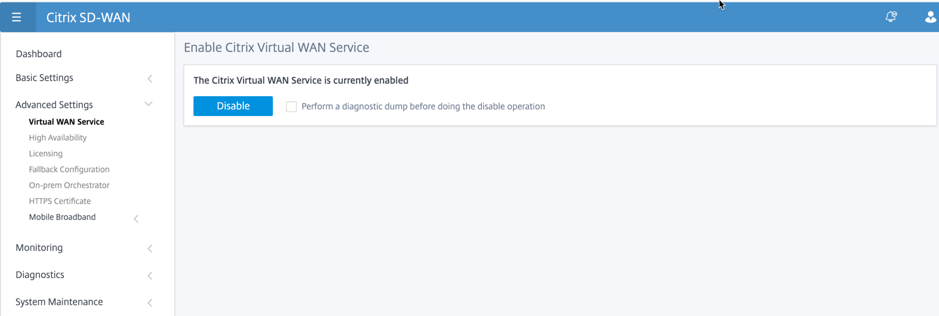
Citrix Virtual WAN service
The CItrix Virtual WAN Service page allows you to enable/disable the Citrix Virtual WAN Service. For more information, see Configure Virtual WAN Service.
High Availability
From the High Availability page, you can toggle between active and standby state for an SD-WAN high availability (HA) setup. The high availability status is available in the dashboard (if high availability is configured). For more information, see High Availability Mode.

Mobile broadband
The Citrix SD-WAN 110 LTE Wi-Fi SE appliance has a built-in internal LTE modem. You can also connect an external USB modem on Citrix SD-WAN 110 SE and Citrix SD-WAN 110 LTE Wi-Fi SE appliances. To view the mobile broadband settings, select the modem type.
The Mobile Broadband is divided into two sections – Status and Operations.
-
For an external USB LTE modem, you can view only the status information. You cannot set an Access Point Name (APN).
-
For the internal modem on SD-WAN 110 LTE Wi-Fi SE appliances, you can view the status and perform other modem operations.
NOTE
The SIM PIN and other LTE modem configurations are currently not supported.
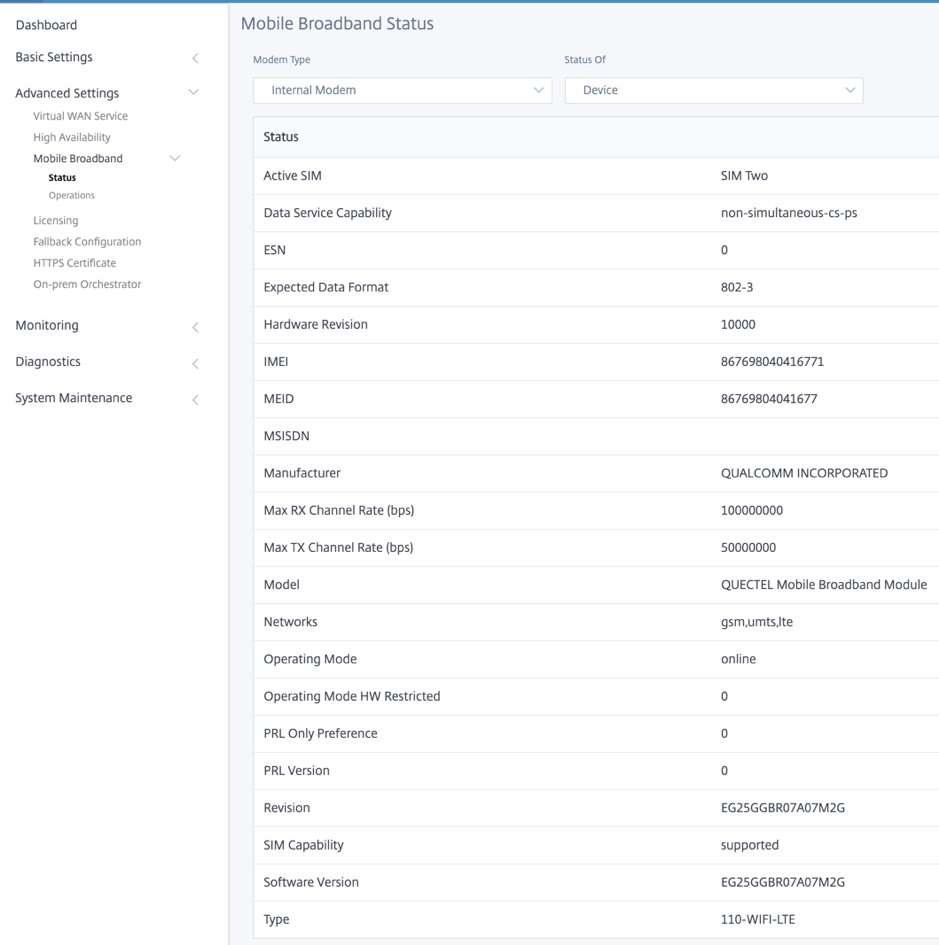
The following are some useful status information:
- Modem Type: Select the modem type as External or Internal. Internal modem shows the status under Mobile Broadband > Status page. All the other sections such as SIM preference, APN settings, Enable/Disable the modem, Reboot modem, and Refresh SIM are available under Mobile Broadband > Operations page.
- Active SIM: At any given time, only one SIM can be active. Displayed the SIM that is currently active.
- Operating Mode: Displays the modem state.
- SIM Capabilities: Displays whether the SIM is supported or not.
- Model: Displays the mobile broadband module name.
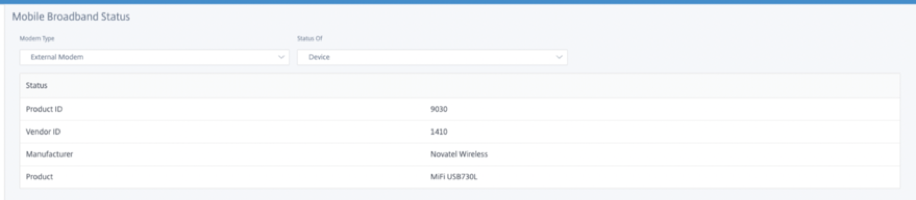
If you select the External modem, it shows the status of the external modem. But if the external modem is not configured, it shows a warning message as Selected Modem is not configured on this device.
Perform the following pre-requisites for the External modem support:
-
Before inserting the External modem on the SD-WAN 110 device, you must connect the external USB stick to a Windows/Linux client and ensure the internet is working properly (with proper APN configuration and enable the Mobile Data Roaming).
-
The supported dongle hardware vendors are Verizon USB730L and AT&T USB800.
The Mobile Broadband Operations page contains the following operations:
SIM preference
You can insert dual SIMs on a Citrix SD-WAN 110-LTE-WiFi appliance. At any given time, only one SIM is active. Select the SIM preference:
- SIM One preferred: If two SIMs are inserted, on boot-up the LTE modem uses SIM One, if available. When the LTE modem is up and running it uses whichever SIM (SIM One or SIM Two) is useable at that moment and will continue to use it until the SIM is active.
- SIM Two preferred: If two SIMs are inserted, on boot-up the LTE modem uses SIM Two, if available. When the LTE modem is up and running it uses whichever SIM (SIM One or SIM Two) is useable at that moment and will continue to use it until the SIM is active.
- SIM One: Only SIM One is used, irrespective of the SIM state on both the SIM slots. SIM One is always active.
- SIM Two: Only SIM Two is used, irrespective of the SIM state on both the SIM slots. SIM Two is always active.

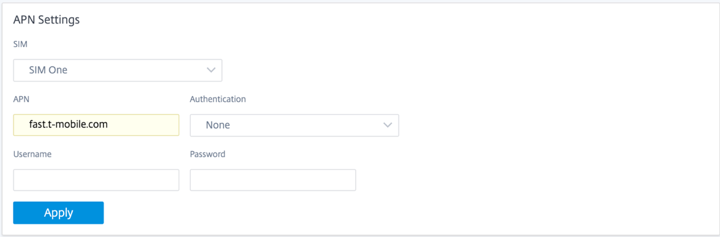
APN settings
-
Insert the SIM card into the SIM card slot of the Citrix SD-WAN 110-LTE-WiFi appliance.
Note
Citrix SD-WAN 110-LTE-WiFi appliance has two standard (2FF) SIM slots. To use Micro (3FF) and Nano (4FF) size SIMs, use a SIM adapter. Snap the smaller SIM into the adapter. You can obtain the adapter from Citrix as a Field Replaceable Unit (FRU) or from the SIM provider.
- Fix the antennas to the Citrix SD-WAN 110-LTE-WiFi appliance. For more information, see Installing the LTE antennas.
- Power on the appliance.
-
To configure the APN settings, navigate to Advanced Settings > Mobile Broadband > Operations > and go to the APN settings section.
Note
Obtain the APN information from the carrier.
-
Select the SIM card, enter the APN, Username, Password, and Authentication provided by the carrier. You can choose from PAP, CHAP, PAPCHAP authentication protocols. If the carrier has not provided any authentication type, set it to None.
Note
All these fields are optional.
-
Click Apply.
Enable/Disable modem
Enable/disable modem depending on your intent to use the LTE functionality. By default, the LTE modem is enabled.

Reboot modem
Reboots the modem. It can take up to 7 minutes for the reboot operation to complete.

Refresh SIM
Use the Refresh SIM option when the SIM card is not detect properly by the 110-LTE-WiFi modem.
Note
The Refresh SIM operation is applicable for the active SIM only.

You can remotely view and manage all the LTE sites in your network using Citrix SD-WAN Center. For more information see, Remote LTE site management.
For more information on LTE configuration, see Configure LTE functionality on 110-LTE-WiFi appliance.
Licensing
The Licensing page displays the license details such as, server location, model, license type and so on.
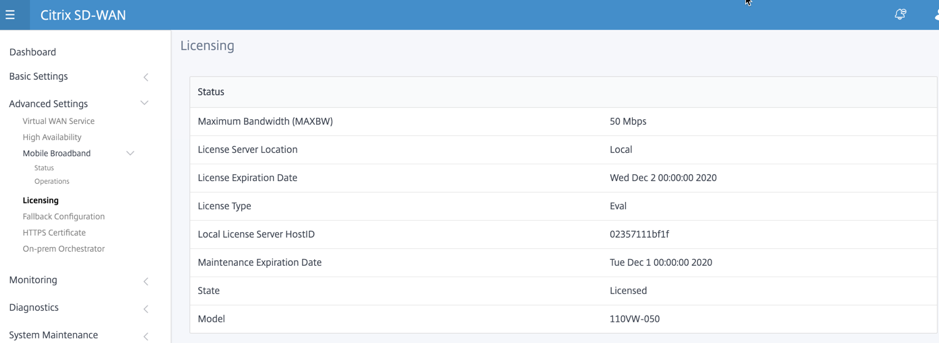
Note
When installing and applying a license from SD-WAN Center, make sure that your specific appliance supports the SD-WAN appliance edition you want to enable, and that you have the correct software version available.
Fallback configuration
The Fallback Configuration page displays the stored fallback configuration data. If the fallback configuration is disabled, you can enable it by switching on the Enable Fallback Configuration switch.
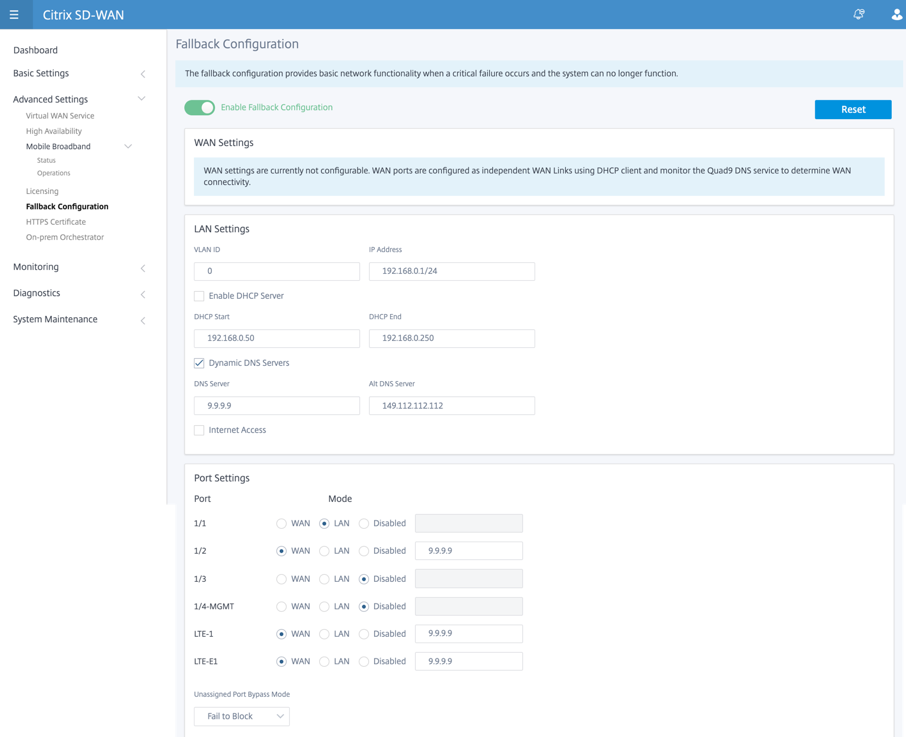
For more information see, Fallback configuration.
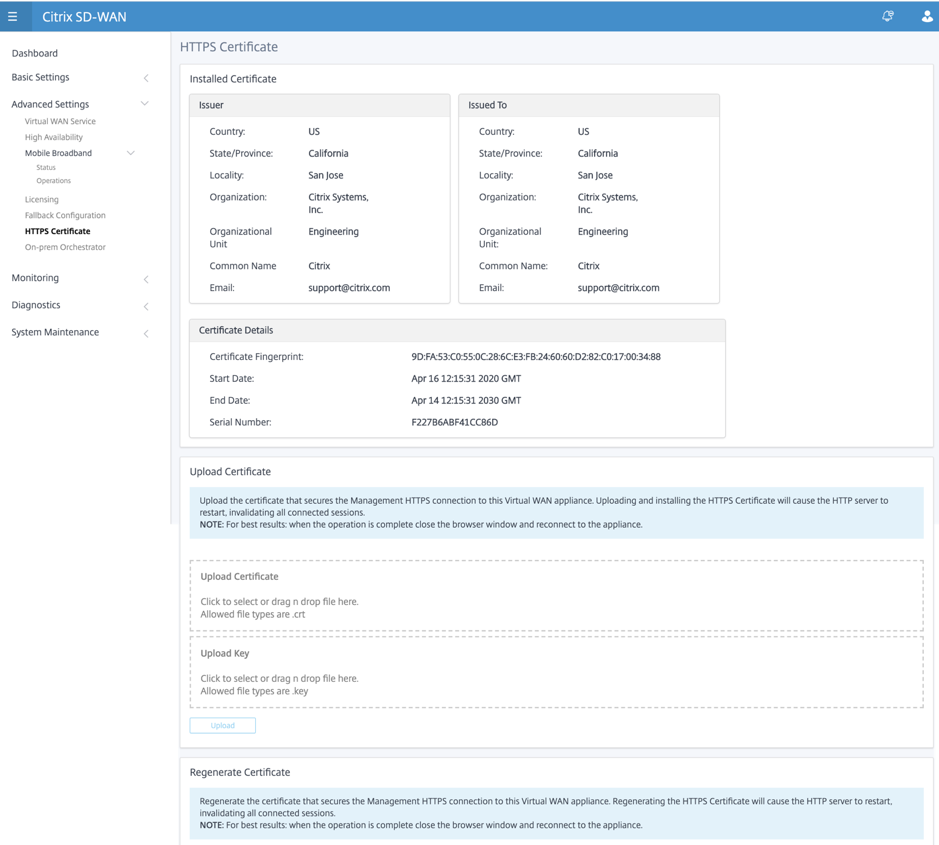
HTTPS certificate
HTTPS certificate is required for establishing a secured connection. The HTTPS Certificate page displays the details of HTTPS certificate that is already installed. For more information, see HTTPS certificates.
On-prem Orchestrator
You can establish a connection between your Citrix SD-WAN appliance and Citrix SD-WAN on-prem Orchestrator by enabling Orchestrator connectivity and specifying the on-prem SD-WAN Orchestrator identity.
Note
This is to provide appliance connectivity to the Citrix SD-WAN on-prem Orchestrator when available.
You can establish a connection between your Citrix SD-WAN appliance and the Citrix On-prem SD-WAN Orchestrator by enabling Orchestrator connectivity and specifying the On-prem SD-WAN Orchestrator identity.
To enable Orchestrator connectivity:
- In the appliance GUI, navigate to Advanced Settings > On-prem Orchestrator.
- Select Enable On-prem SD-WAN Orchestrator Connectivity and enter the On-prem SD-WAN Orchestrator IP address and click Apply.
Note
IP Address text box is enabled only if the Enable On-prem SD-WAN Orchestrator Connectivity check box is selected.
To disable the on-prem SD-WAN Orchestrator connectivity, uncheck Enable ON-prem SD-WAN Orchestrator Connectivity and click Apply.
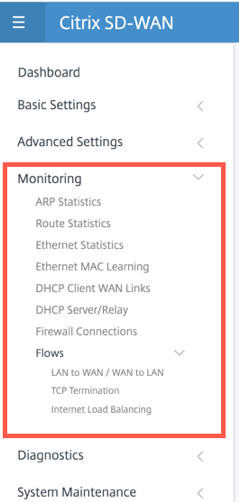
Monitoring
Under Monitoring section, you can view the Address Resolution Protocol (ARP), Route, Ethernet, Ethernet MAC statistics along with DHCP Client WAN Links, DHCP Server/Relay, Firewall Connections, and Flows.
-
ARP, Route, Ethernet, and Ethernet MAC Statistics: You can see the statistics information for ARP, Route, Ethernet, and Ethernet MAC. Using the statistics information, you can verify any traffic or interface errors. For more information, see Viewing Statistical Information.
-
DHCP Client WAN Links: The DHCP Client WAN Links page provides the status of learned IPs. You can request to renew the IP, which refreshes the lease time. You can also choose to Release Renew, which issues a new IP address with a new lease. For more details, see Monitoring DHCP client WAN links.
-
DHCP Server/Relay: You can use the SD-WAN 110 appliances as either DHCP Servers or DHCP Relay agents.
- The DHCP server feature allows devices on the same network as the SD-WAN appliance’s LAN/WAN interface to obtain their IP configuration from the SD-WAN appliance.
- The DHCP relay feature allows your SD-WAN appliances to forward DHCP packets between DHCP client and server.
For more information, see DHCP server and DHCP relay.
-
Firewall Connections: The Firewall Connections page provides the Firewall connection statistics. You can see how the firewall policies are acting on the traffic for each Application. For more information, see Viewing Firewall Statistics.
-
Flows: The Flows section provides basic instructions for viewing Virtual WAN flow information. For more details, see Viewing Flow Information.
Diagnostics
The Diagnostics section provides the options to test and investigate connectivity issues. For more information, see Diagnostics.

Note
Only one diagnostic package can be present at a time.
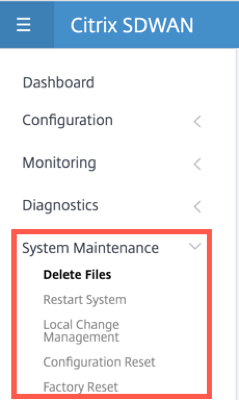
System maintenance
Use the System Maintenance section to perform maintenance activities. The System Maintenance page contains the following options:
- Delete Files: You can delete Log files, Backup files, and Archived Databases. Select the file that you want to delete from the drop-down menu and click the delete button.
- Restart System: You can restart virtual WAN service or reboot the system.
- Local Change Management: The Local Change Management process allows you to upload a new appliance package to this individual appliance.
- Configuration Reset: You can reset the configuration. This option clears out the user data, logs, history, and local configuration data on this appliance.
- Factory Reset: Use Factory Reset option to reset the SD-WAN appliance to the shipped version.
Note
All of these features are already explained in details in the existing SD-WAN documentation.