-
Software installation and upgrade
-
Virtual WAN software upgrade to 9.3.5 with working Virtual WAN deployment
-
Upgrading to 11.1 without working virtual WAN configuration
-
Configuration guide for Citrix Virtual Apps and Desktops™ workloads
-
Citrix SD-WAN Orchestrator™ on-premises configuration on Citrix SD-WAN appliance
-
-
This content has been machine translated dynamically.
Dieser Inhalt ist eine maschinelle Übersetzung, die dynamisch erstellt wurde. (Haftungsausschluss)
Cet article a été traduit automatiquement de manière dynamique. (Clause de non responsabilité)
Este artículo lo ha traducido una máquina de forma dinámica. (Aviso legal)
此内容已经过机器动态翻译。 放弃
このコンテンツは動的に機械翻訳されています。免責事項
이 콘텐츠는 동적으로 기계 번역되었습니다. 책임 부인
Este texto foi traduzido automaticamente. (Aviso legal)
Questo contenuto è stato tradotto dinamicamente con traduzione automatica.(Esclusione di responsabilità))
This article has been machine translated.
Dieser Artikel wurde maschinell übersetzt. (Haftungsausschluss)
Ce article a été traduit automatiquement. (Clause de non responsabilité)
Este artículo ha sido traducido automáticamente. (Aviso legal)
この記事は機械翻訳されています.免責事項
이 기사는 기계 번역되었습니다.책임 부인
Este artigo foi traduzido automaticamente.(Aviso legal)
这篇文章已经过机器翻译.放弃
Questo articolo è stato tradotto automaticamente.(Esclusione di responsabilità))
Translation failed!
Upgrading to 11.1 without working virtual WAN deployment
Note: To configure the latest 11.1 features, remiage the MCN appliance to 11.1 software. For more information, see Reimage Citrix SD-WAN appliance software
-
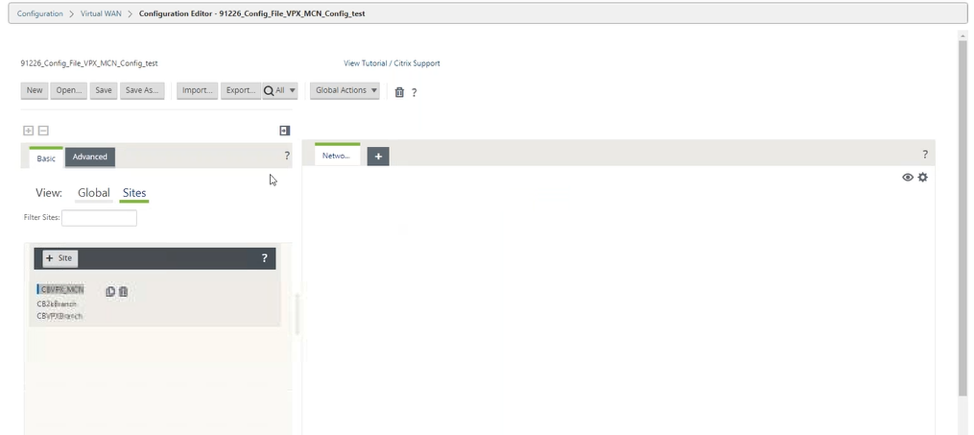
Prepare the configuration using the Configuration Editor and save the configuration with a valid name. For more information, see Configuration topic.
-
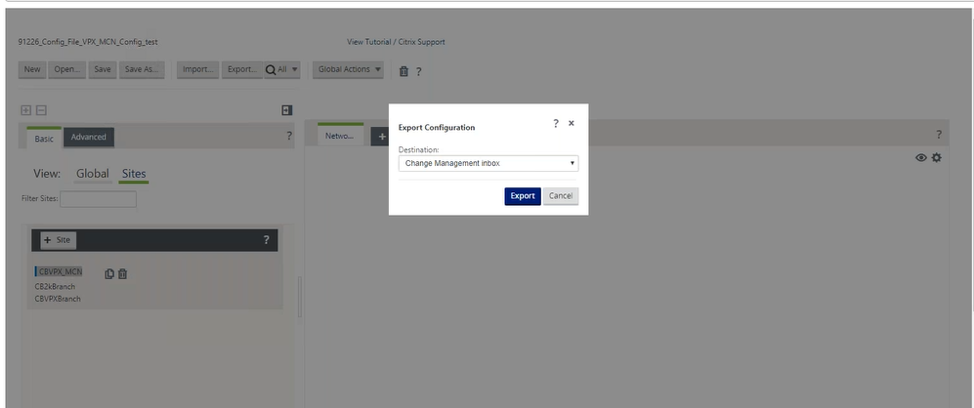
Export the saved configuration to Change Management. Click Export and select Change Management Inbox as the destination. Click Export.
-
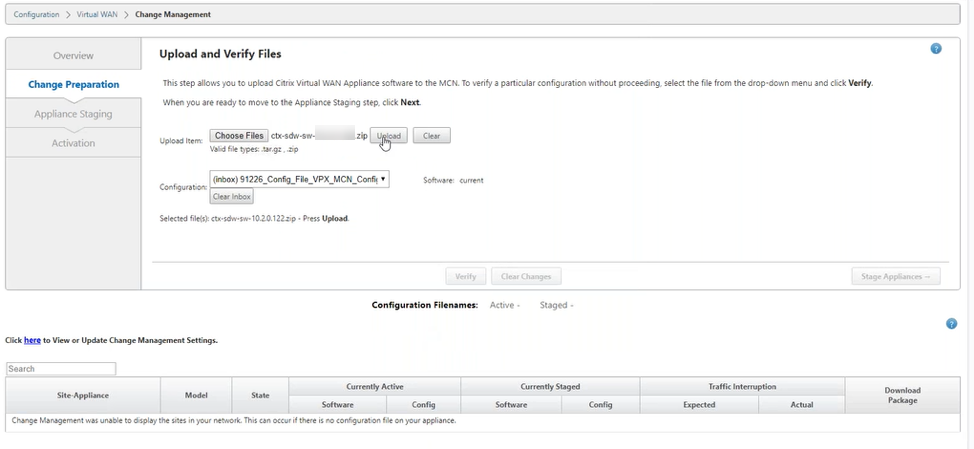
In the Change Management > Change Preparation page, click Choose Files and select the ctx-sdw-sw-11.1.0.x.zip software package file. Click Upload.
Note:
You can download the Citrix SD-WAN release 11.1 software package from the Downloads page.
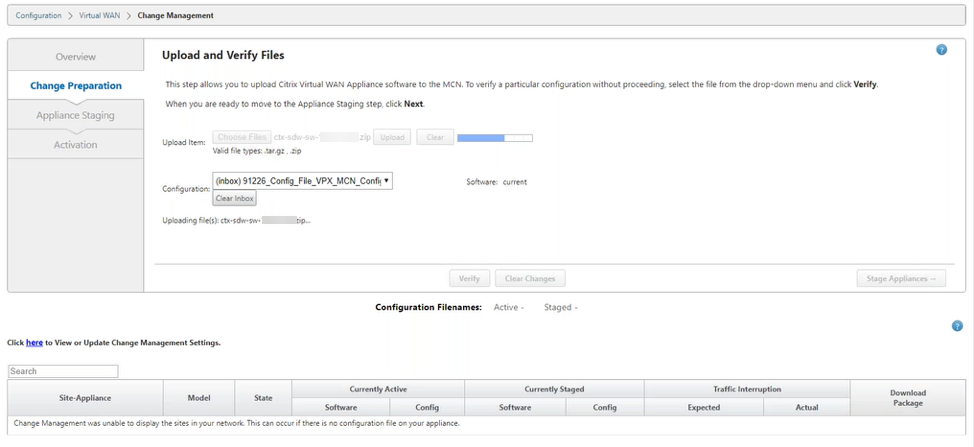
A progress bar appears to show the current upload progress.
-
After upload process is successful, relevant models are displayed that would be upgraded based on the configuration file that has information about each branch platform model.
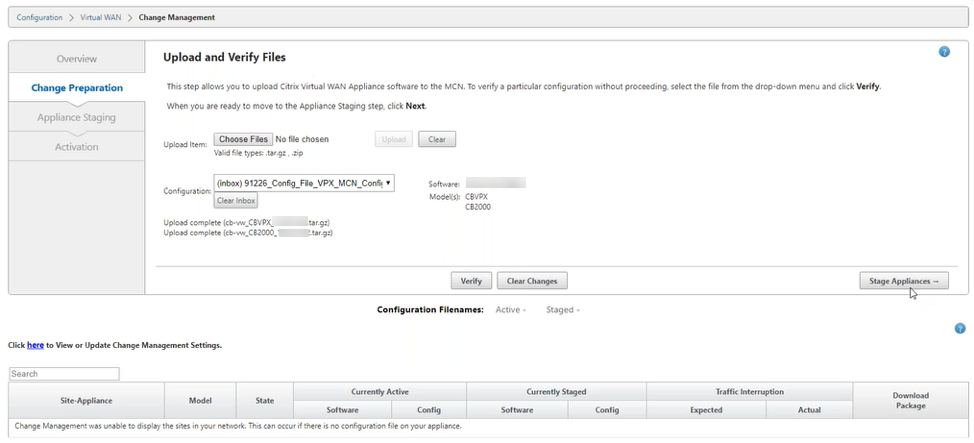
-
Click Stage Appliance to proceed with validation of configuration file. The License agreement page for user acceptance appears. Click I accept the End User License Agreement and click OK.
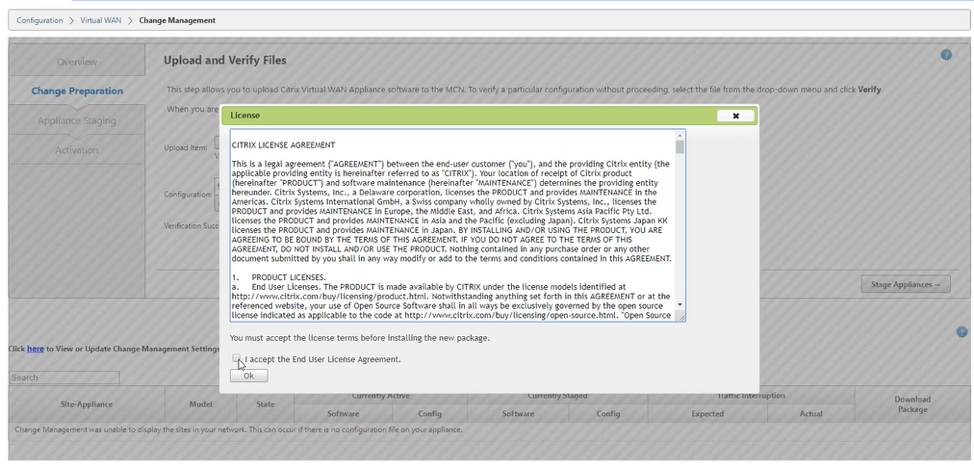
-
The Appliance Staging process is initiated the changes will be distributed to all appliances on the network. The transfer progress bar appears and the site details table is updated.
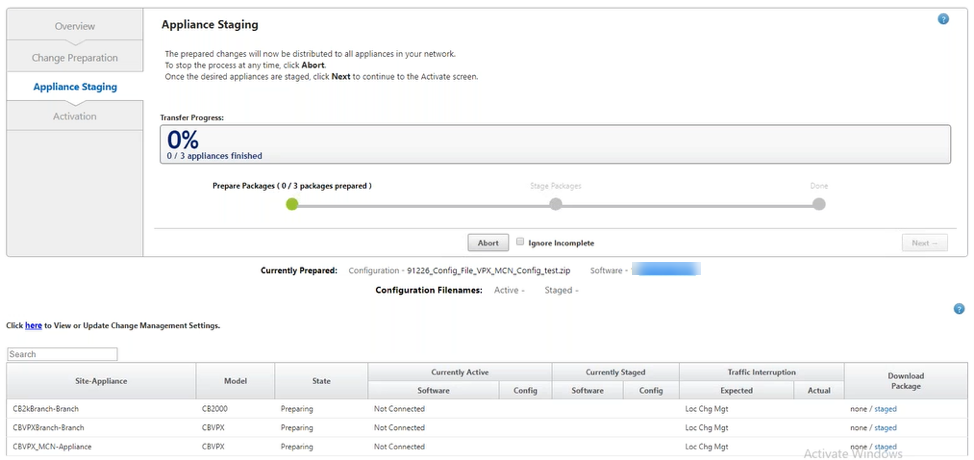
-
Once the transfer progress is 100% complete, click Next to proceed to activation.
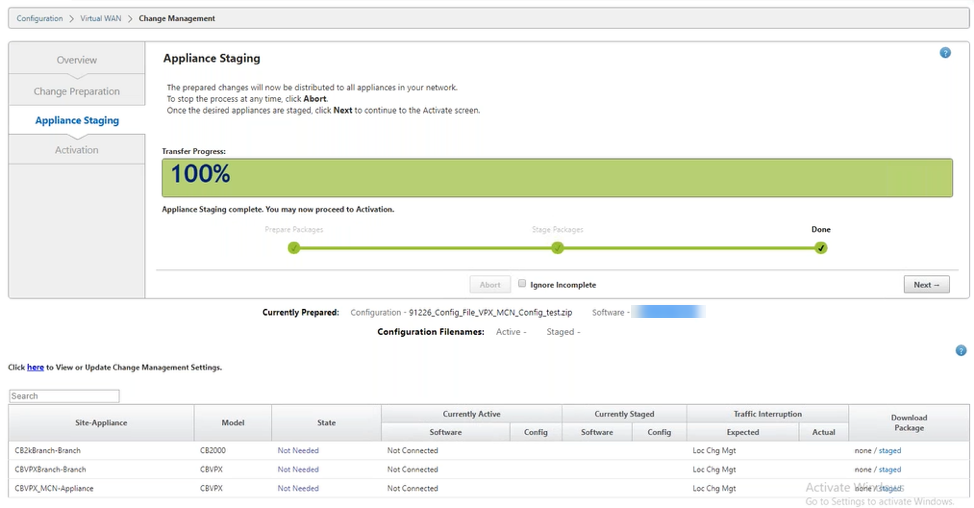
-
Click Activate Staged. A user acceptance pop-up message appears as this is the first time the appliance is being staged.
You are redirected to the Local Change Management page for activating the local appliance. Click OK to proceed.
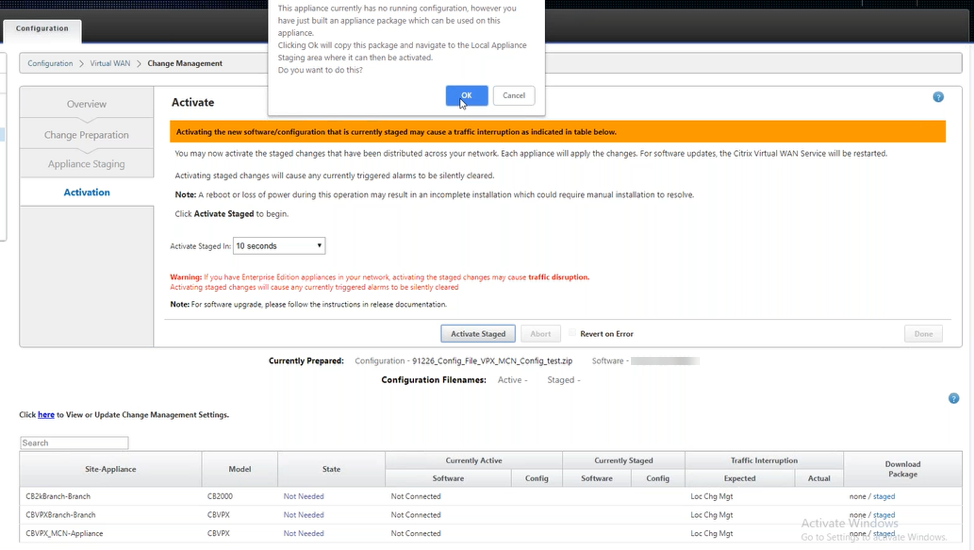
-
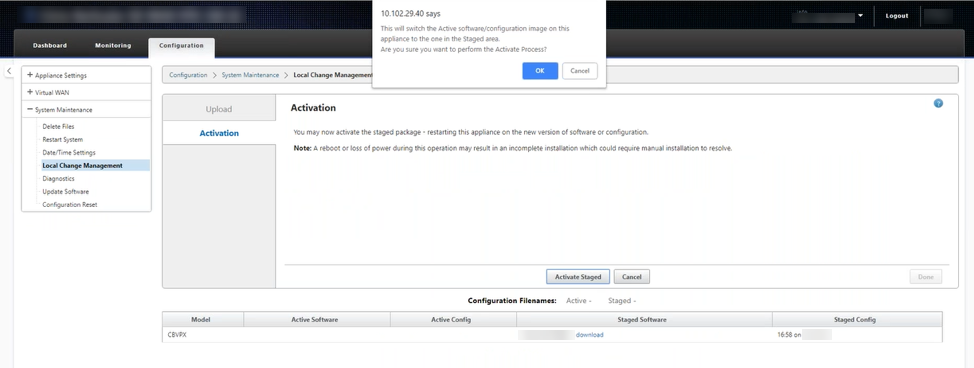
Click Activate Staged in Local Change Management. An activation confirmation message appears. Click OK.
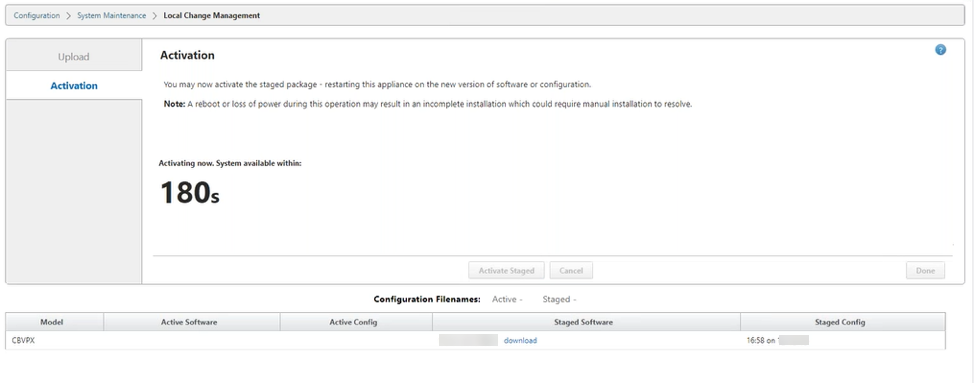
Activation starts with a countdown timer of 180 seconds.
-
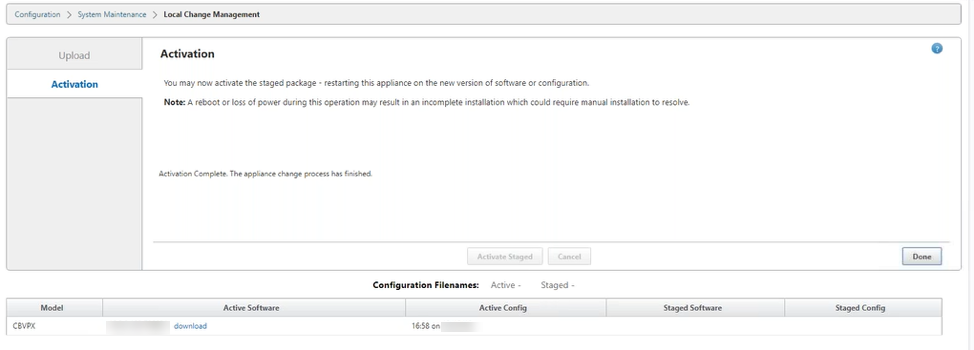
After the countdown, a message indicates that activation is completed. Click Done, the appliance restarts.
-
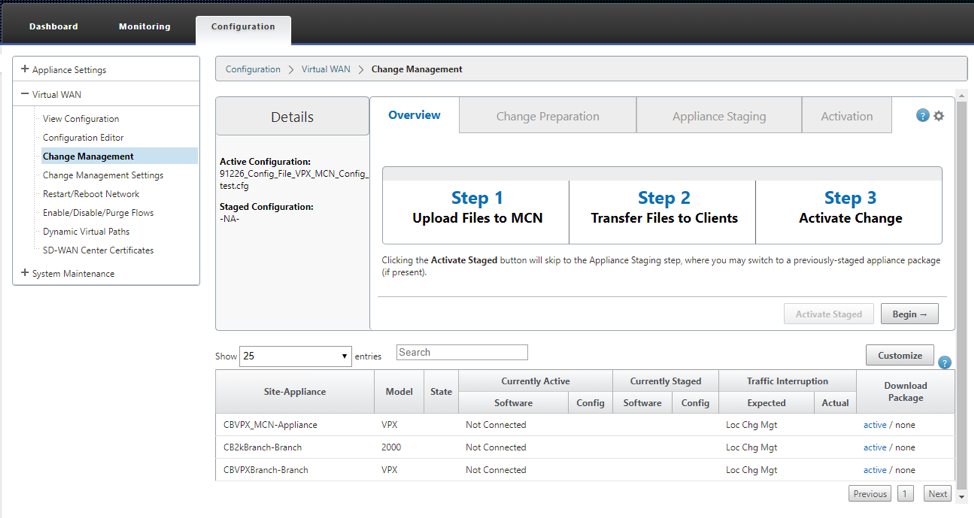
After the appliance restarts, navigate to Change Management page to download the local change management packages for the respective branches that you need to bootstrap to the network with Virtual WAN software upgrade only.
-
Enable SD-WAN service on the appliance. Navigate to Virtual WAN > Enable/Disable/Purge Flows and click Enable.

To further configure and add new sites to the network, folow the procedure in Configure branch node topic.
Share
Share
In this article
This Preview product documentation is Cloud Software Group Confidential.
You agree to hold this documentation confidential pursuant to the terms of your Cloud Software Group Beta/Tech Preview Agreement.
The development, release and timing of any features or functionality described in the Preview documentation remains at our sole discretion and are subject to change without notice or consultation.
The documentation is for informational purposes only and is not a commitment, promise or legal obligation to deliver any material, code or functionality and should not be relied upon in making Cloud Software Group product purchase decisions.
If you do not agree, select I DO NOT AGREE to exit.