Create and edit a config pack
In NetScaler Console, you can create a config pack from a StyleBook. And, the config pack is tied to the StyleBook from which it is created. The updates to the config pack are made through the StyleBook to which it is tied.
Create a config pack
Perform the following to create a config pack from a StyleBook:
-
Navigate to Applications > StyleBooks > Configurations.
-
Click Add.
-
In Choose StyleBooks, select the required StyleBooks from which you want to create a config pack.
This page categorizes StyleBooks into default and custom StyleBooks. Select the respective tabs to find the required StyleBooks.
-
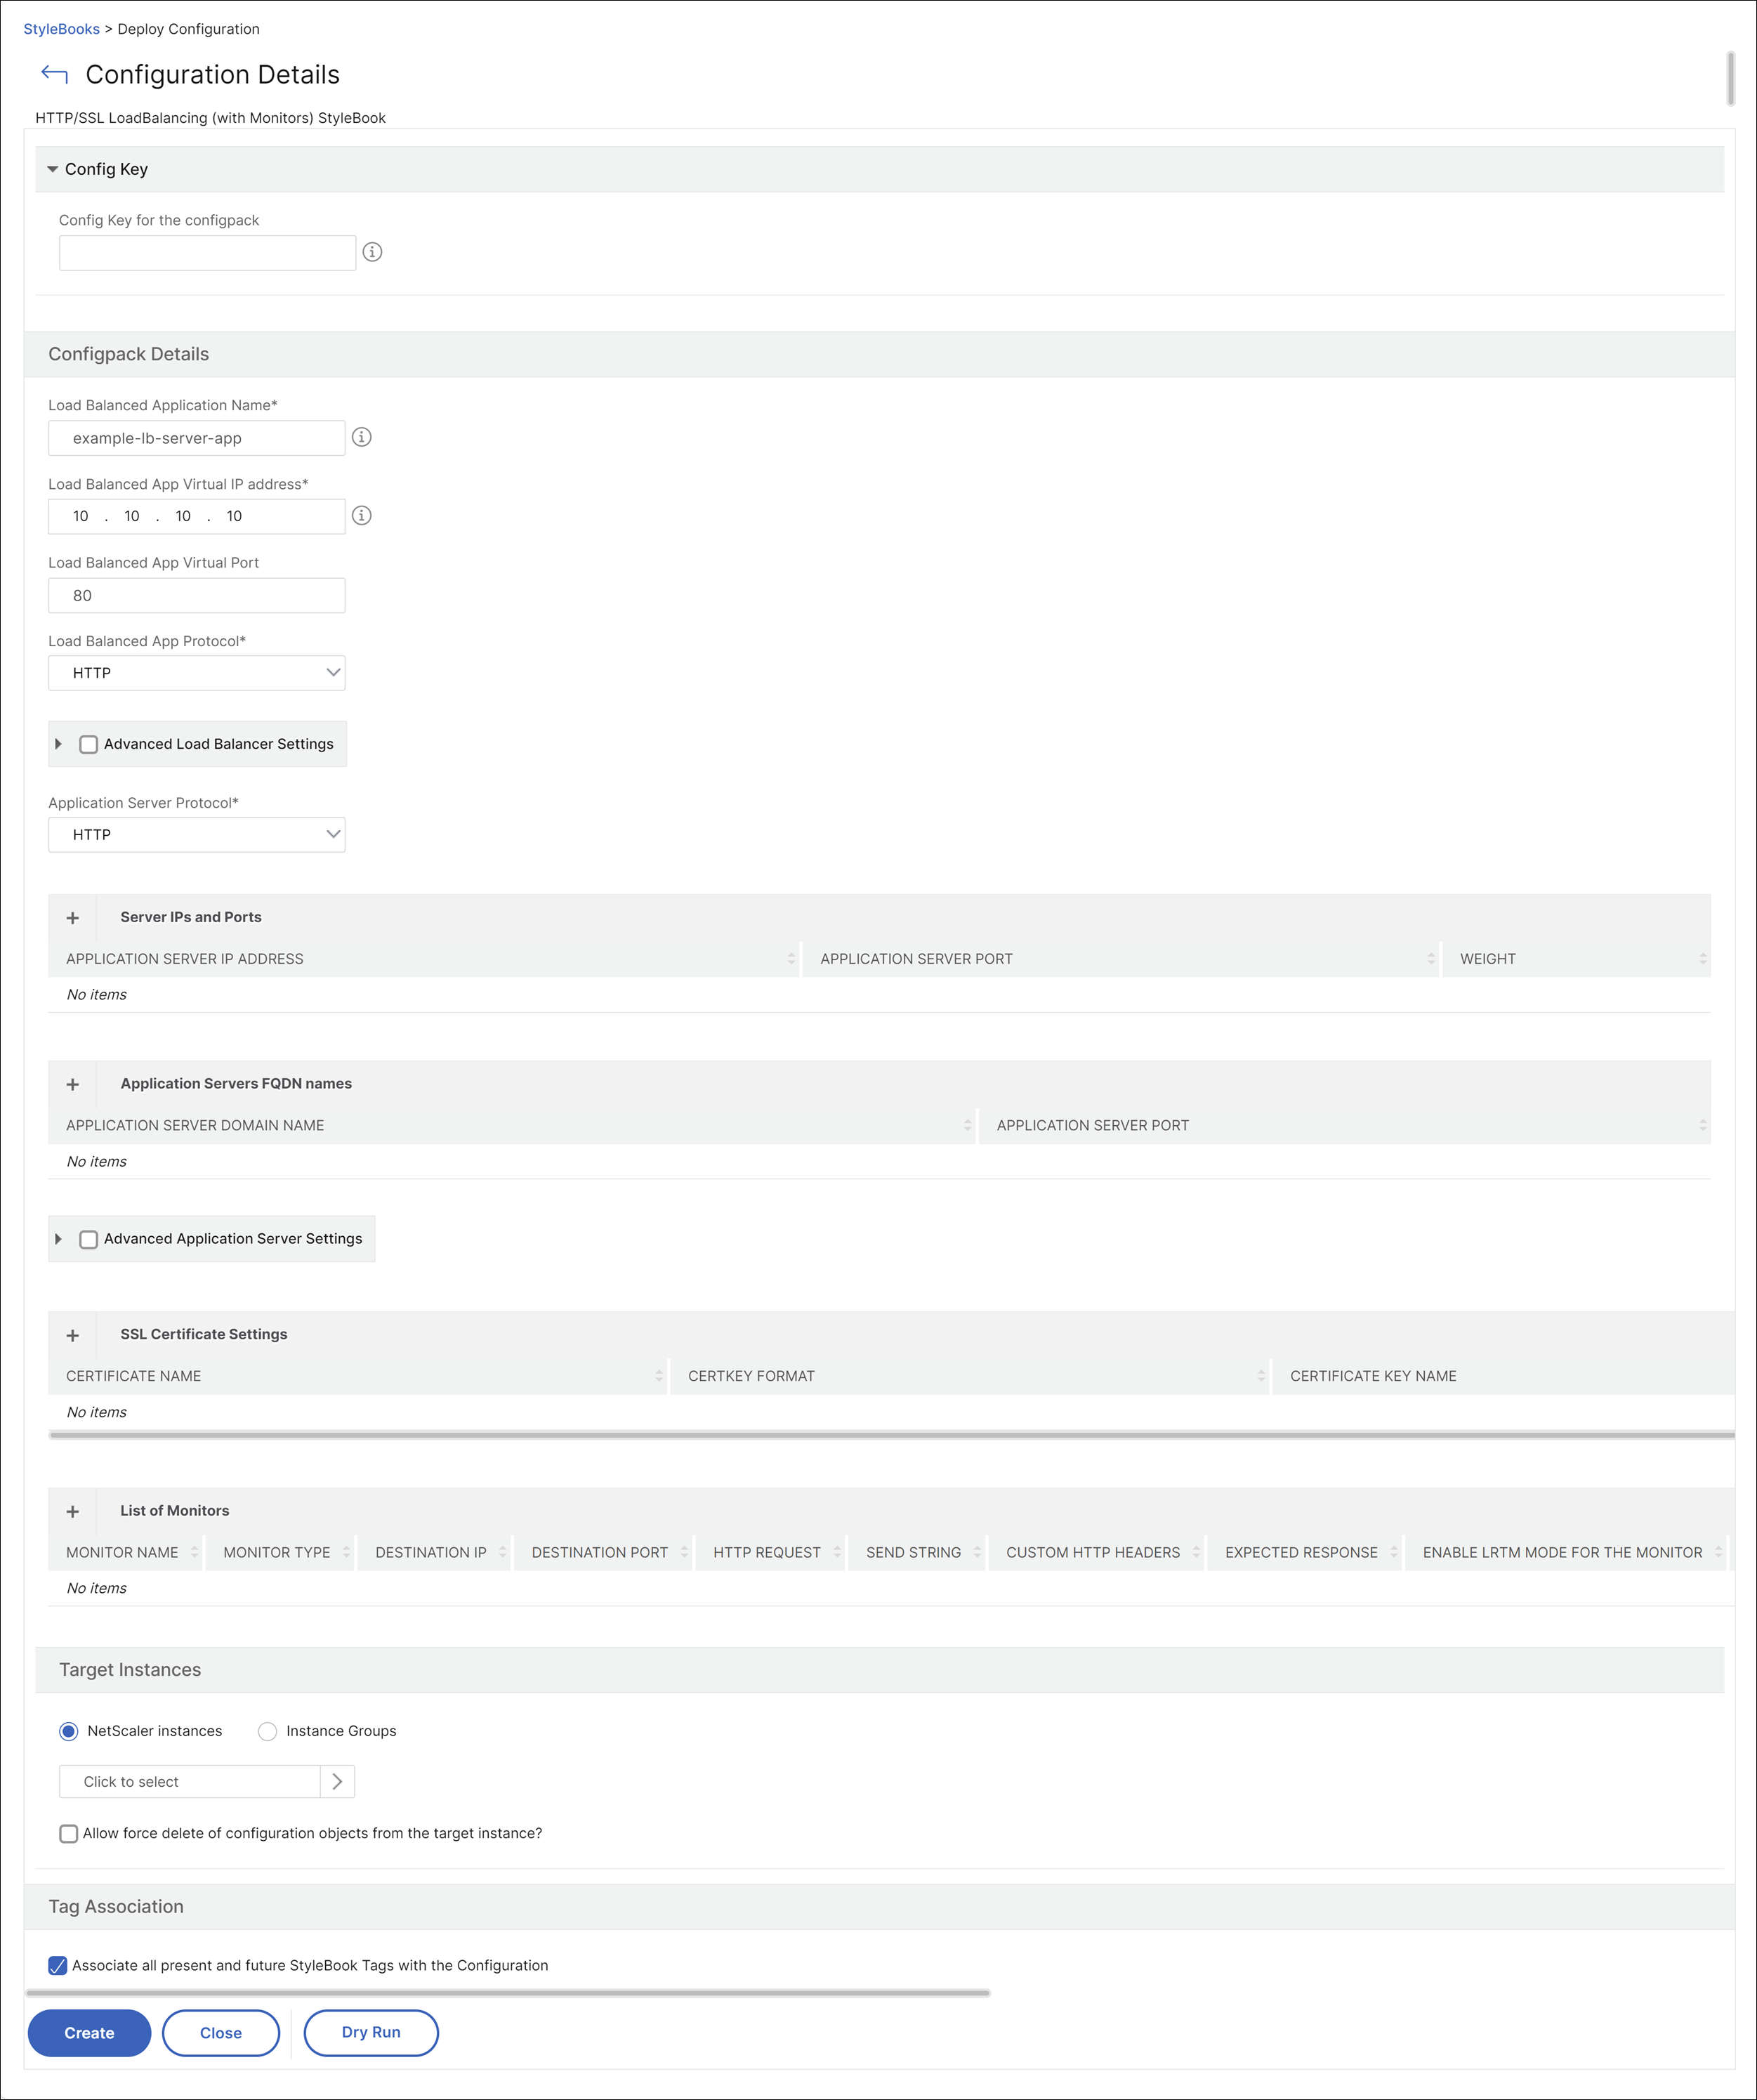
Specify the required details such as application name, IP address, port, or protocol type.
The GUI fields differ from one StyleBook to another StyleBook.
-
In Target Instances, select instances or instance groups where you want to run the configuration.
Note:
You can deploy the configuration on more than one NetScaler, by specifying as many target instances as needed.
-
Click Dry Run.
The Objects page displays the objects that get created, modified, or removed from the NetScaler instances.
-
Click Create
The config pack appears in the StyleBook > Configurations page.
If you want to edit the existing config packs, select the config pack and click Edit.
Reuse configurations created outside of StyleBooks and share configurations between ConfigPacks
Sometimes, you might have created NetScaler® configurations outside of Stylebooks, whether due to particular operational needs or legacy setups. You can now integrate and manage these previously existing configurations as part of Stylebook config packs enabling more flexible and centralized management.
For example, before this feature, if NetScaler is already configured with an SSL Profile, and if StyleBook’s config pack operation attempts to create an SSL Profile with the same name, the config pack operation would have failed with the “Resource Already Exists” error. Now with this feature enabled, the configpack operation succeeds and the existing SSL Profile with the same name can be reused in the new config pack.
Similarly, you might also face scenarios where resources like network settings, security policies, or part of application configurations are required across multiple applications or configurations. This feature enables you to share the configurations across multiple config packs.
To enable this feature, follow these steps:
-
Navigate to Applications > Configuration > Stylebooks.
-
On the Stylebooks page, select the Stylebook you will use for creating a new config pack or the one associated with the config pack you are editing.
-
In Select Action, click Configure Settings.
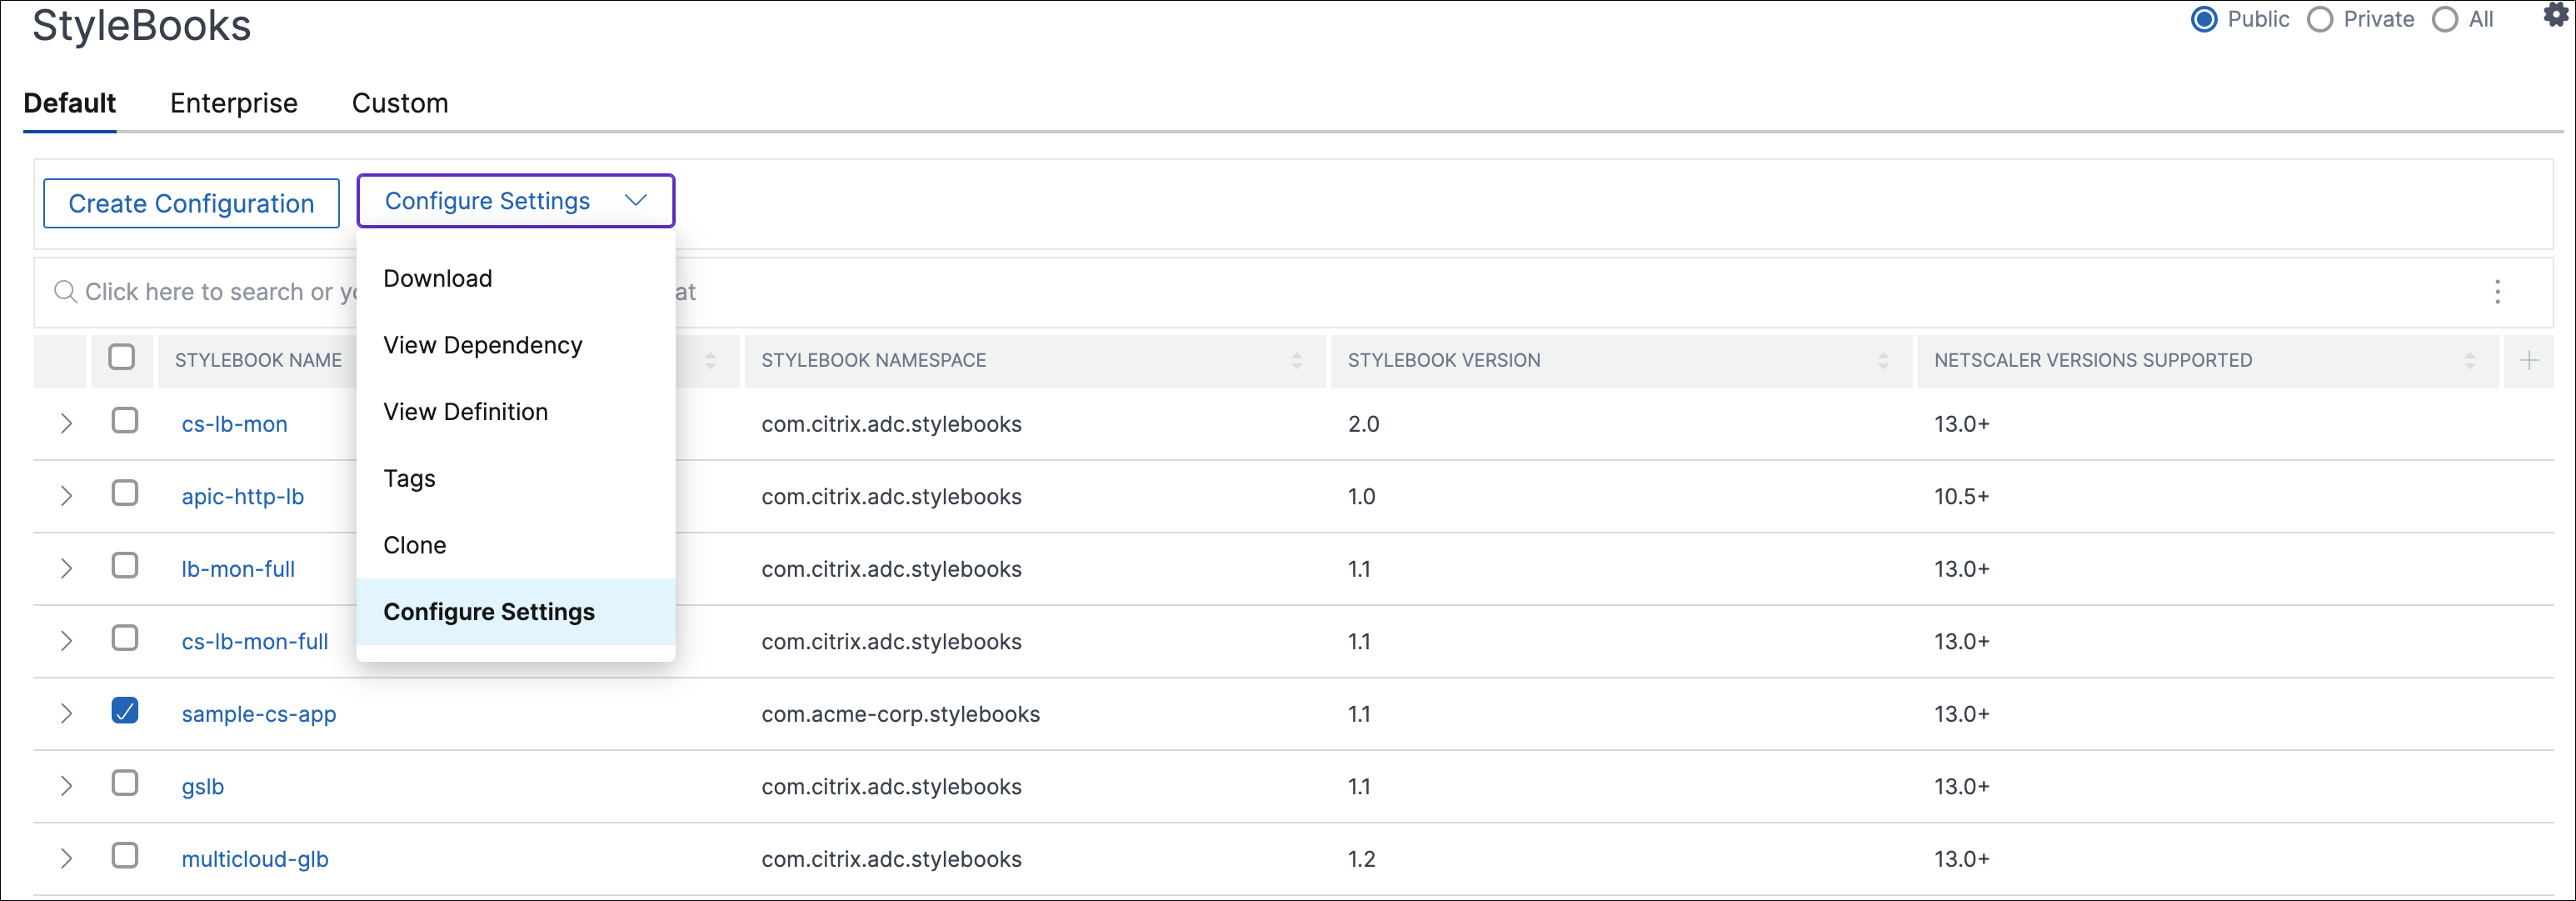
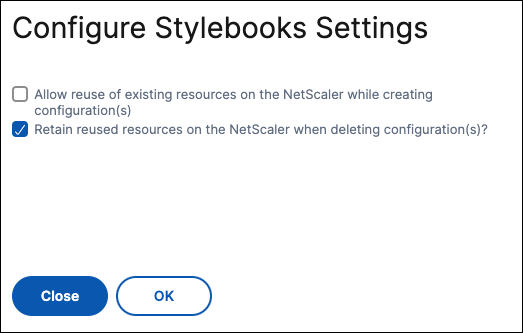
- Adjust the settings by choosing one or both of the following options:
- To enable reuse of existing resources on the NetScaler when creating configurations, select the option Allow reuse of existing resources on the NetScaler while creating configuration(s).
- To retain reused resources on the NetScaler when deleting configurations, select the option Retain reused resources on the NetScaler when deleting configuration(s)?. This option retains the resources originally created outside of Stylebooks on the NetScaler, even if the last config pack referencing them is deleted, ensuring their continued availability.
- Click OK.
Change the StyleBook of a config pack
Sometimes, you need to update the StyleBook to add functionality or fix an issue. If you already have created config packs using the old StyleBook, you might want to update them to use the new updated StyleBook. To use a new StyleBook, change the existing StyleBook of the config pack.
Consider an example StyleBook example-lb that deploys a basic load balancer configuration on a NetScaler instance. And, you create a config pack CP1 from this StyleBook.
When you want to configure monitors with the basic load balancer configuration, you need a new StyleBook. Therefore, create example-lb-mon StyleBook that includes the ability to configure monitors along with the basic load balancer configuration.
After you create a StyleBook, update the existing config pack CP1 to add some monitors. To do so, perform the following:
-
Navigate to Applications > StyleBooks > Configurations.
-
Select the config pack for which you want to change the StyleBook.
In this example, select CP1 from the list.
-
Click Change StyleBook.
-
Select the required StyleBook from the list. Then, click Save Selection.
-
Click Change.
In this example, select example-lb-mon from the list.
When you change the StyleBook of a config pack, the parameters in the new StyleBook might have a different structure than the existing StyleBook. If the parameter structure is similar to the previous StyleBook, the parameters’ values are automatically retained in their respective fields. Otherwise, only parameters that have the same structure between the two StyleBooks are transferred. For example, the same parameter name, type, parameter parent, and more.
If new required parameters are added in the new StyleBook, after changing the StyleBook, you have to manually specify the values for such parameters.
In this example, the parameters that appear on the configuration page for the example-lb StyleBook are as follows:
The parameters that appear on the configuration page for the new example-lb-mon StyleBook are as follows:
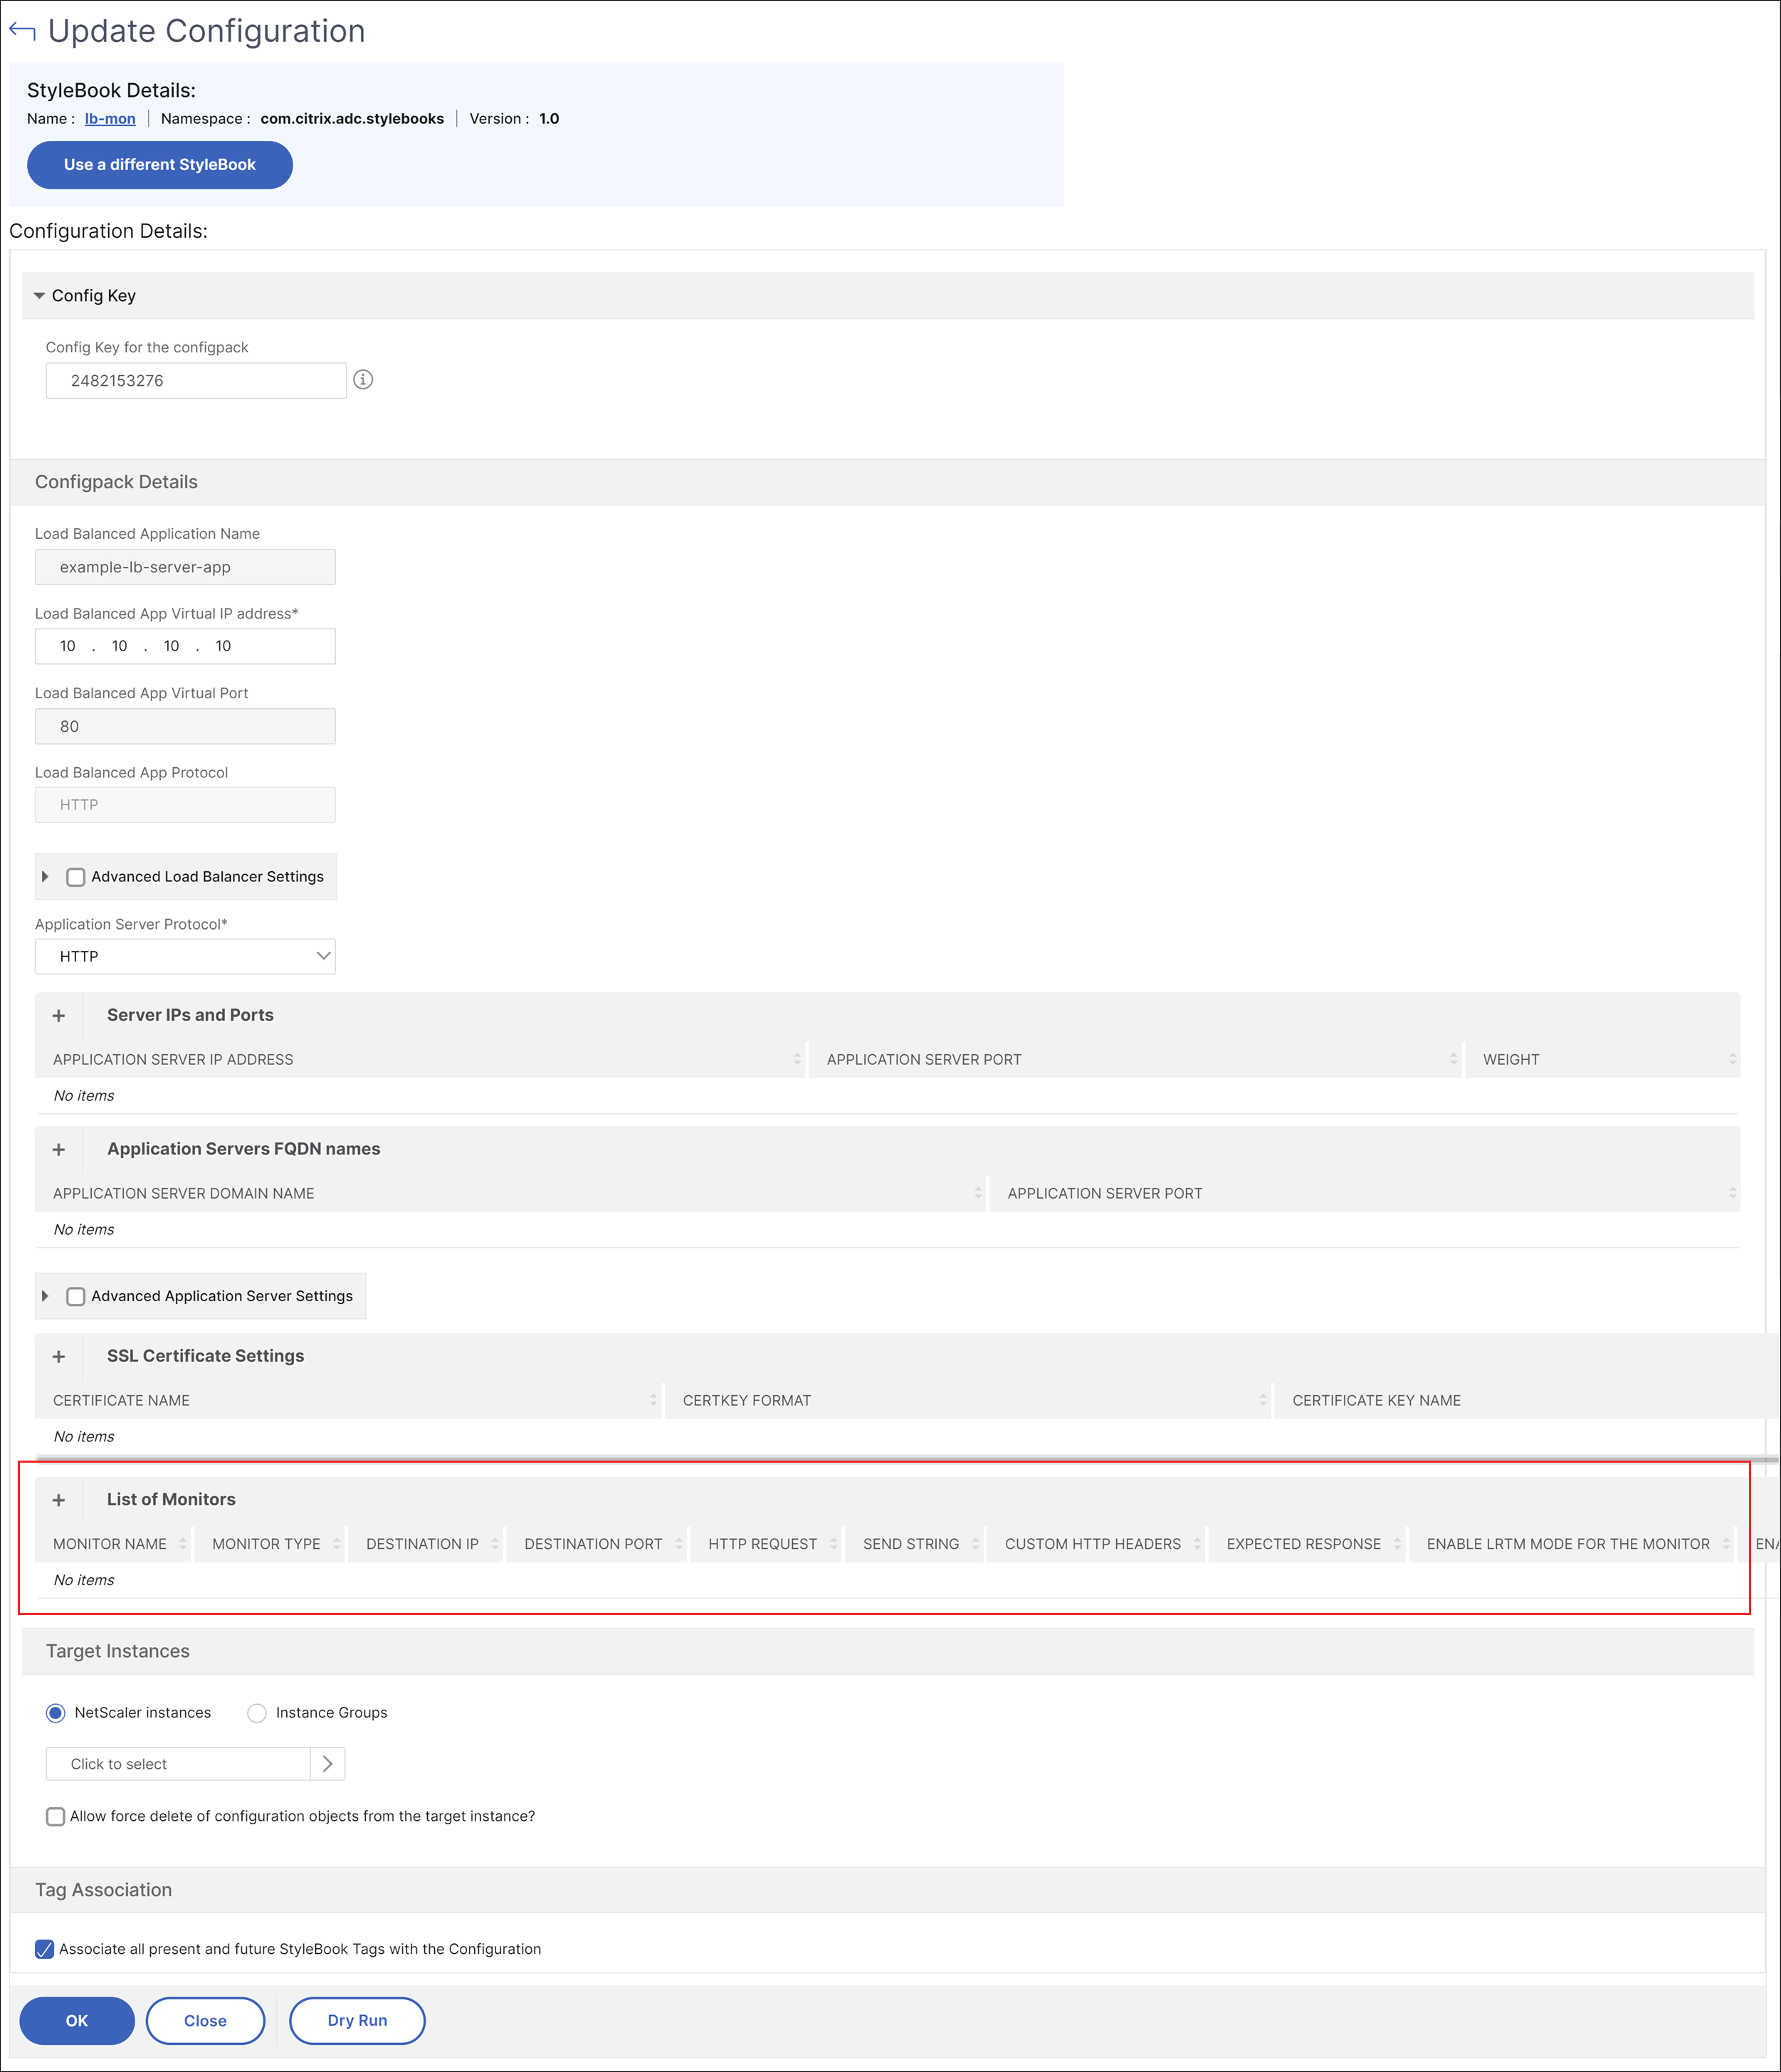
In this case, the StyleBooks retain the older values for the basic load balancer configuration because the new StyleBook hasn’t changed existing parameters. And, it adds only the new parameters. For monitor parameters, manually specify the required values.
-
In Target Instances, review the selected instances and update the list if necessary.
-
Click Dry Run.
The Objects page displays the objects that get created, modified, or removed from the NetScaler instances.
-
Click OK.
In the StyleBook > Configurations page, the StyleBook Name column displays the new StyleBook name for the selected config pack. In this case, it displays example-lb-mon.
Change the StyleBook that has multiple config packs
When you change an existing StyleBook that has multiple config packs, do the following:
-
Import a new StyleBook to NetScaler Console.
Typically, the new StyleBook has the same name and namespace with a higher version than the existing StyleBook. However, you can skip this step if the name, namespace, or version are different.
-
Change the StyleBook for the config packs that are associated with the existing StyleBook.
You can select Change StyleBook only when the selected config packs are associated with the same StyleBook.
For the selected config packs, the NetScaler Console successfully changes the StyleBook when the following conditions are met:
-
All the configuration parameters of the existing StyleBook must present in the selected StyleBook.
-
The new parameters from the selected StyleBook are optional.
To see the progress of the selected config packs, select Configurations in Progress/Failed in the Configurations page.
-
-
Remove the old StyleBook from NetScaler Console once all config packs are tied to the new StyleBook.
Export or import config packs
You can export or import a config pack like StyleBooks. With this feature, you can readily share the StyleBook configuration to another NetScaler Console. When you export a config pack, a tgz or zip bundle downloads to your local computer. This bundle includes a JSON file with all the parameters defined in a config pack.
Export configuration
Do the following to export a config pack:
-
Navigate to Applications > StyleBooks > Configurations.
-
Select a config pack that you want to export.
-
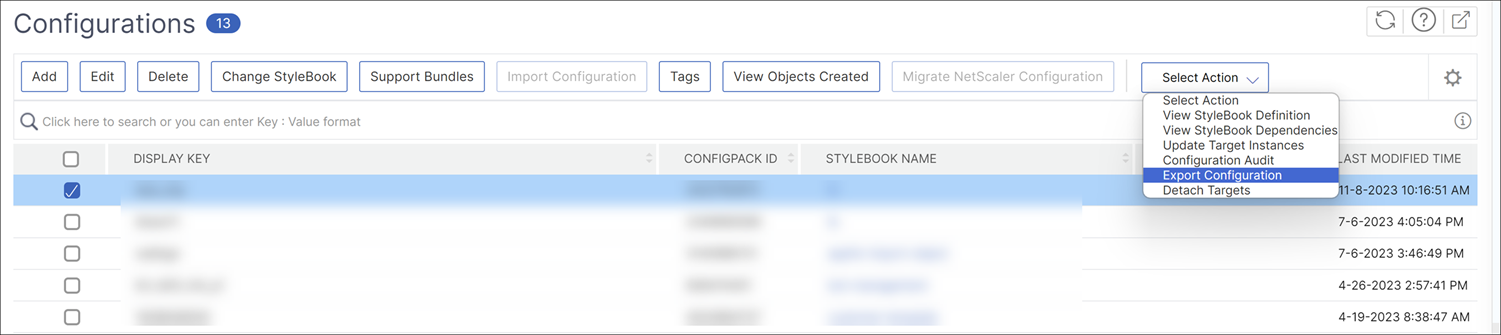
In Select Action, select Export Configuration.
-
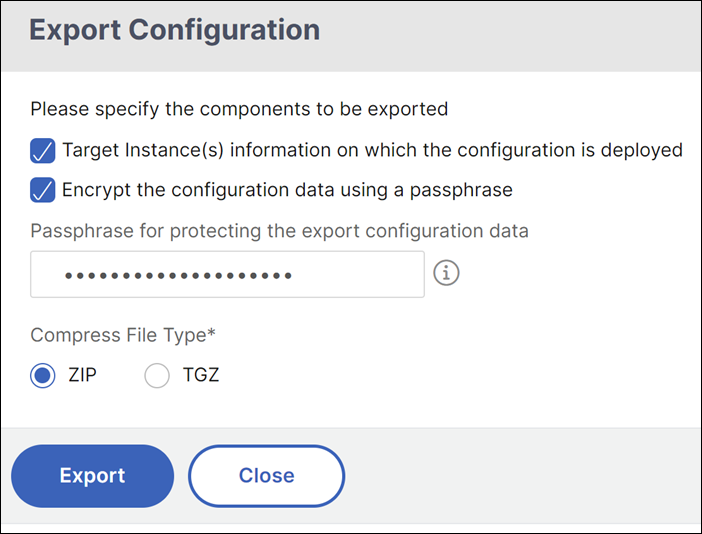
In the Export Configuration pane, specify the following:
-
Target instance(s) information on which the configuration is deployed: Select this option to include target instances’ information with the export bundle.
-
StyleBook associated with Configuration: Select this option to include the StyleBook in the export bundle.
-
Passphrase for protecting the export configuration data: Specify a passphrase to encrypt the export bundle. This passphrase secures the sensitive data of a config pack.
-
Compress file type: Select either ZIP or TGZ file type.
-
-
Click Export.
Save the export bundle on your local computer.
Import configuration
You can import a config pack from your local computer to a different NetScaler Console. To import a config pack, do the following:
-
Navigate to Applications > StyleBooks > Configurations.
-
Select Import Configuration.
-
Choose the import file bundle from your computer.
-
Use the passphrase that you have specified during export.
-
Optional, in Advanced Options, select Only allow creation of new configuration if all config objects already exist on NetScaler.
This option does not alter the objects that are already created on the NetScaler instance.
Consider that you added the same NetScaler instance in two NetScaler Console servers. And, you want to migrate a config pack from one NetScaler Console server to another server. Use this option to import a config pack without altering its configuration objects on a NetScaler instance.
Important
To use this option, ensure that the specified configuration bundle has the target instances information. See, Export configuration.
This option only migrates the configuration if all the objects are present on the target instance.
-
Click Import.

When you import a config pack, the NetScaler Console verifies the following:
-
Associated StyleBook: If the associated StyleBook is not in the NetScaler Console, it imports the StyleBook along with the config pack.
-
Target instances: Check for target instances and deploys the configuration on the specified target instances. If the mentioned NetScaler instances are absent in the NetScaler Console, the config pack is imported without target instances.
-
Source NetScaler Console: If you are importing a config pack on the same NetScaler Console server, the selected bundle updates the existing config pack.
Save a config pack as a draft
The Save as Draft option in config packs allows you to save your configuration changes as drafts. This feature saves the changes without immediately deploying them to a NetScaler instance.
To save a config pack as a draft:
- Navigate to Applications > Configuration > Config Packs.
- On the Configurations page, click Add.
- Select your desired stylebook and click Select.
- On the Create Configuration page, click Save as Draft.
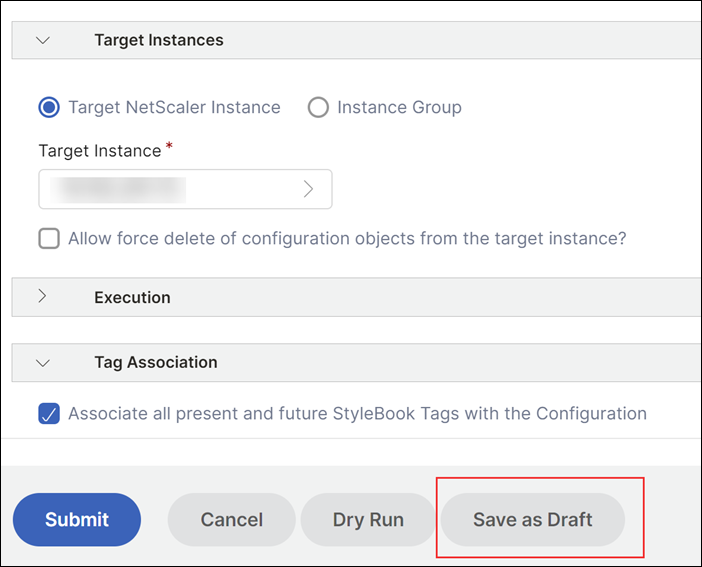
Once the config pack is saved as a draft, your configuration changes are not deployed directly to NetScaler instance. Instead, the config packs are stored as drafts in the Draft Configurations tab under Pending Configurations.
In the Draft Configurations tab, select the config pack to perform the following operations:
- Edit the configuration of a config pack.
- Deploy the configuration to a NetScaler instance.
- Delete the draft to remove the configuration without deploying it.

You can also schedule when to deploy your saved drafts.
For more information, see Schedule a config pack.
Create a schedule for a config pack
When you create a config pack, the config pack is automatically deployed to a NetScaler instance by default. With this feature, you can schedule when to deploy the config pack.
To create a schedule for a config pack:
- Navigate to Applications > Configuration > Config Packs.
- On the Configurations page, click Add.
- Select the StyleBook and click Select.
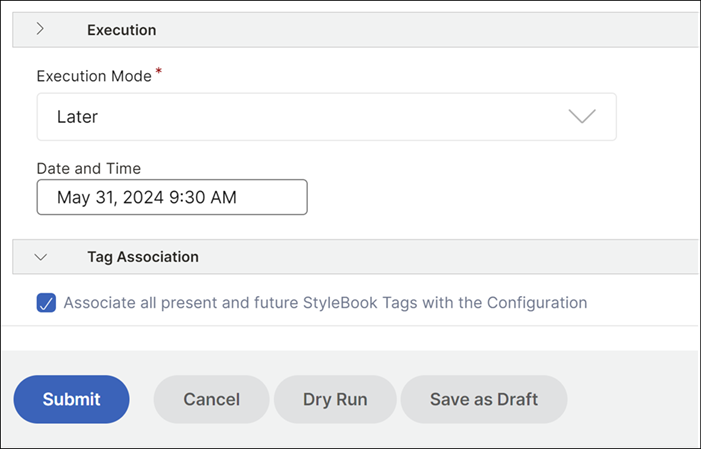
- On the Create Configuration page, under Execution, select Later from the Execution Mode list.
- Select the desired time and date for scheduling and click Submit.
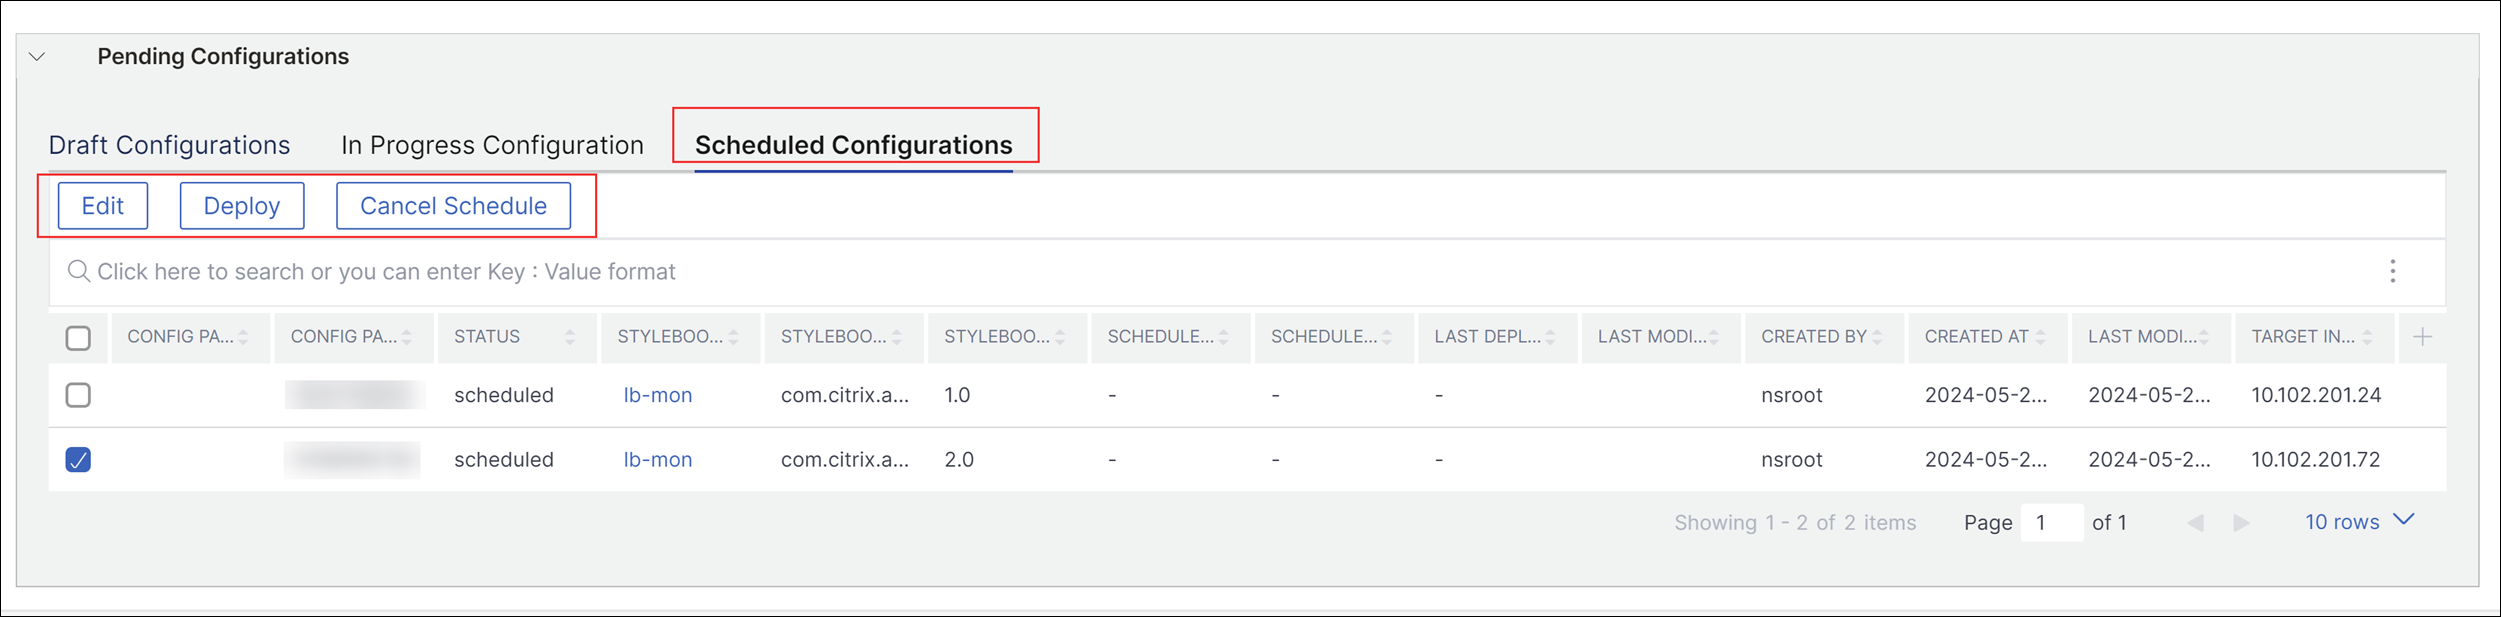
All the scheduled configurations are stored in Scheduled configurations tab under Pending Configurations. You can select the created schedule to edit, deploy or cancel the schedule.
For a deployed config pack
You can also create a schedule to edit and delete a deployed config pack.
Schedule an edit operation for a config pack
To create a schedule to edit the deployed config pack:
- Navigate to Applications > Configuration > Config Packs.
- On the Configurations page, select a StyleBook and click Edit.
- On the Edit Configuration page, edit the config pack.
- In the Execution Mode list, select Later.
- Select the desired time and date for scheduling and click Submit.
Schedule a delete operation for a config pack
To create a schedule to delete the deployed config pack:
- Navigate to Applications > Configuration > Config Packs.
- On the Configurations Page, select a StyleBook and click Delete.
- In the Execution Mode list, select Later.
- Select the desired time and date for scheduling and click Submit.
Detach a target instance from a config pack
To detach a target instance from a config pack, do the following:
-
Navigate to Applications > Configuration > Config Packs.
-
Select the config pack with a target instance that you want to remove.
-
In Select Action, select Detach Targets.
-
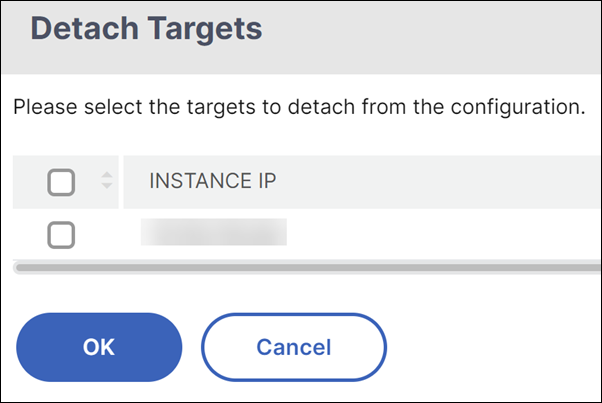
In the Detach Targets pane, select the target instance you want to remove from the config pack.
-
Click OK.
A message displays, confirming the creation of a duplicate config pack with the target instance now removed.
Build your StyleBooks
The full content of example-lb StyleBook is provided for your reference as follows:
name: example-lb
namespace: examples.stylebooks
version: "1.0"
display-name: Basic Load Balancer App
description: This is an example StyleBook that creates a load balancer application
schema-version: "1.0"
import-stylebooks:
  -
    namespace: com.citrix.adc.stylebooks
    prefix: stlb
    version: "1.0"
parameters-default-sources:
  - stlb::lb
components:
  -
    name: lb-comp
    type: stlb::lb
    description: Uses the default lb StyleBook to build the typical lb configuration objects
    properties-default-sources:
      - $parameters
<!--NeedCopy-->
The full content of example-lb-mon StyleBook is provided for your reference as follows:
name: example-lb-mon
namespace: examples.stylebooks
version: "1.0"
description: This is an example StyleBook that creates a load balancer application with monitors
display-name: Basic Load Balancer App with Monitors
schema-version: "1.0"
import-stylebooks:
  -
    namespace: netscaler.nitro.config
    prefix: ns
    version: "10.5"
  -
    namespace: com.citrix.adc.stylebooks
    prefix: stlb
    version: "1.0"
  -
    namespace: com.citrix.adc.commontypes
    prefix: cmtypes
    version: "1.0"
parameters-default-sources:
  - stlb::lb
parameters:
  -
    name: monitors
    label: "List of Monitors"
    description: "List of Monitors to monitor Application Servers"
    type: cmtypes::monitor[]
substitutions:
  mon-name(appname, monname): $appname + "-mon-" + $monname
components:
  -
    name: lb-comp
    type: stlb::lb
    description: Uses the default lb StyleBook to build the typical lb configuration objects
    properties-default-sources:
      - $parameters
  -
    name: monitors-comp
    type: cmtypes::monitor
    condition: $parameters.monitors
    repeat: $parameters.monitors
    repeat-item: mon
    repeat-index: ndx
    description: Builds a list of NetScaler monitor objects and binds them to the servicegroup of this LB config
    properties-default-sources:
      - $mon
    properties:
        monitorname: $substitutions.mon-name($parameters.lb-appname, $mon.monitorname)
    components:
      -
        name: monitor-svcg-binding-comp
        condition:  $parameters.svc-servers
        type: ns::servicegroup_lbmonitor_binding
        properties:
          servicegroupname: $components.lb-comp.outputs.servicegroup.properties.servicegroupname
          monitor_name: $parent.properties.monitorname
<!--NeedCopy-->
In this article
- Create a config pack
- Reuse configurations created outside of StyleBooks and share configurations between ConfigPacks
- Change the StyleBook of a config pack
- Export or import config packs
- Save a config pack as a draft
- Create a schedule for a config pack
- Detach a target instance from a config pack
- Build your StyleBooks