Deploy a NetScaler VPX instance on Azure Local
NetScaler VPX™ supports deployment on Azure Local (Azure Stack hyper-converged infrastructure (HCI)) versions 22H2, 23H2, and 24H2. You can deploy NetScaler VPX instances on standalone Azure Local hosts or set them up as a high-availability (HA) pair in Azure Local instances (formerly Azure Stack HCI clusters). Azure Local is a hybrid cloud platform that lets organizations run Azure services in their own data centers. Deploying NetScaler VPX on Azure Local provides advanced load balancing, application delivery, and security features on-premises, while ensuring seamless integration with Azure cloud services. This solution is beneficial for businesses that require low latency, data sovereignty, or regulatory compliance, as NetScaler can optimize and secure applications locally with the benefits of the Azure ecosystem.
Prerequisites to deploy a NetScaler VPX instance on Azure Local
-
Make sure that your environment meets the following NetScaler VPX version and Azure Local version requirements.
-
Supported NetScaler VPX versions: 14.1-60.x and later
-
Supported Azure Local OS builds: 25398.1965, 26100.7171, and 20349.3692
For more information on Azure Local release versions, see the Microsoft documentation.
-
-
Ensure that you have access to a dedicated Azure Local node and that Windows Admin Center is installed and properly connected to this node.
-
Download the NetScaler virtual hard disk (VHD) image from the official Citrix website or your licensed source. Make sure that the image is compatible with your environment.
Deploy a NetScaler VPX instance on Azure Local using a VM file package from Windows Admin Center
Use this method to deploy NetScaler VPX on Azure Local from a VM file package.
To deploy NetScaler VPX on Azure Local using a VM file package, follow these five steps:
- Download the NetScaler Hyper-V package and upload the downloaded package to an Azure Local node.
- Create a new virtual machine using the extracted package.
- Configure VM settings and start the virtual machine.
- Assign the NetScaler IP address via console access.
- Connect remotely to NetScaler VPX for further configuration.
Step 1. Download the NetScaler Hyper-V package.
- Open a web browser and navigate to
https://www.citrix.com/. - Sign in using your assigned credentials.
- Locate and click the Downloads section.
- From the Select a Product drop-down menu, choose NetScaler (NetScaler ADC).
- Select NetScaler VPX Release X.X under the NetScaler Release X.X > Virtual Appliances section.
- Download the compressed installation package (for example,
NSVPX-HyperV-14.1-60.57_nc_64.zip) directly to your server. - Upload the downloaded package to your Azure Local node at your preferred location. Extract the contents of the package.
Step 2. Create a new virtual machine using the extracted VM package.
Complete the following steps to create and configure the virtual machine:
- Open Windows Admin Center and navigate to the Virtual Machines section.
-
Click the Add button, then select Import.
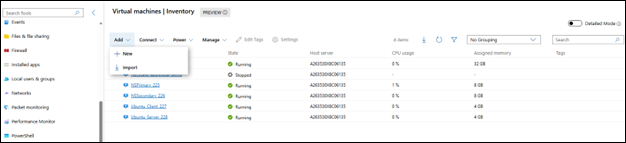
-
Browse to and select the folder containing the NetScaler VM image that you extracted.
-
From the drop-down menu of available Virtual Machines, choose the NetScaler Virtual Appliance.
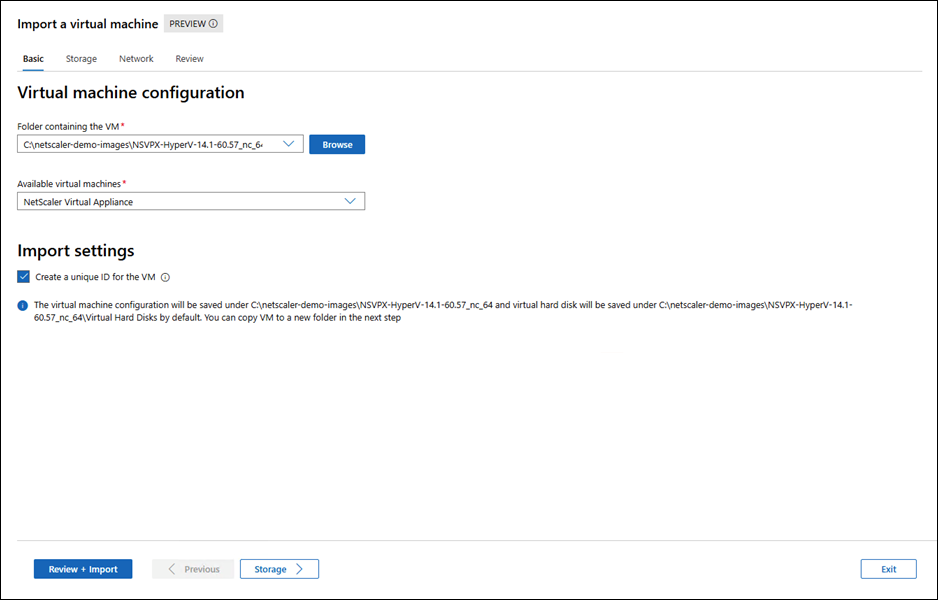
- Click Import.
- Proceed to the Review + Create option to finalize and create the new virtual machine.
Step 3. Configure VM settings and start the virtual machine.
After importing the NetScaler virtual appliance, configure the VM for best performance and connectivity.
- Review Resources: Check the VM name, memory, CPU, and storage allocations and adjust as needed.
-
Assign Network Adapter: Connect the proper network adapter to enable connectivity.

-
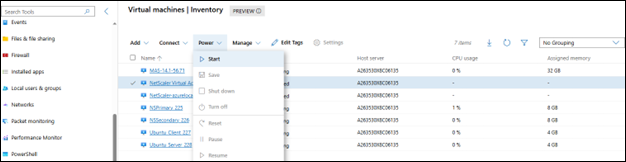
Start the VM: Power on the NetScaler VM to begin initialization.
Step 4. Assign the NetScaler IP address through console access.
- Access the NetScaler instance console directly through Hyper-V Manager.
-
Log in to the NetScaler through the Hyper-V console of the Azure Local node.
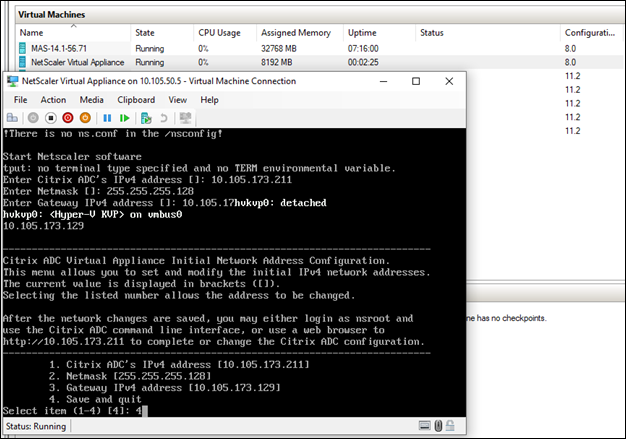
- Assign the IP address.
-
Save the IP configuration.
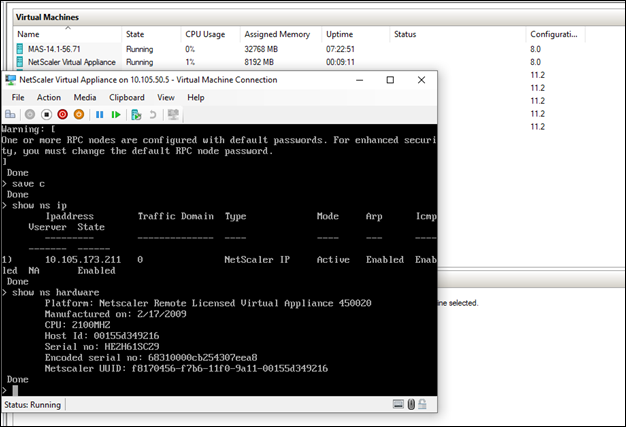
Step 5. Connect remotely to NetScaler VPX.
- Check connectivity to the NetScaler management interface.
- Log in and configure NetScaler for further setup and management tasks.
Deploy a NetScaler VPX instance on Azure Local using VHD from Windows Admin Center
To deploy a NetScaler VPX instance on Azure Local using VHD from Windows Admin Center, follow these steps:
-
Upload the NetScaler VHD file to your Azure Stack HCI node using Windows Admin Center.
-
Create a new virtual machine (VM) in Windows Admin Center, configuring VM settings such as name, Generation 1, CPU, memory, virtual switch, and selecting the uploaded VHD.
-
Start the newly created NetScaler VM and monitor its boot status.
-
Access the NetScaler instance console using Hyper-V Manager, log in, and assign the IP address.
-
Connect to the NetScaler VPX instance remotely using SSH for further setup and management.
-
Validate deployment by checking connectivity to the NetScaler management interface and completing the required configuration.
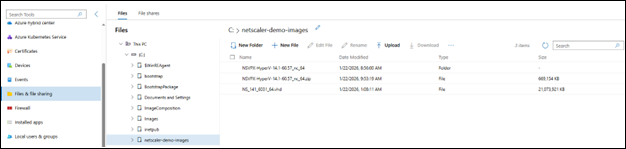
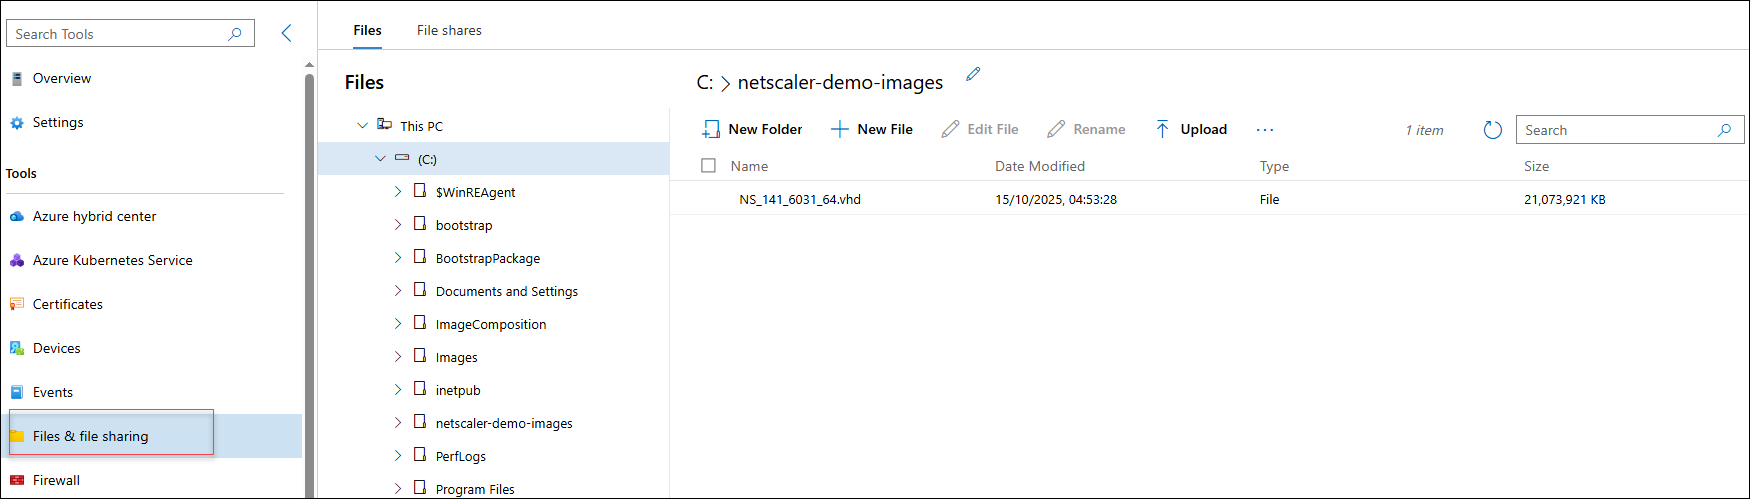
Step 1. Upload the NetScaler VHD file to your Azure Local machine using Windows Admin Center.
- Open Windows Admin Center and connect to your Azure Local machine.
- Navigate to Tools > Files and file sharing.
- Browse to the desired volume and navigate to the specific folder where you want to upload the VHD file.
- Click Upload and choose the VHD file from your computer.
- Wait for the upload process to complete. Once finished, verify that the VHD file appears in the selected folder.
Step 2. Create a new virtual machine and configure VM settings.
- In Windows Admin Center, go to Virtual machines.
- Click Add, then select New.
- Enter a name for the VM and select Generation 1.
- Configure virtual processors (CPU), memory, and virtual switch to meet NetScaler requirements and your deployment needs.
- In the Storage settings, select Use an existing virtual hard disk and choose the uploaded VHD image.
- Complete creating the VM.

Step 3. Start the NetScaler VM.
-
After you finish configuring, start the NetScaler virtual machine you created in the previous step.
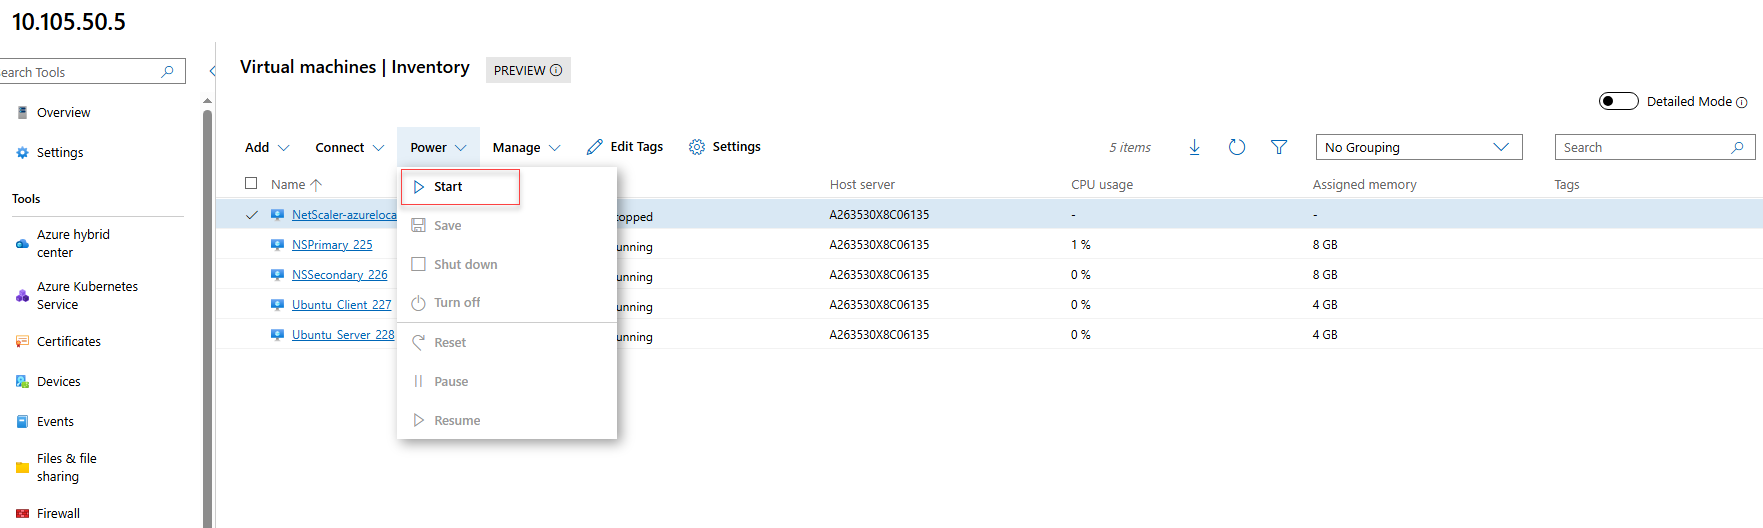
-
Monitor the VM status in Windows Admin Center to ensure it boots successfully.
Step 4. Configure network and set up remote access using Hyper-V manager.
-
After the NetScaler instance boots, open the console in Hyper-V Manager.
-
Log in to NetScaler from the Hyper-V console on the Azure Local node.
-
Assign and save the IP address.
-
Use SSH to connect to NetScaler remotely for other setup and management.
Step 5. Validate the NetScaler VPX deployment.
- Log in to the NetScaler GUI or CLI using the configured IP address and continue with the NetScaler VPX configuration.
- Verify that the NetScaler configuration is complete and the VPX instance is functioning as expected.