Import and synchronize StyleBooks from an external repository
Consider a scenario where you are using CI/CD processes for your development. Or, a scenario where you are managing all the application source code and deployment artifacts in GitHub/GitLab.
In the GitHub/GitLab repository, you might be maintaining several StyleBooks for deploying the NetScaler configurations and managing these StyleBooks. You must upload these StyleBooks to NetScaler Console. With this feature, you can directly import your StyleBooks present in GitHub/GitLab into NetScaler Console. You don’t need to manually copy them from GitHub/GitLab and then upload them into NetScaler Console. Or, manually synchronize the files in both NetScaler Console and GitHub/GitLab. Also, you can import and synchronize config packs from GitHub/GitLab.
To import StyleBooks and config packs, define a repository in NetScaler Console that represents a GitHub/GitLab repository. Provide the GitHub/GitLab repository URL and your username and API or Personal Access(PA) token created in GitHub/GitLab. That means, only authorized users who have a valid account in GitHub/GitLab can import and sync StyleBooks.
You can import and synchronize the following types of repositories:
- Publicly accessible repositories - The repositories that are open to the public and can be accessed over the internet.
- On-premise or private GitLab/GitHub repositories - The repositories that are hosted privately and are typically accessible only within an enterprise’s intranet. For these repositories, you must select a NetScaler agent during the registration process. The NetScaler agent acts as a proxy to access the repositories within the enterprise’s intranet.
After creating the repository, you can sync NetScaler Console your GitHub/GitLab repository. NetScaler Console connects to GitHub/GitLab and imports StyleBooks and config packs found in that repository. NetScaler Console then validates the StyleBooks and adds them to the list of StyleBooks in NetScaler Console. StyleBooks are not added to NetScaler Console if they fail validation. You can identify and correct the errors on your StyleBooks. Then, commit the updated versions into your GitHub/GitLab repository. Later you can try importing them or syncing them again into NetScaler Console.
If you encounter the following error while creating a repository, it indicates that NetScaler Console is unable to verify the SSL certificate for the repository due to a missing or unrecognized Certificate Authority (CA) certificate:
certificate verify failed: unable to get local issuer certificate
To resolve this issue, you can manually add the required CA certificate to the NetScaler Console agent that is used for accessing the repository. Adding the required CA certificate ensures that secure connections to the external repository is properly validated.
Log in to NetScaler Console agent that is used for accessing the repository and add your CA certificate to the trusted certificate bundle /var/mps/ca_certs/cacert.pem.
Important
StyleBooks files can be imported and synchronized from any branch of a GitHub/GitLab repository.
You can import and synchronize StyleBooks that have dependent StyleBooks associated with them too. These dependent StyleBooks can be in the GitHub/GitLab repository or already present in NetScaler Console.
The synchronization of StyleBooks from a GitHub/GitLab repository must be initiated manually from the NetScaler Console GUI or API. That is, currently, importing and syncing of StyleBooks does not happen automatically based on your GitHub/GitLab commit activity.
The configuration pack file that you want to import must be in the JSON format. Also, the configuration file contents must follow the exported configuration format. Under your GitHub/GitLab repository, the files associated with the configuration pack must be in the
configpacksfolder.
You can import StyleBook files to NetScaler Console from any folder in the GitHub/GitLab repository. To import config packs, do the following:
-
Create a folder with name
configpacksunder the root directory. Make sure all files associated with configurations are in this folder. -
In the
configpacksfolder, create a JSON file that contains the payload for the configuration pack. This payload is used to synchronize config packs. The following is an example payload:{ "config_key": "unique-key-for-configpack", "parameters": { "param-name1": "param-value1", "param-name": "param-value2", "param-namen": "param-valuen" }, "stylebook": { "namespace": "some namespace", "name": "somename", "version": "spme-version" } } <!--NeedCopy-->-
config_key- A unique ID or name to identify a configuration pack in NetScaler Console. If you do not specify config_key, NetScaler Console auto-generates the ID on creating the configuration pack.If the specified ID is found in the NetScaler Console GUI, the sync action updates the configuration pack in the NetScaler Console GUI. Else, it creates a configuration pack with the specified ID.
-
parameters- It contains all the necessary parameters to create or update the configuration pack. -
stylebook- It is a mandatory property in a JSON file. It contains a namespace, version, and StyleBook name with which you want to associate the configuration pack.
-
-
In the
configpacksfolder, keep all the files that are associated with the configuration pack such as certificates, signature files, and XML files.
Add a repository
-
In NetScaler Console, go to Applications > Configuration > Repositories. Click Add.
-
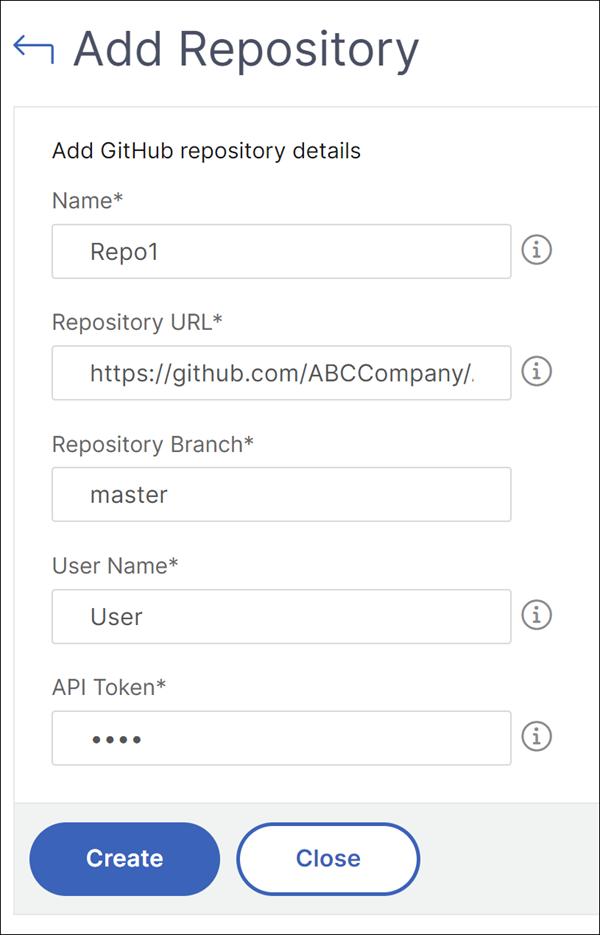
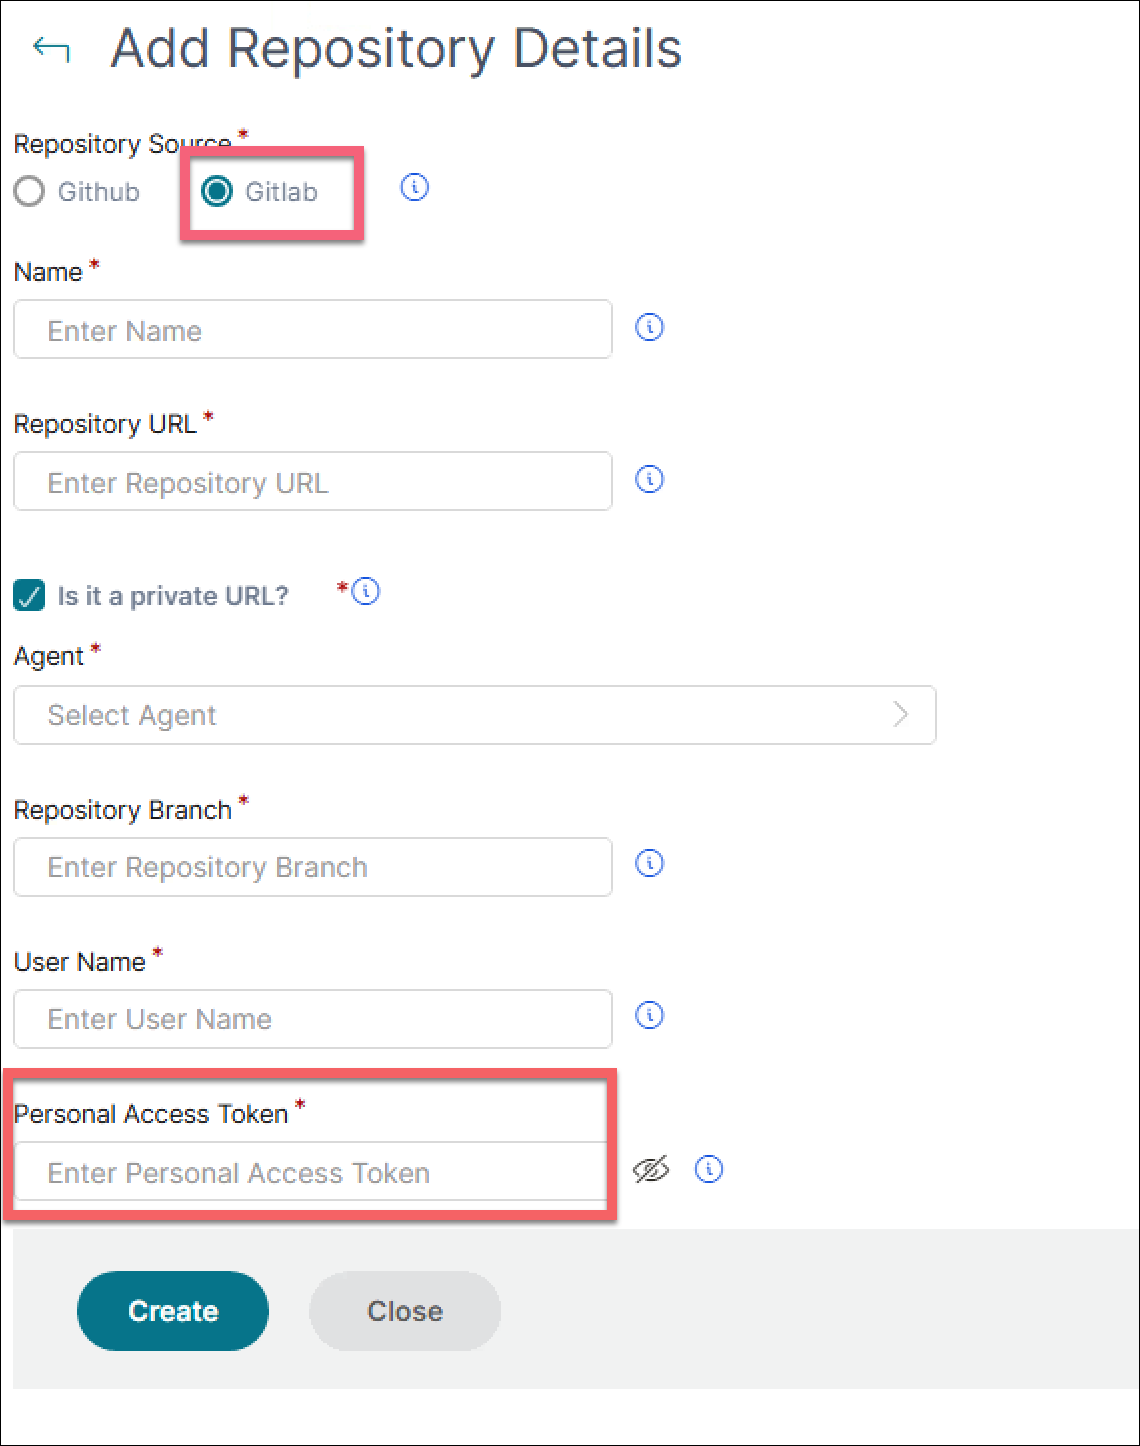
In the Add Repository window, enter the following parameters:
-
Name - Type the name of the repository. This name can be the same as the repository name in GitHub/GitLab or a different one.
-
Repository URL - Type the GitHub/GitLab repository URL.
You can specify a GitHub/GitLab enterprise URL. It helps you import or synchronize StyleBooks and config packs from GitHub/GitLab enterprise accounts.
-
Is it a private URL? - If the repository is an on-premise or private GitLab/GitHub repository, select this checkbox and then select an Agent.
-
User Name - Type the username that you use to access the GitHub/GitLab account or enterprise account.
-
API/PA Token - This token is used to access your GitHub/GitLab repository. For information on how to create API/PA tokens for your GitHub/GitLab repository, see the GitHub/GitLab documentation for creating personal access tokens.
-
-
Click Create.
The repository is created in NetScaler Console.
Repository options
The following are the additional options for your repositories:
-
Edit - You can edit the repository URL, user name, and API token.
-
Delete - You can delete the repository along with all the StyleBooks present in NetScaler Console that were imported previously from that GitHub/GitLab repository.
Note
You cannot delete a repository from NetScaler Console if it has any StyleBooks that have config packs associated with them. First, delete all the config packs of these StyleBooks. You can later remove the repository from NetScaler Console to clean up the StyleBooks from that repository.
-
Reset - You can remove all StyleBooks in NetScaler Console synced from that repository without actually deleting the repository entry.
-
List files - You can see a list of all StyleBooks present in NetScaler Console that originates from the GitHub/GitLab repository.
Steps to import StyleBooks and config packs from GitHub/GitLab
After you complete the prerequisites, follow the steps to import StyleBooks and config packs from a GitHub/GitLab repository:
- Optional, add a repository if you haven’t added.
- Select the repository in the Repositories page.
- Click Sync.