Configure prefill user name from certificate in NetScaler nFactor authentication
The following section describes the use case of two factor authentication. The first factor is certificate authentication followed by LDAP.
Use Case: Certificate and LDAP authentication
Assume a use case where, admins configure two factor authentication. First-level as certificate authentication and followed by LDAP authentication. As part of the first factor, client requests for a user certificate. The user name is extracted from the certificate and prefilled in the user name field of the logon form returned for the next factor.
-
Client browser accesses traffic management virtual server and gets redirected to a logon page for authentication.
-
First factor is evaluated against a certificate action which extracts the user name. Evaluation is successful and passed to the next factor, policy “label1” in this case.
-
The policy label specifies that the second factor is login schema “PrefilUserFromExpr.xml” with LDAP policy.
-
The logon form with the user name prefilled is returned to get the password from the user for LDAP authentication.
-
The authentication server returns cookies and a response that redirects the client’s browser back to the traffic management virtual server, where the requested content is. On the other hand, if the login fails, the client’s browser is presented with the original logon page, so that the client can retry.
Note
The setup can also be created through the nFactor Visualizer available in NetScaler version 13.0 and later.

Perform the following by using the CLI
-
Configure traffic management virtual server and authentication server.
add lb vserver lbvs1 HTTP 10.217.28.152 80 -AuthenticationHost auth1.nsi-test.com -Authentication ONadd authentication vserver avn SSL 10.217.28.154 443 -AuthenticationDomain nsi-test.com-
set ssl vserver avn -clientAuth ENABLED -clientCert Mandatoryor
set ssl parameter –denysslrenegotiation NO
-
Configure a first factor as certificate action.
add authentication certAction cert -userNameField Subject:CNadd authentication Policy certpol -rule true -action cert
-
Configure a second factor.
add authentication loginSchema PrefilUserFromExpr -authenticationSchema PrefilUserFromExpr.xmladd authentication policylabel label1 -loginSchema PrefilUserFromExpr
-
Configure LDAP action.
add authentication ldapAction ldapact -serverIP 10.217.201.84 -ldapBase "cn=users,dc=dep,dc=sqltest,dc=net" -ldapBindDn Administrator@dep.sqltest.net -ldapBindDnPassword 8f7e6642195bc181f734cbc1bd18dfaf03bf9835abda7c045f7a964ceb58d4c9 -encrypted -encryptmethod ENCMTHD_3 -ldapLoginName sAMAccountName -groupAttrName memberOf -subAttributeName CN -ssoNameAttribute userprincipalnameadd authentication Policy ldappolicy -rule true -action ldapact
-
Bind the policies.
bind authentication vserver avn -policy certpol -priority 1 -nextFactor label1 -gotoPriorityExpression NEXTbind authentication policylabel label1 -policyName ldappolicy -priority 10 -gotoPriorityExpression END
Configuring by using the nFactor Visualizer
-
Navigate to Security > AAA-Application Traffic > nFactor Visualizer > nFactor Flow and click Add.
-
Click + to add the nFactor flow.
-
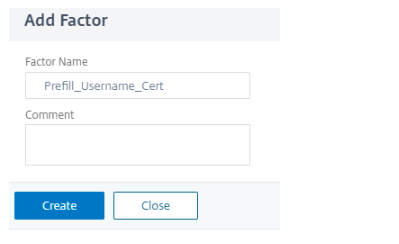
Add a factor. The name that you enter is the name of the nFactor flow.
-
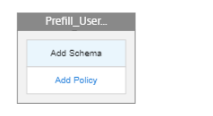
No Schema is needed for the certificate authentication.
-
Click Add Policy to create policy for the certificate authentication.
-
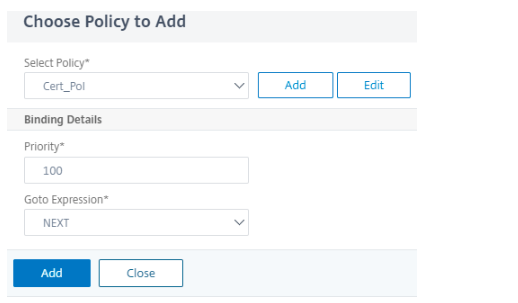
Add policy for the certificate authentication.
Note
For more information on certificate authentication, see Configuring and Binding a Client Certificate Authentication Policy.
-
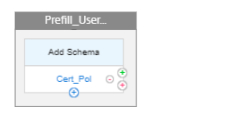
Click green + next to cert policy to add the next factor.
-
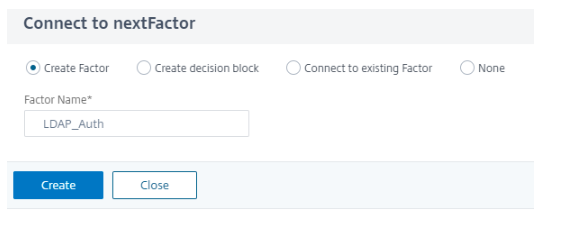
Select Create Factor to create a factor for LDAP Authentication.
-
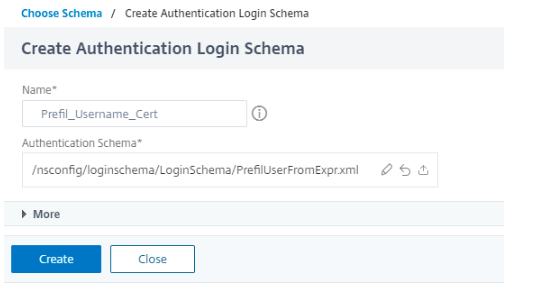
Click Add Schema to add a PrefilUserFormExpr.xml schema for the second factor that has pre-filled user name.
-
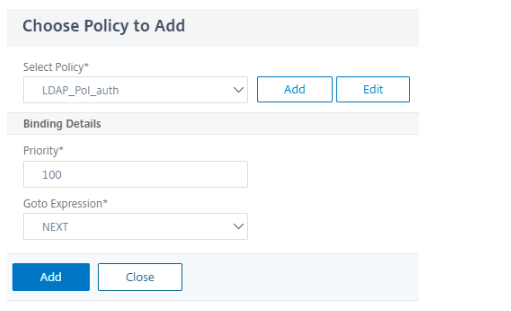
Select Add Policy to add policy for LDAP authentication.
Note
For more information on creating LDAP authentication, see To configure LDAP authentication by using the configuration utility.
-
Click Done to save the configuration.
-
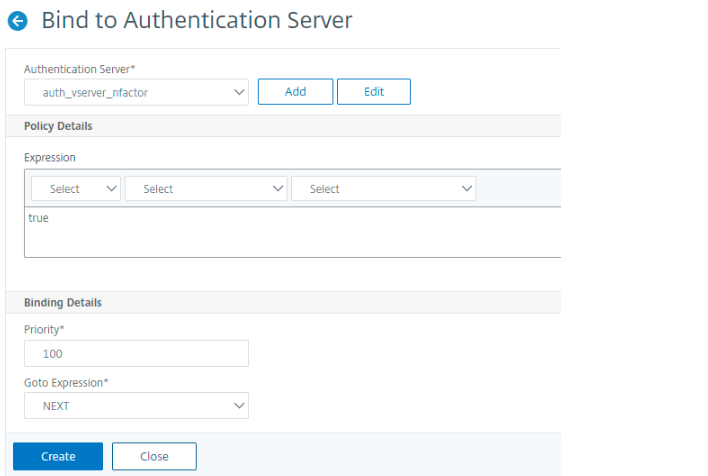
To bind the created nFactor Flow to an authentication, authorization, and auditing virtual server, click Bind to Authentication Server and click Create.
Note
Bind and unbind the nFactor Flow through the option given in nFactor Flow under Show Bindings only.
Unbind the nFactor Flow
-
Select the nFactor Flow and click Show Bindings.
-
Select the authentication virtual server and click Unbind.