-
-
-
管理 NetScaler 实例的管理分区
-
-
This content has been machine translated dynamically.
Dieser Inhalt ist eine maschinelle Übersetzung, die dynamisch erstellt wurde. (Haftungsausschluss)
Cet article a été traduit automatiquement de manière dynamique. (Clause de non responsabilité)
Este artículo lo ha traducido una máquina de forma dinámica. (Aviso legal)
此内容已经过机器动态翻译。 放弃
このコンテンツは動的に機械翻訳されています。免責事項
이 콘텐츠는 동적으로 기계 번역되었습니다. 책임 부인
Este texto foi traduzido automaticamente. (Aviso legal)
Questo contenuto è stato tradotto dinamicamente con traduzione automatica.(Esclusione di responsabilità))
This article has been machine translated.
Dieser Artikel wurde maschinell übersetzt. (Haftungsausschluss)
Ce article a été traduit automatiquement. (Clause de non responsabilité)
Este artículo ha sido traducido automáticamente. (Aviso legal)
この記事は機械翻訳されています.免責事項
이 기사는 기계 번역되었습니다.책임 부인
Este artigo foi traduzido automaticamente.(Aviso legal)
这篇文章已经过机器翻译.放弃
Questo articolo è stato tradotto automaticamente.(Esclusione di responsabilità))
Translation failed!
管理 NetScaler 实例的管理分区
您可以在 Citrix Application Delivery Controller (NetScaler) 实例上配置管理分区,以便组织中的不同组在同一 NetScaler 实例上分配到不同的分区。您可以将网络管理员分配给管理多个 NetScaler 实例上的多个分区。
NetScaler Console 提供了一种无缝方式,可从单一控制台管理管理员拥有的所有分区。您可以在不中断其他分区配置的情况下管理这些分区。
要允许多个用户管理不同的管理分区,您必须创建组,然后将用户和分区分配给这些组。有关创建组或用户的更多信息,请参阅创建用户和创建组。
用户只能查看和管理用户所属组中的分区。当您发现 NetScaler 实例时,在该 NetScaler 实例上配置的管理分区会自动添加到系统中。每个管理分区在 NetScaler Console 中都被视为一个实例。
查看管理分区
假设您有两个 NetScaler VPX 实例,并且每个实例上都配置了两个管理分区。例如,NetScaler 实例 10.xx.xx.100 具有 partition-1 和 partition-2,而 10.xx.xx.101 实例具有 first-partition 和 second-partition。
执行以下步骤以查看管理分区:
-
导航到 Infrastructure > Instances > NetScaler。
-
在 VPX 选项卡中,单击 Partitions。
例如,如果您创建一个具有以下条件的组:
-
在 Settings > Users & Roles > Create Group > Authorization Settings > Select Instances 中,您选择“10.xx.xx.100-partition-1”和“10.xx.xx.101-first-partition”实例。
-
您将“User1”分配给该组。
User1 只能查看和管理添加到该组的分区。但是,即使未添加到该组的分区属于同一实例,它们也对用户受限。
在此示例中,10.xx.xx.100-partition-2 和 10.xx.xx.101-second-partition 受限,因为这些实例未添加到分配用户的组中。
如果您希望其他用户管理管理分区 10.xx.xx.100-partition-2 和 10.xx.xx.101-second-partition,请创建一个具有以下条件的组:
-
在 Authorization Settings 选项卡中,选择 10.xx.xx.100-partition-2 和 10.xx.xx.101-second-partition 实例。
-
将所需用户分配给该组。
此组使分配的用户能够查看和管理选定的管理分区。
查看修订历史差异
修订历史差异对于管理分区,允许您查看分区 NetScaler 实例的五个最新配置文件之间的差异。您可以相互比较配置文件(例如,配置修订版 - 1 与配置修订版 - 2),或将当前运行/保存的配置与配置修订版进行比较。除了配置差异之外,还会显示更正配置。您可以将所有更正命令导出到本地文件夹并更正配置。
查看修订历史差异
-
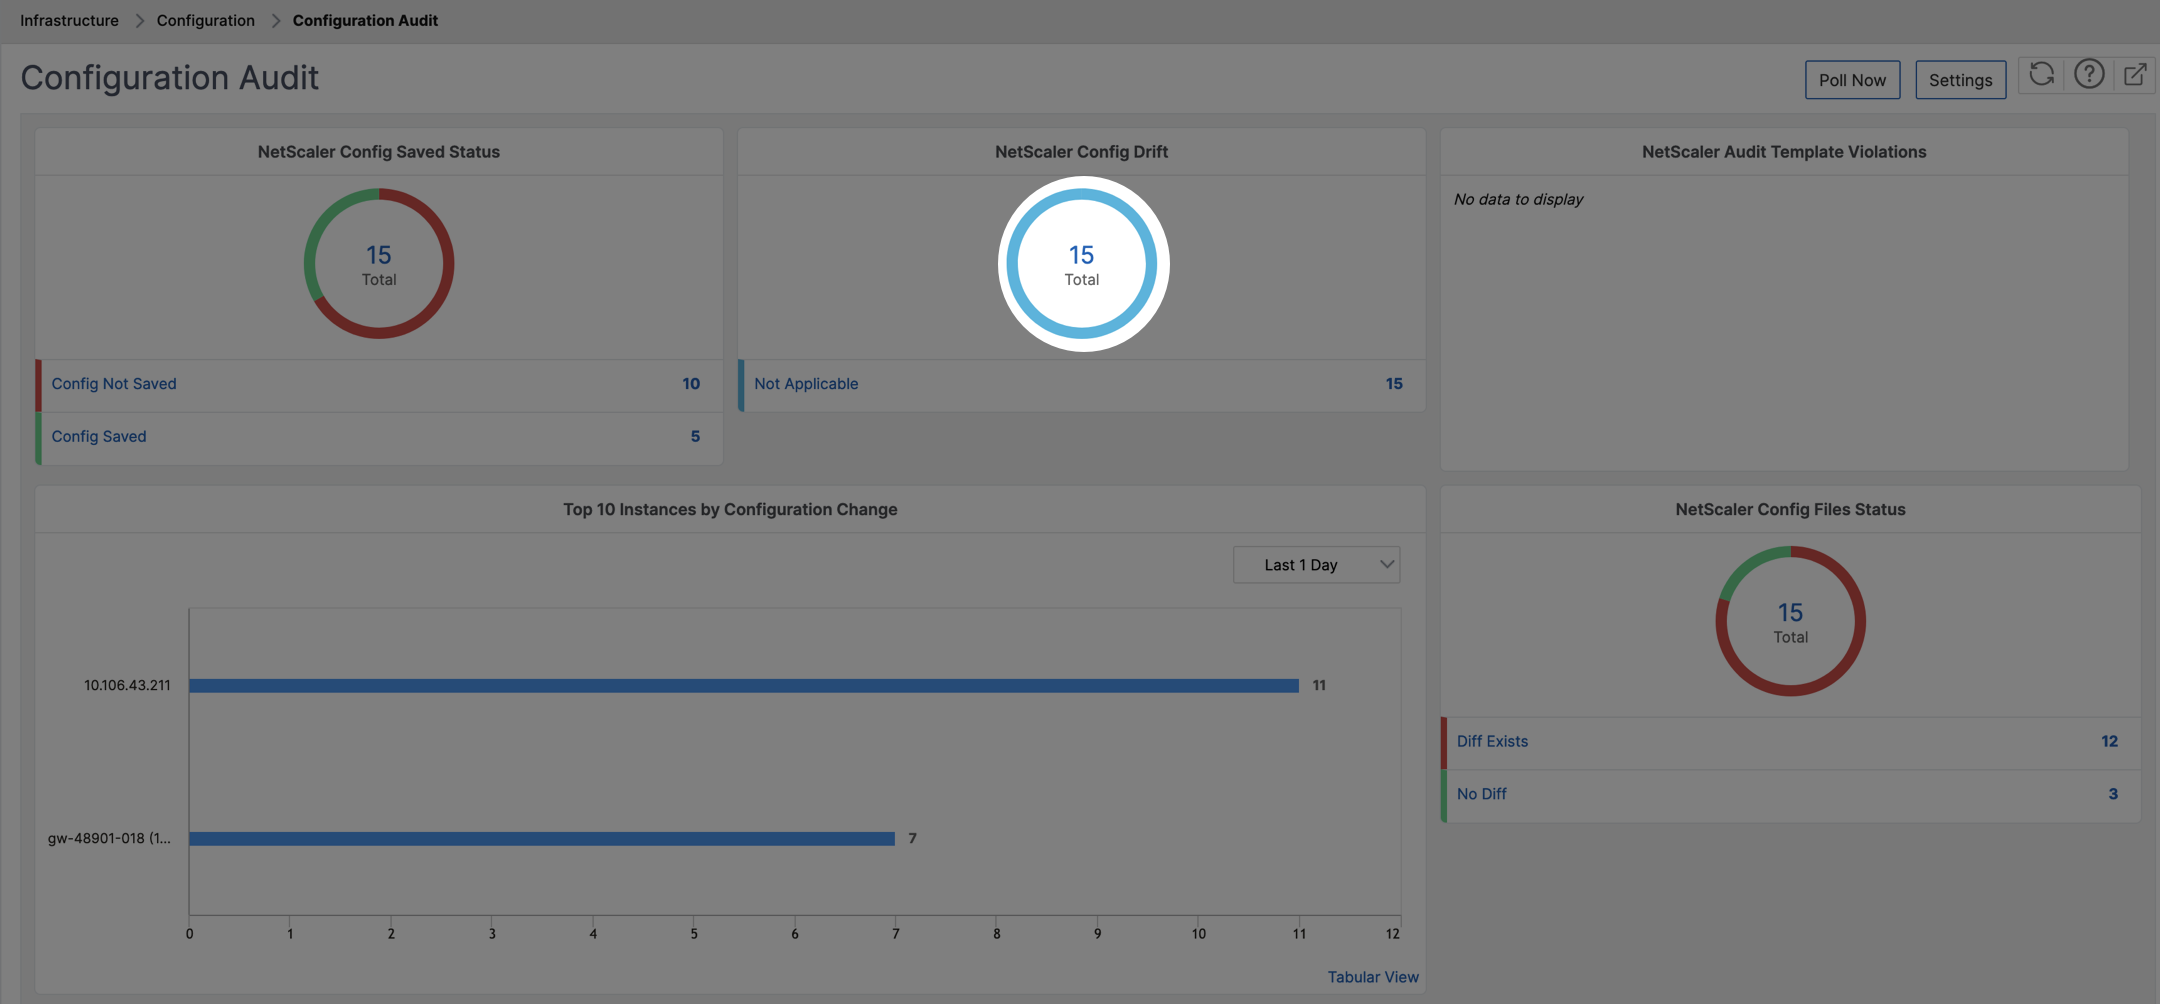
导航到 Infrastructure > Configuration > Configuration Audit。配置审计仪表板显示各种报告。单击圆环图中心显示的数字。
-
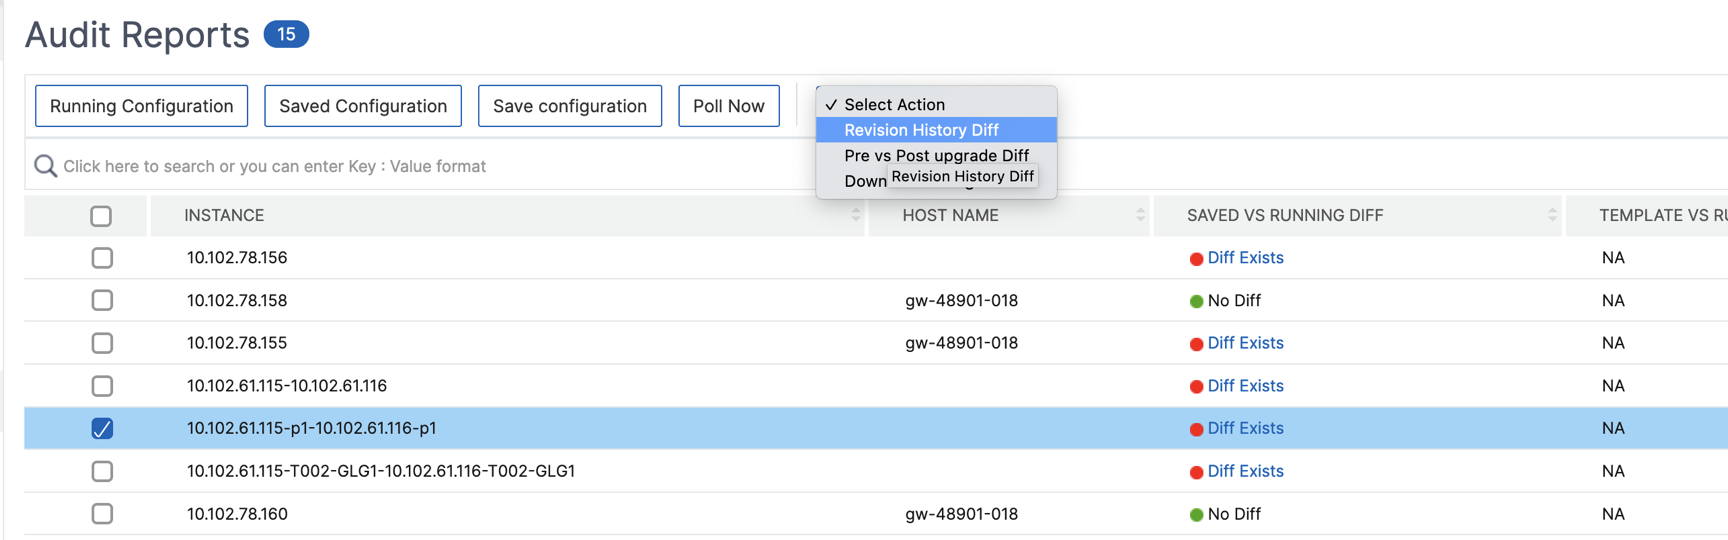
选择分区 NetScaler 实例。
-
在“操作”框中,单击 Revision History Diff.
-
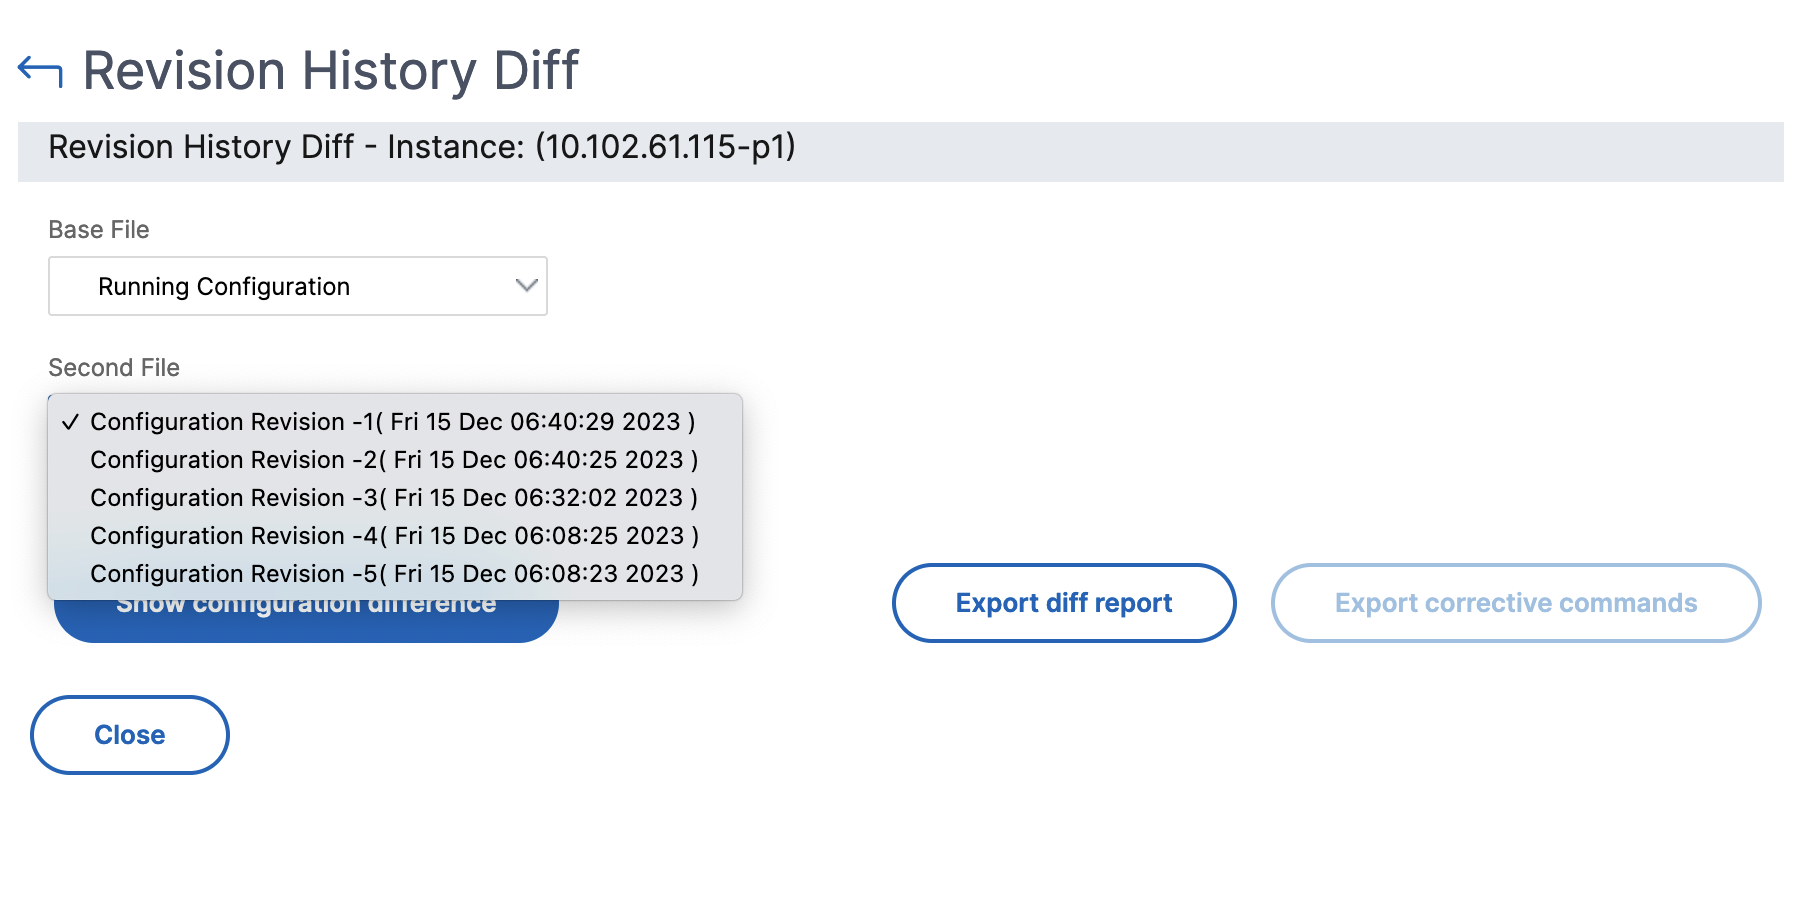
在 Revision History Diff 页面上,选择要比较的文件。例如,比较“Saved Configuration”与“Configuration Revision-2”,然后单击 Show configuration difference。
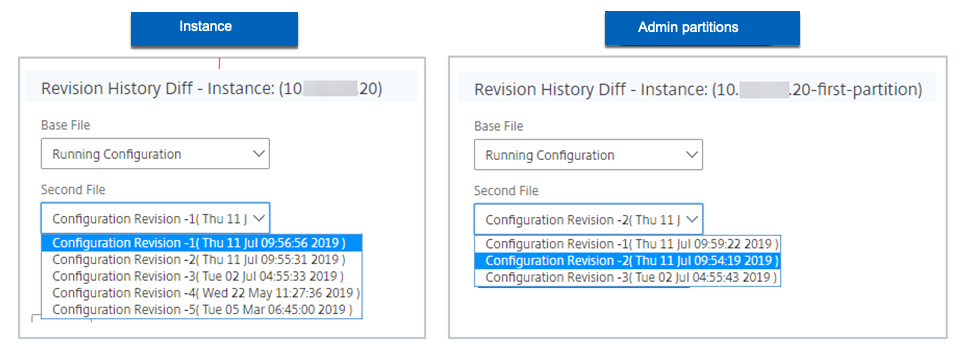
然后,您可以查看选定的分区 NetScaler 实例的五个最新配置文件之间的差异。以下是一个具有五个已保存配置的管理分区示例:
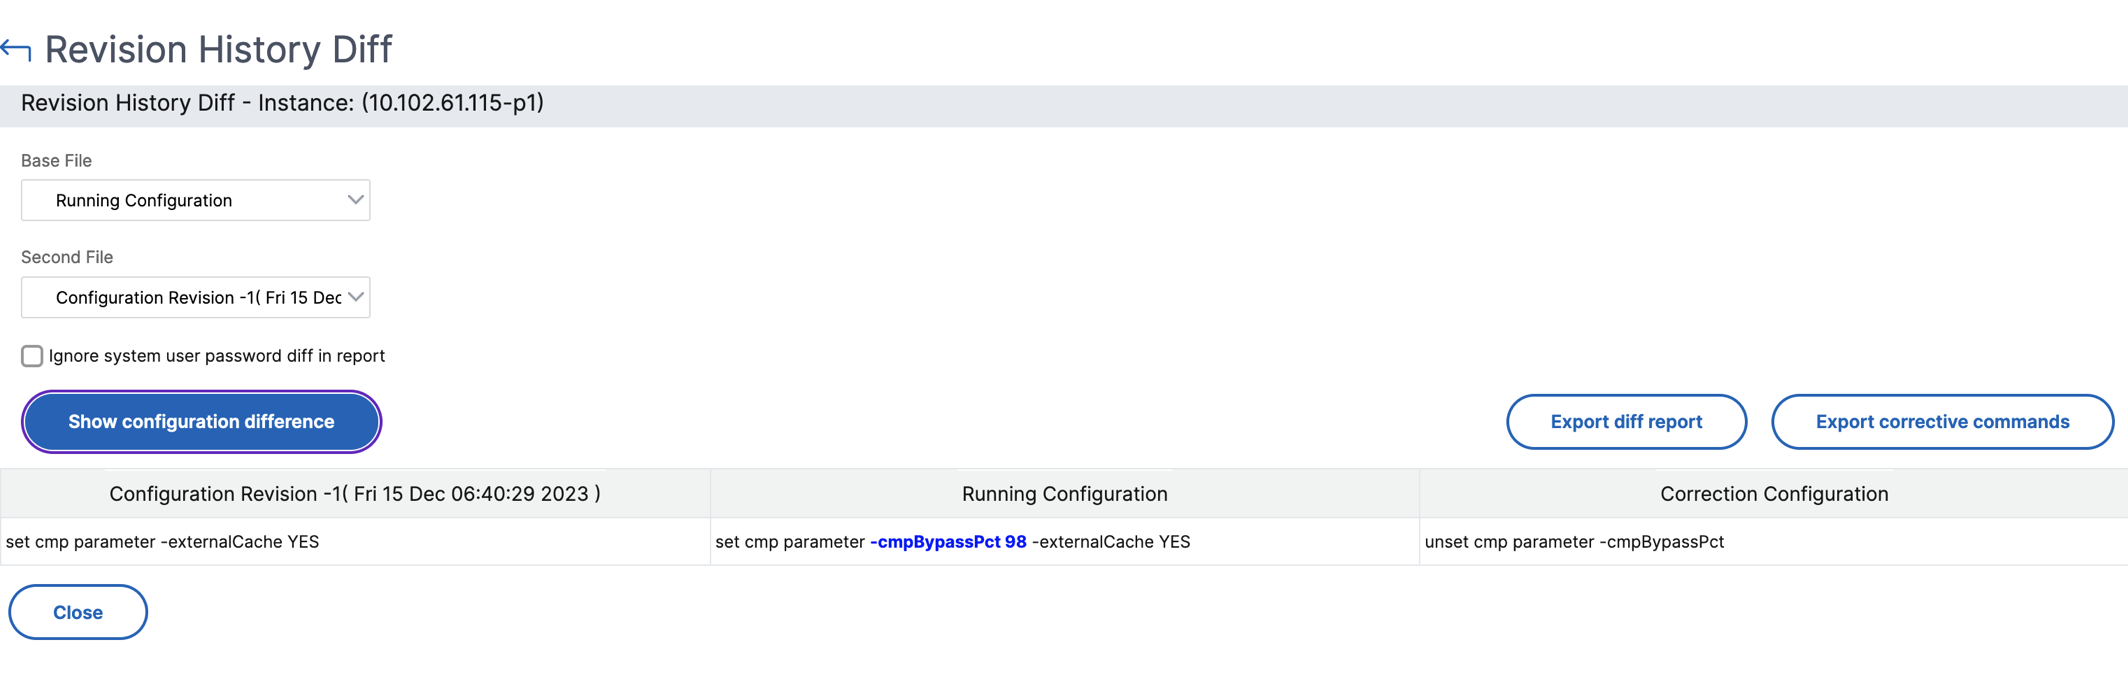
您还可以查看更正配置命令,并将这些更正命令导出到本地文件夹。这些更正命令是需要在基本文件上运行的命令,以使配置达到所需状态(正在用于比较的配置文件)。
管理分区和实例上的已保存配置不同。在以下示例中,10.xx.xx.20 实例有五个已保存配置,而此实例的管理分区有三个不同的已保存配置:
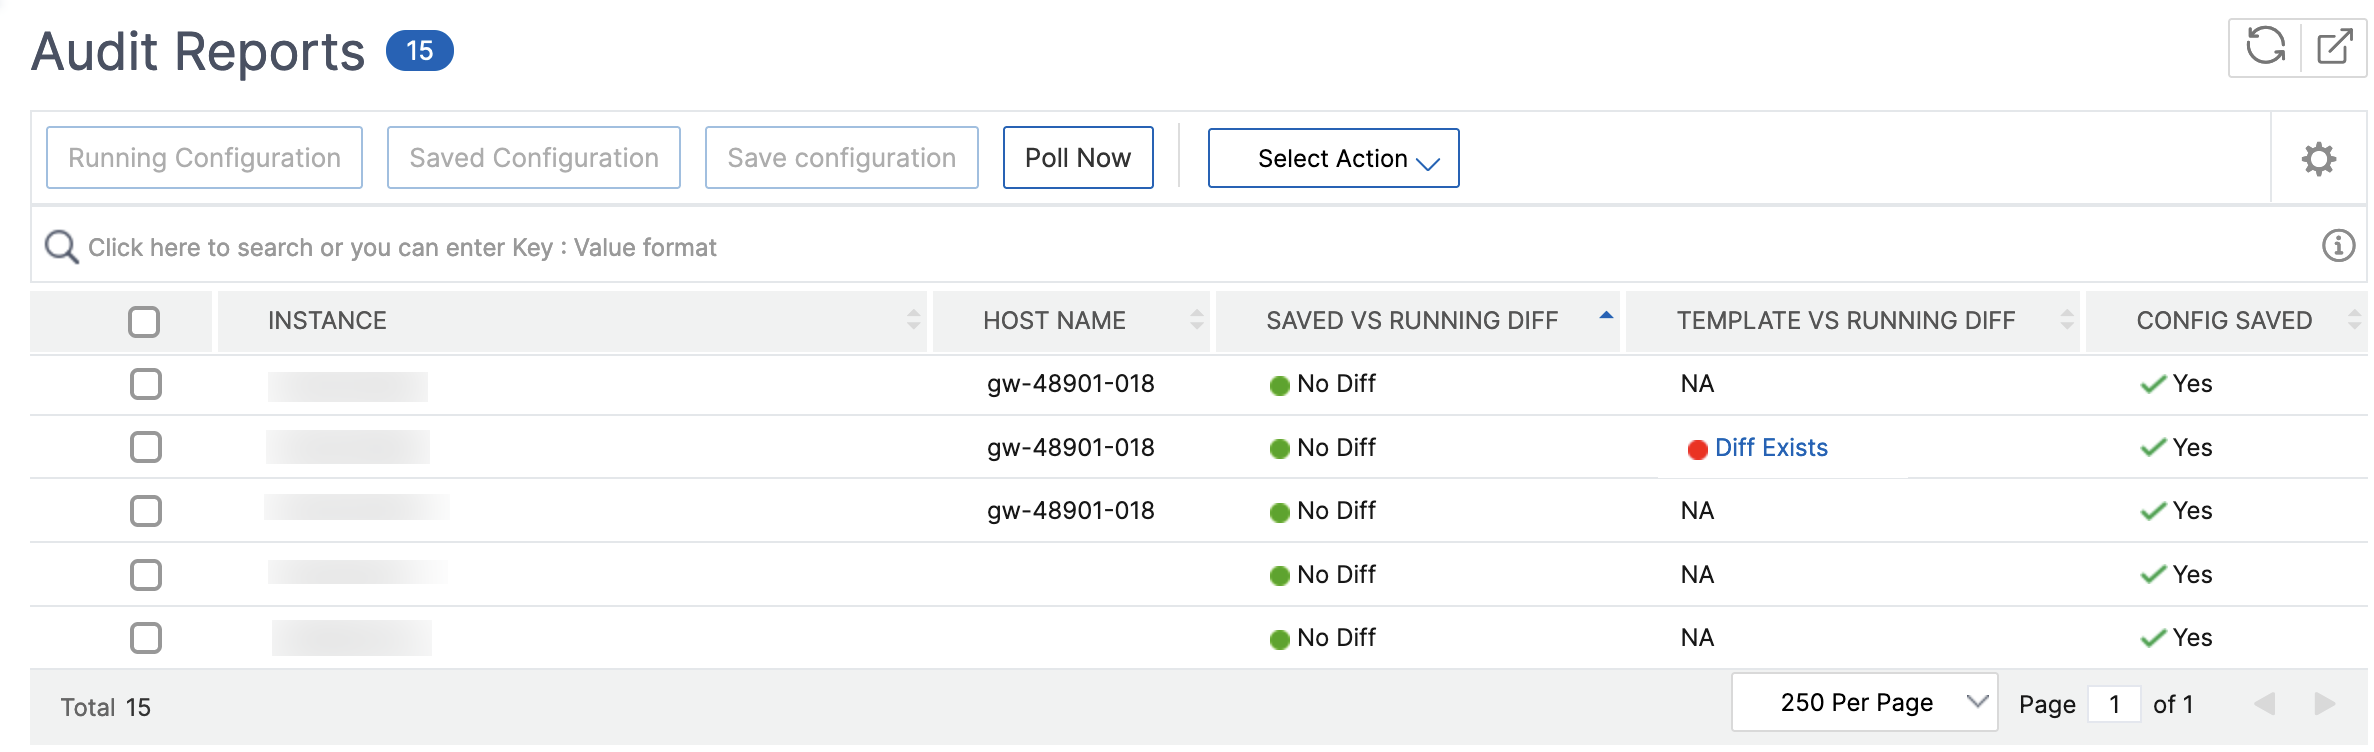
查看模板与运行差异
分区的审计模板允许您创建自定义配置模板并将其与分区实例关联。实例运行配置与审计模板的任何差异都显示在 Audit Reports 页面上的“Template vs Running diff”列中。除了配置差异之外,还会显示更正配置。您还可以将所有更正命令导出到本地文件夹并更正配置。
-
导航到 Infrastructure > Configuration > Configuration Audit。配置审计仪表板显示各种报告。单击圆环图中心显示的数字。
-
在 Audit Reports 页面上,单击 Template vs Running Diff 列下的 Diff Exists 超链接。
如果审计模板与运行配置之间存在任何差异,差异将显示为超链接。单击超链接可查看是否存在差异。除了配置差异之外,还会显示更正配置。您还可以将所有更正命令导出到本地文件夹并更正配置。
导出此仪表板的报告
要导出此页面的报告,请单击此页面的右上角的 Export 图标。在 Export 页面上,您可以执行以下操作之一:
-
选择 Export Now 选项卡。以 PDF、JPEG、PNG 或 CSV 格式查看和保存报告。
-
选择 Schedule Export 选项卡。每日、每周或每月计划报告,并通过电子邮件或 Slack 消息发送报告。
Note:
- 如果您选择每周重复,请确保选择要计划报告的星期几。
- 如果您选择每月重复,请确保输入要计划报告的所有日期,并用逗号分隔。
共享
共享
This Preview product documentation is Cloud Software Group Confidential.
You agree to hold this documentation confidential pursuant to the terms of your Cloud Software Group Beta/Tech Preview Agreement.
The development, release and timing of any features or functionality described in the Preview documentation remains at our sole discretion and are subject to change without notice or consultation.
The documentation is for informational purposes only and is not a commitment, promise or legal obligation to deliver any material, code or functionality and should not be relied upon in making Cloud Software Group product purchase decisions.
If you do not agree, select I DO NOT AGREE to exit.