Configure a domain drop-down list for user input in the first factor to decide the next factor authentication flow
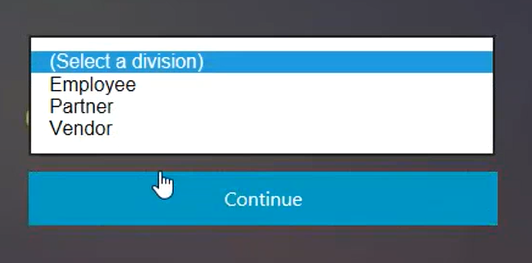
Consider an organization which has the following three departments (groups), Employee, Partner, and Vendor. The NetScaler appliance can be configured to present the user with a logon form based on the department the user belongs to. Administrator can configure different authentication flows for respective departments as shown in the following table as an example.
| Group Name | Factor |
|---|---|
| Employee | Single Auth (Username/Password) |
| Partner |
OAuth (redirects to a different IdP) |
| Vendor | SAML (redirects to a different IdP) |
The following diagram shows a high level interaction between a user and the NetScaler appliance configured for the previously mentioned use case.
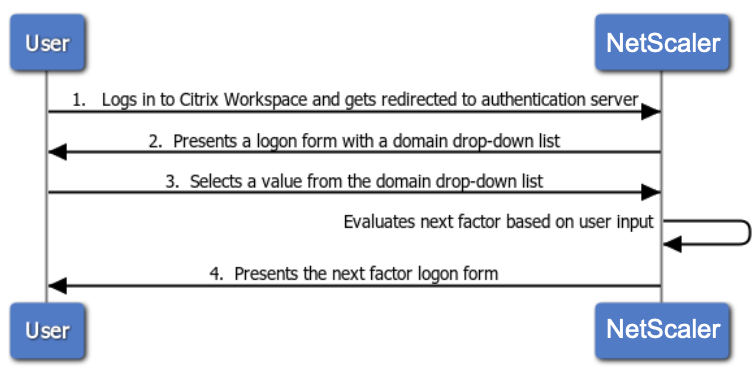
- User logs in to Citrix Workspace and gets redirected to an authentication virtual server.
-
NetScaler presents a logon form with a domain drop-down list.
-
User selects a value from the domain (division) drop-down list.
- NetScaler presents a logon form based on user input for the drop-down list.
Configure domain drop-down list for user input in the first factor to decide the next factor authentication flow using CLI
Prerequisite
A load balancing virtual server is configured with authentication enabled.
Configure authentication virtual server for the domain drop-down list value
Note
You can modify the OnlyDomainDropdown.xml schema to create a customized login schema (divisionDropdown.xml) in this case.
Create first factor as NO_AUTHN
add authentication Policy noauth_division_select_pol -rule true -action NO_AUTHN
Create next factor for Employee, Partner, Vendor Departments/Division using policy labels
add authentication loginSchema lschema_division_dropdown -authenticationSchema "/nsconfig/loginschema/devisionDropdown.xml"

add authentication policylabel plabel_noauth_Employee_Partner_Vendor -loginSchema lschema_division_dropdown

add authentication Policy noauth_Employee_pol -rule "AAA.LOGIN.DOMAIN.EQ(\"Employee\")" -action NO_AUTHN

add authentication Policy noauth_Partner_pol -rule "AAA.LOGIN.DOMAIN.EQ(\"Partner\")" -action NO_AUTHN

add authentication Policy noauth_Vendor_pol -rule "AAA.LOGIN.DOMAIN.EQ(\"Vendor\")" -action
Create a single authentication policy factor (LDAP is used as an example for this configuration)
add authentication loginSchema lschema_singleauth_Employee -authenticationSchema "/nsconfig/loginschema/LoginSchema/SingleAuth.xml"

add authentication policylabel plabel_singleauth_Employee -loginSchema lschema_singleauth_Employee

add authentication ldapAction aaa_local_pwd_act -serverIP 90.196.17.40 -ldapBase "OU=ABSOU,dc=aaa,dc=local" -ldapBindDn administrator@aaa.local -ldapBindDnPassword xxxx -ldapLoginName samAccountName -groupAttrName memberOf -subAttributeName CN -secType TLS -ssoNameAttribute userPrincipalName -passwdChange ENABLED -nestedGroupExtraction ON -maxNestingLevel 7 -groupNameIdentifier sAMAccountName -groupSearchAttribute memberOf -groupSearchSubAttribute CN -defaultAuthenticationGroup ldapDefaultAuthGroup -Attribute1 userPrincipalName -Attribute2 mail

add authentication Policy aaa_local_pwd_pol -rule true -action aaa_local_pwd_act
bind authentication policylabel plabel_singleauth_Employee -policyName aaa_local_pwd_pol -priority 100 -gotoPriorityExpression NEXT
Create OAuth policy for redirecting to OAuth IdP
add authentication policylabel plabel_oauth_Partner -loginSchema lschema_noschema

add authentication OAuthAction oauth_sp_act -authorizationEndpoint "https://absauthidp.aaa.local/oauth/idp/login?response_type=code&scope=openid&client_id=netscaler" -tokenEndpoint "https://absauthidp.aaa.local/oauth/idp/token" -clientID netscaler -clientSecret 1e1155e92ad926dea4fa05a46e1dfa7e10063ad6fe2086394e9e435b19b28a5e -encrypted -encryptmethod ENCMTHD_3 -kek -suffix 2021_02_18_11_22 -CertEndpoint "https://absauthidp.aaa.local/oauth/idp/certs" -audience absauthidp.aaa.local

add authentication Policy oauth_sp_pol -rule true -action oauth_sp_act

bind authentication policylabel plabel_oauth_Partner -policyName oauth_sp_pol -priority 100 -gotoPriorityExpression NEXT
Create SAML policy for redirecting to SAML IdP
add authentication policylabel plabel_saml_Vendor -loginSchema lschema_noschema

add authentication samlAction saml_sp_act -samlIdPCertName server_certkey -samlSigningCertName server_certkey -samlRedirectUrl "https://absauthidp.aaa.local/saml/login" -samlUserField nameid -samlIssuerName "https://abssamlissuer.aaa.local"

add authentication Policy saml_sp_pol -rule true -action saml_sp_act

bind authentication policylabel plabel_saml_Vendor -policyName saml_sp_pol -priority 100 -gotoPriorityExpression NEXT
Bind the three policy factors created previously to plabel_noauth_Employee_Partner_Vendor
bind authentication policylabel plabel_noauth_Employee_Partner_Vendor -policyName noauth_Employee_pol -priority 100 -gotoPriorityExpression NEXT -nextFactor plabel_singleauth_Employee

bind authentication policylabel plabel_noauth_Employee_Partner_Vendor -policyName noauth_Partner_pol -priority 110 -gotoPriorityExpression NEXT -nextFactor plabel_oauth_Partner

bind authentication policylabel plabel_noauth_Employee_Partner_Vendor -policyName noauth_Vendor_pol -priority 120 -gotoPriorityExpression NEXT -nextFactor plabel_saml_Vendor
Bind group based policy label as nextFactor for drop-down list based authentication policy selection
bind authentication vserver abs_sp_auth_vs -policy noauth_division_select_pol -priority 100 -nextFactor plabel_noauth_Employee_Partner_Vendor -gotoPriorityExpression NEXT
Configure domain drop-down list for user input in first factor to decide the next factor authentication flow using GUI
- Navigate to Security > AAA-Application Traffic > nFactor Visualizer > nFactor Flow and click Add.
- Click + to add the nFactor flow.
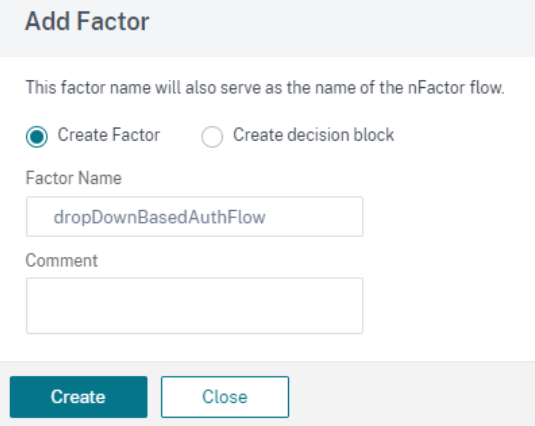
- Add a factor. The name that you enter is the name of the nFactor flow and click Create.
-
Create a factor for drop-down list based authentication flow.
-
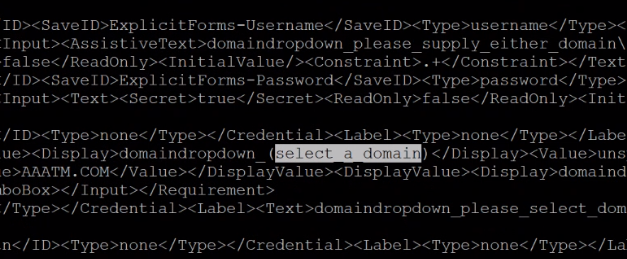
Click Add Schema on the nFactor block. To create a customized login schema (divisionDropdown in this case), you can edit the built-in DomainDropdown.xml schema.
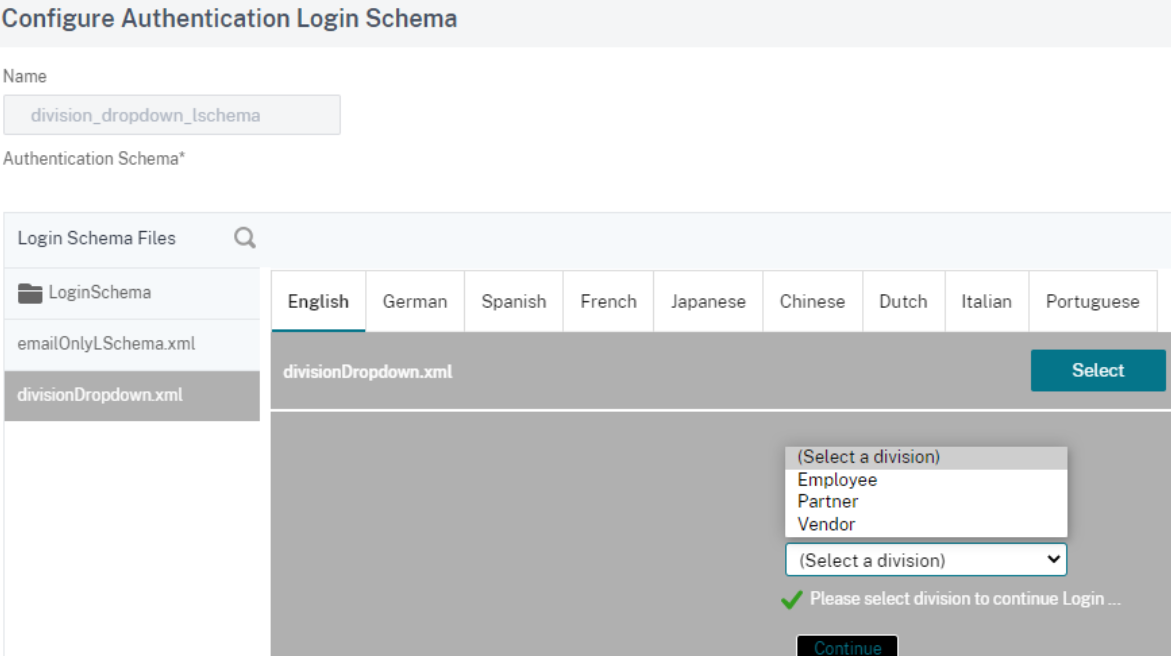
Note: You can create a new domain by using an existing DomainDropdown.xml schema. In the “select a domain” tag, add the domain name as per your requirement and then save the XML file. You must then find the domain that you added in the drop-down list.
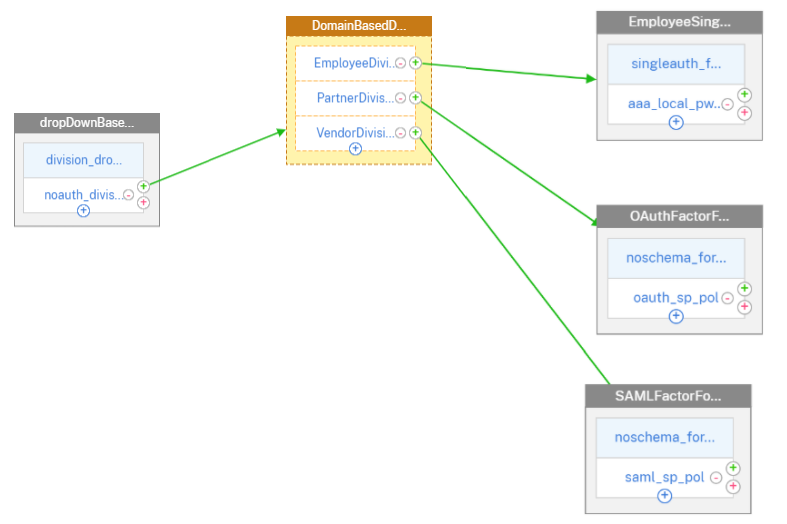
-
Create division based decision block based on domain received from end user and create an authentication factor for each decision block.
-
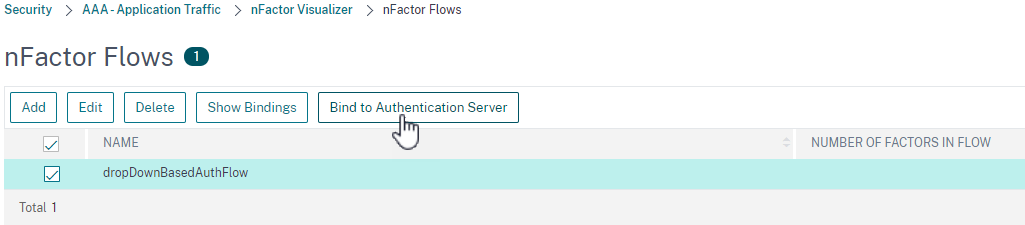
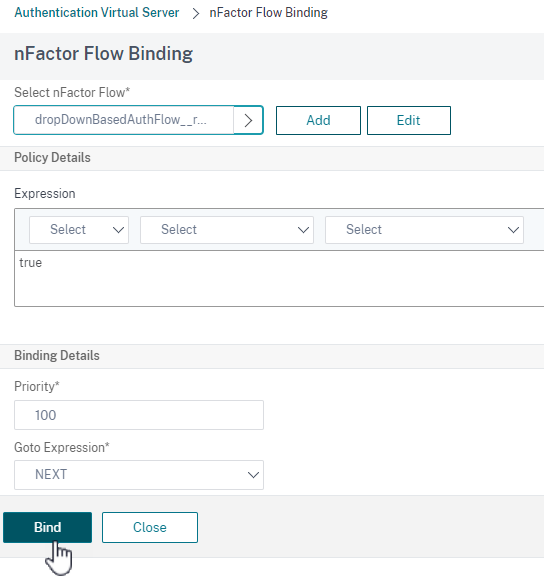
After the nFactor flow is complete, bind this flow to the authentication, authorization, and auditing virtual server. Click Bind to Authentication Server and click Create.
-
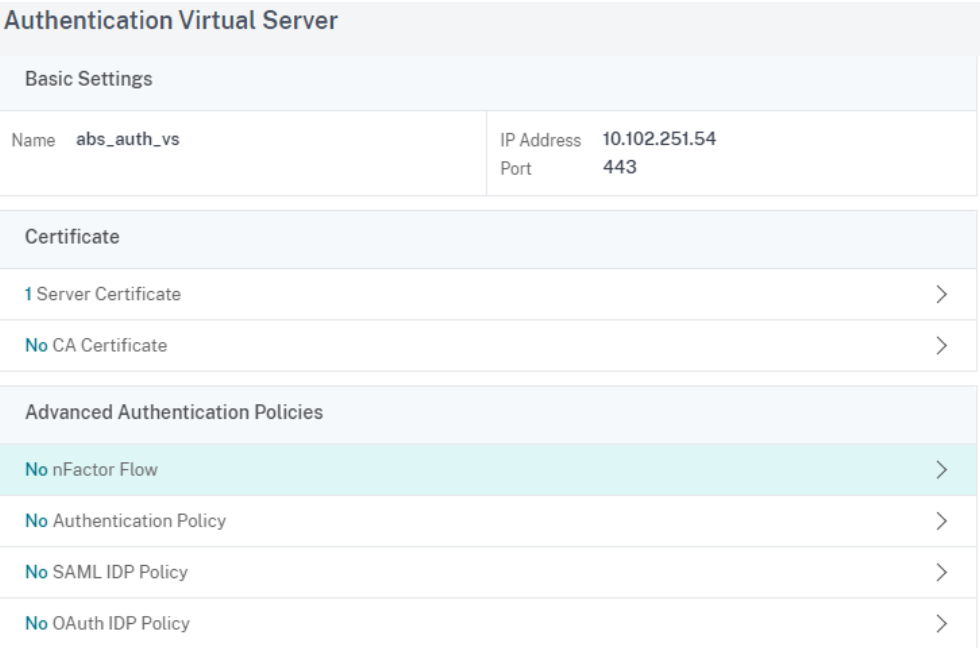
Select authentication virtual server and click nFactor Flow.
-
Choose the nFactor flow under Select nfactor Flow field and click Bind.
Unbind the nFactor flow
- Select the nFactor flow and click Show Bindings.
- Select the authentication virtual server and click Unbind.