Deploy Citrix SD-WAN™ on Azure from Citrix SD-WAN Center
Citrix SD-WAN for Azure enables organizations to have a direct secure connection from each branch to the applications hosted in Azure eliminating the need to backhaul cloud bound traffic through a data center.
Prerequisites
- Citrix Workspace™ Cloud credentials.
- Azure subscription credentials
- Azure application and service principal with the role-based access control, see How to: Use the portal to create an Azure AD application and service principal that can access resources.
- Once the service principal is created, make a note of the following details:
- Azure Subscriber ID
- Tenant ID
- Application ID
- Secret Key
- Perform the change management on the MCN/SD-WAN Center using the ctx-sdw-sw-xxxxxxx.zip.
- From Citrix SD-WAN Center, discover the MCN and pull the active config.
To deploy Citrix SD-WAN on Azure from SD-WAN Center, navigate to Configuration > Cloud Connectivity > Azure > Automated Azure Deployment.
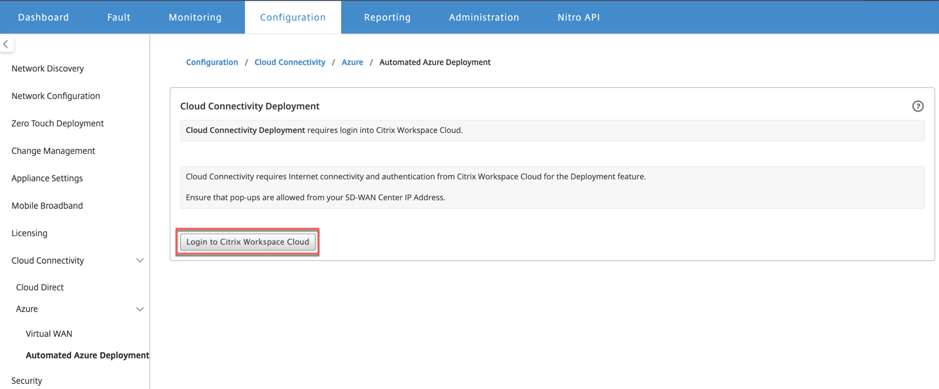
Log in with Citrix Cloud™ credentials.

Automated Azure deployment
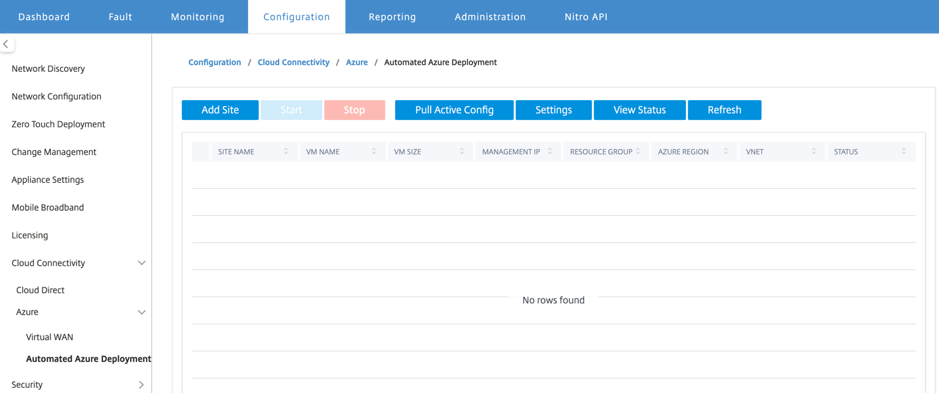
Click Settings option and provide the Azure subscription details. Click Pull Active Config option to retrieve the active running config from the MCN.

Deploy Citrix SD-WAN in Azure
To deploy the Citrix SD-WAN in Microsoft Azure:
-
Click Add a Site to add a new SD-WAN instance. It initiates the creation of an SD-WAN virtual machine on Azure under your current subscription.
As part of this deployment, it also:
- Automatically adds SD-WAN configuration for the newly added site to the current active configuration on MCN.
- Performs the change management.
- Apply the MCN’s software version and configuration to this new site.
Complete the Basic settings, Virtual Machine, and Virtual Network settings.
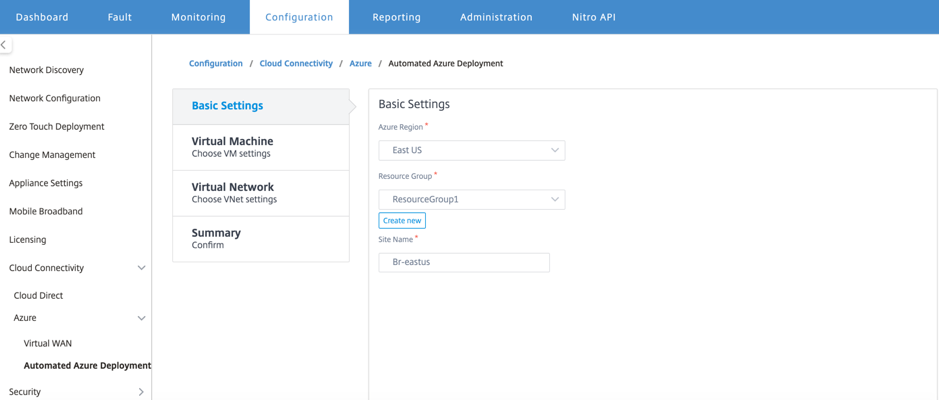
Under Basic Settings, select the region and resource group from the drop-down list. Once the region is selected, the resource group drop-down list shows all the existing resource groups in this region under this subscription.
NOTE:
To add a site, the resource group must be empty.
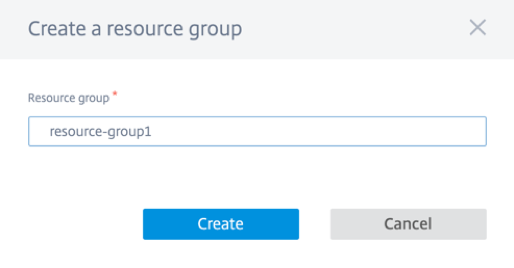
You can choose an existing empty resource group or click Create New option to create a new one.
-
Site name is auto generated with the region name. You can still edit the site name as needed.
NOTE:
Ensure that the site name maintains the SD-WAN site name requirements and is unique in the SD-WAN network.
The Azure VM name is generated from the site name in AZ-regionname-sitename format.
-
Click Next to configure the virtual machine.
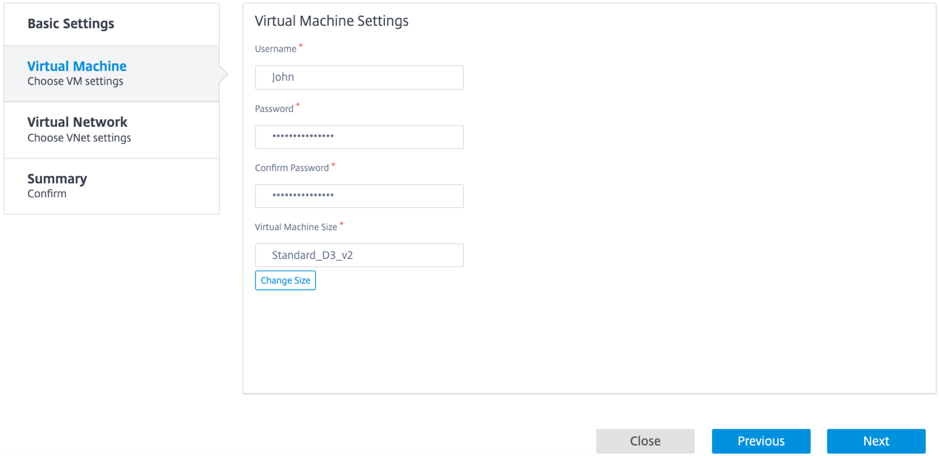
Provide a User name, Password, and Confirm password. By default, the VM size is auto filled with the standard size. Click Change Size to select a different VM size if needed.
NOTE:
This user credential provided during deployment has read-only access to the Azure SD-WAN. For administrative privileges, use admin credentials.
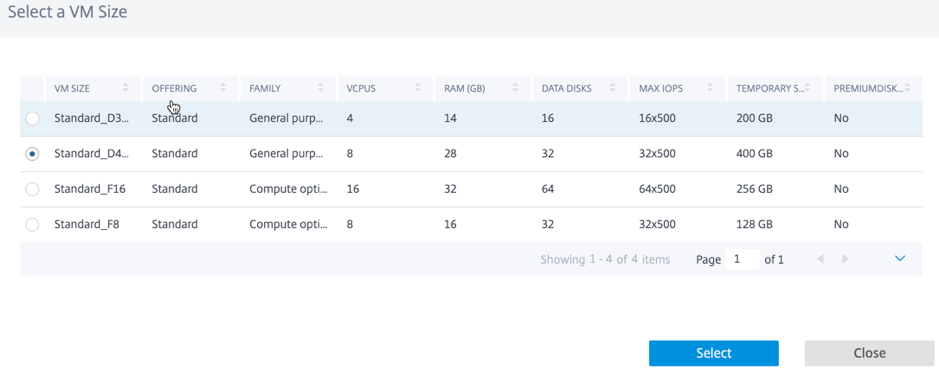
- Click Next to perform the virtual network settings.
-
Select virtual network from the drop-down list. The list contains all the virtual network in the chosen Azure region.
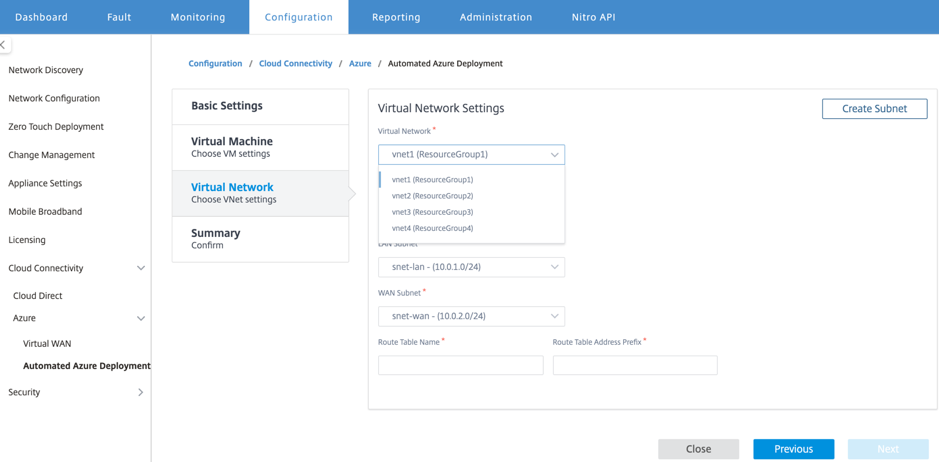
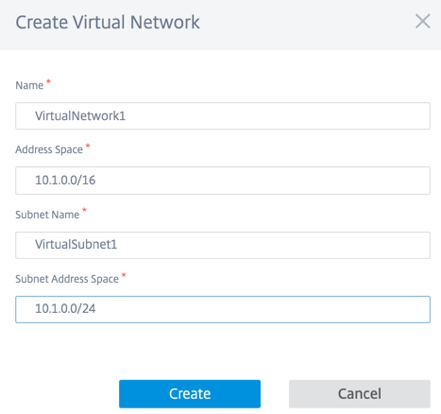
You can deploy the site on an existing virtual network or create a new virtual network. Click Create New to create a new virtual network. Provide the Virtual network name, Address space (specify a custom private IP address space), Subnet name, and Subnet address space.
-
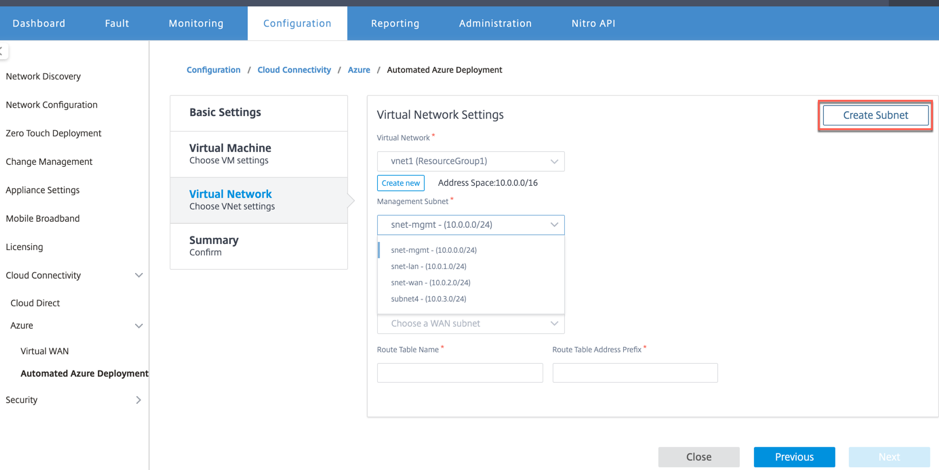
Select a subnet for management.
-
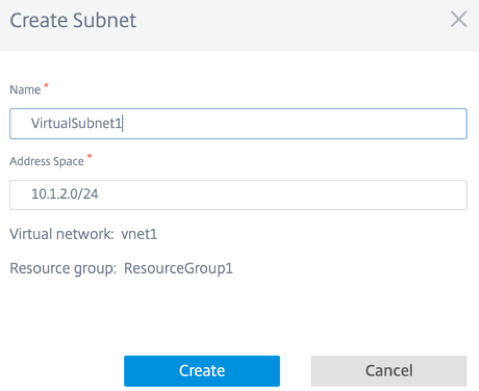
You can also create a subnet using the Create a Subnet option (from the top right corner).
-
From the drop-down list, choose different subnet for LAN and WAN and provide the Routing Table Name along with the Routing Table Address Prefix. The Routing Table Address Prefix is the destination address space that is redirected to this SD-WAN appliance. Other target address will be redirected by Azure routing.
NOTE:
The Routing Table is associated with the LAN subnet. If the chosen LAN subnet already has an associated route table, then that route table will be displayed and cannot be modified. Otherwise you can specify the routing table name.
-
Click Next to review and confirm the setting detail and click Create.

A status message appears on the top stating that the deployment initiated successfully.
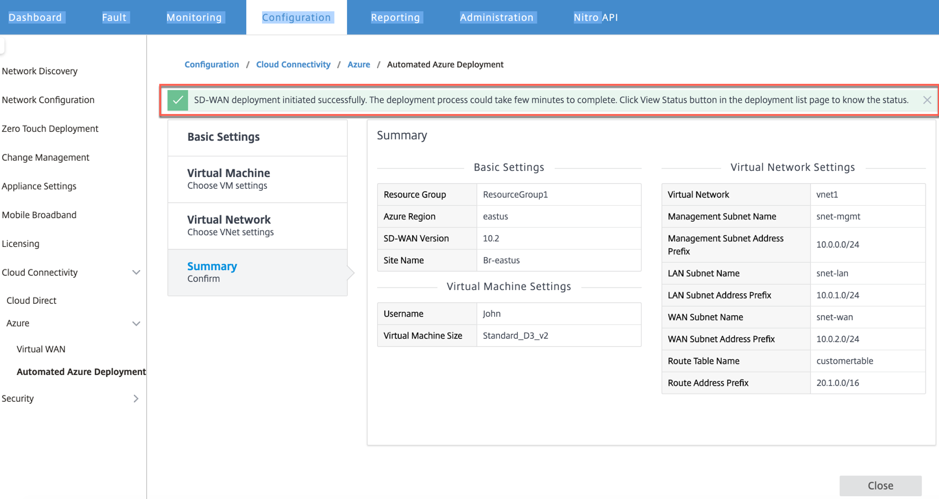
The deployment might take time to complete so it is recommended that you click View Status to get the latest update about the deployment status.
As part of the deployment:
- The virtual machine is created in the selected Azure region.
- A site is automatically added to the active SD-WAN configuration in the SD-WAN.
- Change management is performed on the newly provisioned Azure VM.
Once the deployment is succeeded, the virtual paths are formed between the MCN and Azure site. If the deployment encounters error, the process is rolled back and all the auto-created resources are reverted.
By default, the site is placed as part of the default routing domain. It belongs to the default region using the default auto path group.
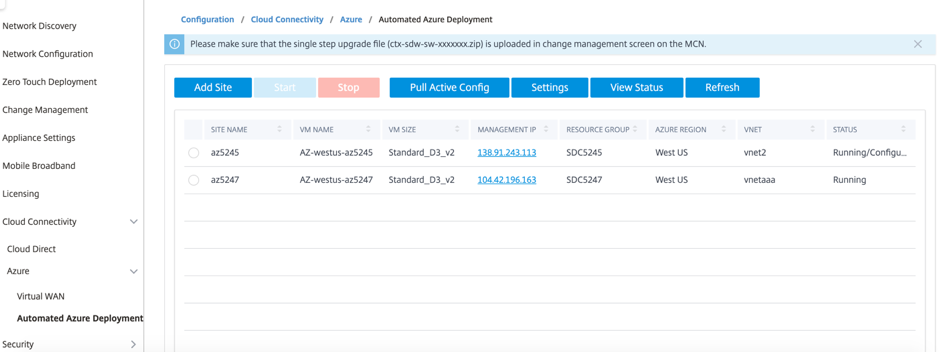
- Site Name: Name of the Citrix SD-WAN site. This site name is used in the Citrix SD-WAN configuration.
- VM Name: Name of the Virtual Machine (VM) that is provisioned in Azure.
- VM Size: The VM size that was selected while creating the site.
- Management IP: Management IP address that was assigned to the newly created SD-WAN VM.
-
Resource Group: Resource groups are logical constructs and data exchange across resource groups is always possible. The Azure virtual machine belongs to this resource group. The new resources created during the deployment of the Citrix SD-WAN, are grouped under this resource group. If there is any error during the deployment, the resources created in this resource group will be deleted.
- Azure Region: Represents the location of the resource group and its resources.
- VNet: Virtual network that is being used by the site.
- Status: Provides the VM’s status.
Click Refresh button to get the latest site status. You can Start or Stop the VM anytime for the selected site. You can select only one site at a time.
When the deployment is complete, login to MCN or Citrix SD-WAN Center to view the status of virtual paths.