
Enable data collection to monitor NetScalers deployed in LAN user mode
External users who access Citrix Virtual App or Desktop applications must authenticate themselves on the NetScaler Gateway. Internal users, however, might not require to be redirected to the NetScaler Gateway. Also, in a transparent mode deployment, the administrator must manually apply the routing policies, so that the requests are redirected to the NetScaler appliance.
To overcome these challenges, and for LAN users to directly connect to Citrix Virtual Apps and Desktops applications, you can deploy the NetScaler appliance in a LAN user mode by configuring a cache redirection virtual server, which acts as a SOCKS proxy on the NetScaler Gateway appliance.
Figure 4. NetScaler Console deployed in LAN User Mode
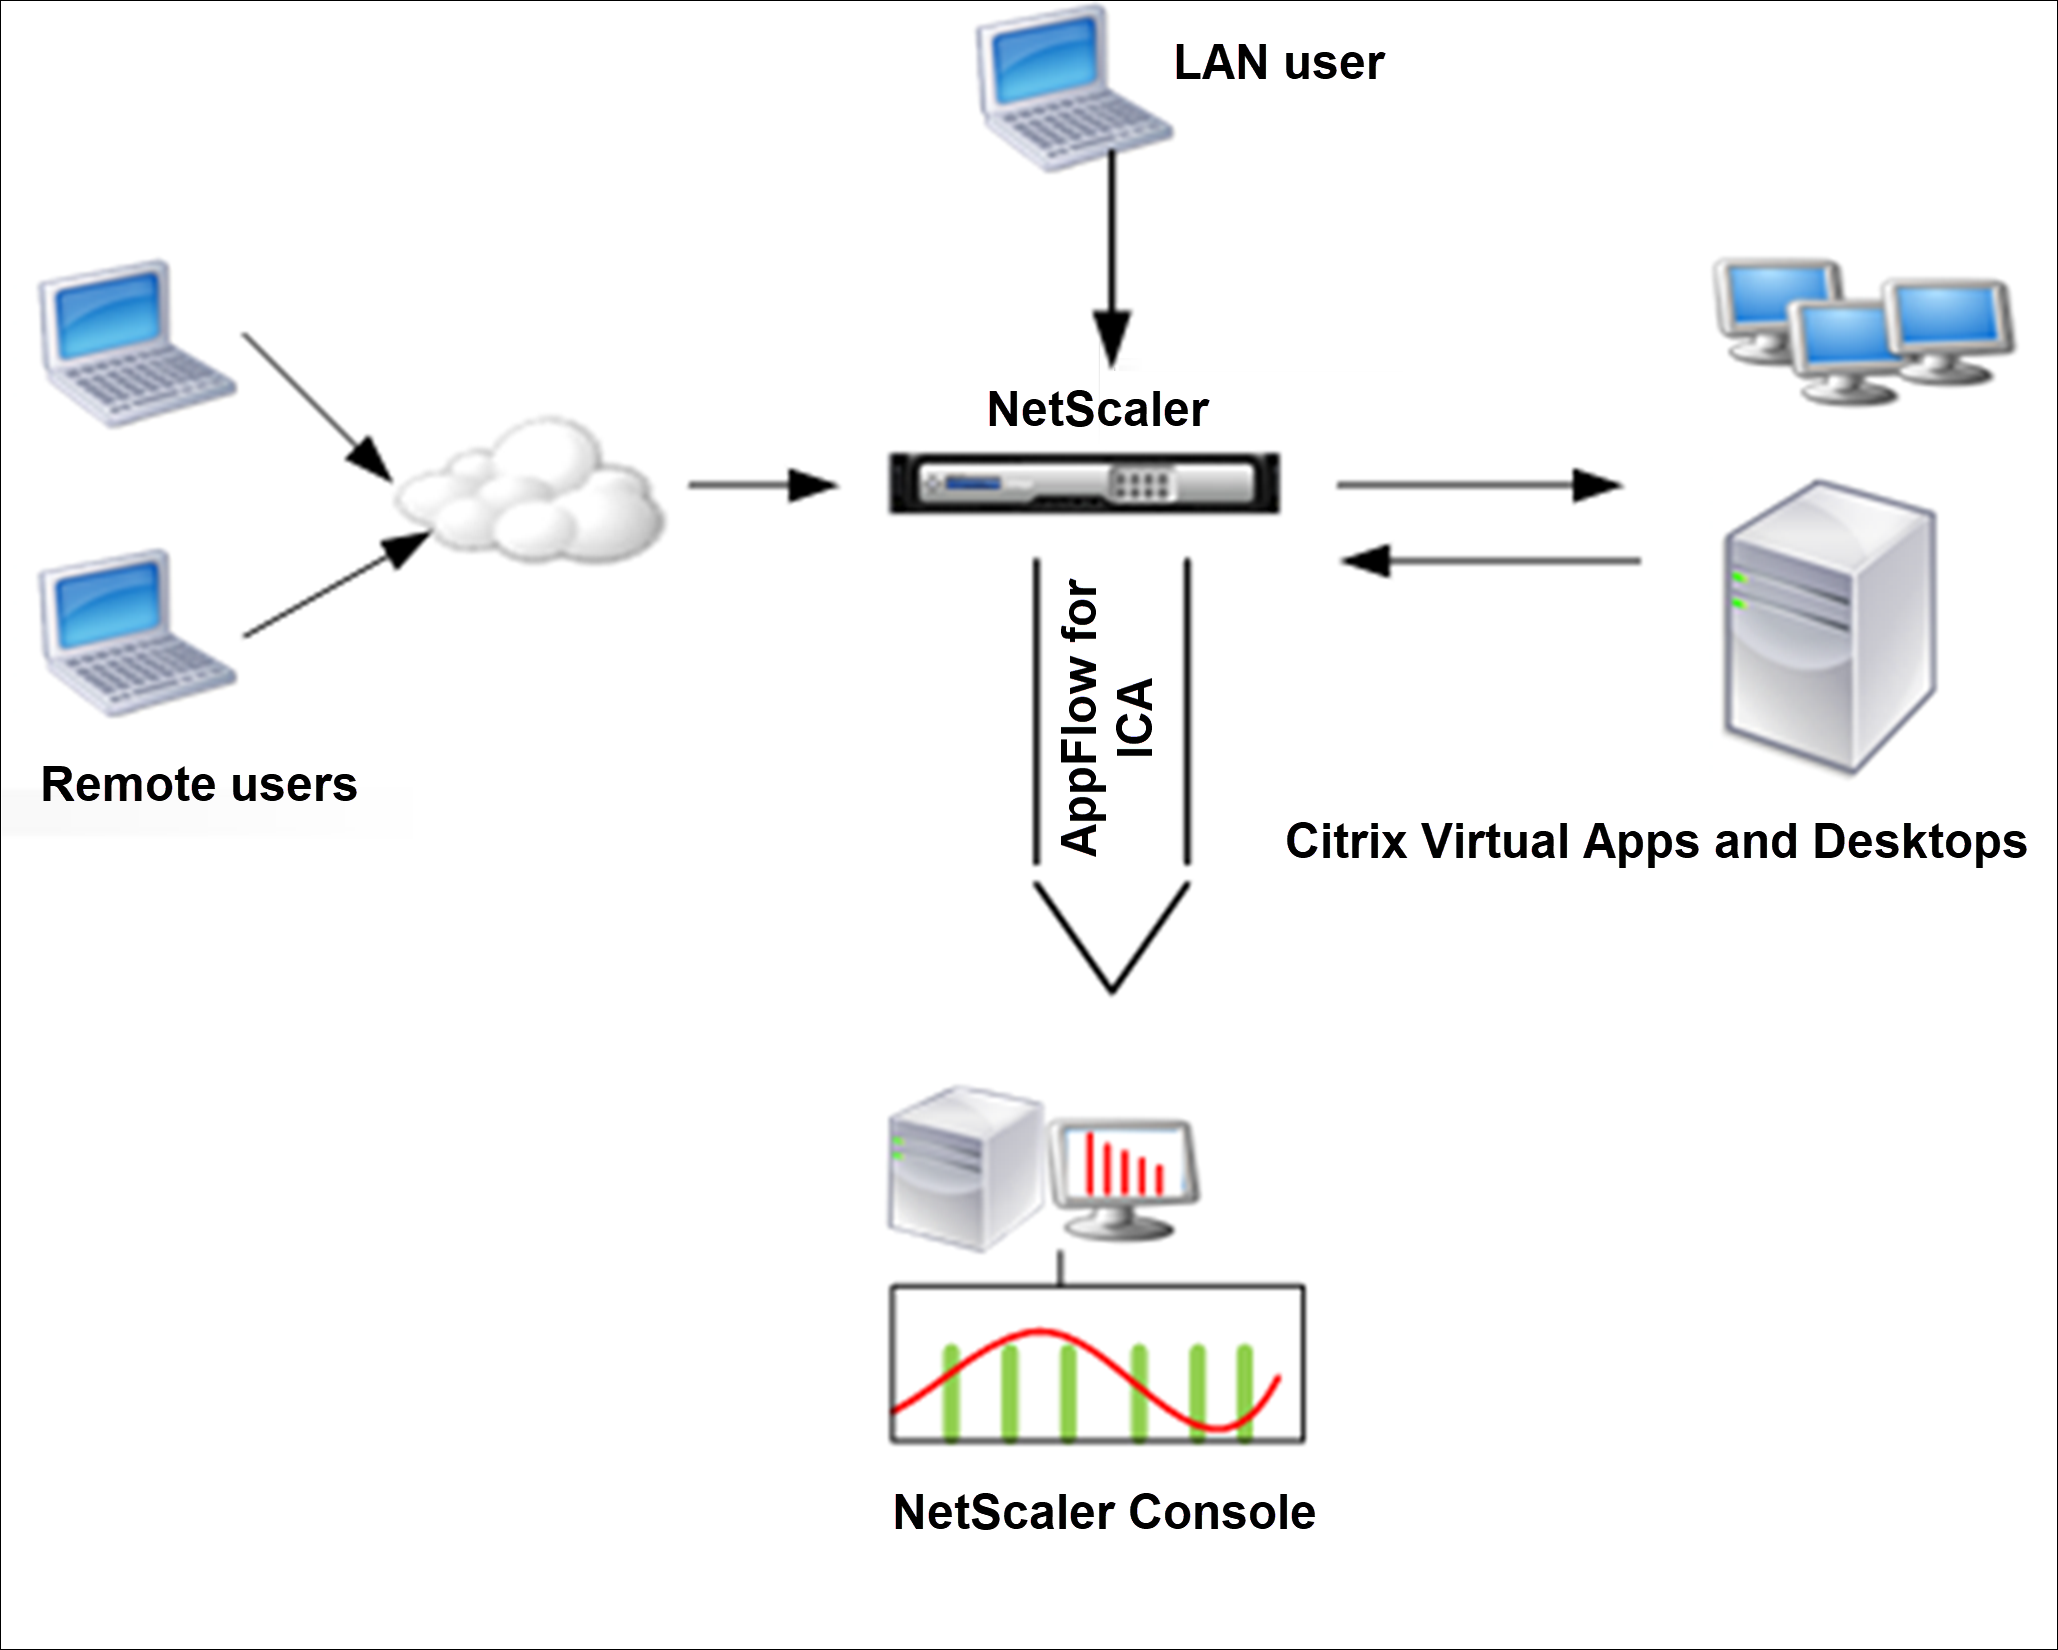
Note NetScaler Console and NetScaler Gateway appliance reside in the same subnet.
To monitor NetScaler appliances deployed in this mode, first add the NetScaler appliance to the NetScaler Insight inventory, enable AppFlow, and then view the reports on the dashboard.
After you add the NetScaler appliance to the NetScaler Console inventory, you must enable AppFlow for data collection.
Note
-
You cannot enable data collection on a NetScaler deployed in LAN User mode by using the NetScaler Console configuration utility.
-
For detailed information about the commands and their usage, see Command Reference.
-
For information on policy expressions, see Policies and Expressions.
To configure data collection on a NetScaler appliance by using the command line interface:
At the command prompt, do the following:
-
Log on to an appliance.
-
Add a forward proxy cache redirection virtual server with the proxy IP and port, and specify the service type as HDX.
add cr vserver <name> <servicetype> [<ipaddress> <port>] [-cacheType <cachetype>] [ - cltTimeout <secs>]Example:add cr vserver cr1 HDX 10.12.2.2 443 –cacheType FORWARD –cltTimeout 180Note If you are accessing the LAN network by using a NetScaler Gateway appliance, add an action to be applied by a policy that matches the VPN traffic.add vpn trafficAction** \<name\> \<qual\> \[-HDX ( ON | OFF )\]
add vpn trafficPolicy** \<name\> \<rule\> \<action\>Example:add vpn trafficAction act1 tcp -HDX ON
add vpn trafficPolicy pol1 "REQ.IP.DESTIP == 10.102.69.17" act1 -
Add NetScaler Console as an AppFlow collector on the NetScaler appliance.
add appflow collector** \<name\> **-IPAddress** \<ip\_addr\>Example:add appflow collector MyInsight -IPAddress 192.168.1.101 -
Create an AppFlow® action and associate the collector with the action.
add appflow action** \<name\> **-collectors** \<string\> ...Example:add appflow action act -collectors MyInsight -
Create an AppFlow policy to specify the rule for generating the traffic.
add appflow policy** \<policyname\> \<rule\> \<action\>Example:add appflow policy pol true act -
Bind the AppFlow policy to a global bind point.
bind appflow global** \<policyname\> \<priority\> **-type** \<type\>Example:bind appflow global pol 1 -type ICA\_REQ\_DEFAULTNoteThe value of type must be ICA\_REQ\_OVERRIDE or ICA\_REQ\_DEFAULT to apply to ICA traffic. -
Set the value of the flowRecordInterval parameter for AppFlow to 60 seconds.
set appflow param -flowRecordInterval 60Example:set appflow param -flowRecordInterval 60 -
Save the configuration.
save ns config