Citrix SD-WAN™ Center on AWS in VM importable image format
The Citrix SD-WAN Center is a centralized management system or a single pane of glass management solution that enables enterprises to configure, monitor, and analyze all Citrix SD-WAN appliances on their WAN.
Instantiating an SD-WAN Center virtual Appliance (AMI) on AWS
You need an AWS account to install an SD-WAN Center virtual appliance in an AWS VPC. You can create an AWS account here. SD-WAN Center is available as an Amazon Machine Image (AMI) in AWS Marketplace.
Note:
Amazon makes frequent changes to its AWS pages, so the following instructions may not be up-to-date.
There are two approaches to instantiate an SD-WAN Center virtual appliance (AMI) on AWS:
-
First approach: In a web browser, type http://aws.amazon.com/. Select AWS Management Console under My Account to open the Amazon Web Services (AWS).
Second approach: In a web browser, type http://console.aws.amazon.com to open the Amazon Web Services.
-
Use your AWS account credentials to sign in. This takes you to the Amazon Web Services page. You can view the Recently visited services list along with all other services.
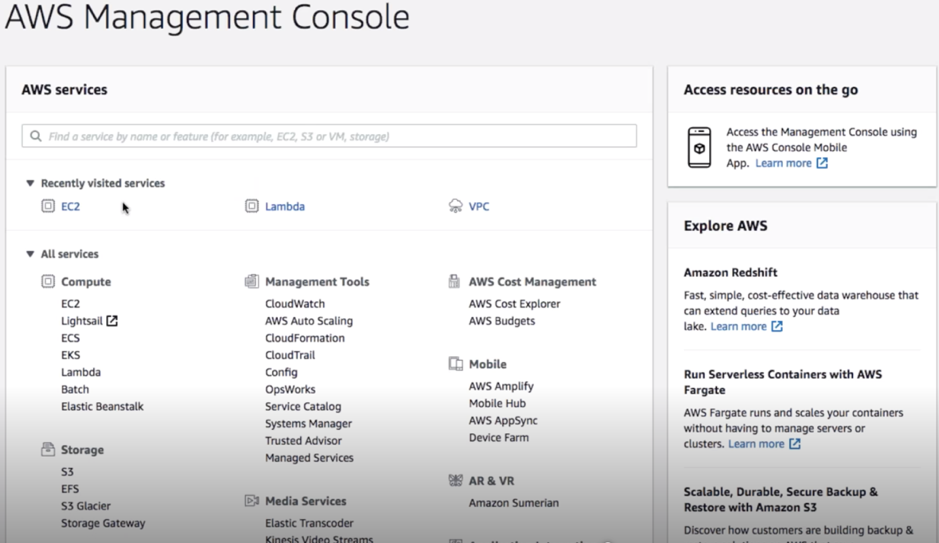
Citrix SD-WAN Center appliances offer the EC2 as an AWS service instances.
- EC2 Dashboard - elastic compute cloud, resizable virtual services / instances
-
Click EC2 in the Compute section, then select Launch Instance.
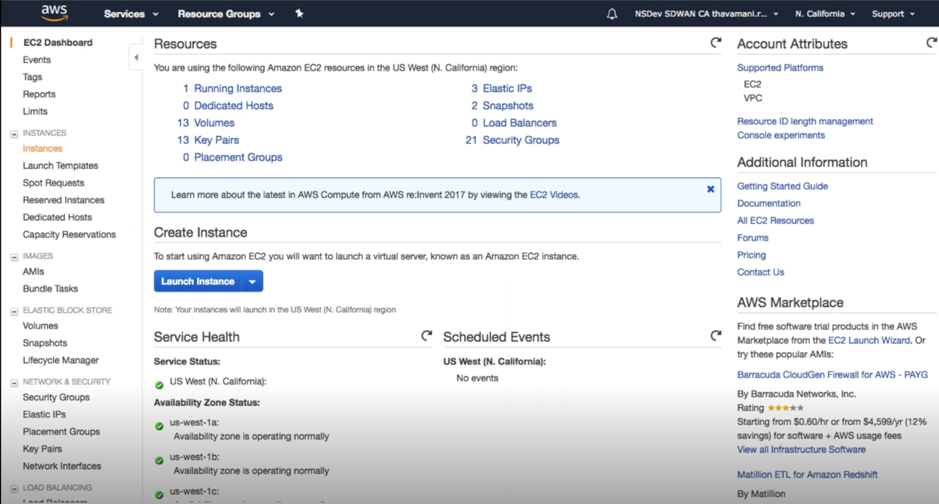
You can either select the Launch Instance option or manually reach to Instance screen by selecting the Instances option location on the left side under INSTANCES (refer the above screenshot).
- In the Choose AMI page, click AWS Marketplace tab.
-
In the Search text field, type SD-WAN to search for the SD-WAN AMI, and click Search.

On the search result page, select one of the Citrix SD-WAN Center AMI with the latest release, click Select.
An AMI template contains the software configuration including operating system, application server, and applications. This template is required to launch instances.
-
Choose an instance type and select Next: Configure Instance Detail. You can filter your search by selecting a specific instance type or all instance type with current generation.
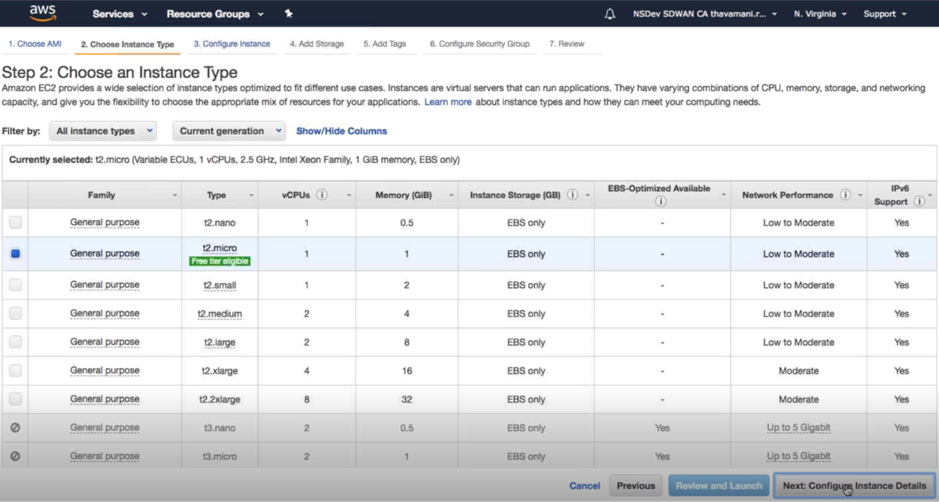
The amazon EC2 provides a wide selection of instance types optimized to fit different use cases. Instances are virtual servers that can run applications.
-
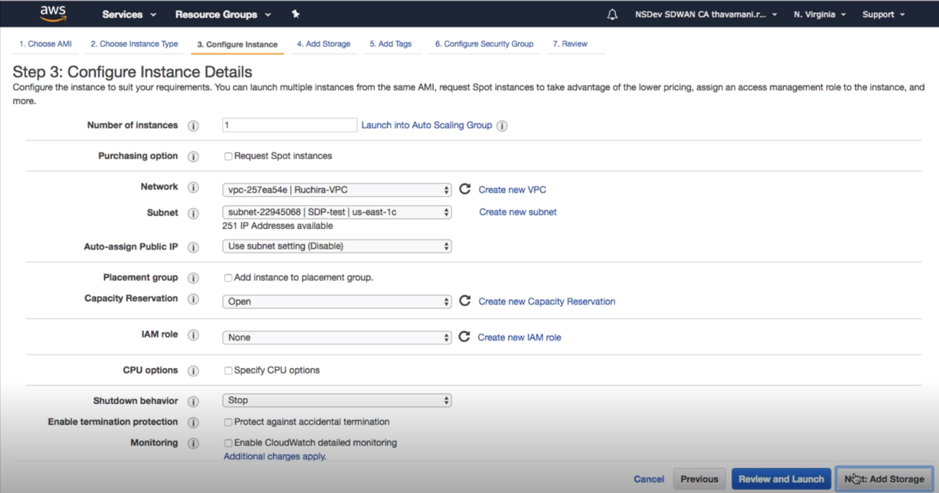
On the Configure Instance page, type 1 in the Number of Instances text box, and fill the other details such as Network, Subnet, and so on for a specific instance as needed. Click Next: Add Storage.
-
The instance is launched with the storage device settings. You can add a new volume separately once the instance is provisioned.
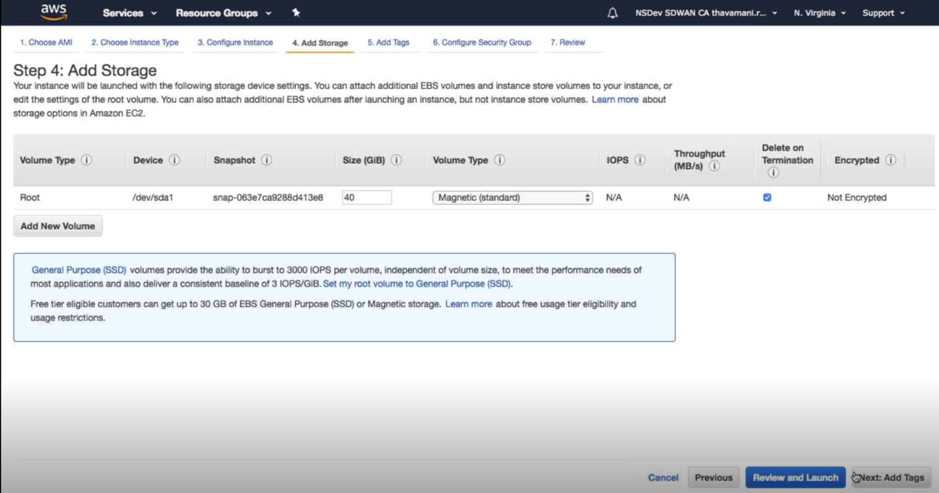
-
Click Review and Launch to select the boot volume option as per your requirement. Click Next.
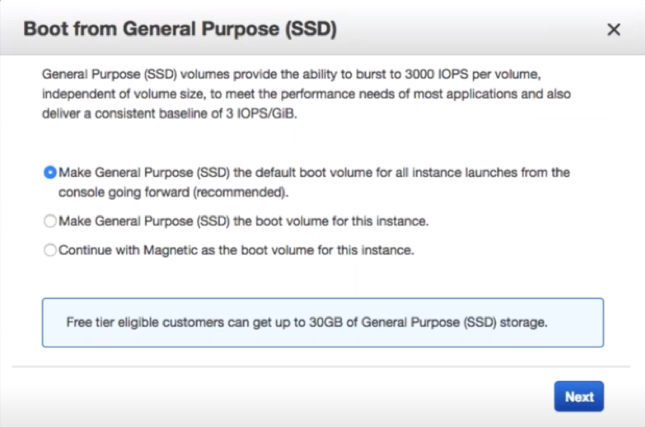
-
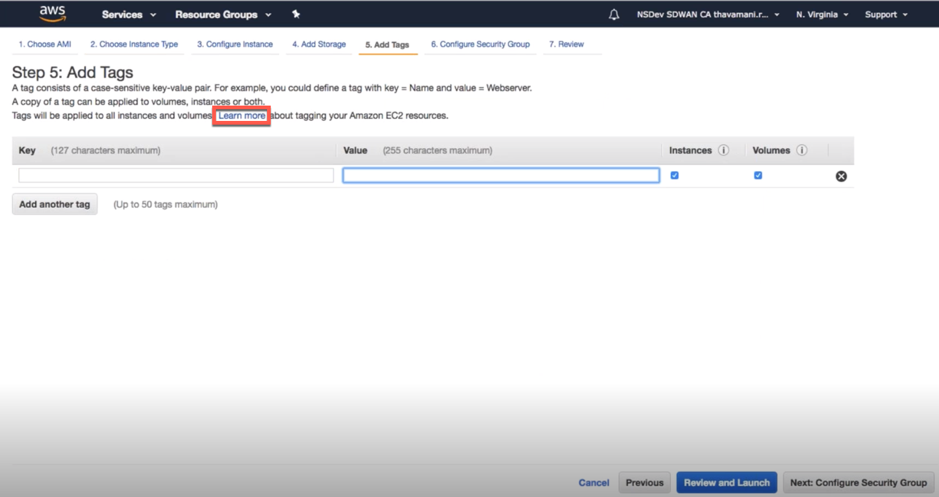
Add or define a tag with a Key Name and Value. Click Learn more to learn more about tagging. You can add up to 50 tags maximum. Click Next: Configure Security Group.
Note:
NOTE: A tag key length must be between 1–127 characters.
-
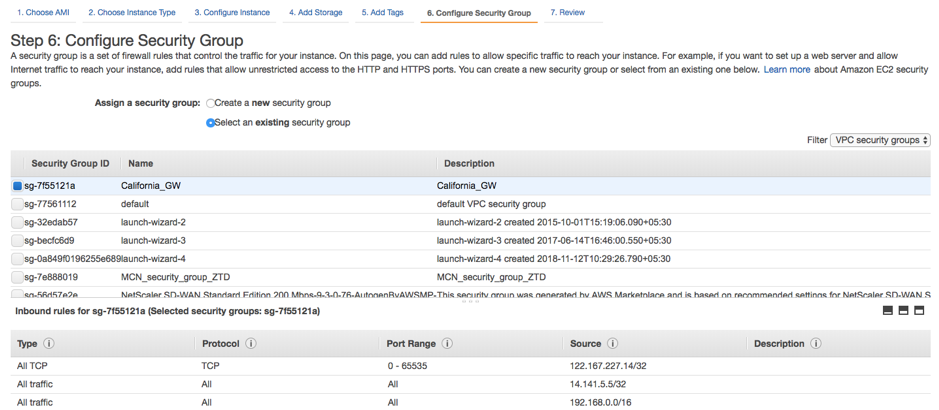
You can create a general security group that helps to control traffic for the instance. You can create a new security group or select an existing security group from the list.
Note:
Ensure the security group allows the inbound connections over 2156 port to collects data from Citrix SD-WAN appliances.
-
Review the instance launch details, and then click Launch. A pop-up box appears to ask for creating a key pair. It is mandatory to create a Key pair for the instance.
