-
-
SSL certificate for services of type LoadBalancer through the Kubernetes secret resource
-
BGP advertisement for type LoadBalancer services and Ingresses using NetScaler CPX
-
NetScaler CPX integration with MetalLB in layer 2 mode for on-premises Kubernetes clusters
-
Advanced content routing for Kubernetes Ingress using the HTTPRoute CRD
-
IP address management using the NetScaler IPAM controller for Ingress resources
-
Deploy NetScaler ingress controller for NetScaler with admin partitions
-
This content has been machine translated dynamically.
Dieser Inhalt ist eine maschinelle Übersetzung, die dynamisch erstellt wurde. (Haftungsausschluss)
Cet article a été traduit automatiquement de manière dynamique. (Clause de non responsabilité)
Este artículo lo ha traducido una máquina de forma dinámica. (Aviso legal)
此内容已经过机器动态翻译。 放弃
このコンテンツは動的に機械翻訳されています。免責事項
이 콘텐츠는 동적으로 기계 번역되었습니다. 책임 부인
Este texto foi traduzido automaticamente. (Aviso legal)
Questo contenuto è stato tradotto dinamicamente con traduzione automatica.(Esclusione di responsabilità))
This article has been machine translated.
Dieser Artikel wurde maschinell übersetzt. (Haftungsausschluss)
Ce article a été traduit automatiquement. (Clause de non responsabilité)
Este artículo ha sido traducido automáticamente. (Aviso legal)
この記事は機械翻訳されています.免責事項
이 기사는 기계 번역되었습니다.책임 부인
Este artigo foi traduzido automaticamente.(Aviso legal)
这篇文章已经过机器翻译.放弃
Questo articolo è stato tradotto automaticamente.(Esclusione di responsabilità))
Translation failed!
Create a NetScaler VPX instance from Azure Marketplace
This topic explains the steps to create a NetScaler VPX instance from Azure Marketplace.
Prerequisites
- A valid Azure Marketplace account and subscription
- An existing Kubernetes cluster in Azure
Deploy NetScaler VPX from Azure Marketplace
Perform the following steps to create a NetScaler VPX instance from Azure Marketplace.
-
Log in to your Azure Marketplace account.
-
Locate the resource group automatically created as a part of creating the Kubernetes cluster.
-
If the Kubernetes cluster
Xis a part of a resource groupYin regionZthen search for a resource group starting withMCfollowed tyX_Y_Z(MC_X_Y_Z). For example, consider a Kubernetes cluster with the following attributes:- cluster name as
cic-cluster-basic-1 - resource group for the cluster as
AKS_RG - region used for the cluster as
southindia
- cluster name as
Then, a resource group would have been automatically created as
MC_AKS_RG_cic-cluster-basic-1_southindia.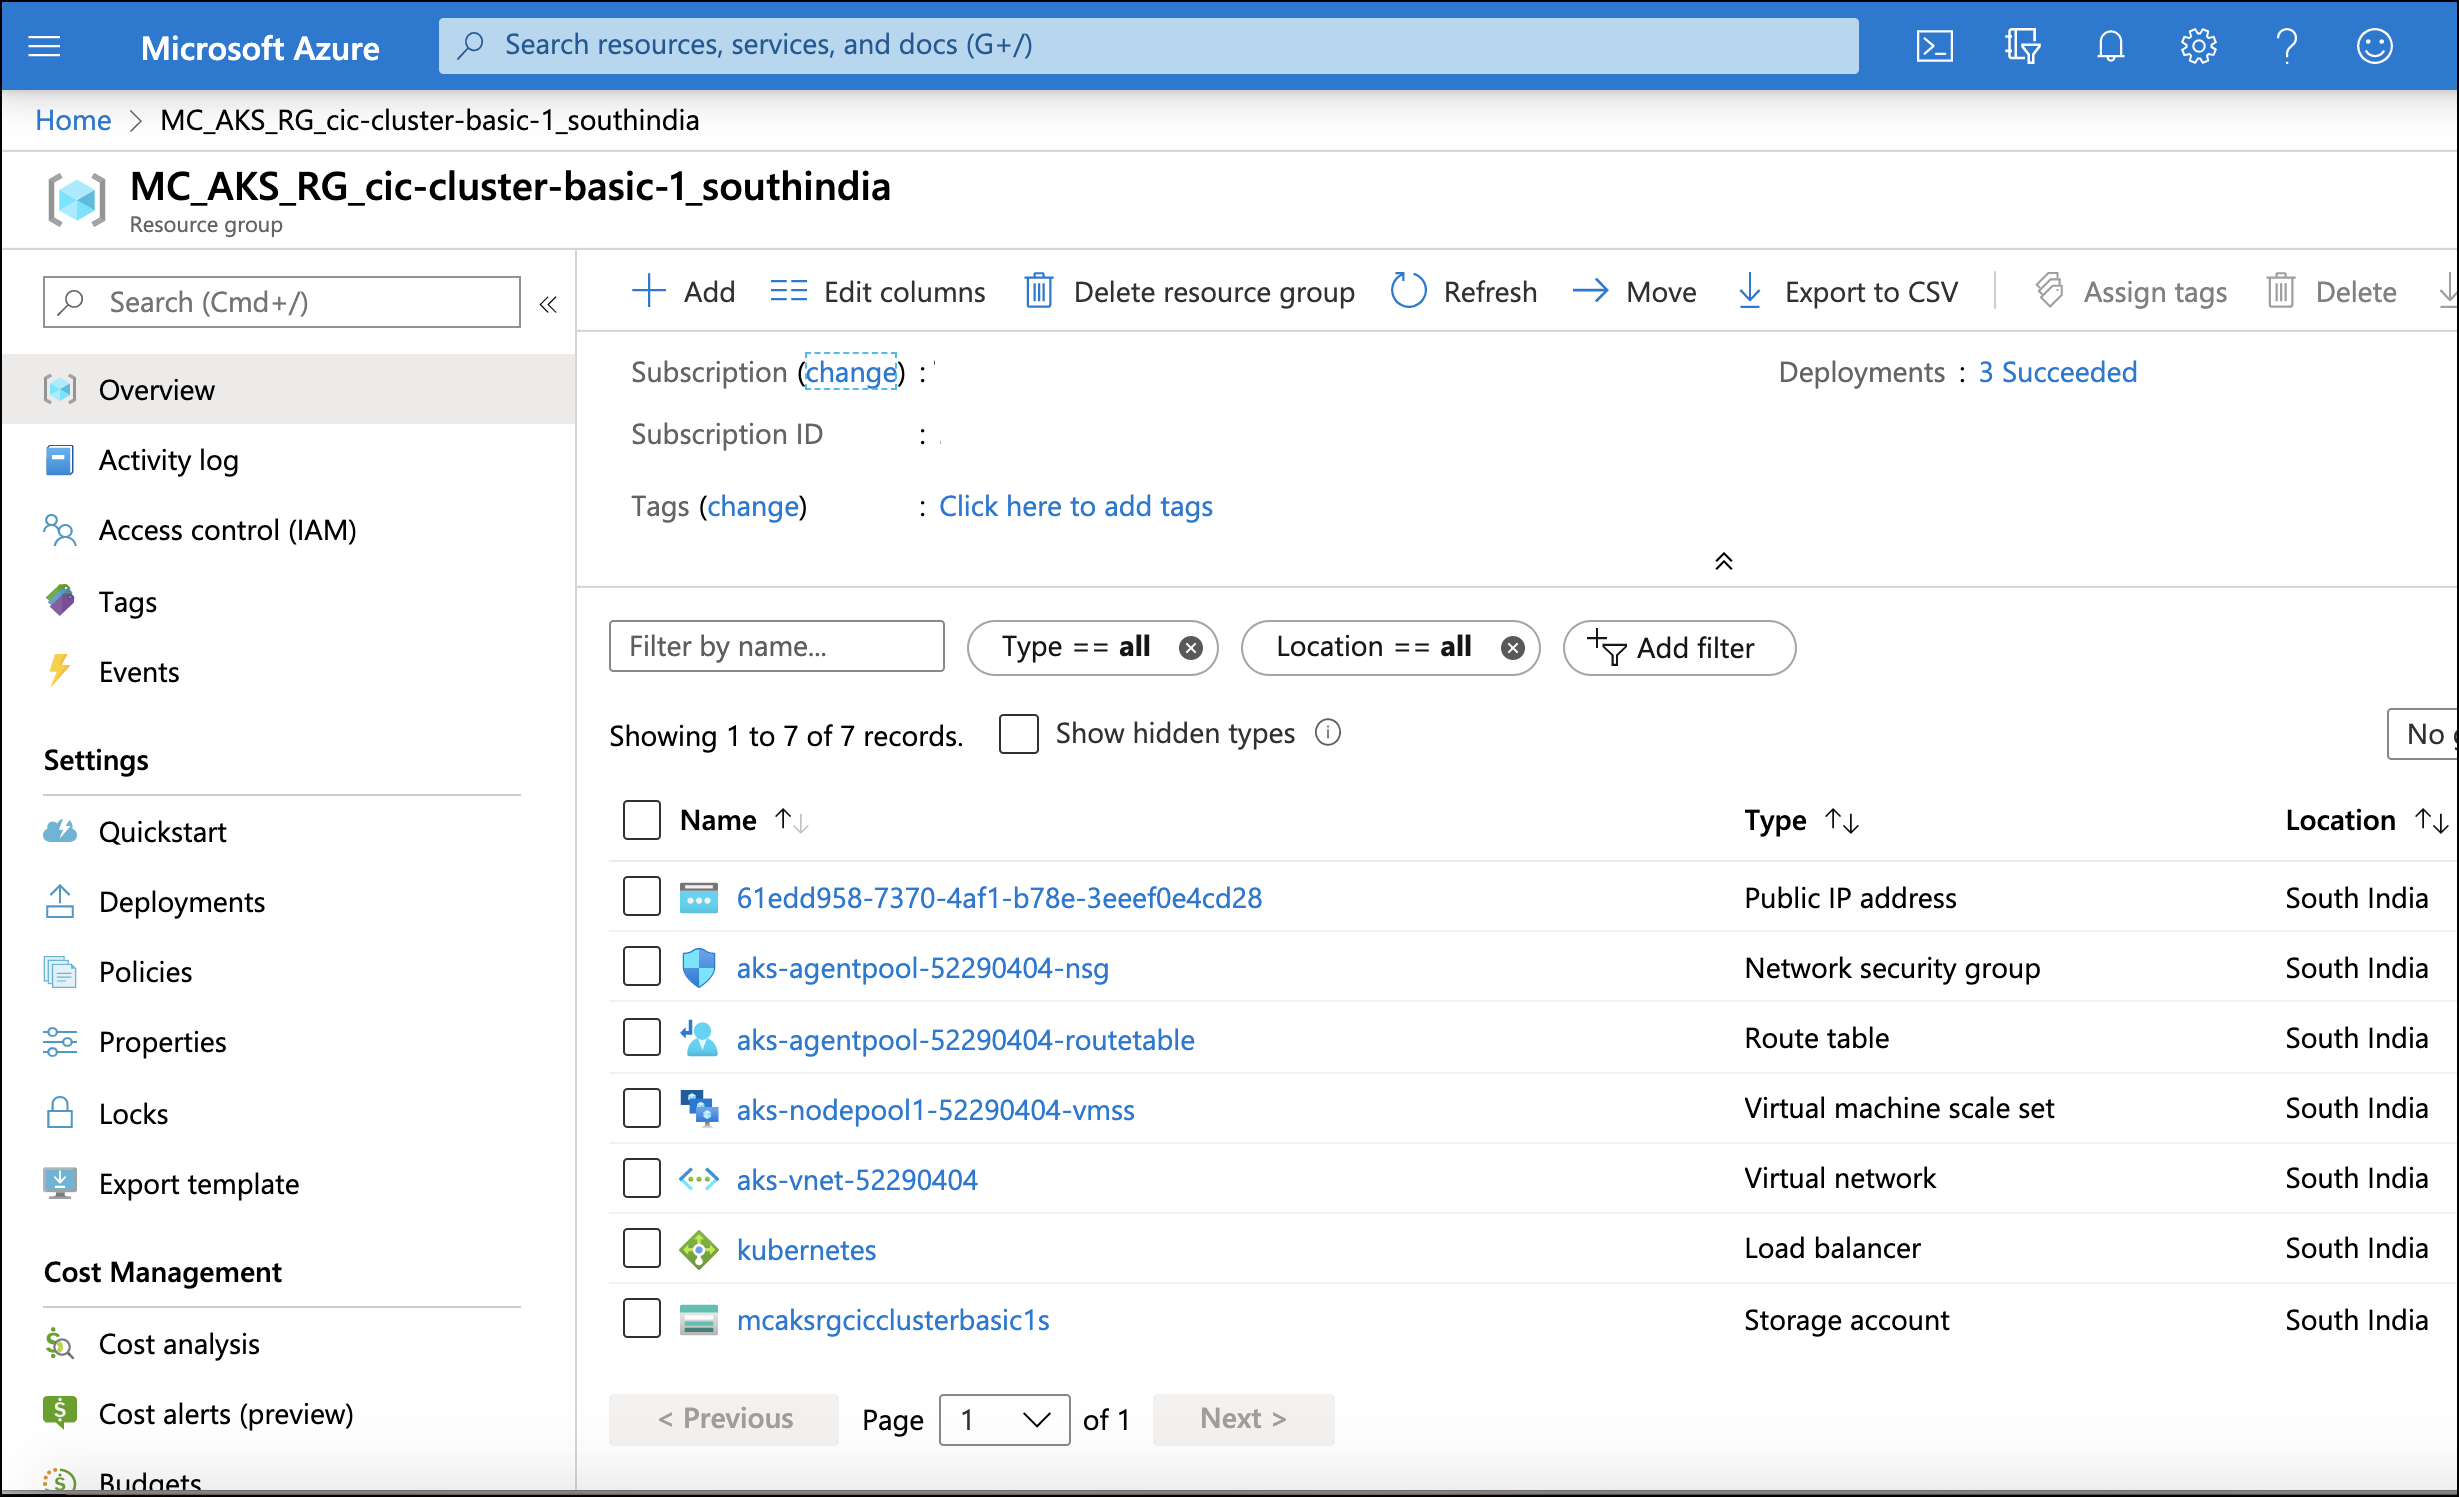
-
-
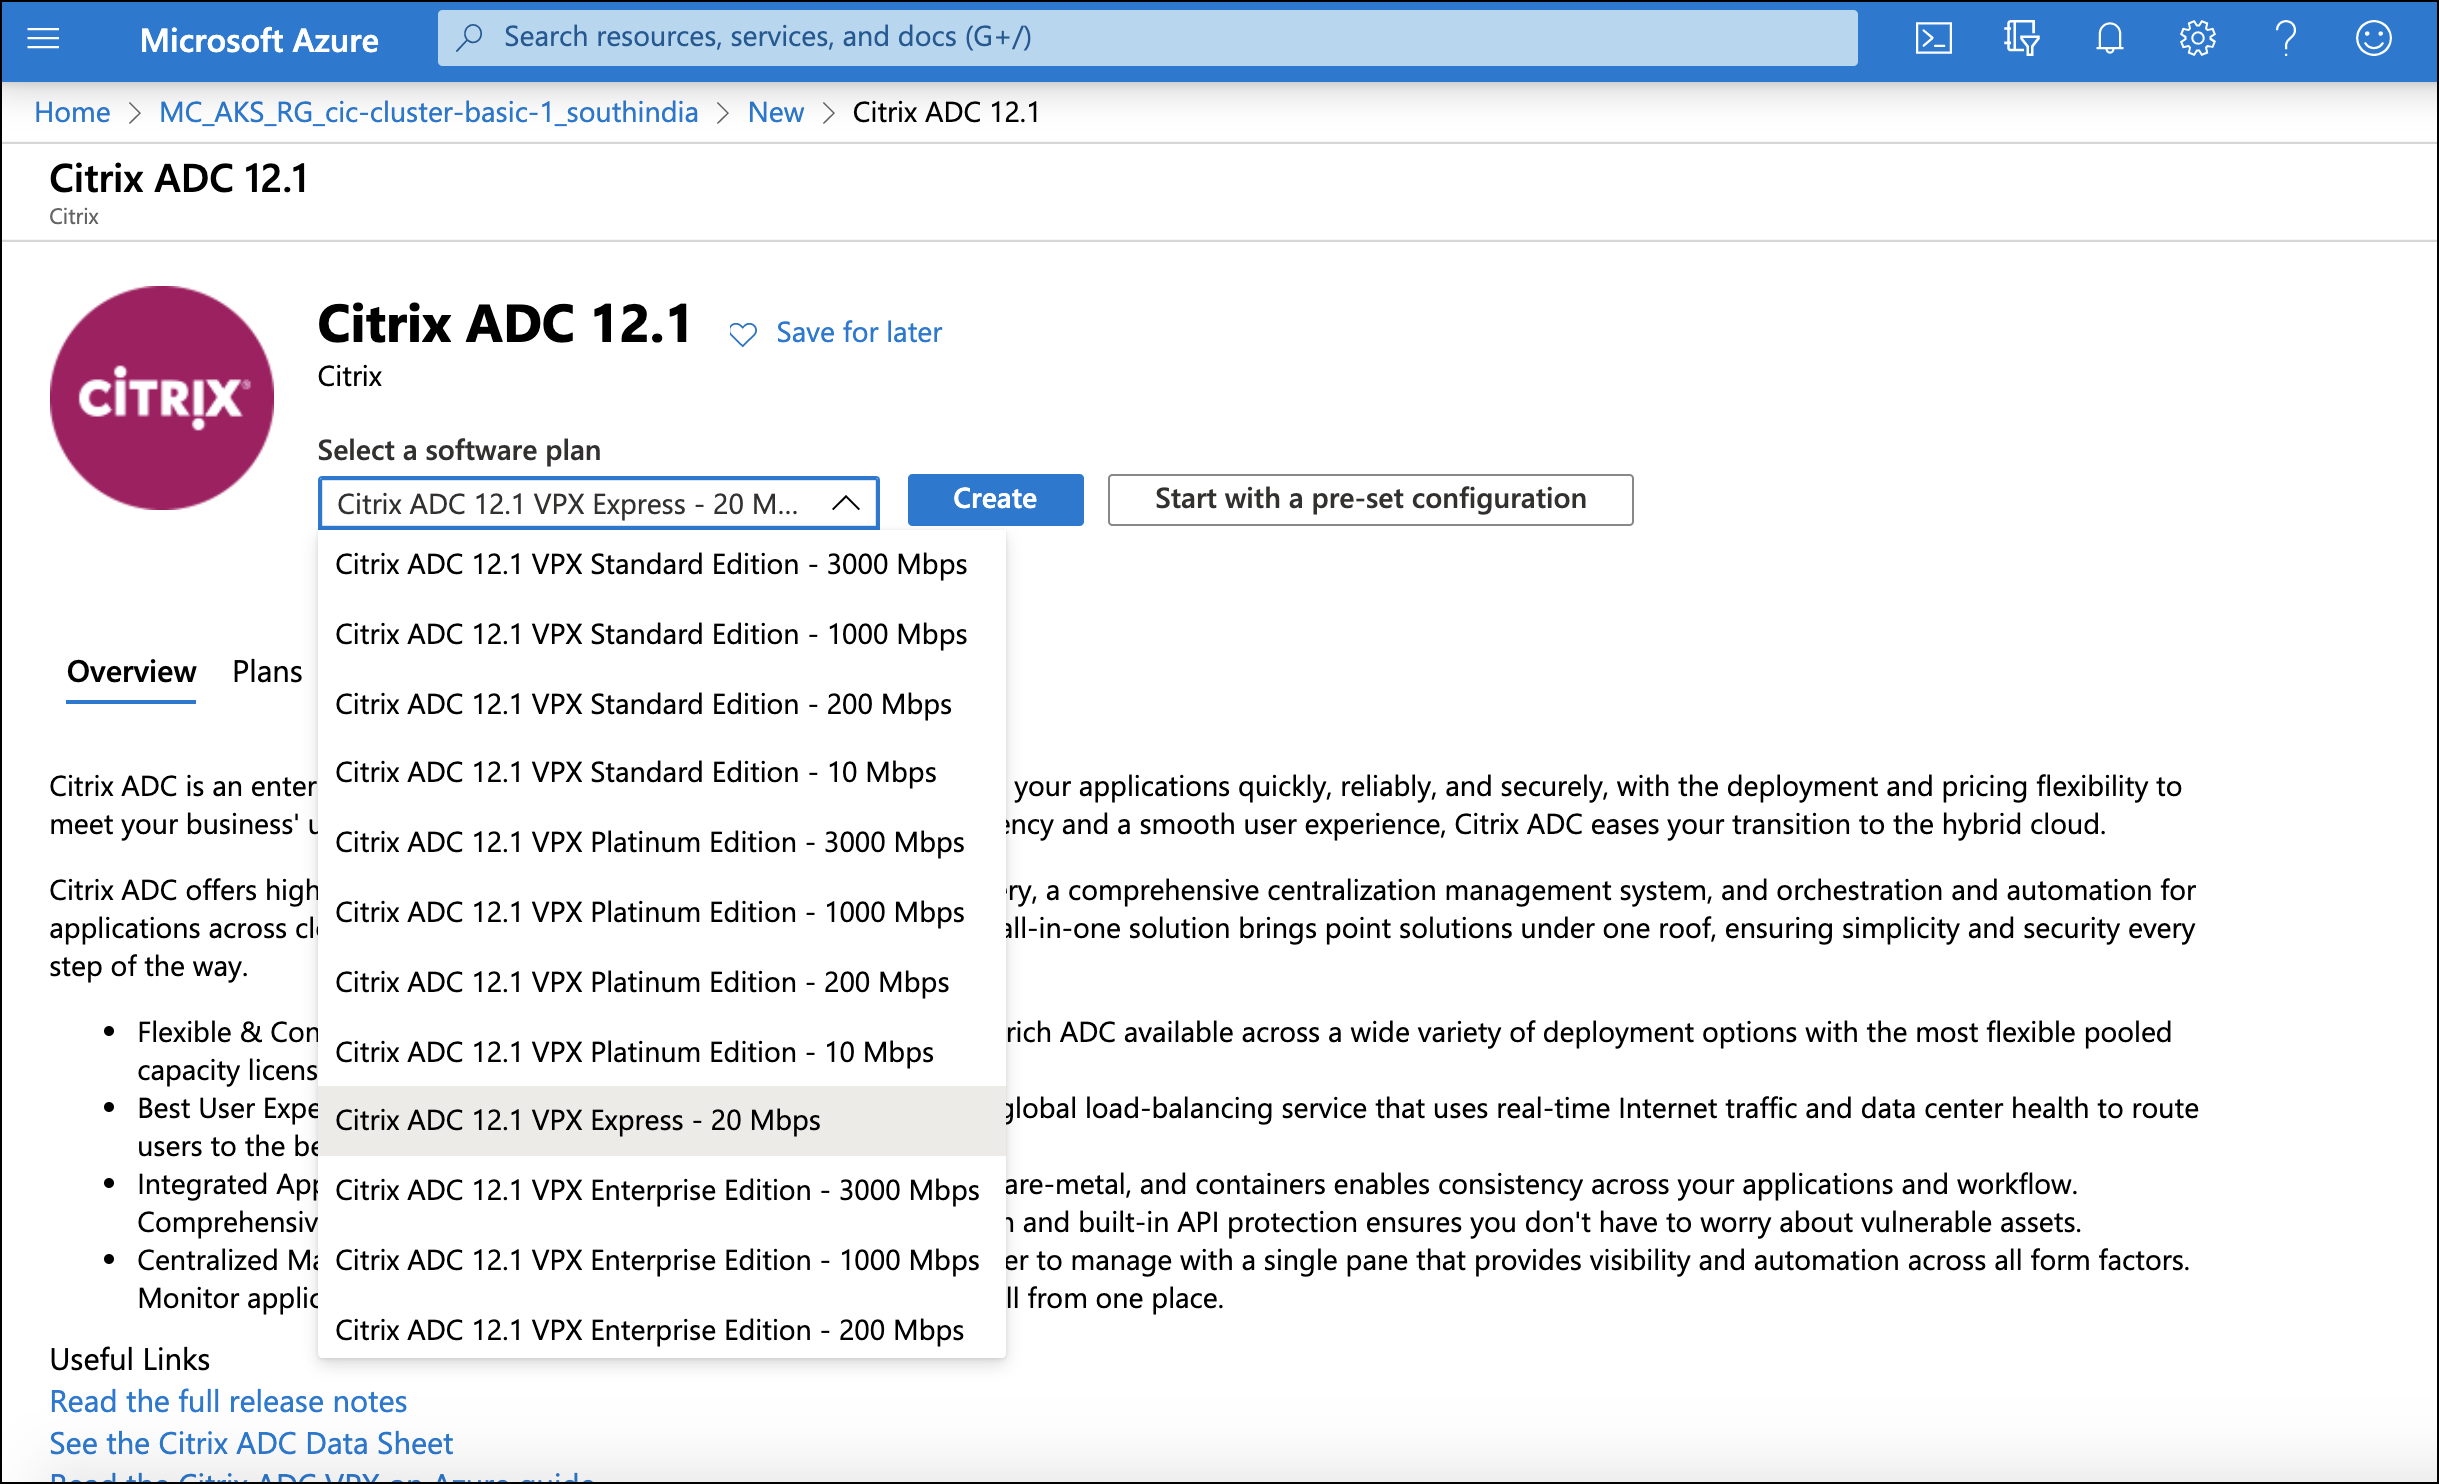
Add NetScaler VPX in the resource group located in step 2.
-
From the resource group page, click +Add.
-
Search for
NetScaler 12.1, select a software plan, and click Create.
-
-
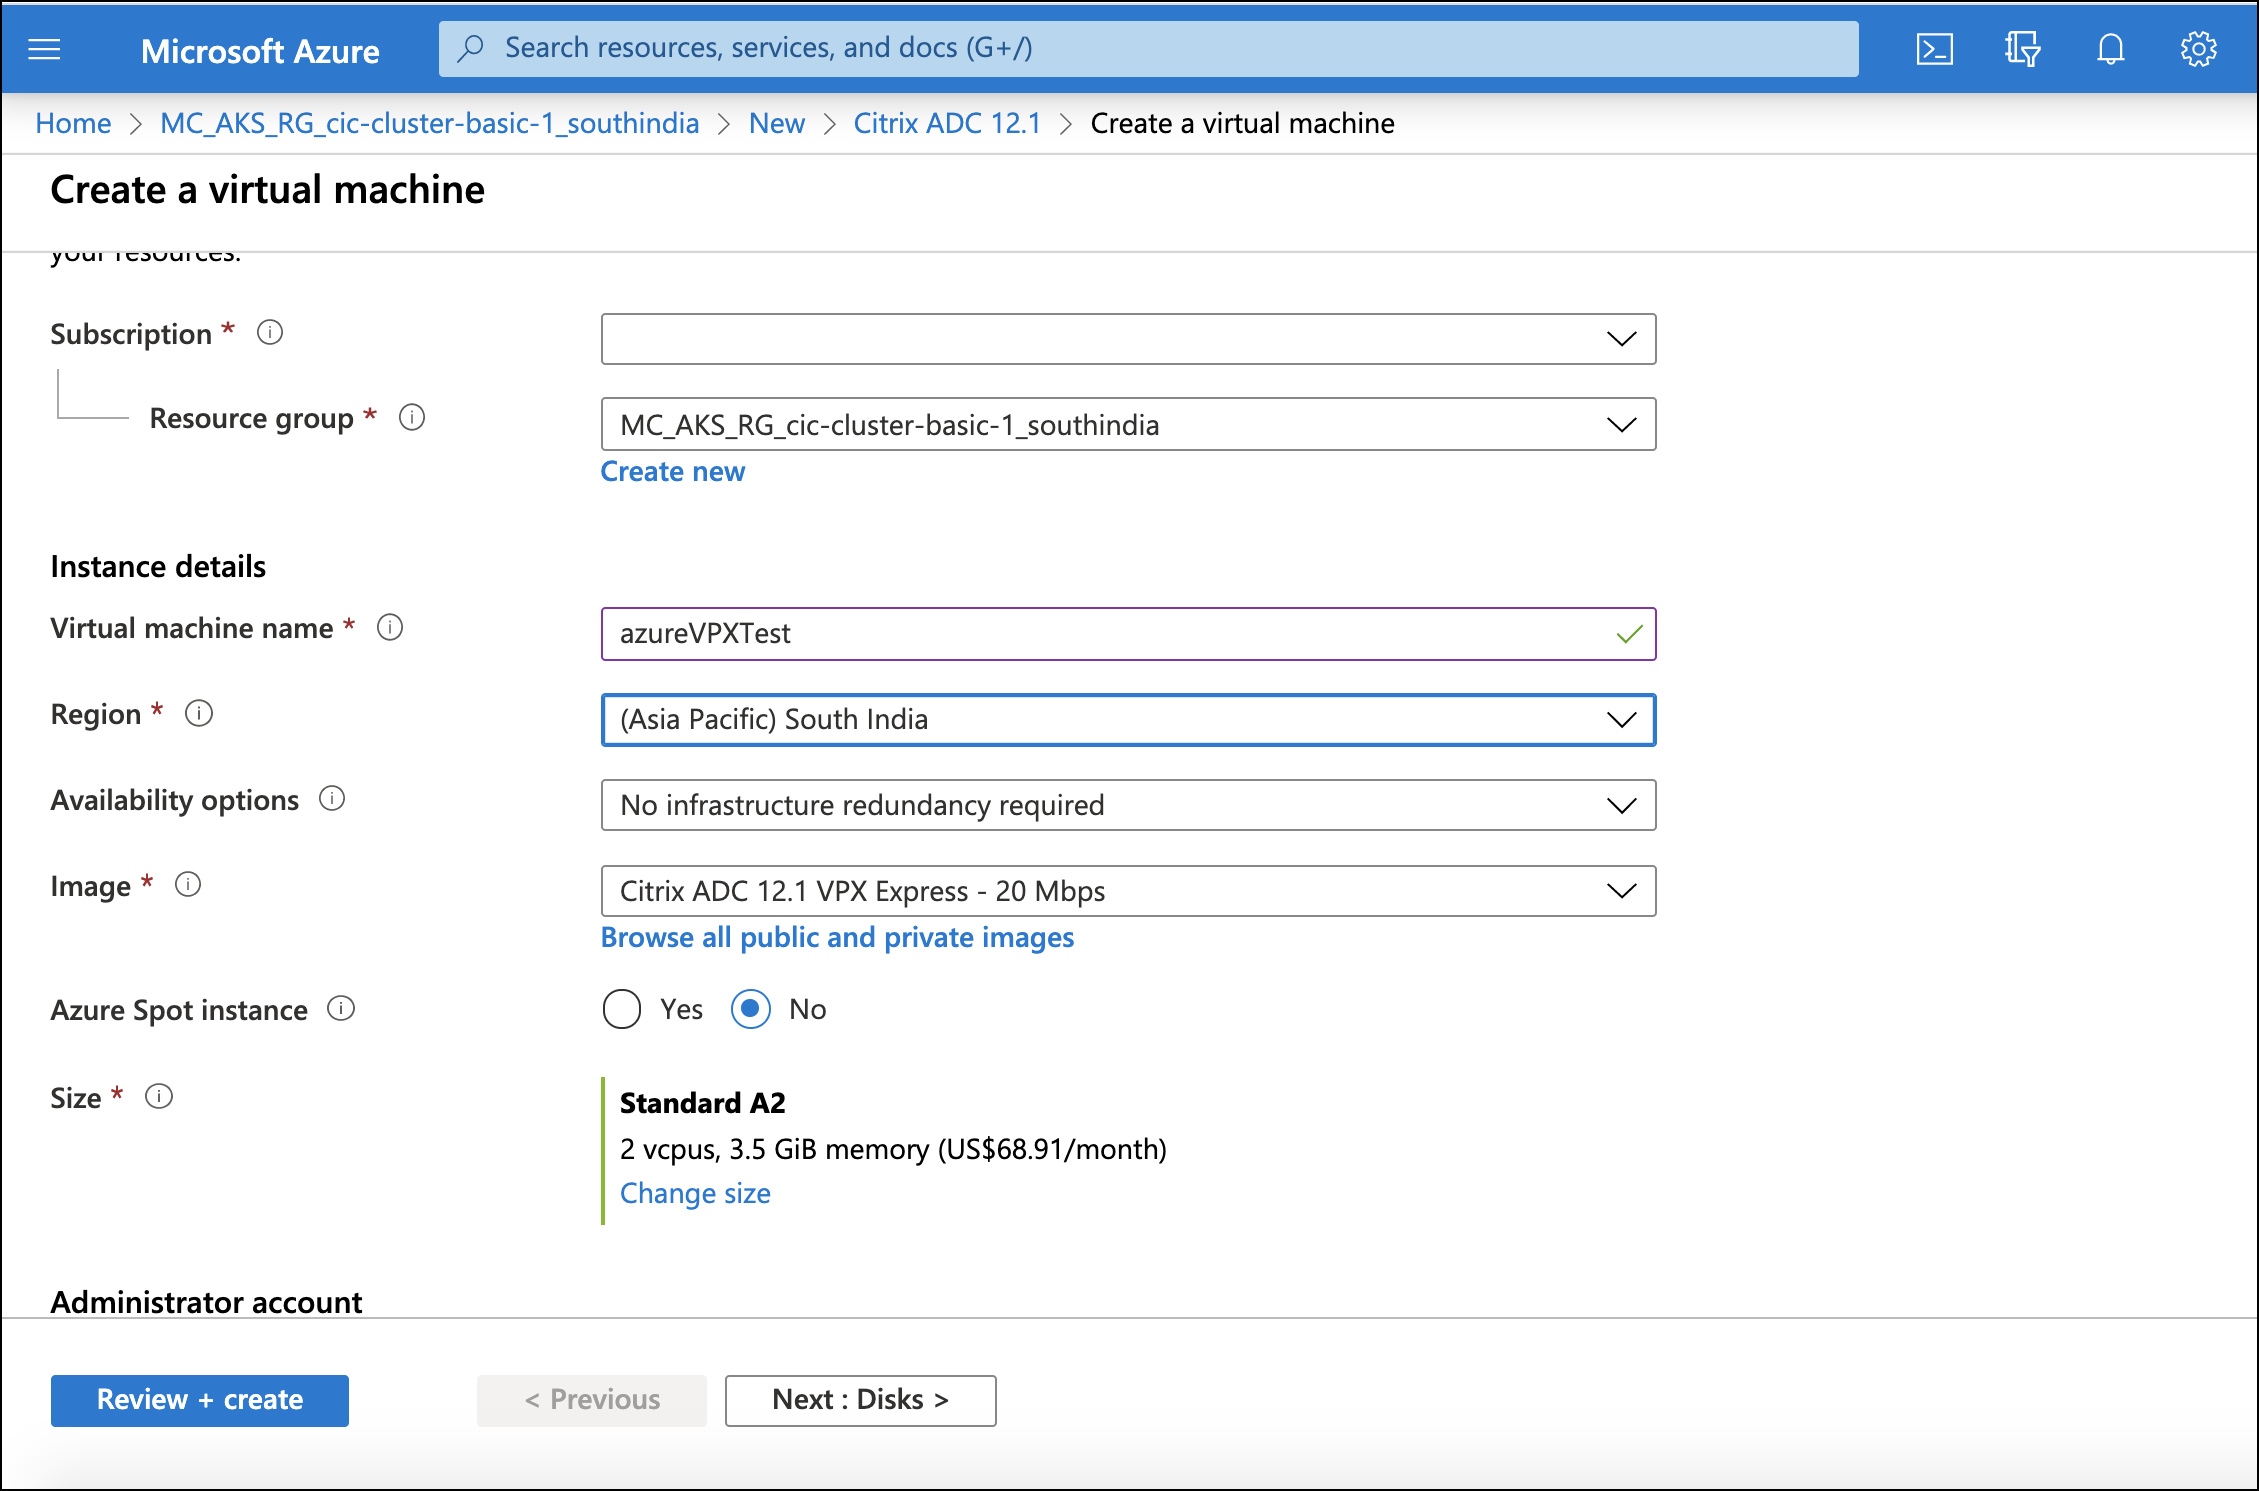
Specify the required details for NetScaler VPX.
-
Specify a virtual machine name.
-
Specify a region which should be same as that of the cluster.
-
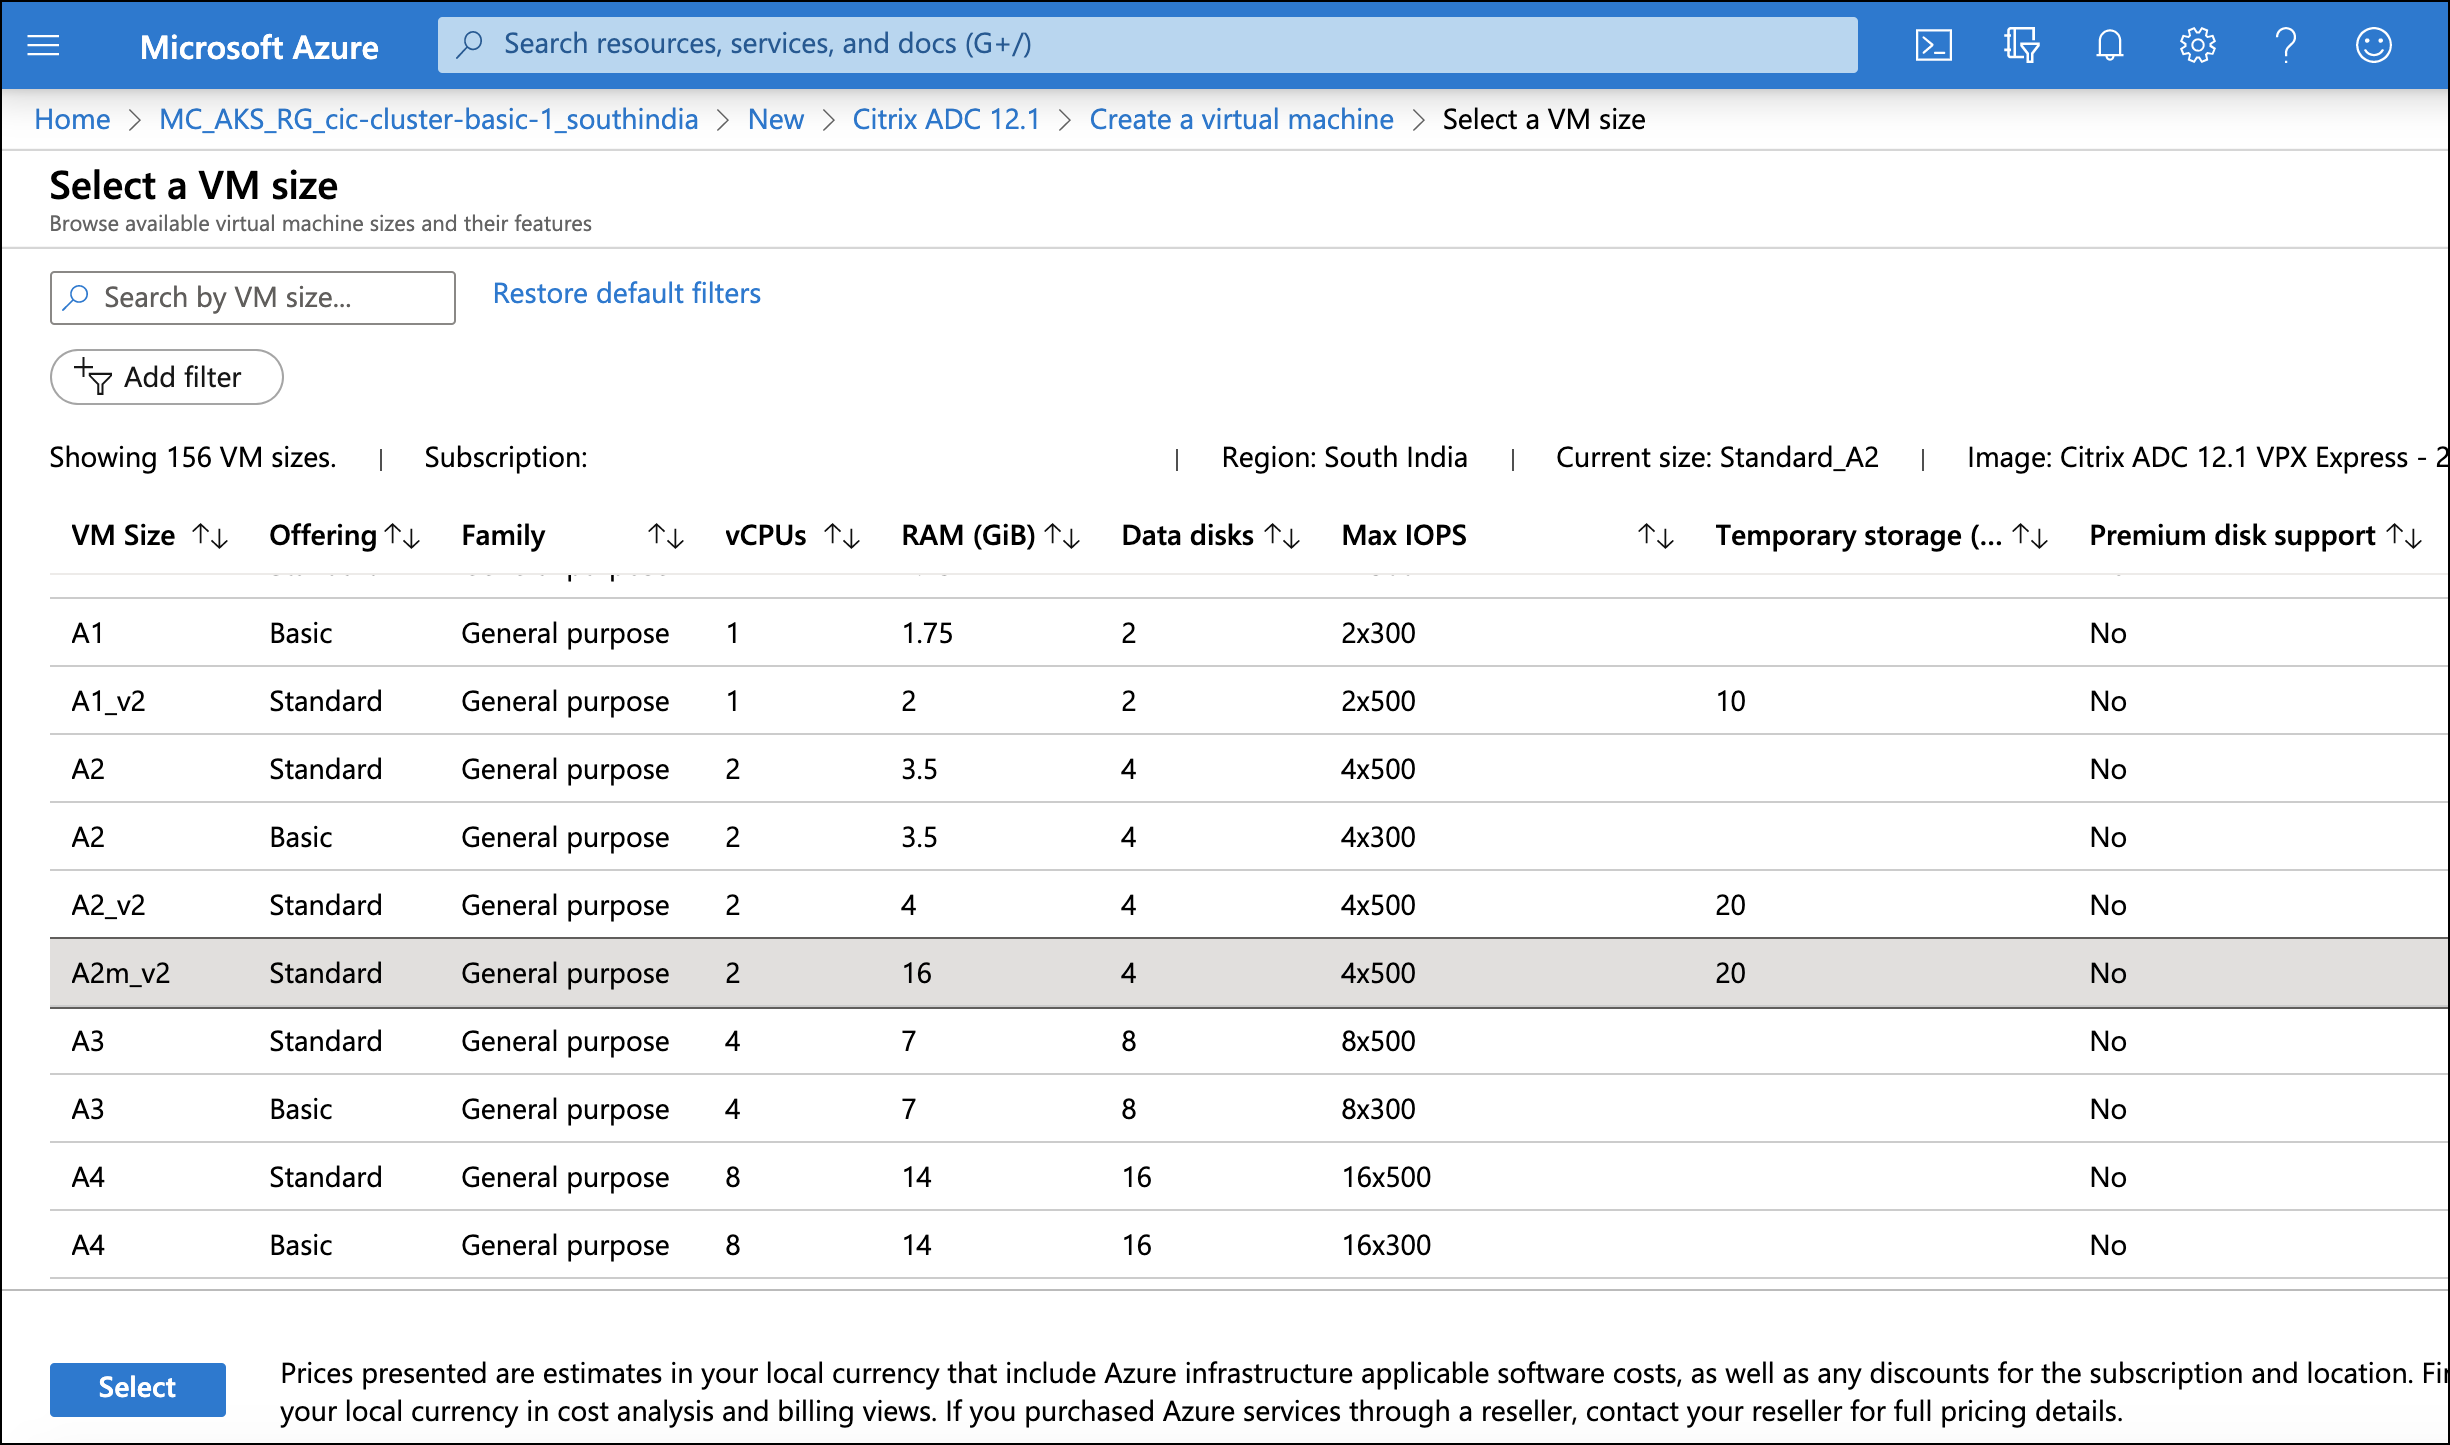
Specify the size for the NetScaler VPX.
-
Under Administrator account, select the authentication type as
Passwordand specify theUsernameandPassword. -
Select all the relevant
inbound portsfrom drop-down menu, then click Next.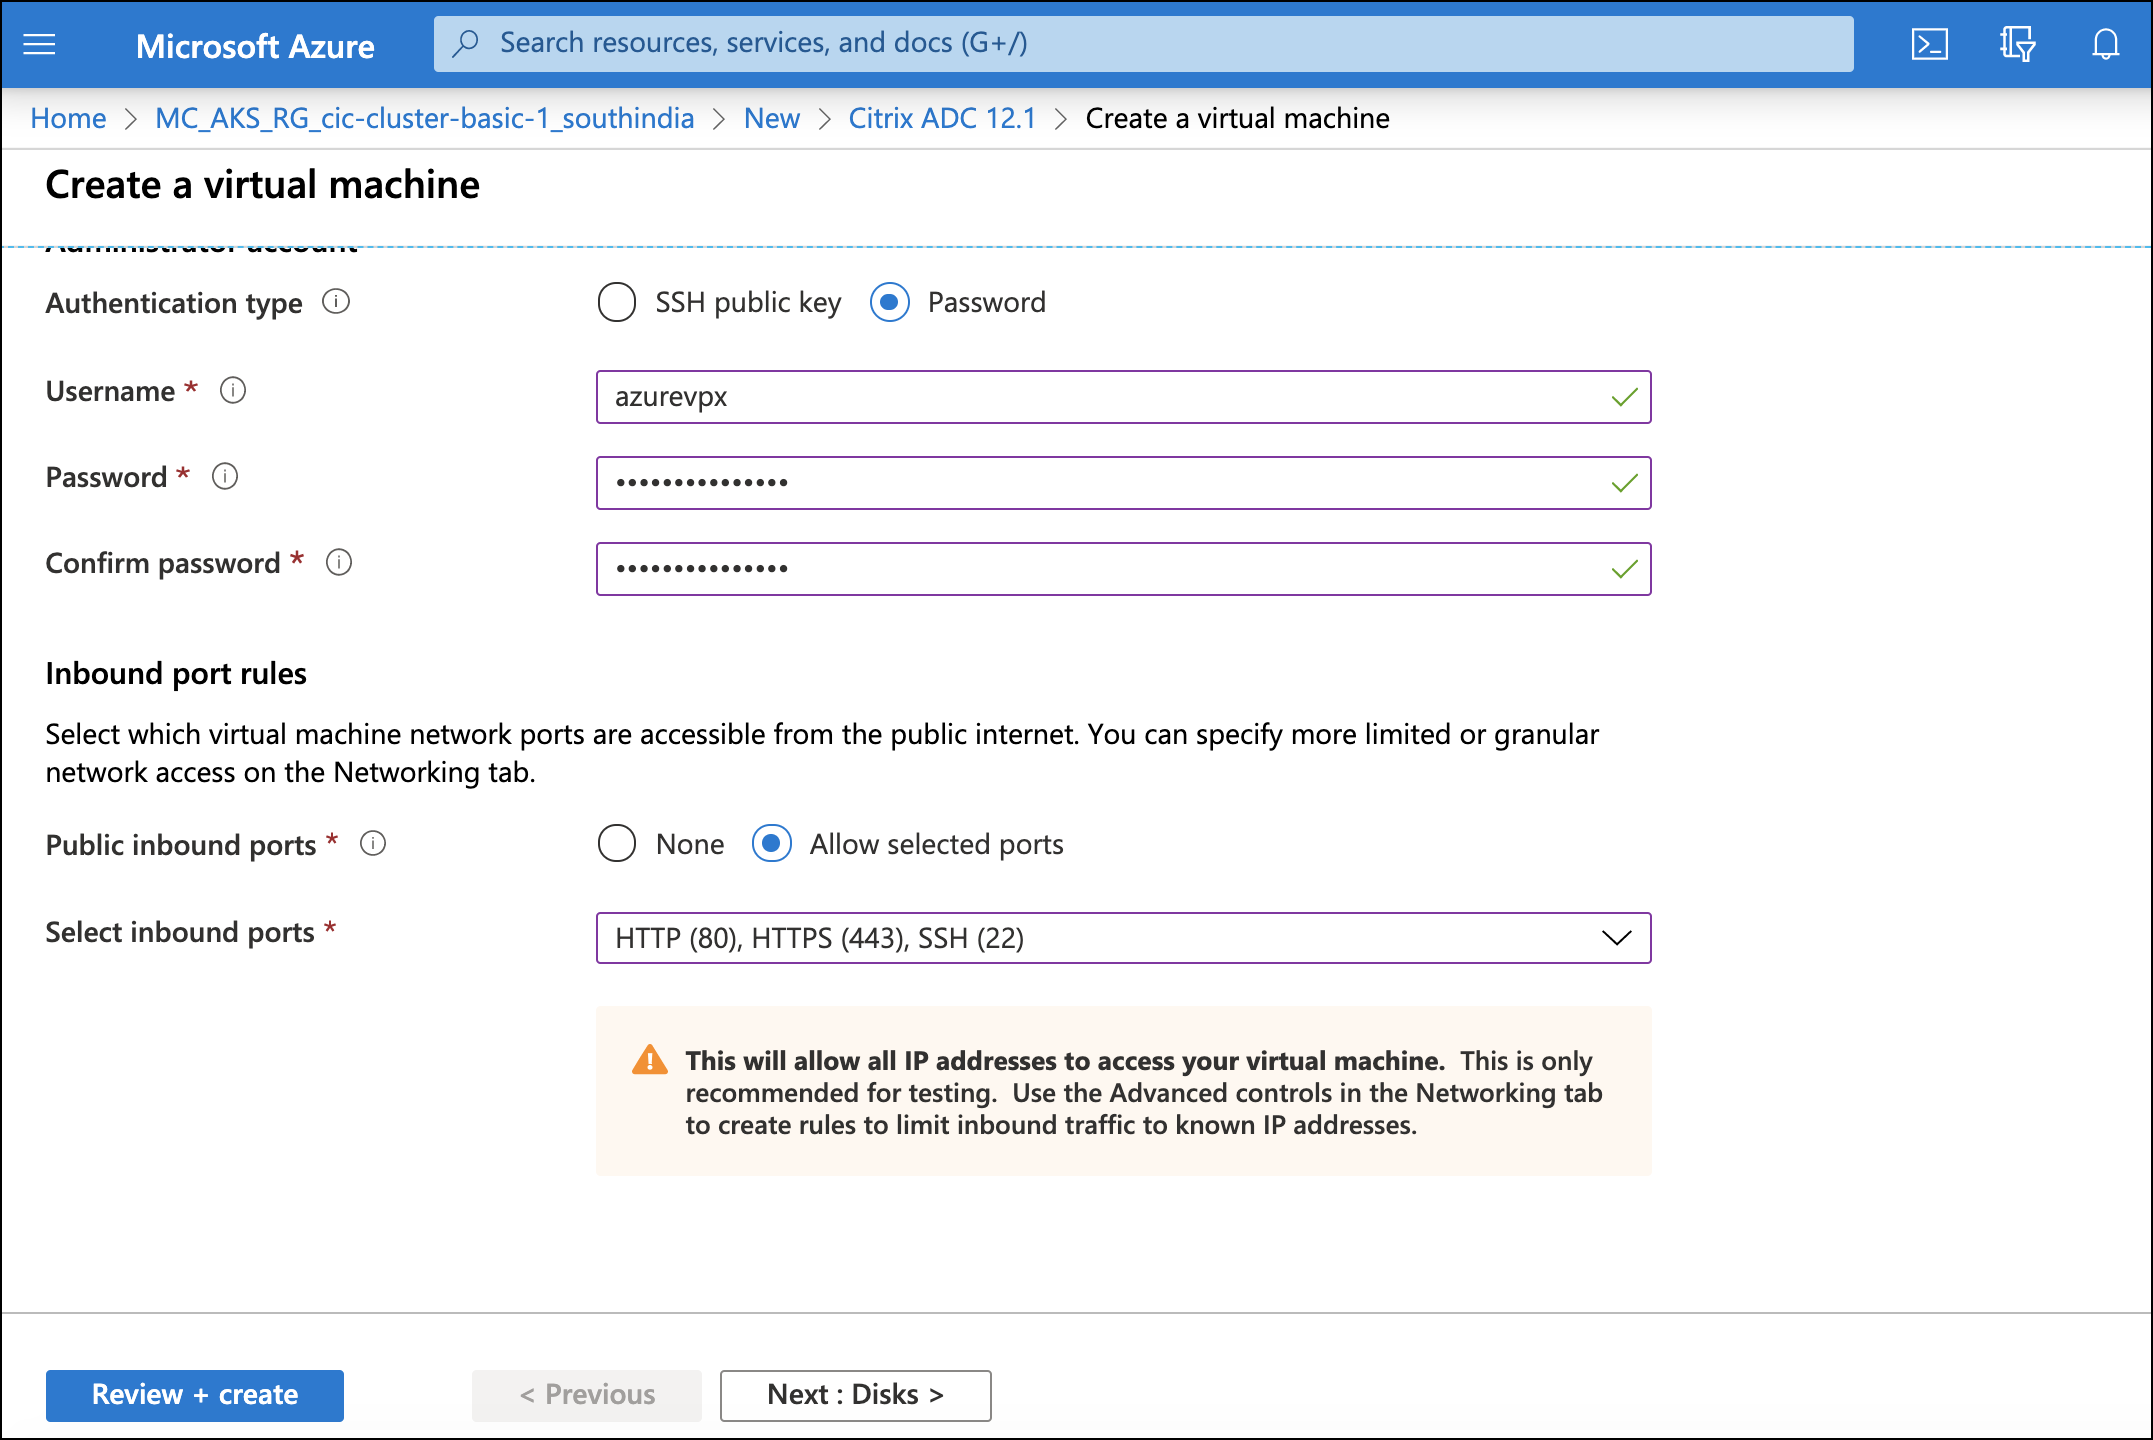
-
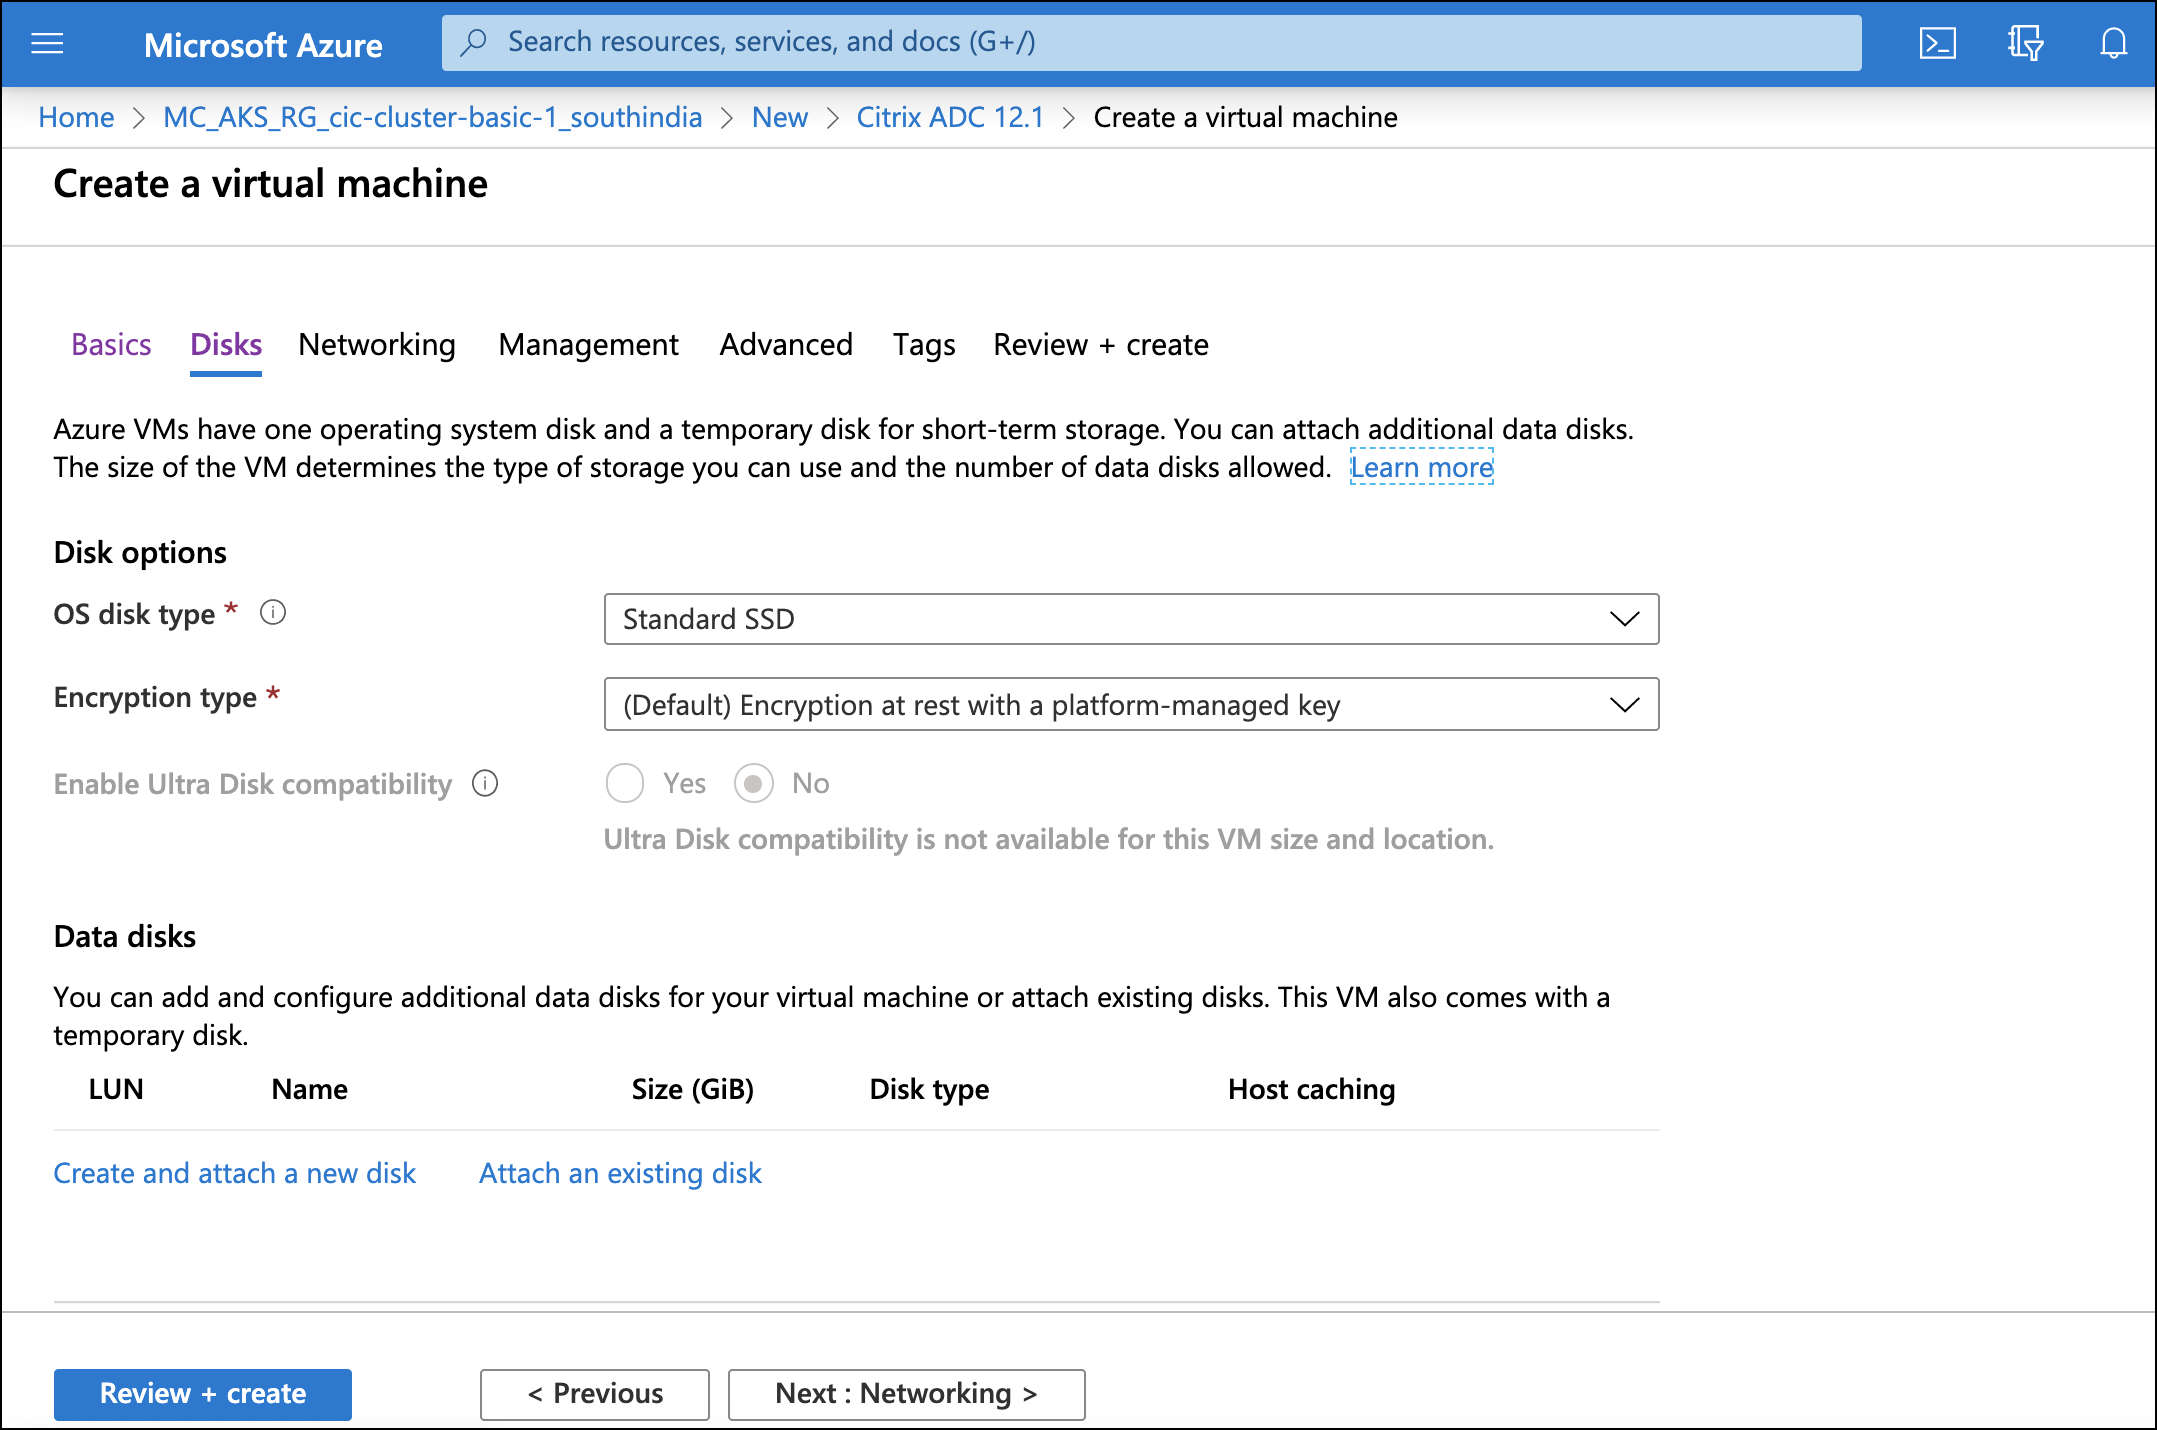
Verify the disk details and then click Next.
-
Verify the
Virtual networkandSubnetinformation and make sure that they are same as the network information of the resource group and then click Next.
-
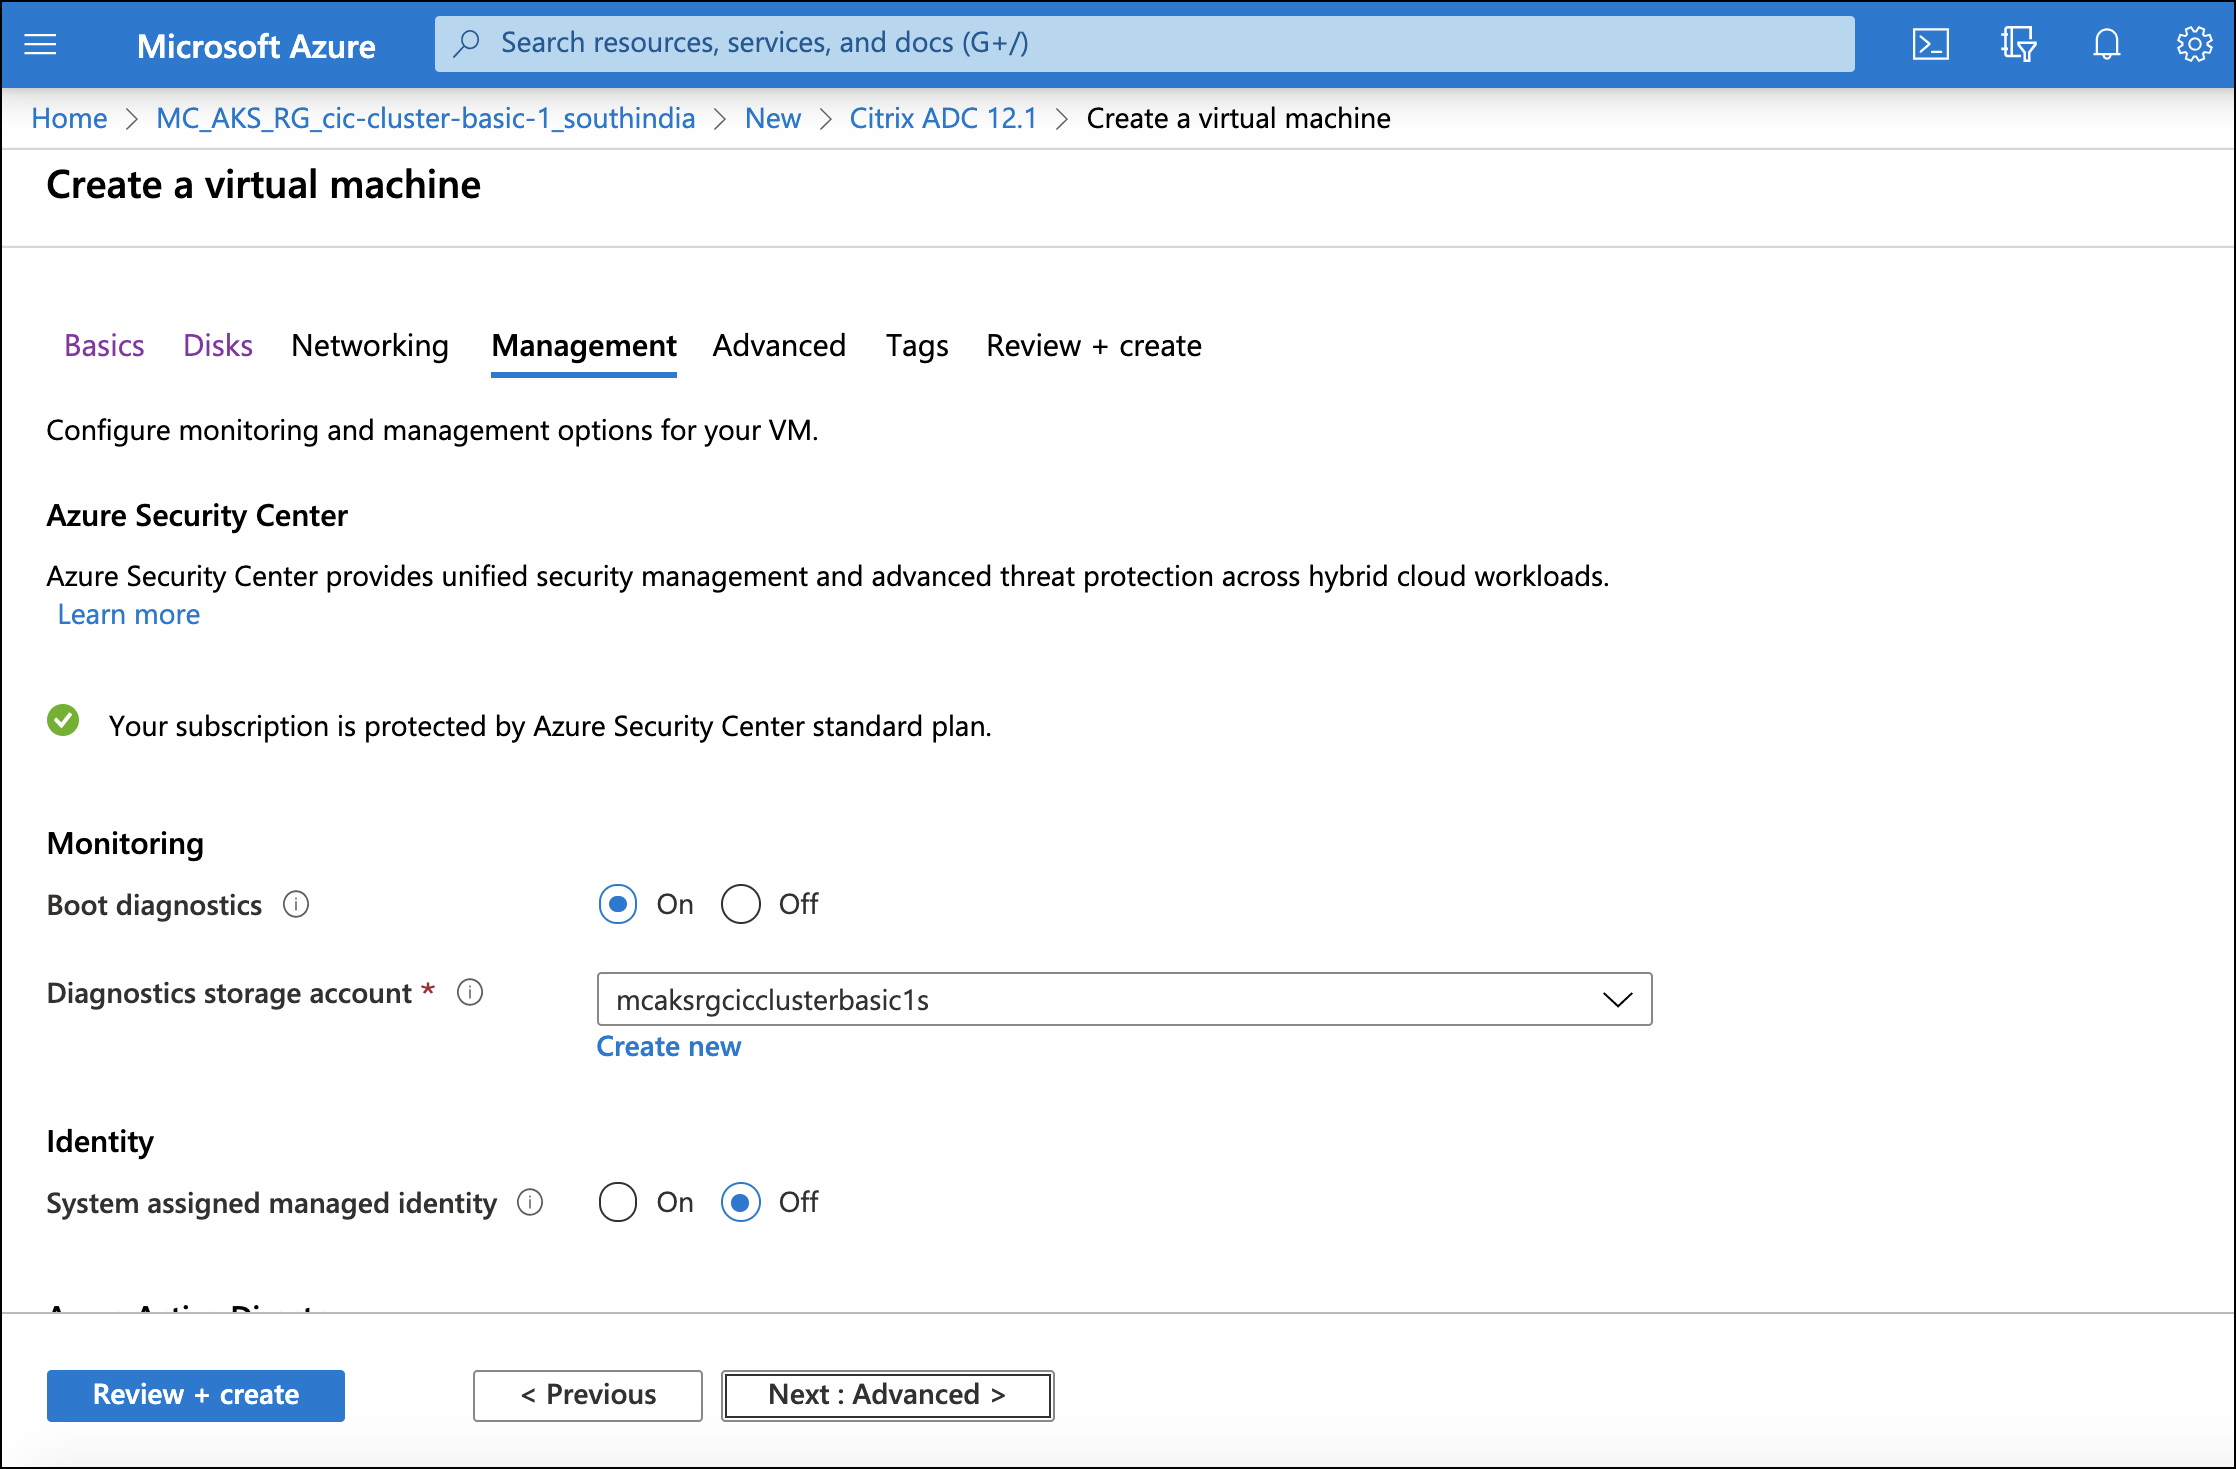
Verify the management details and then click Next.
-
Verify any
Advanced detailsif necessary and then click Next.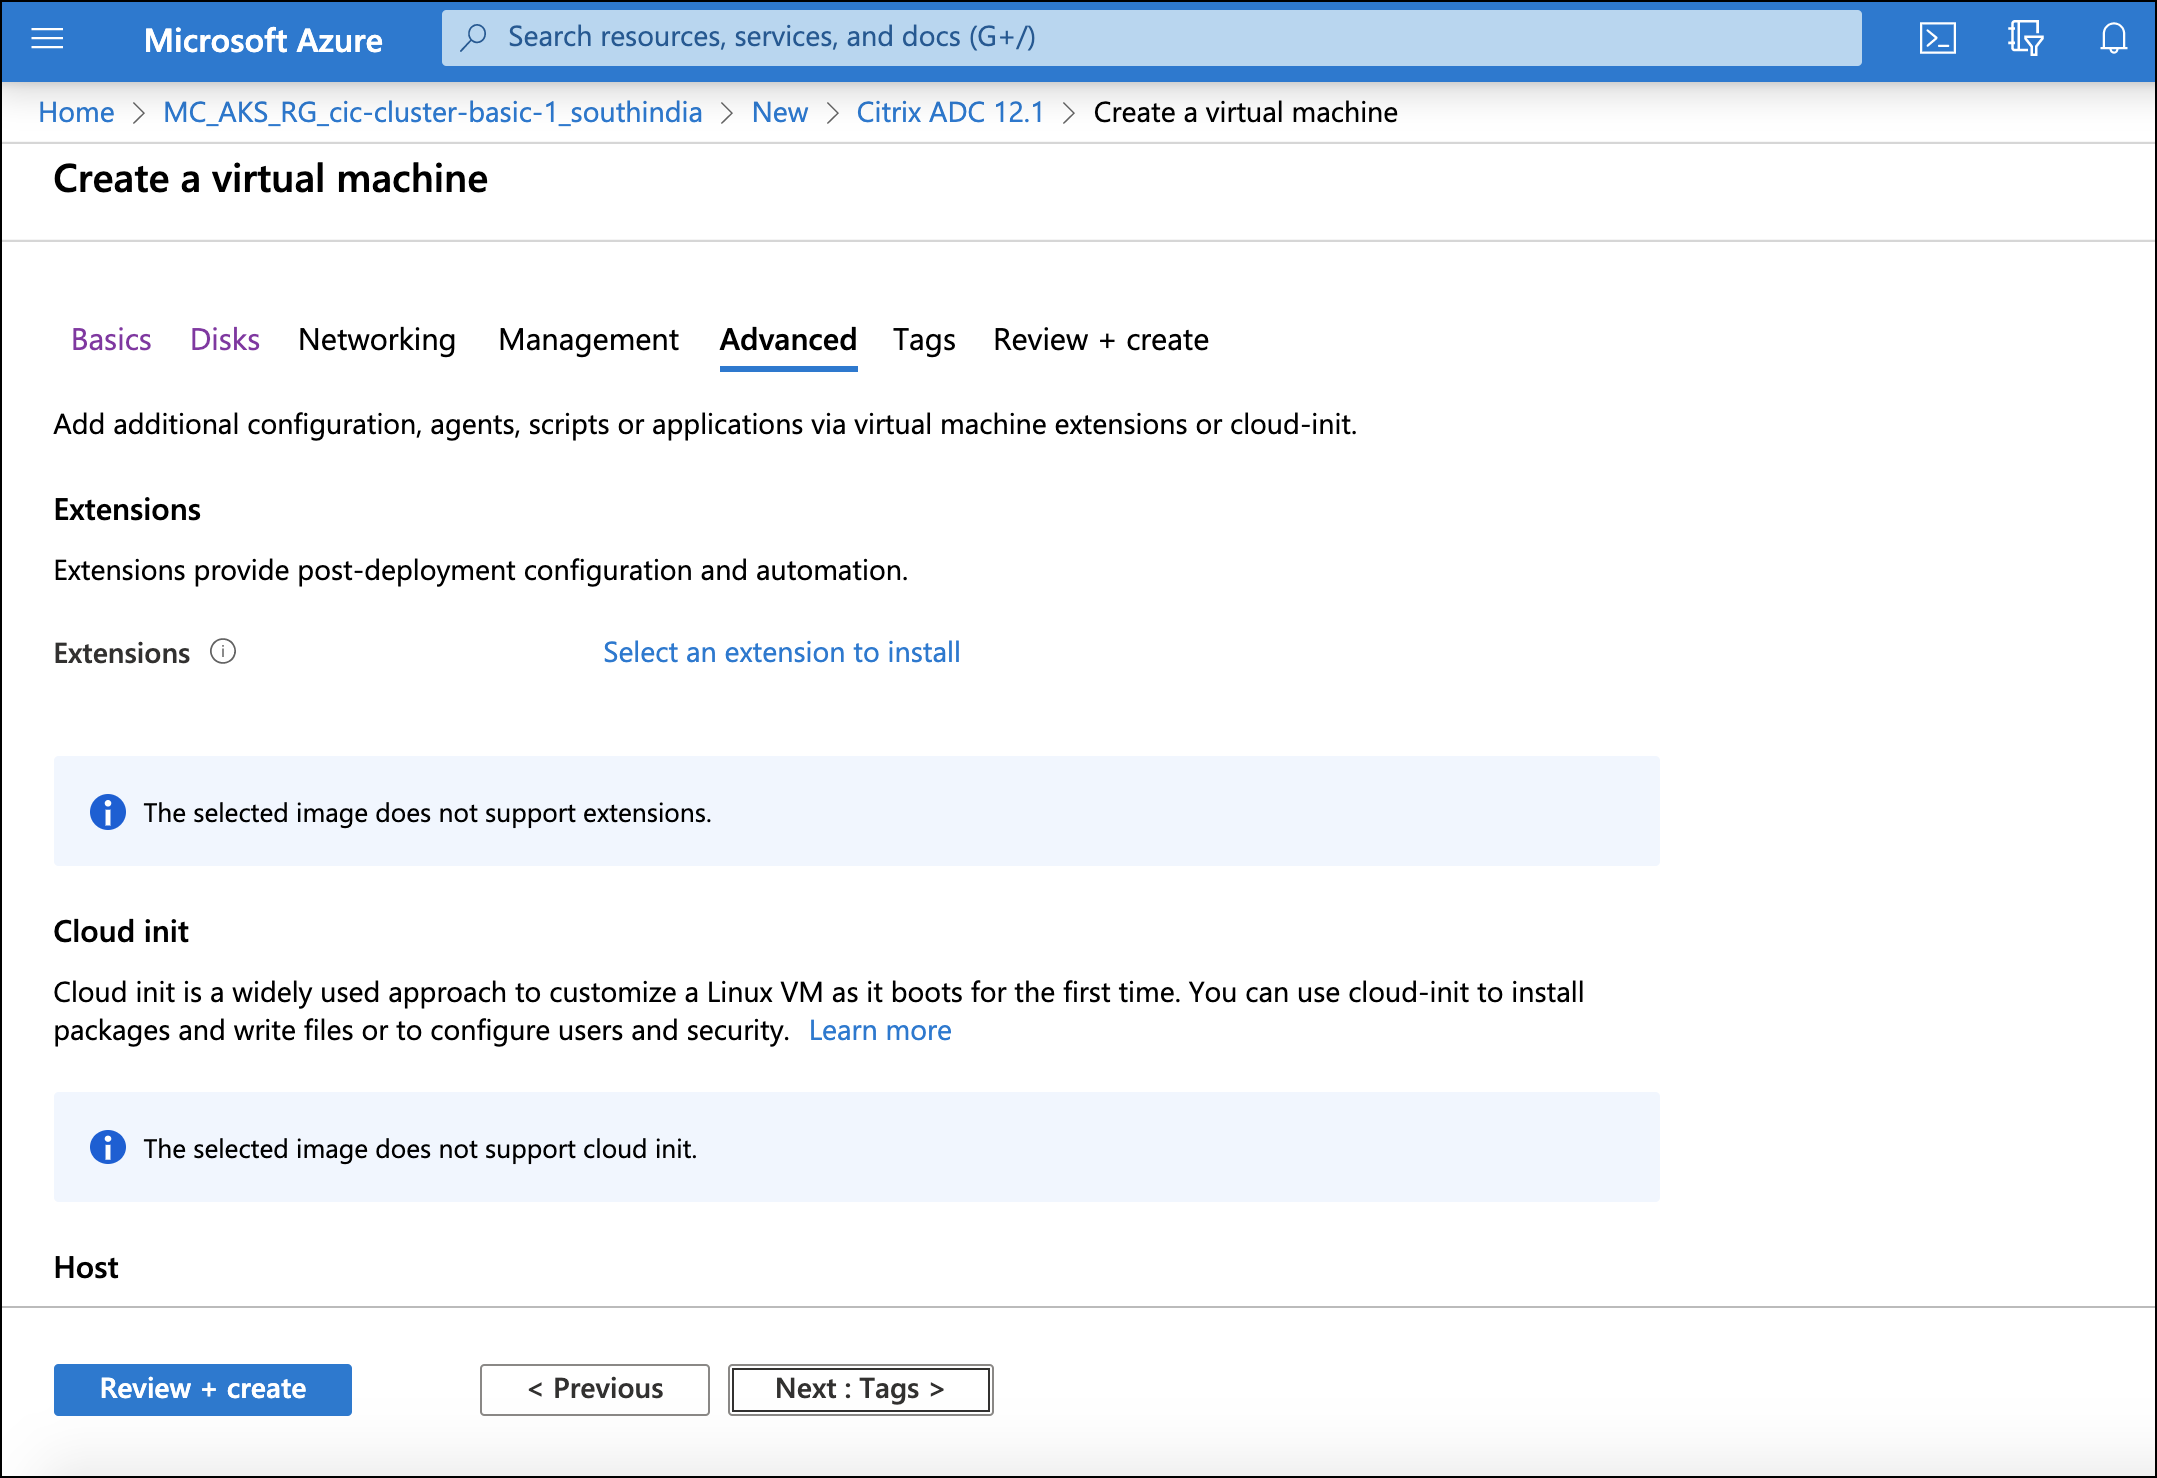
-
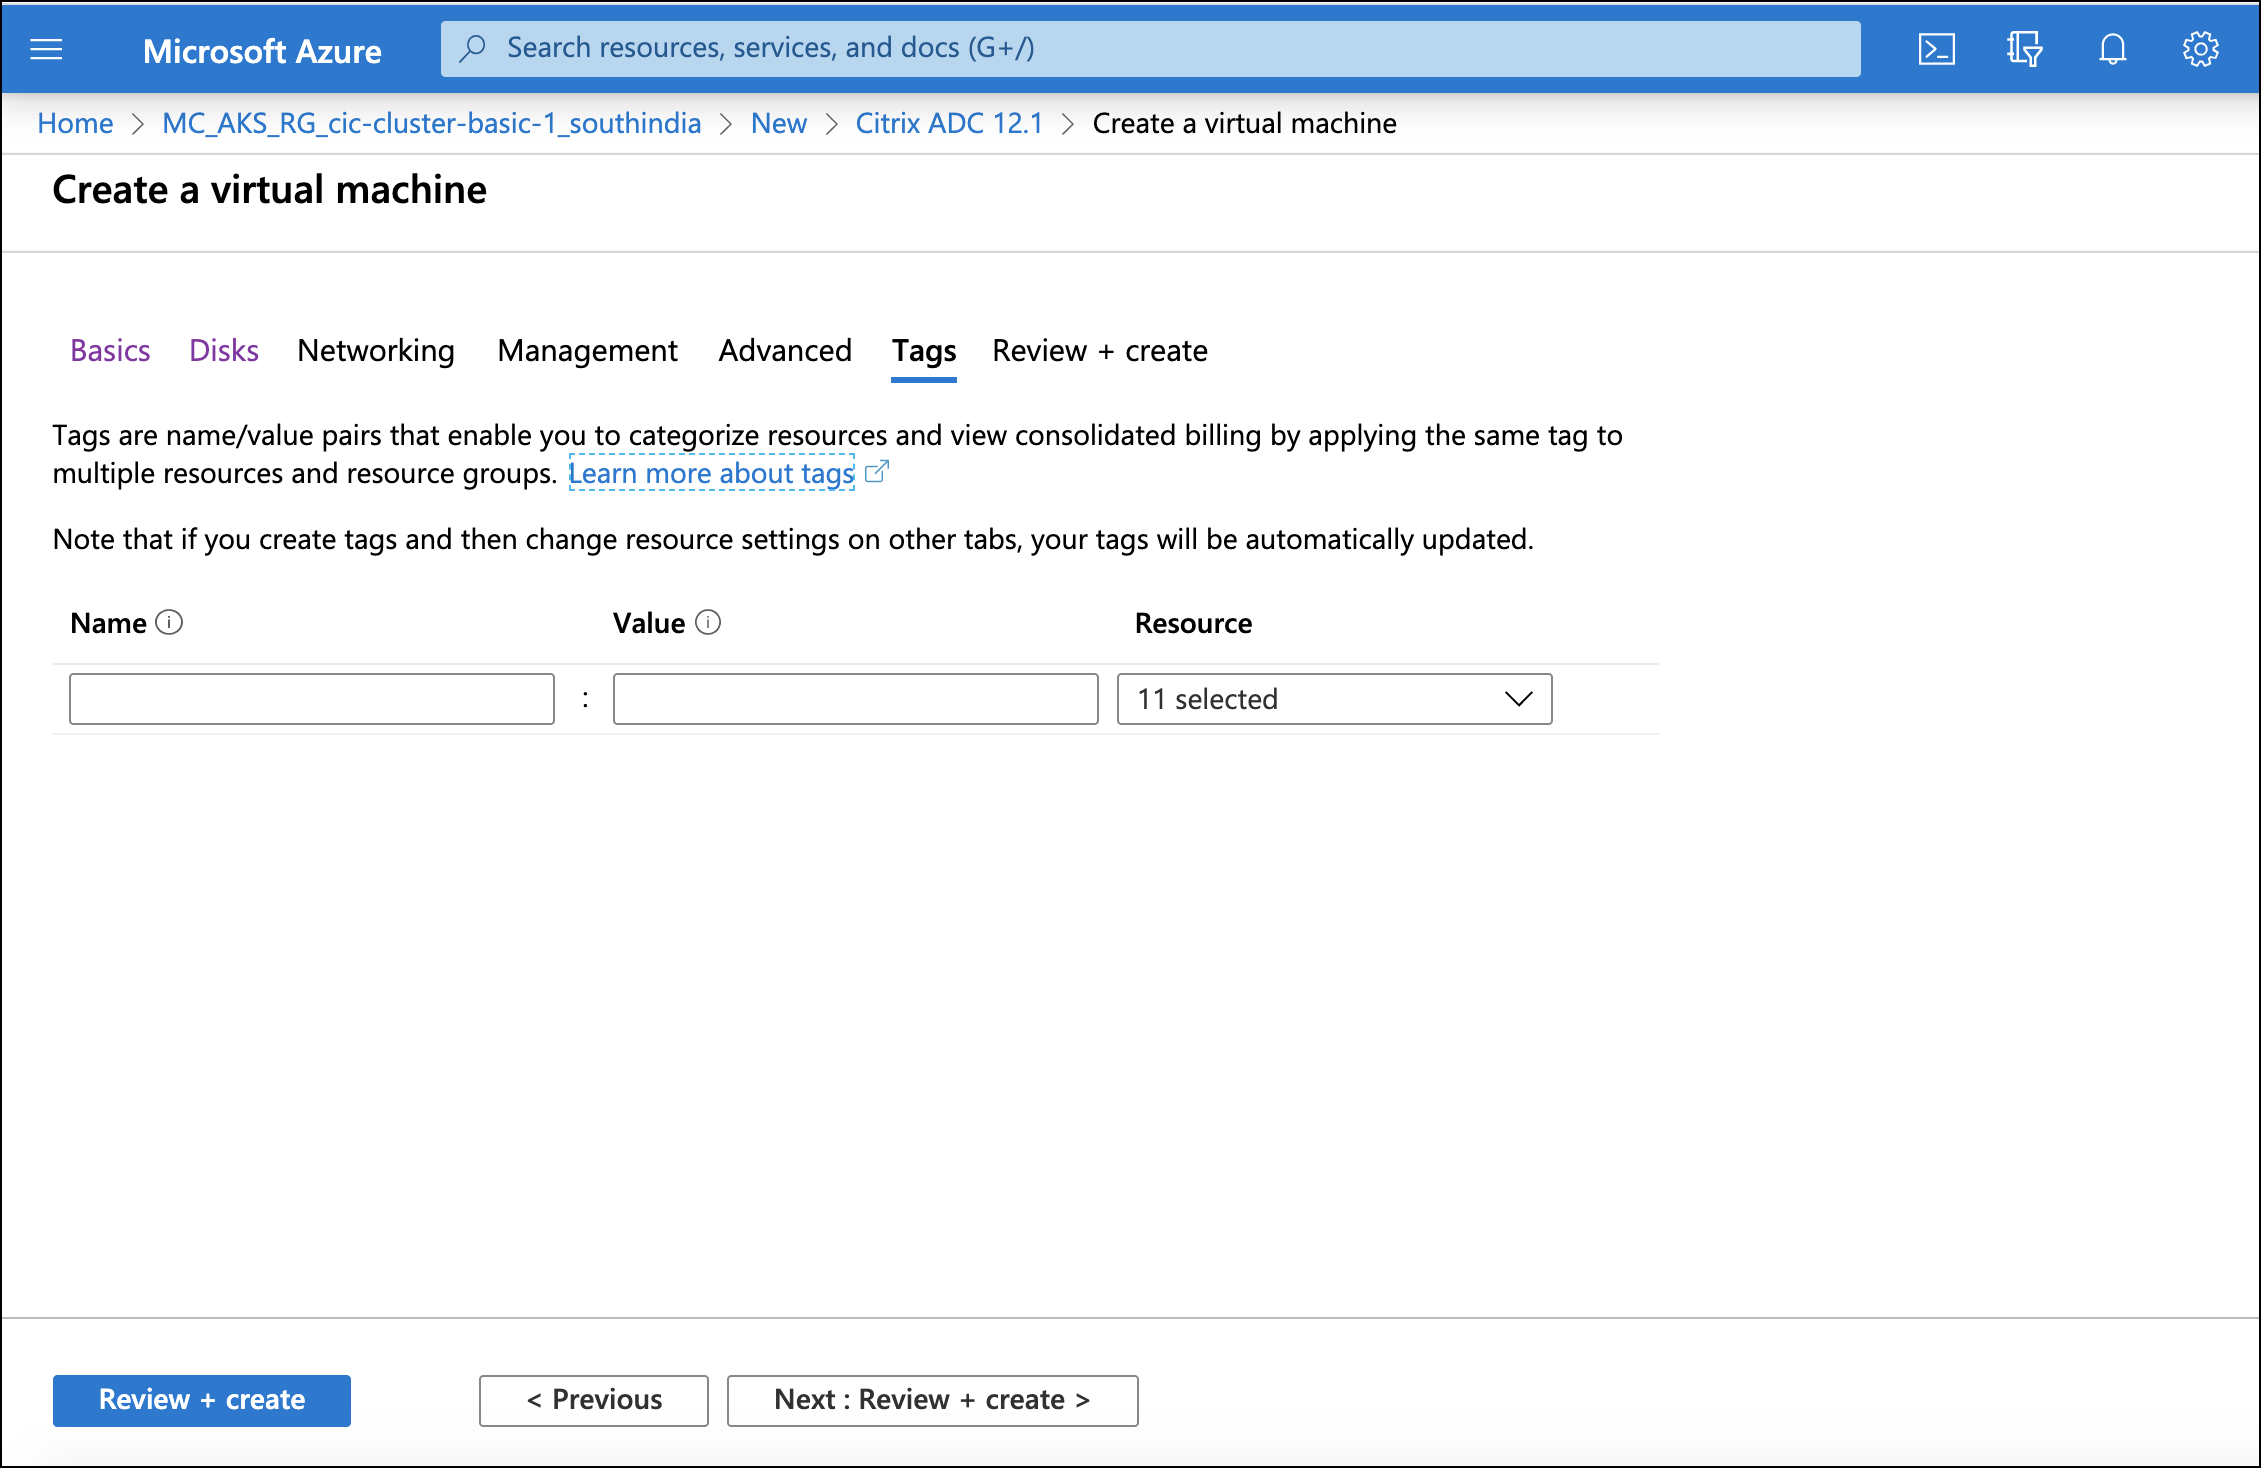
Specify any Tags if needed and click Next.
-
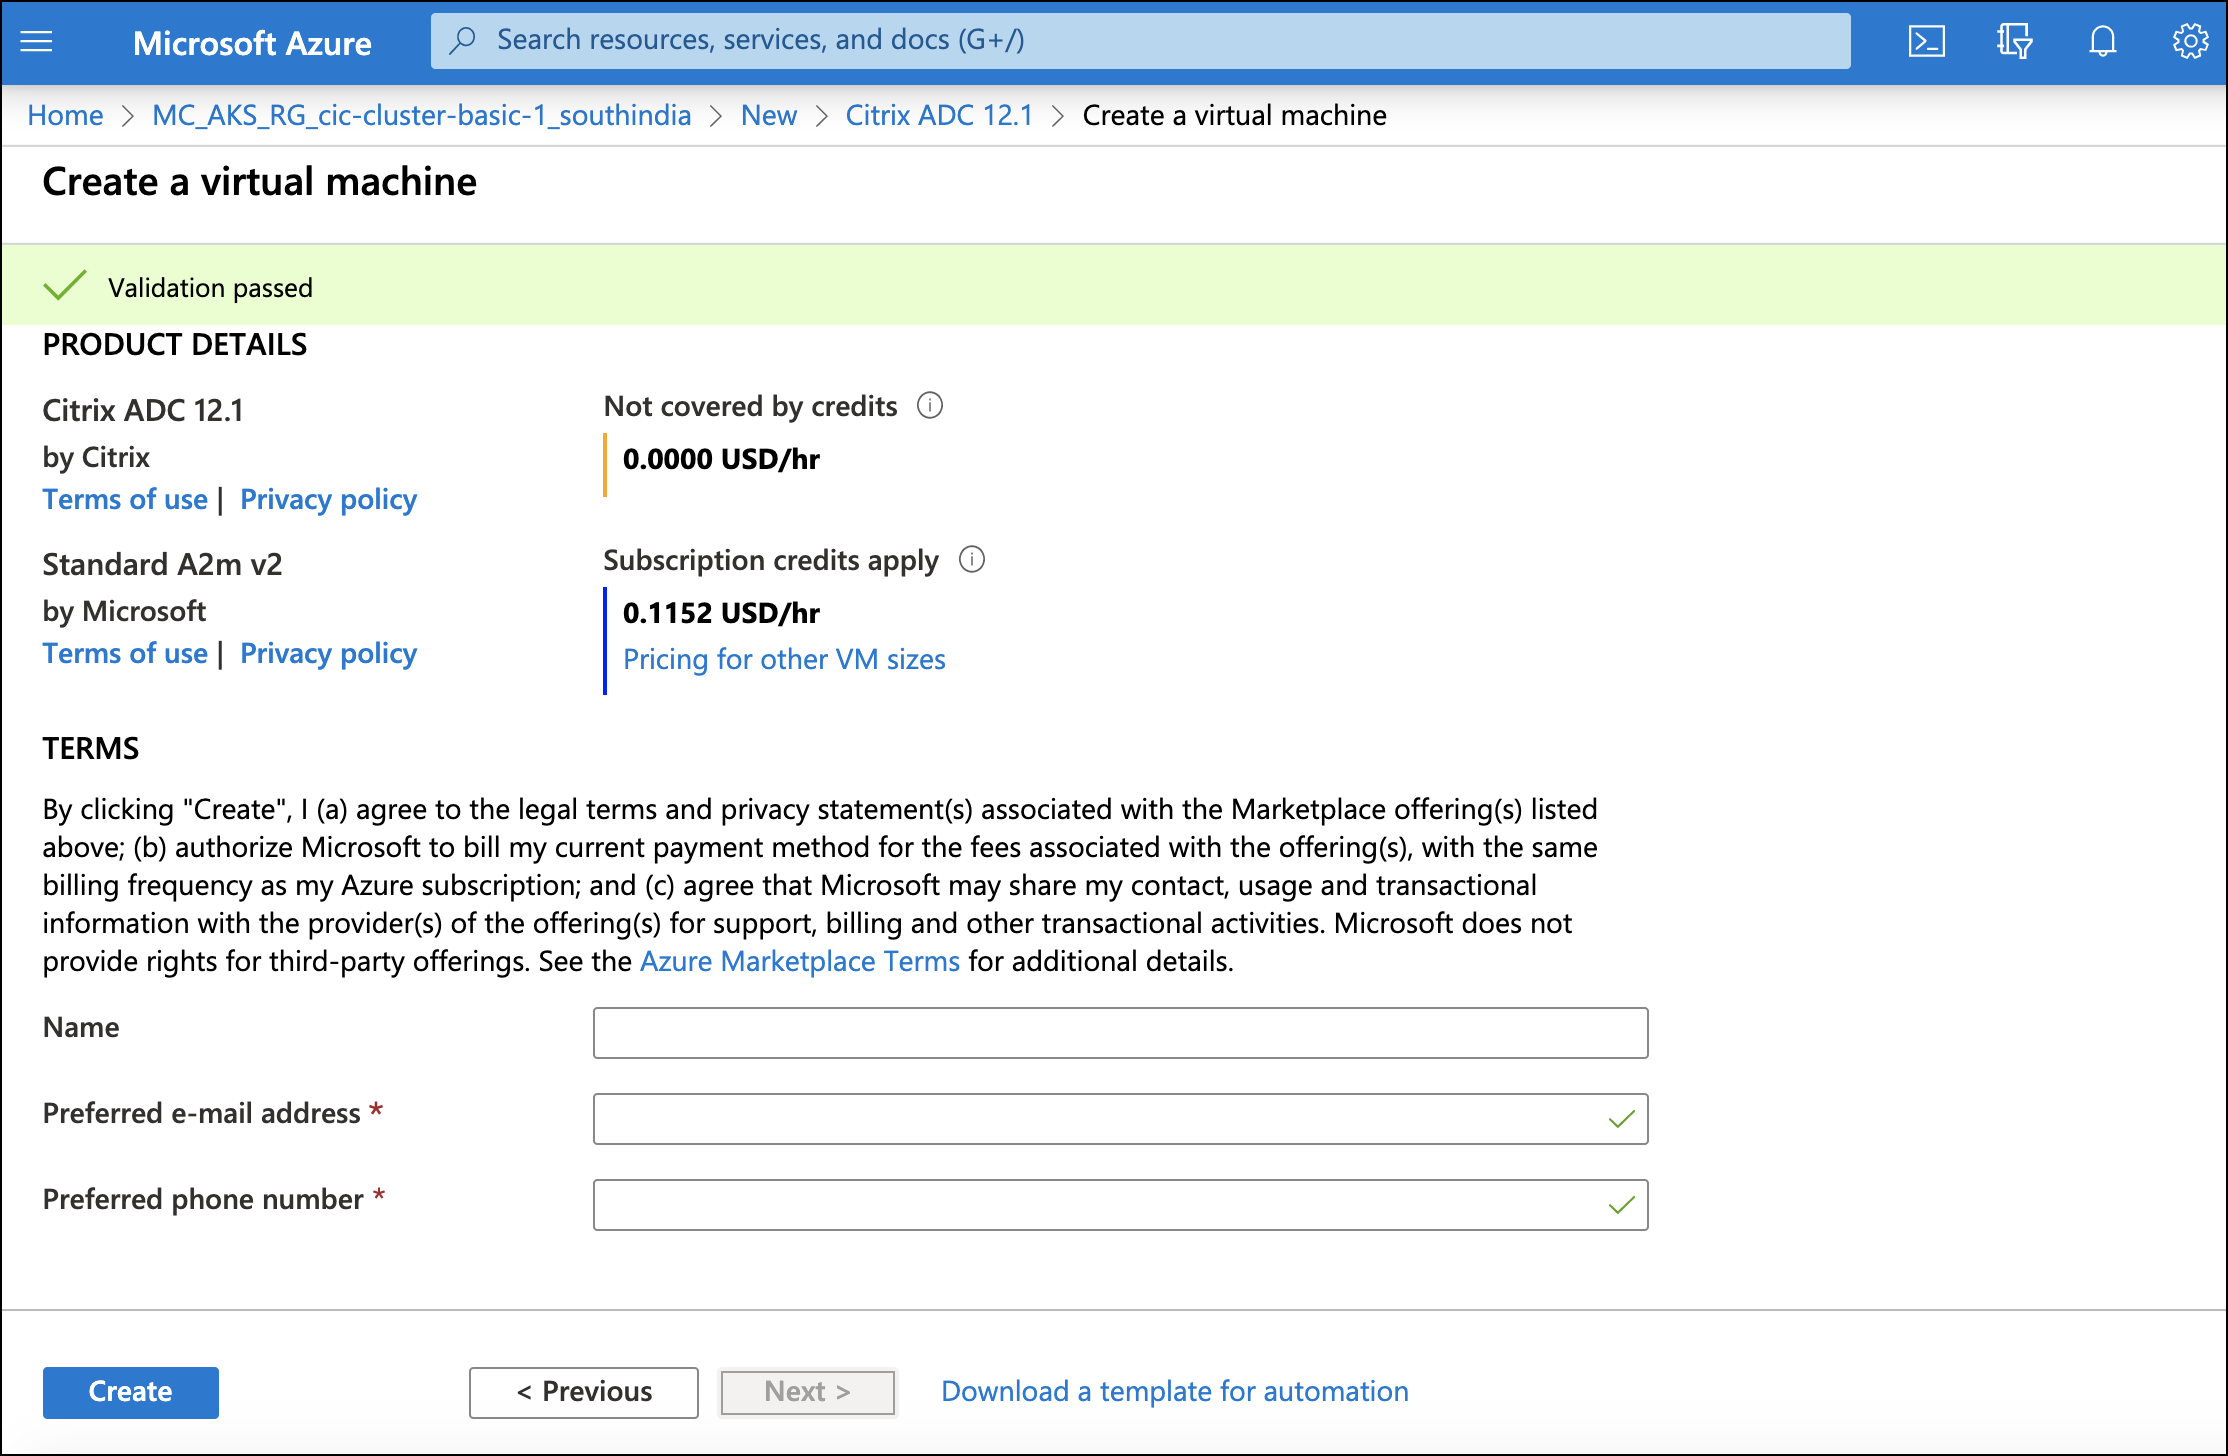
Review all details of the NetScaler VPX, and then click Create. Wait for some time until the deployment is complete.
-
-
Set the NetScaler VPX networking configurations required as part of ingress or the NetScaler Ingress Controller deployment in the cluster.
-
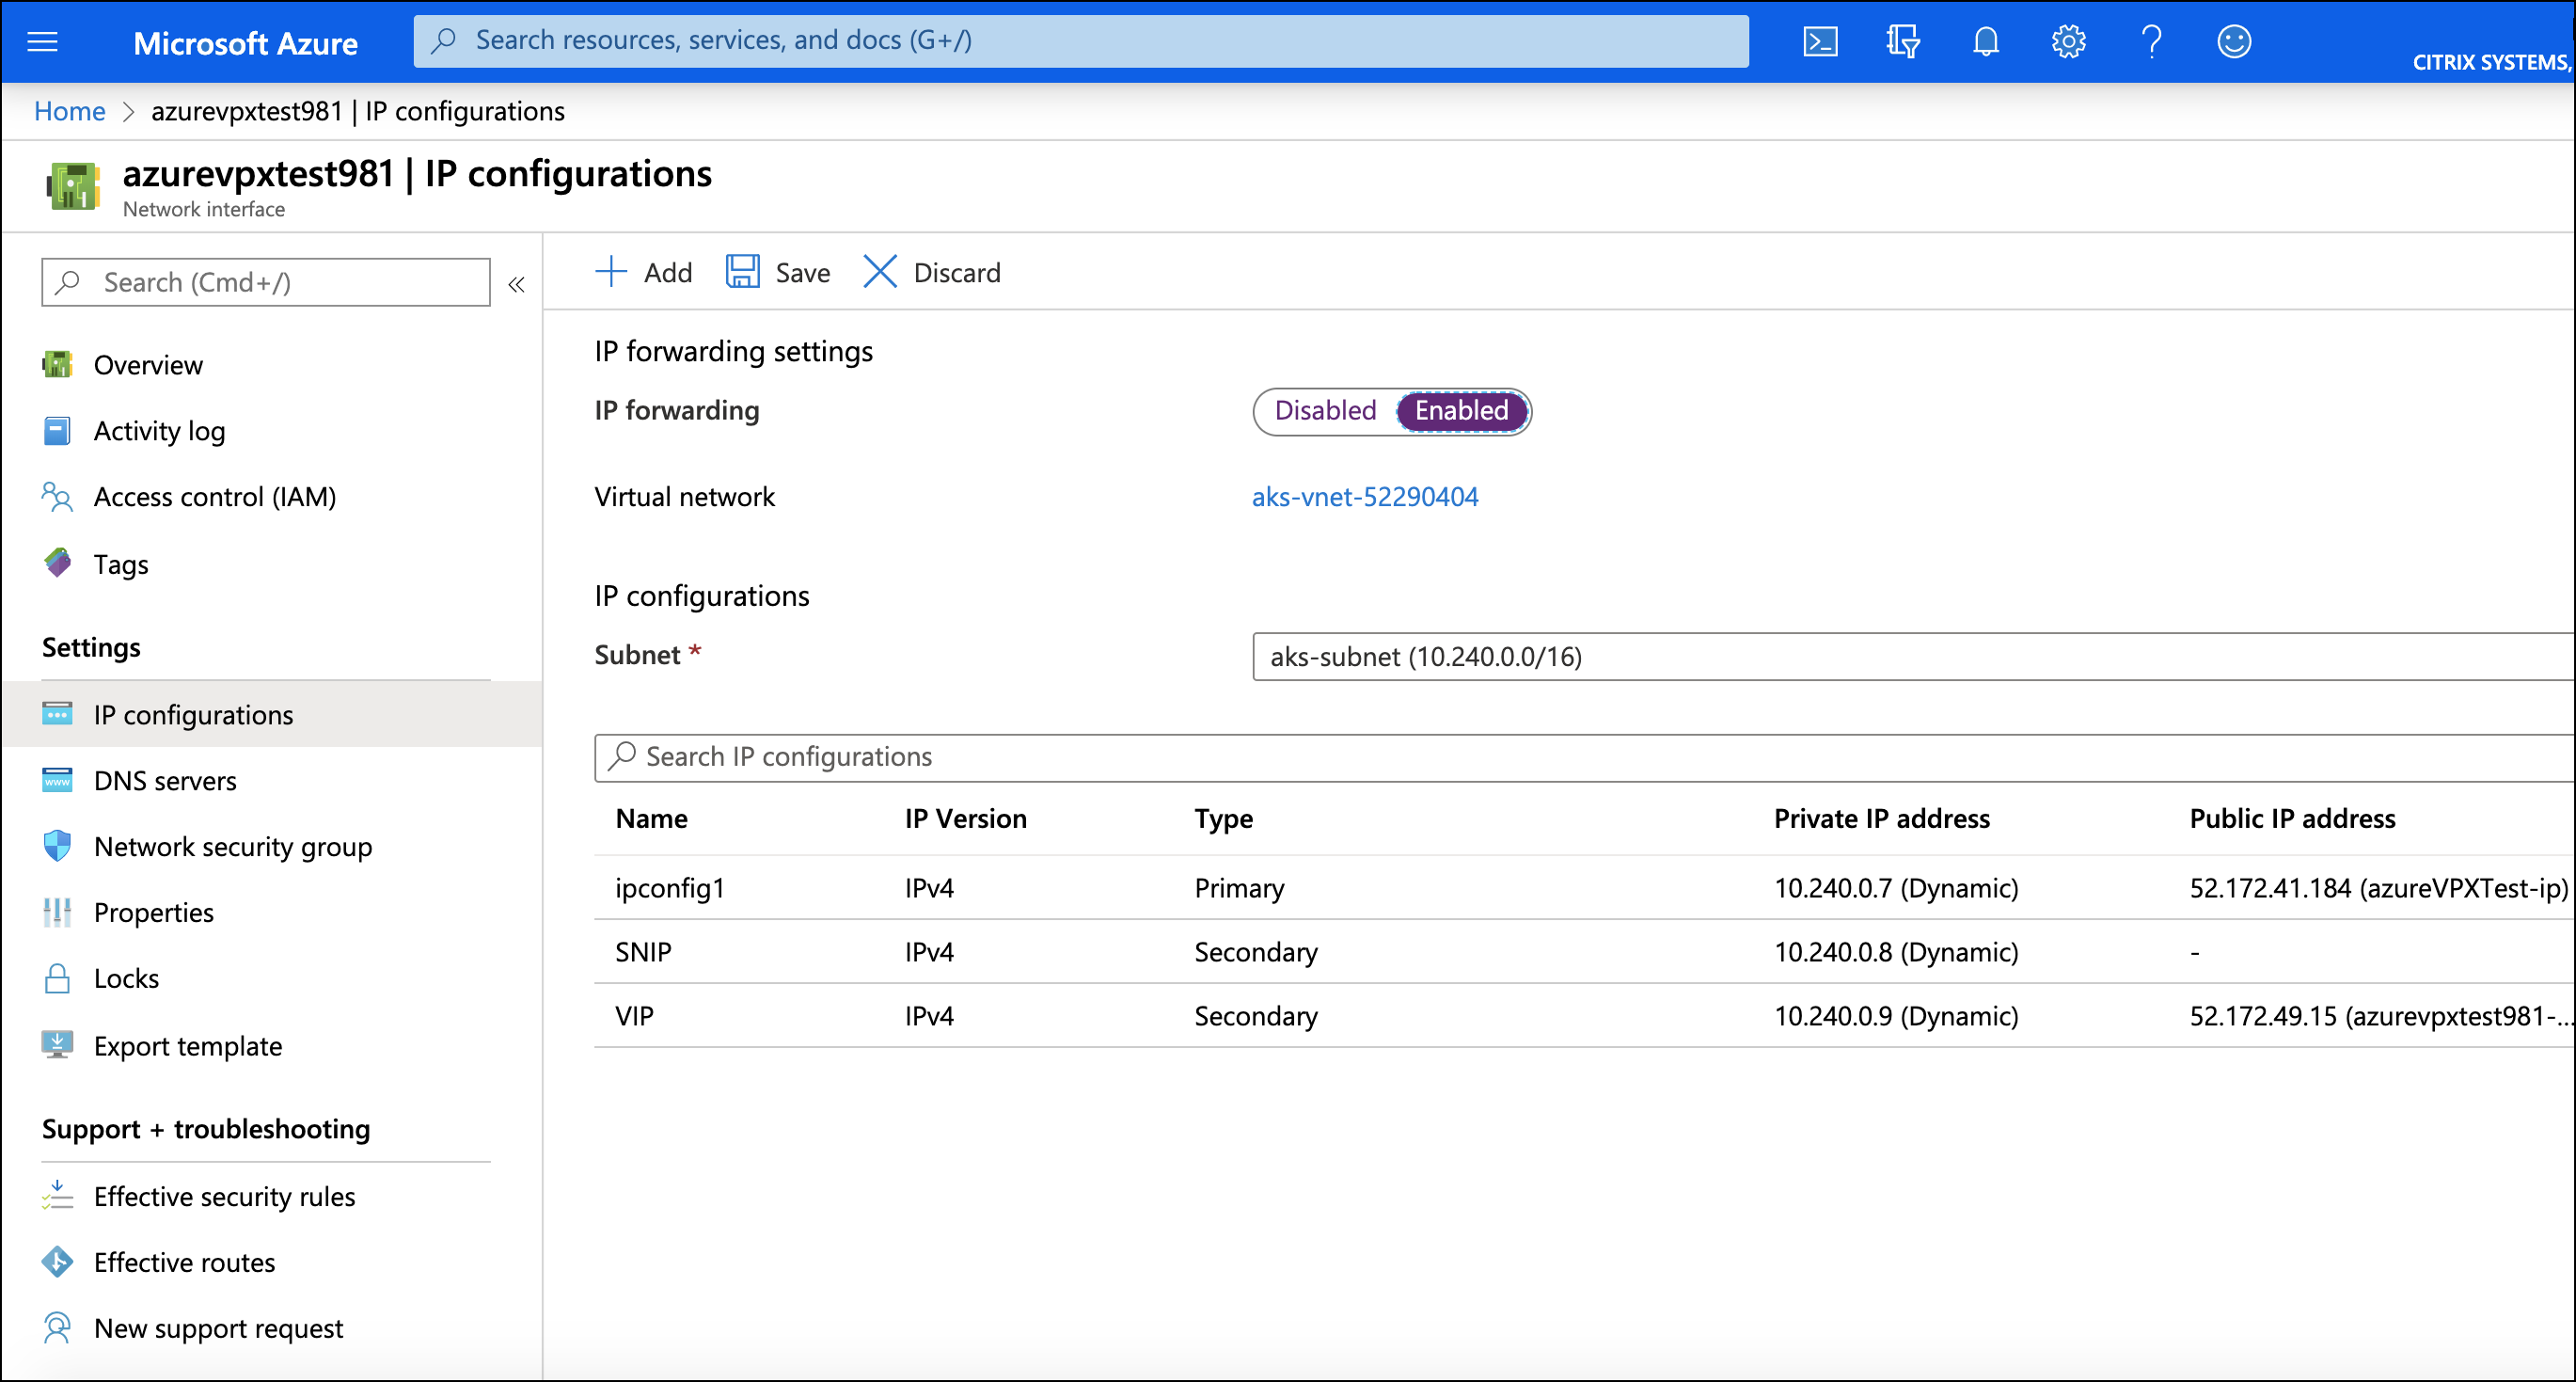
Go to the
Networkingsection on the deployed VPX Page, and select Network Interface on the right.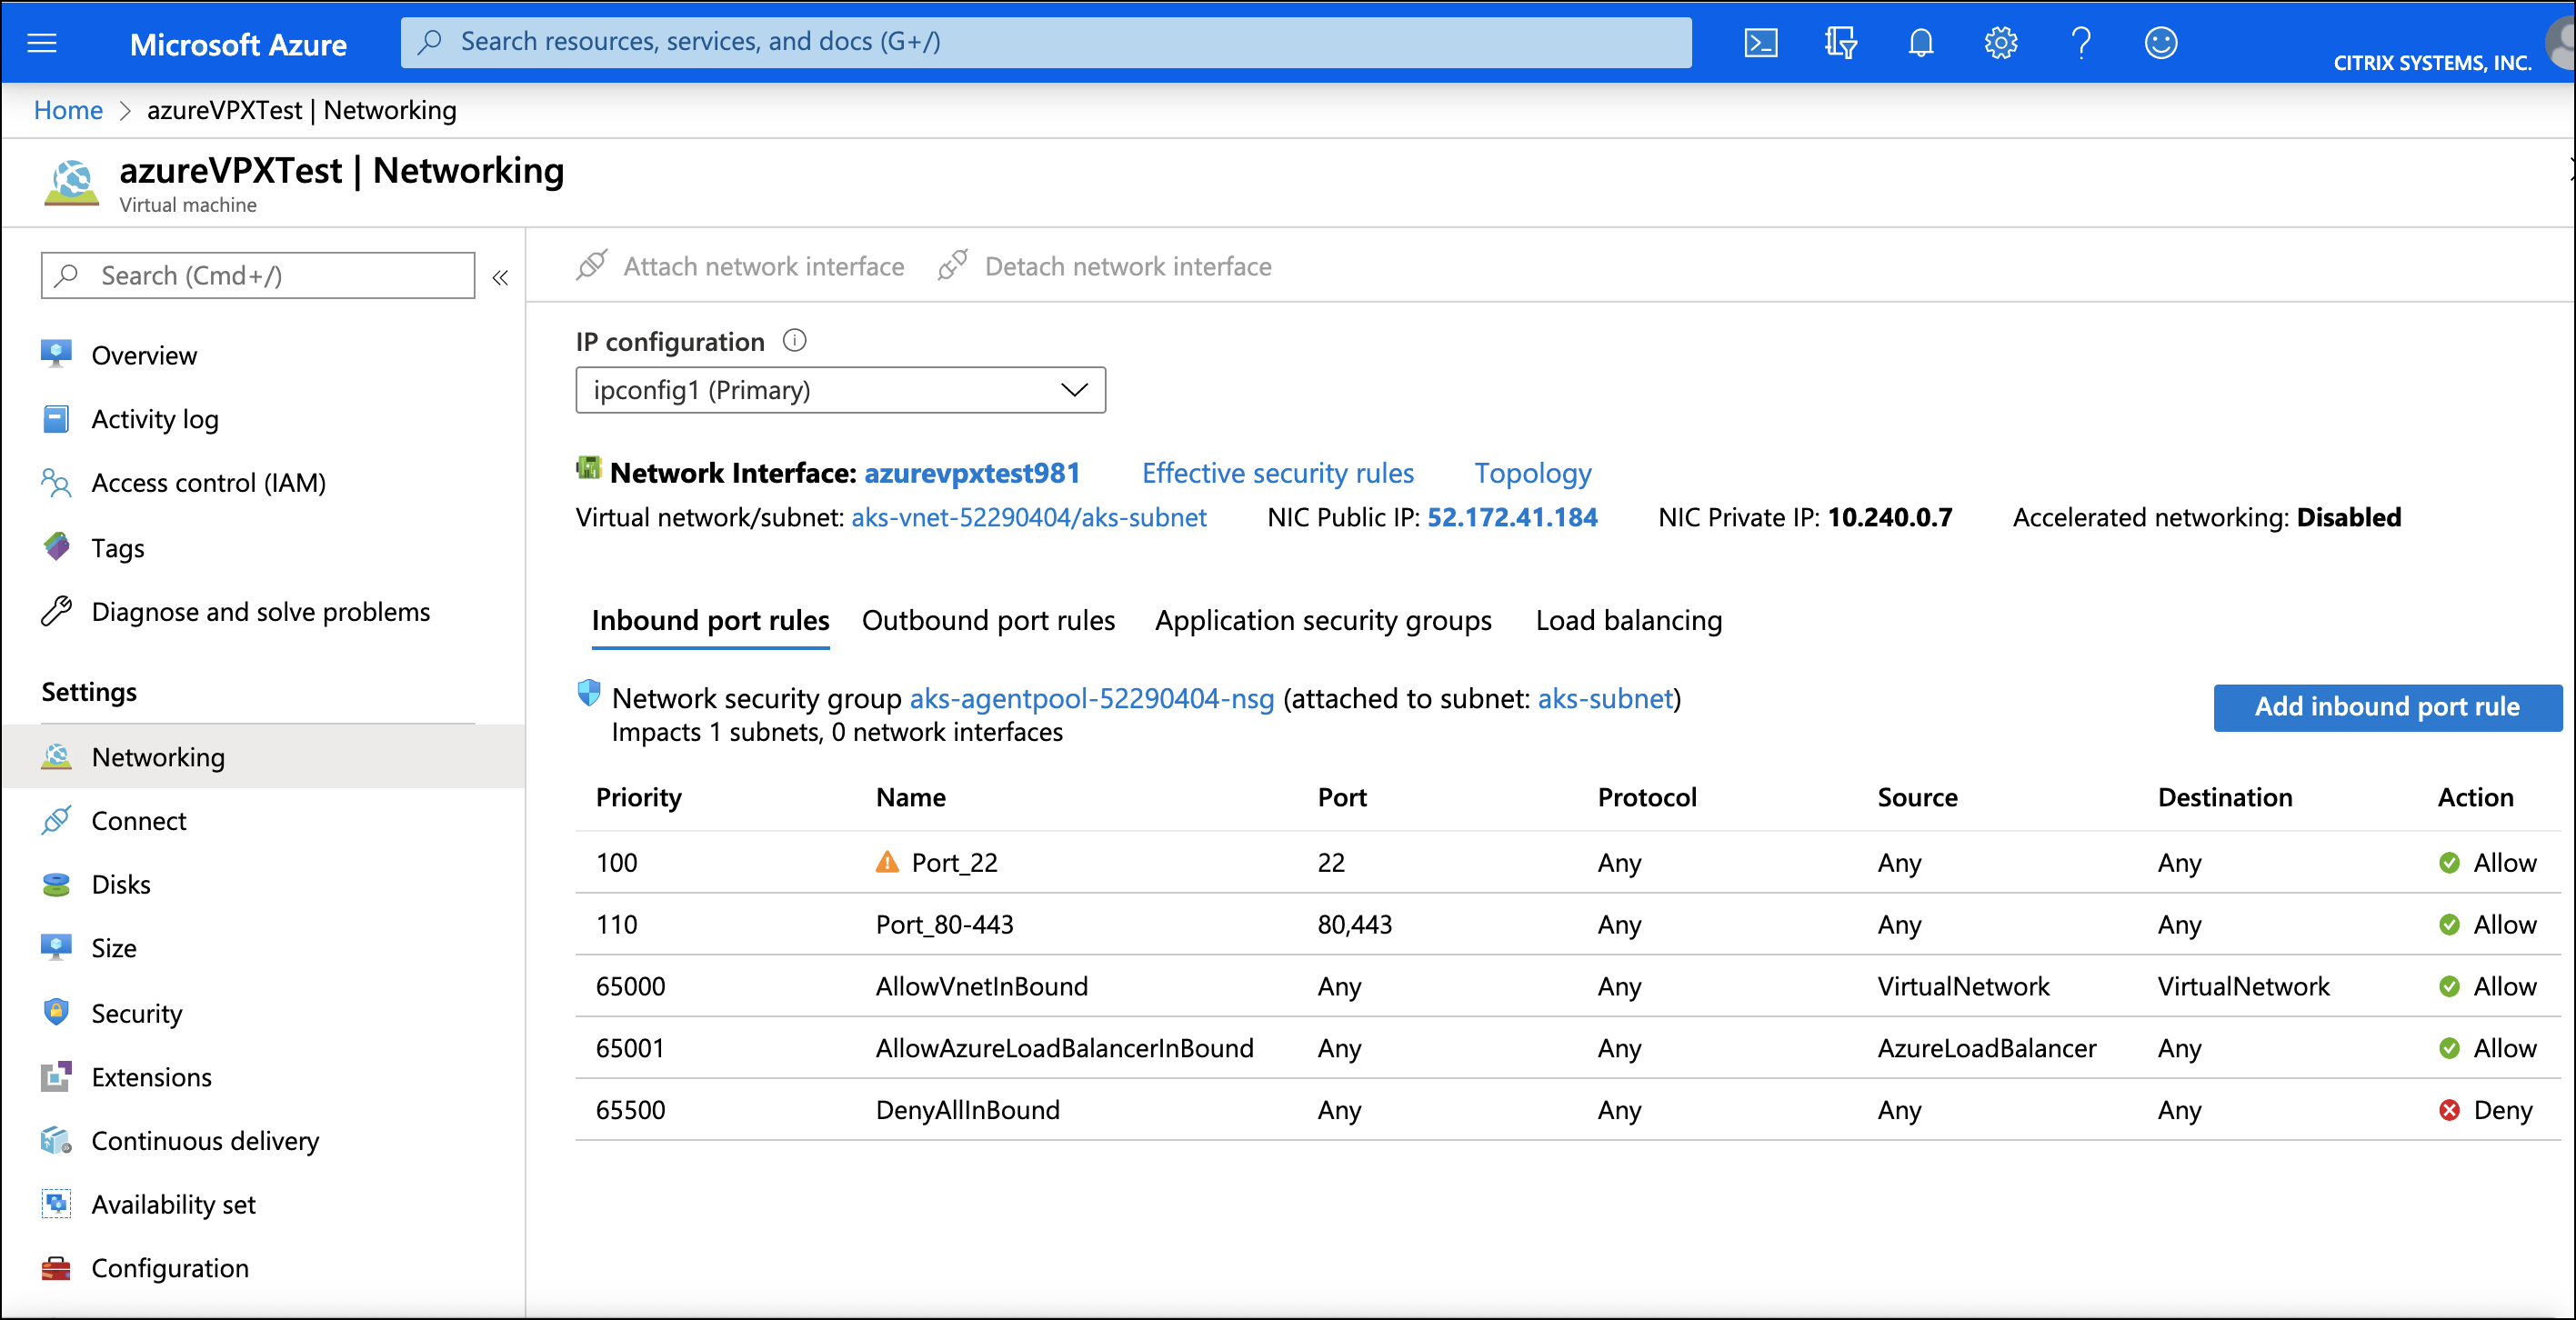
-
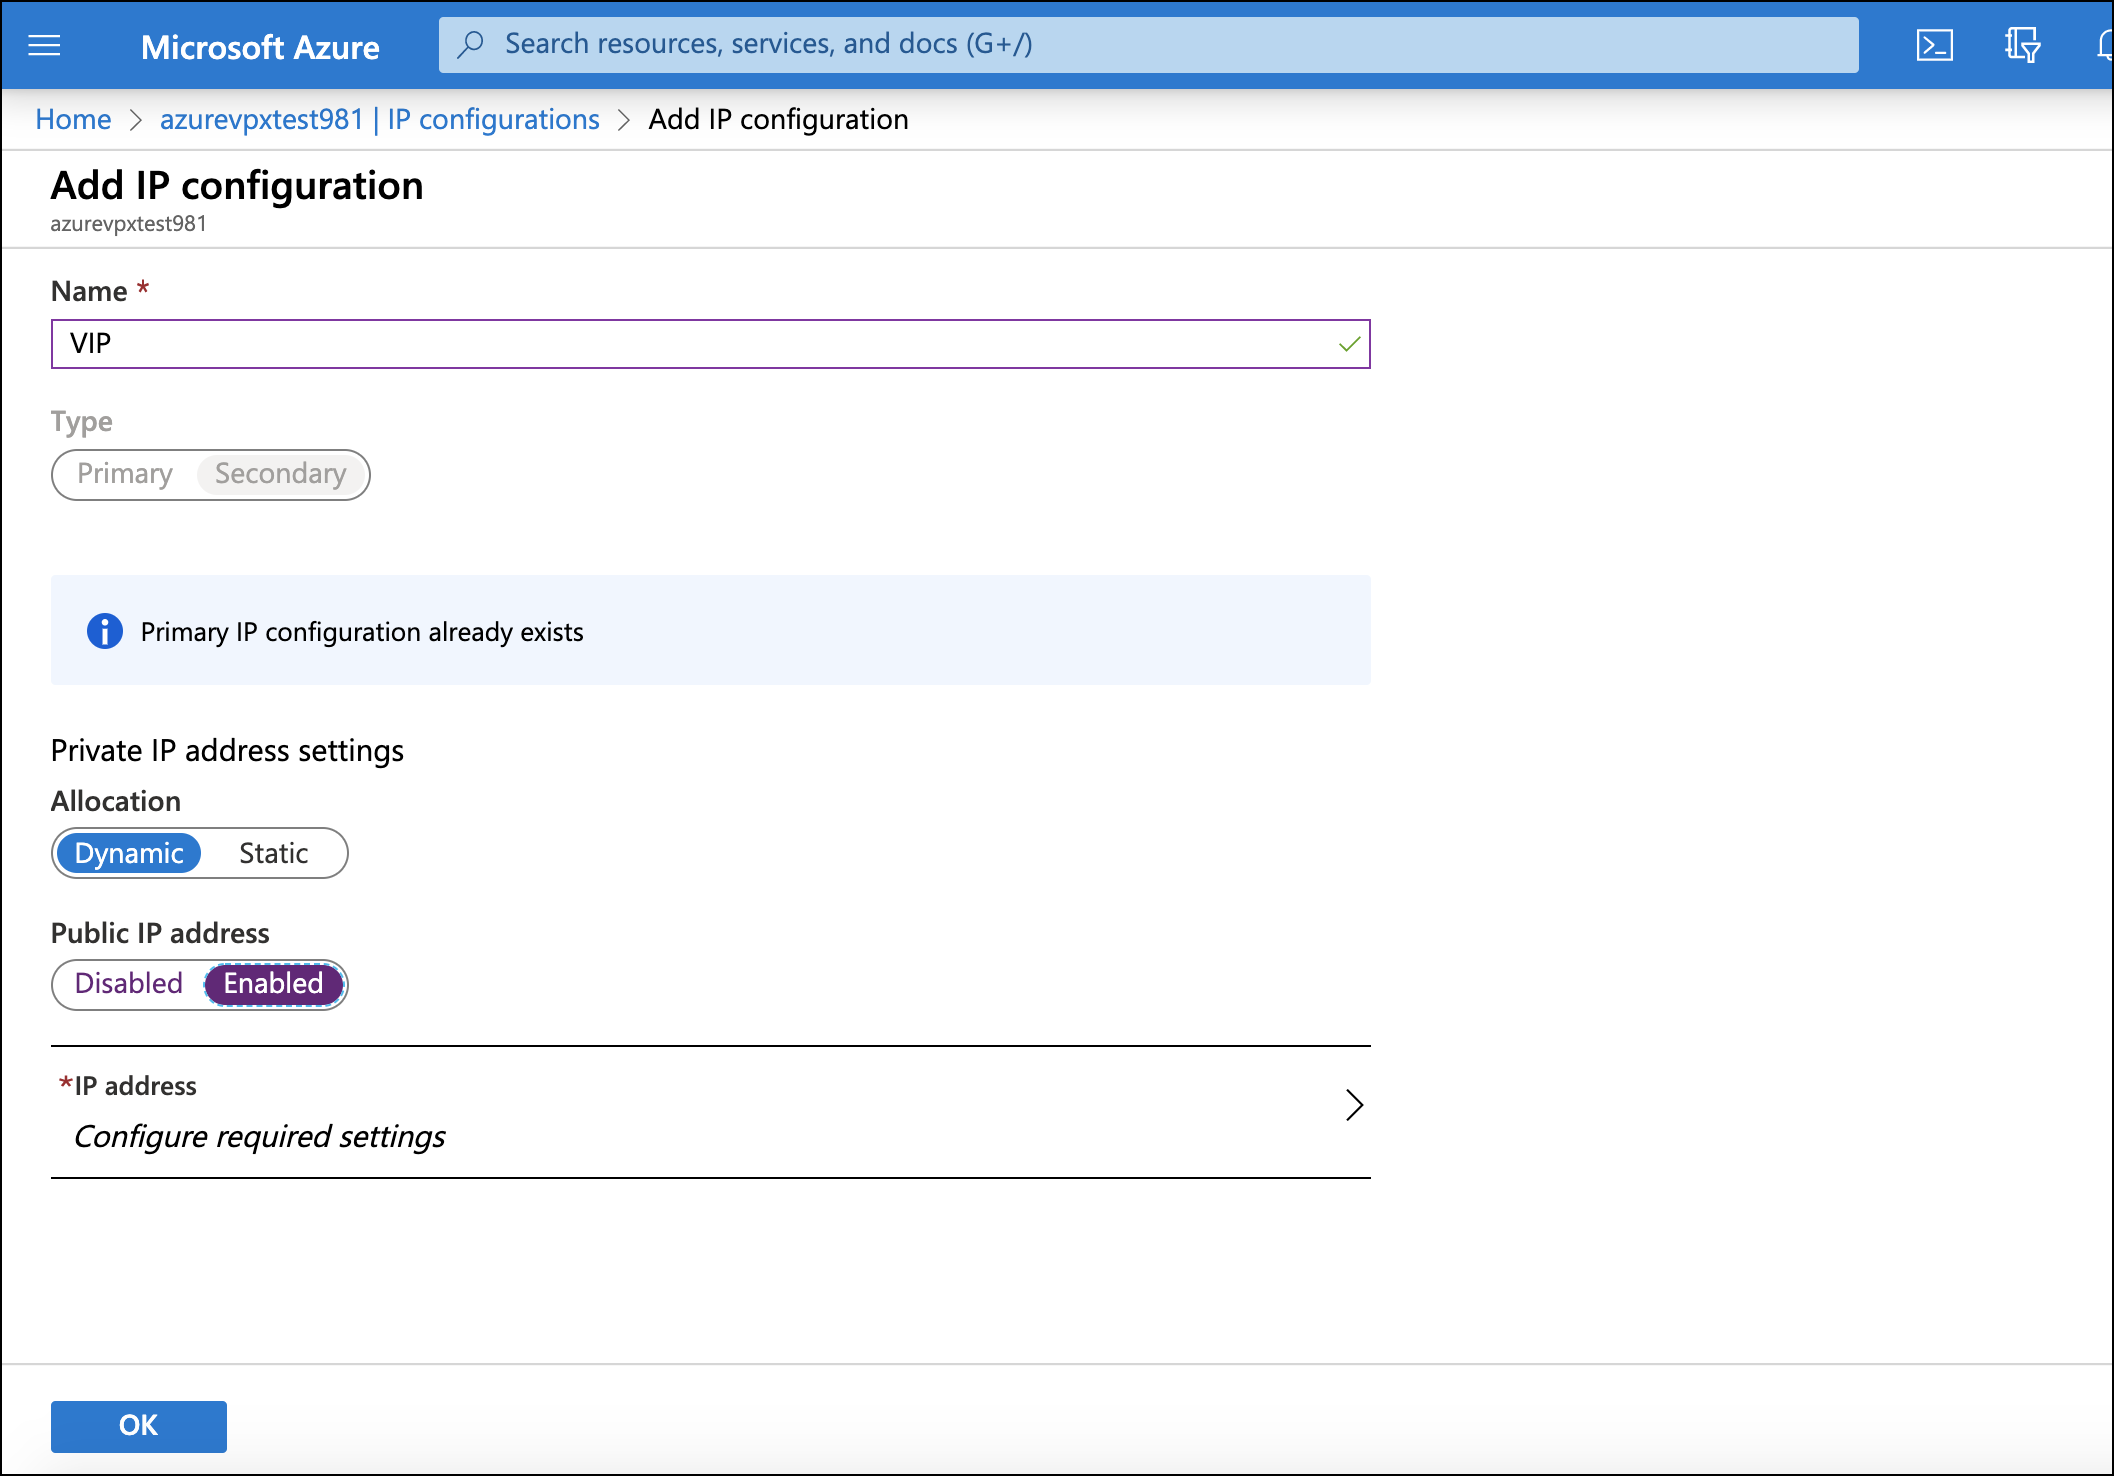
Select IP configurations on the network interfaces page and click +Add for adding a new IP address.
-
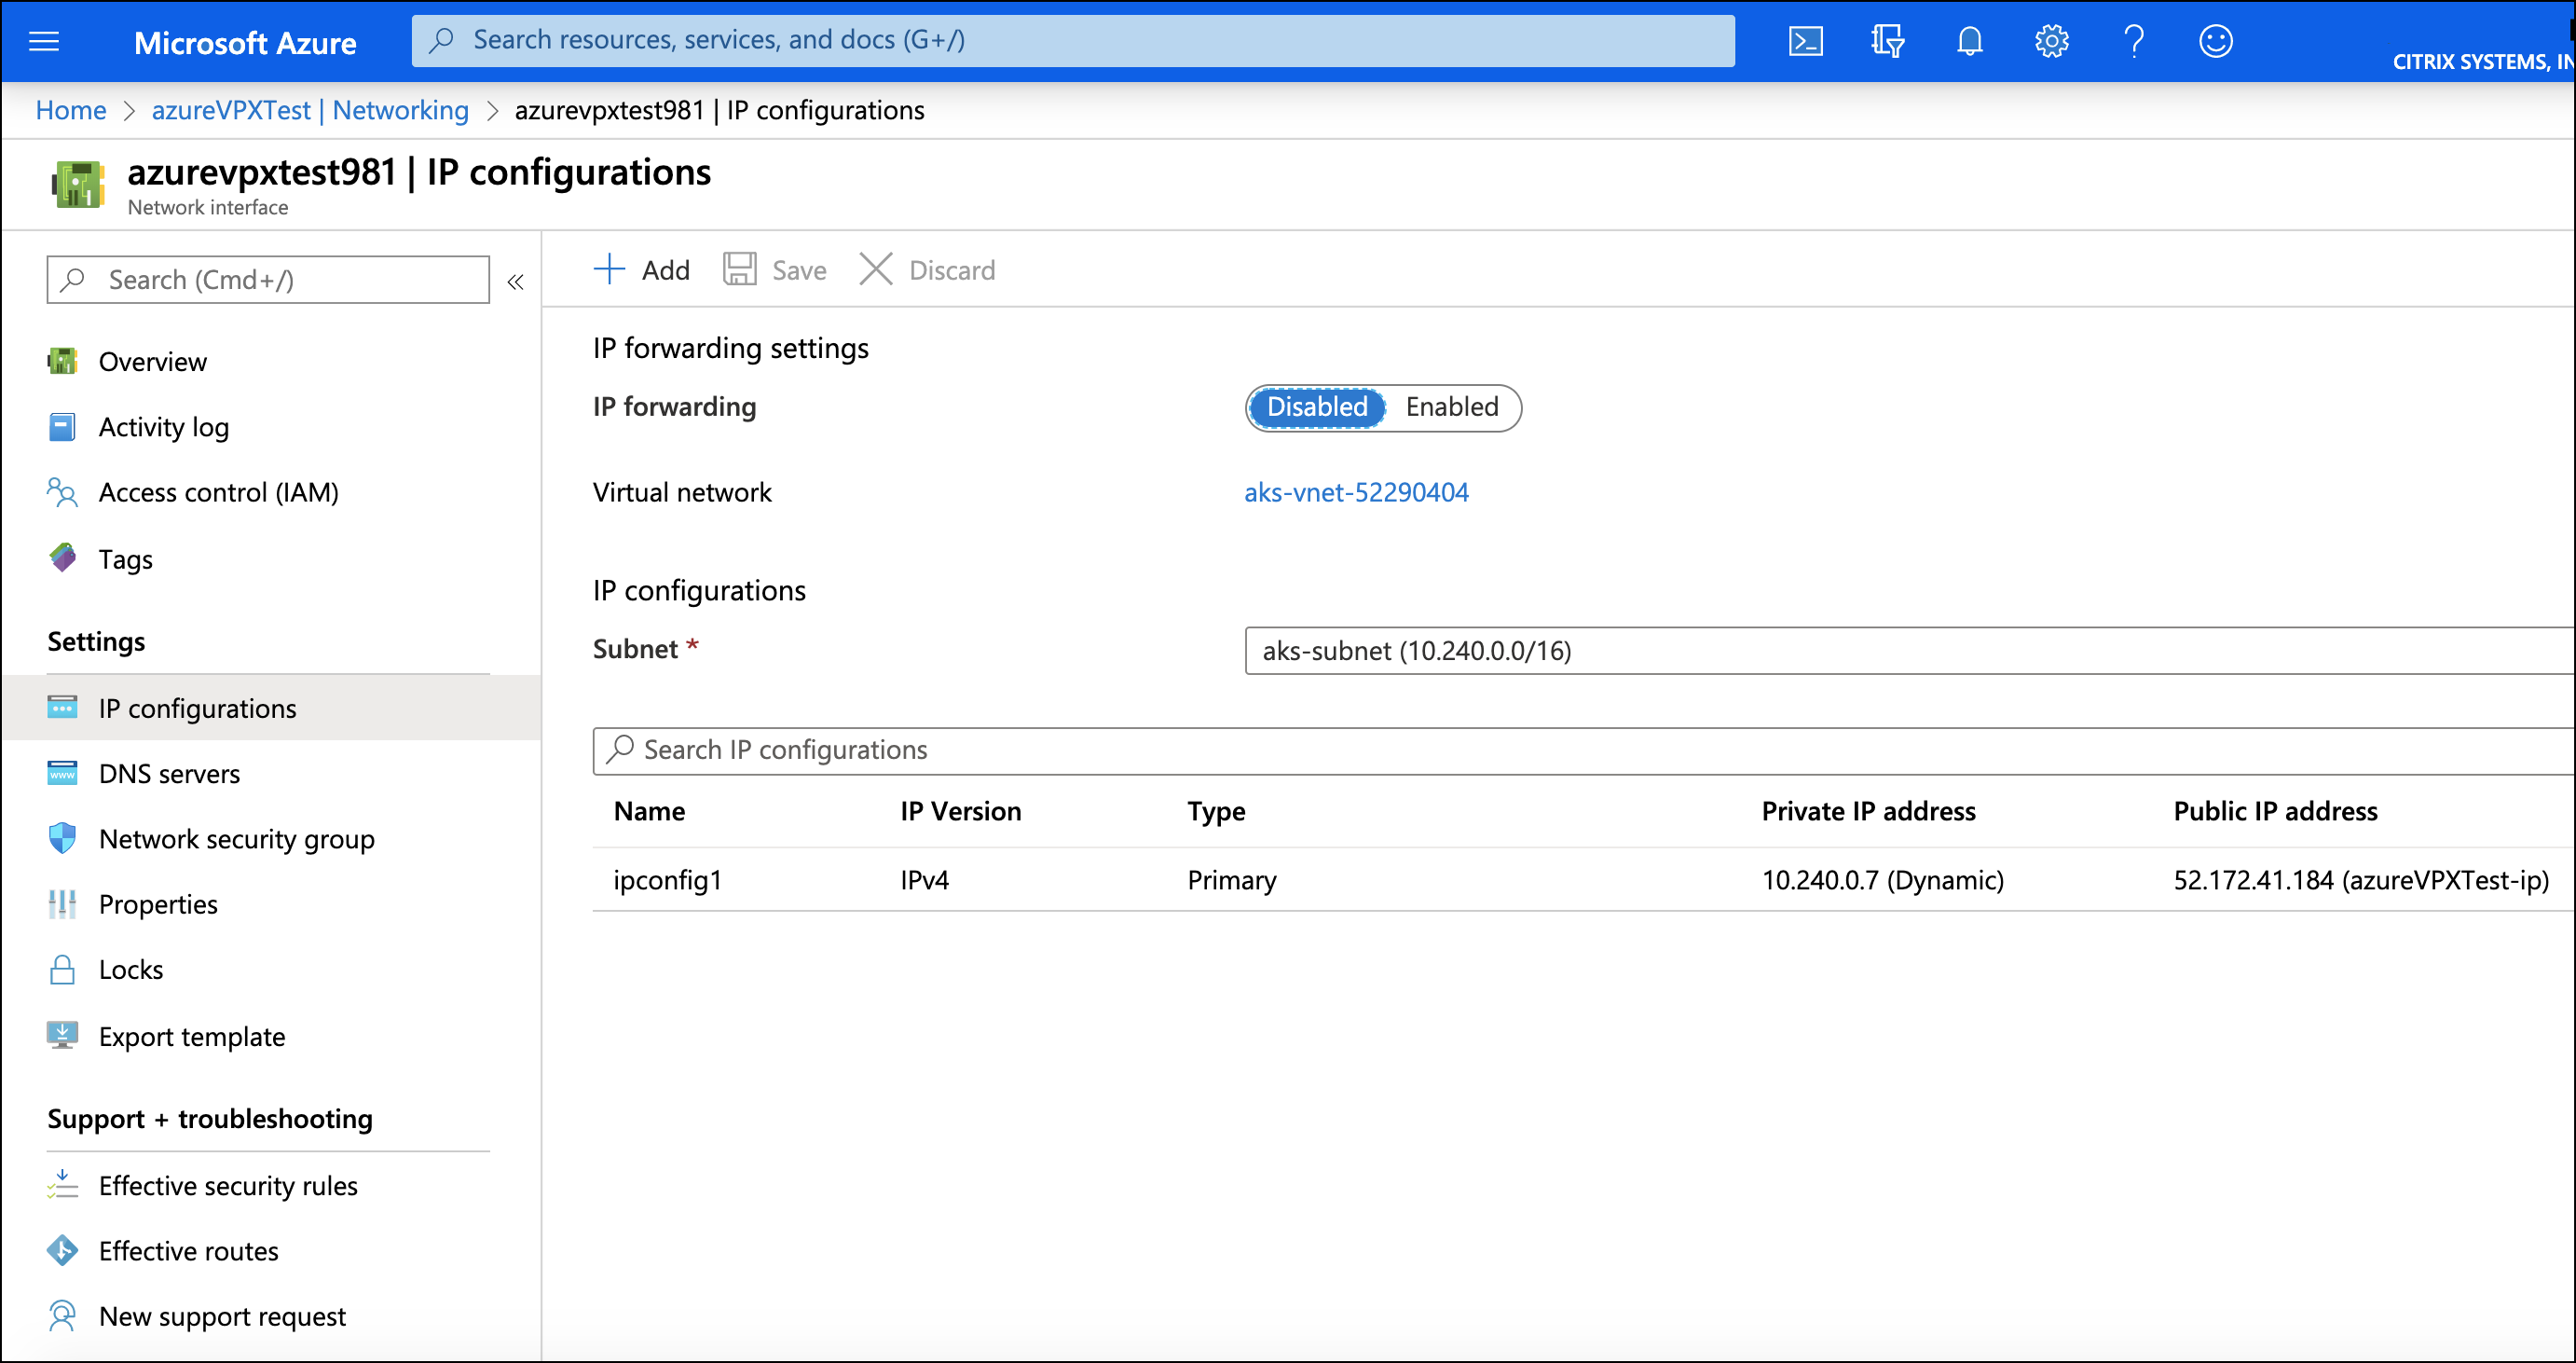
Add an IP address for
SNIP, specify aname, keep the allocation method asDynamic, and set the public IP address asDisabled.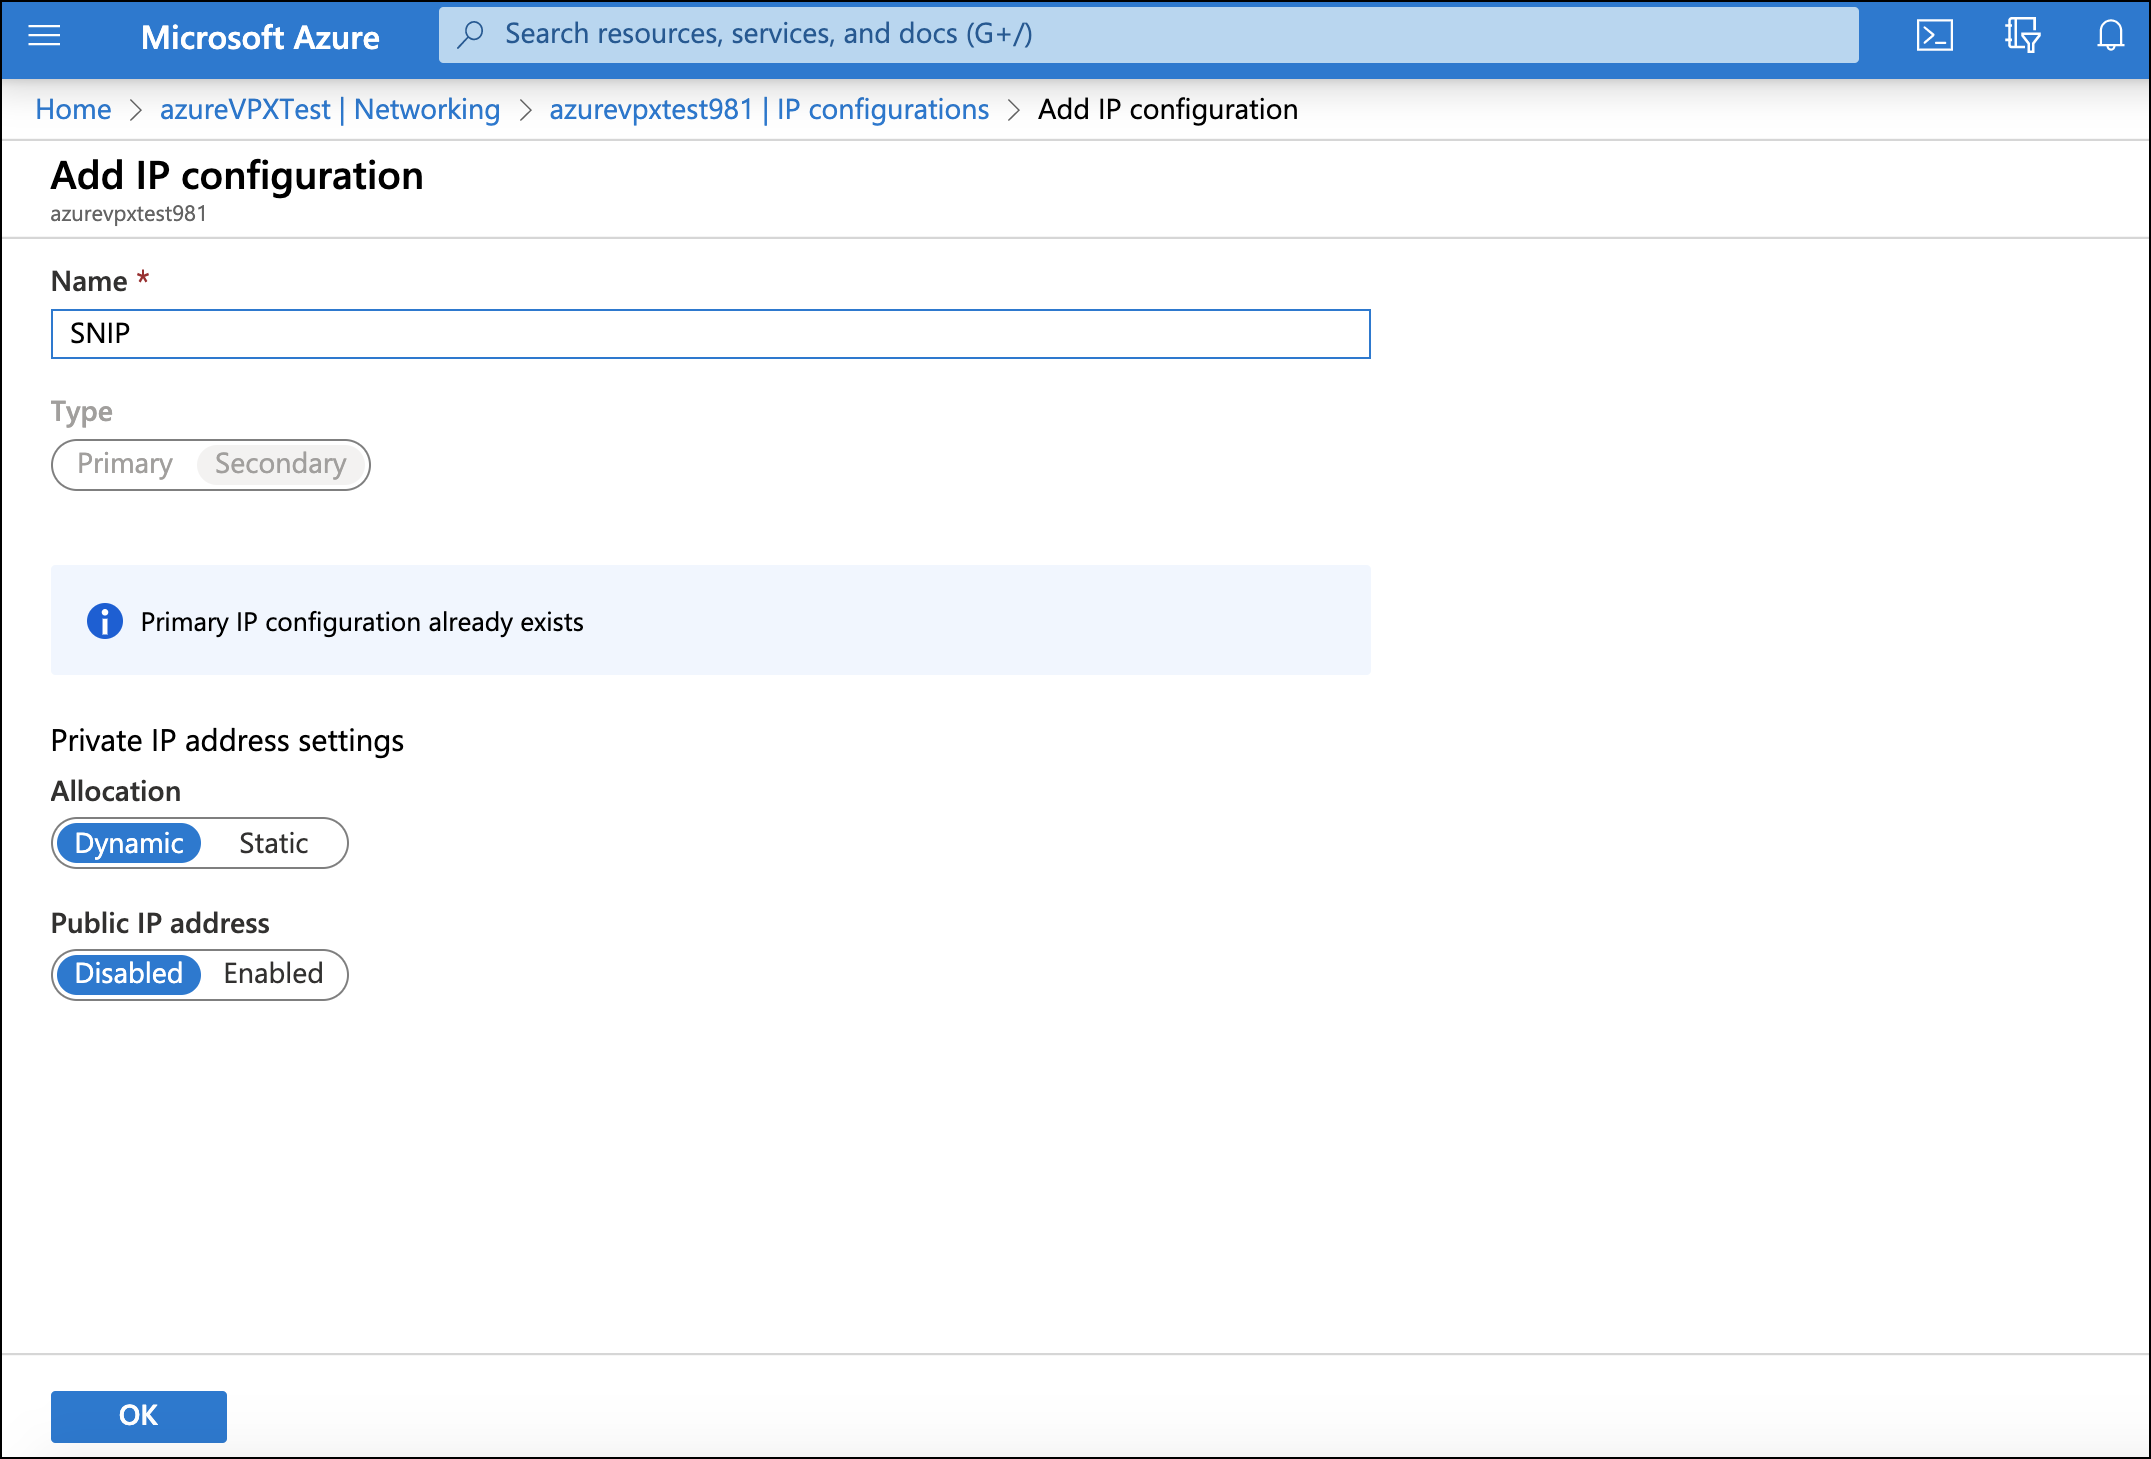
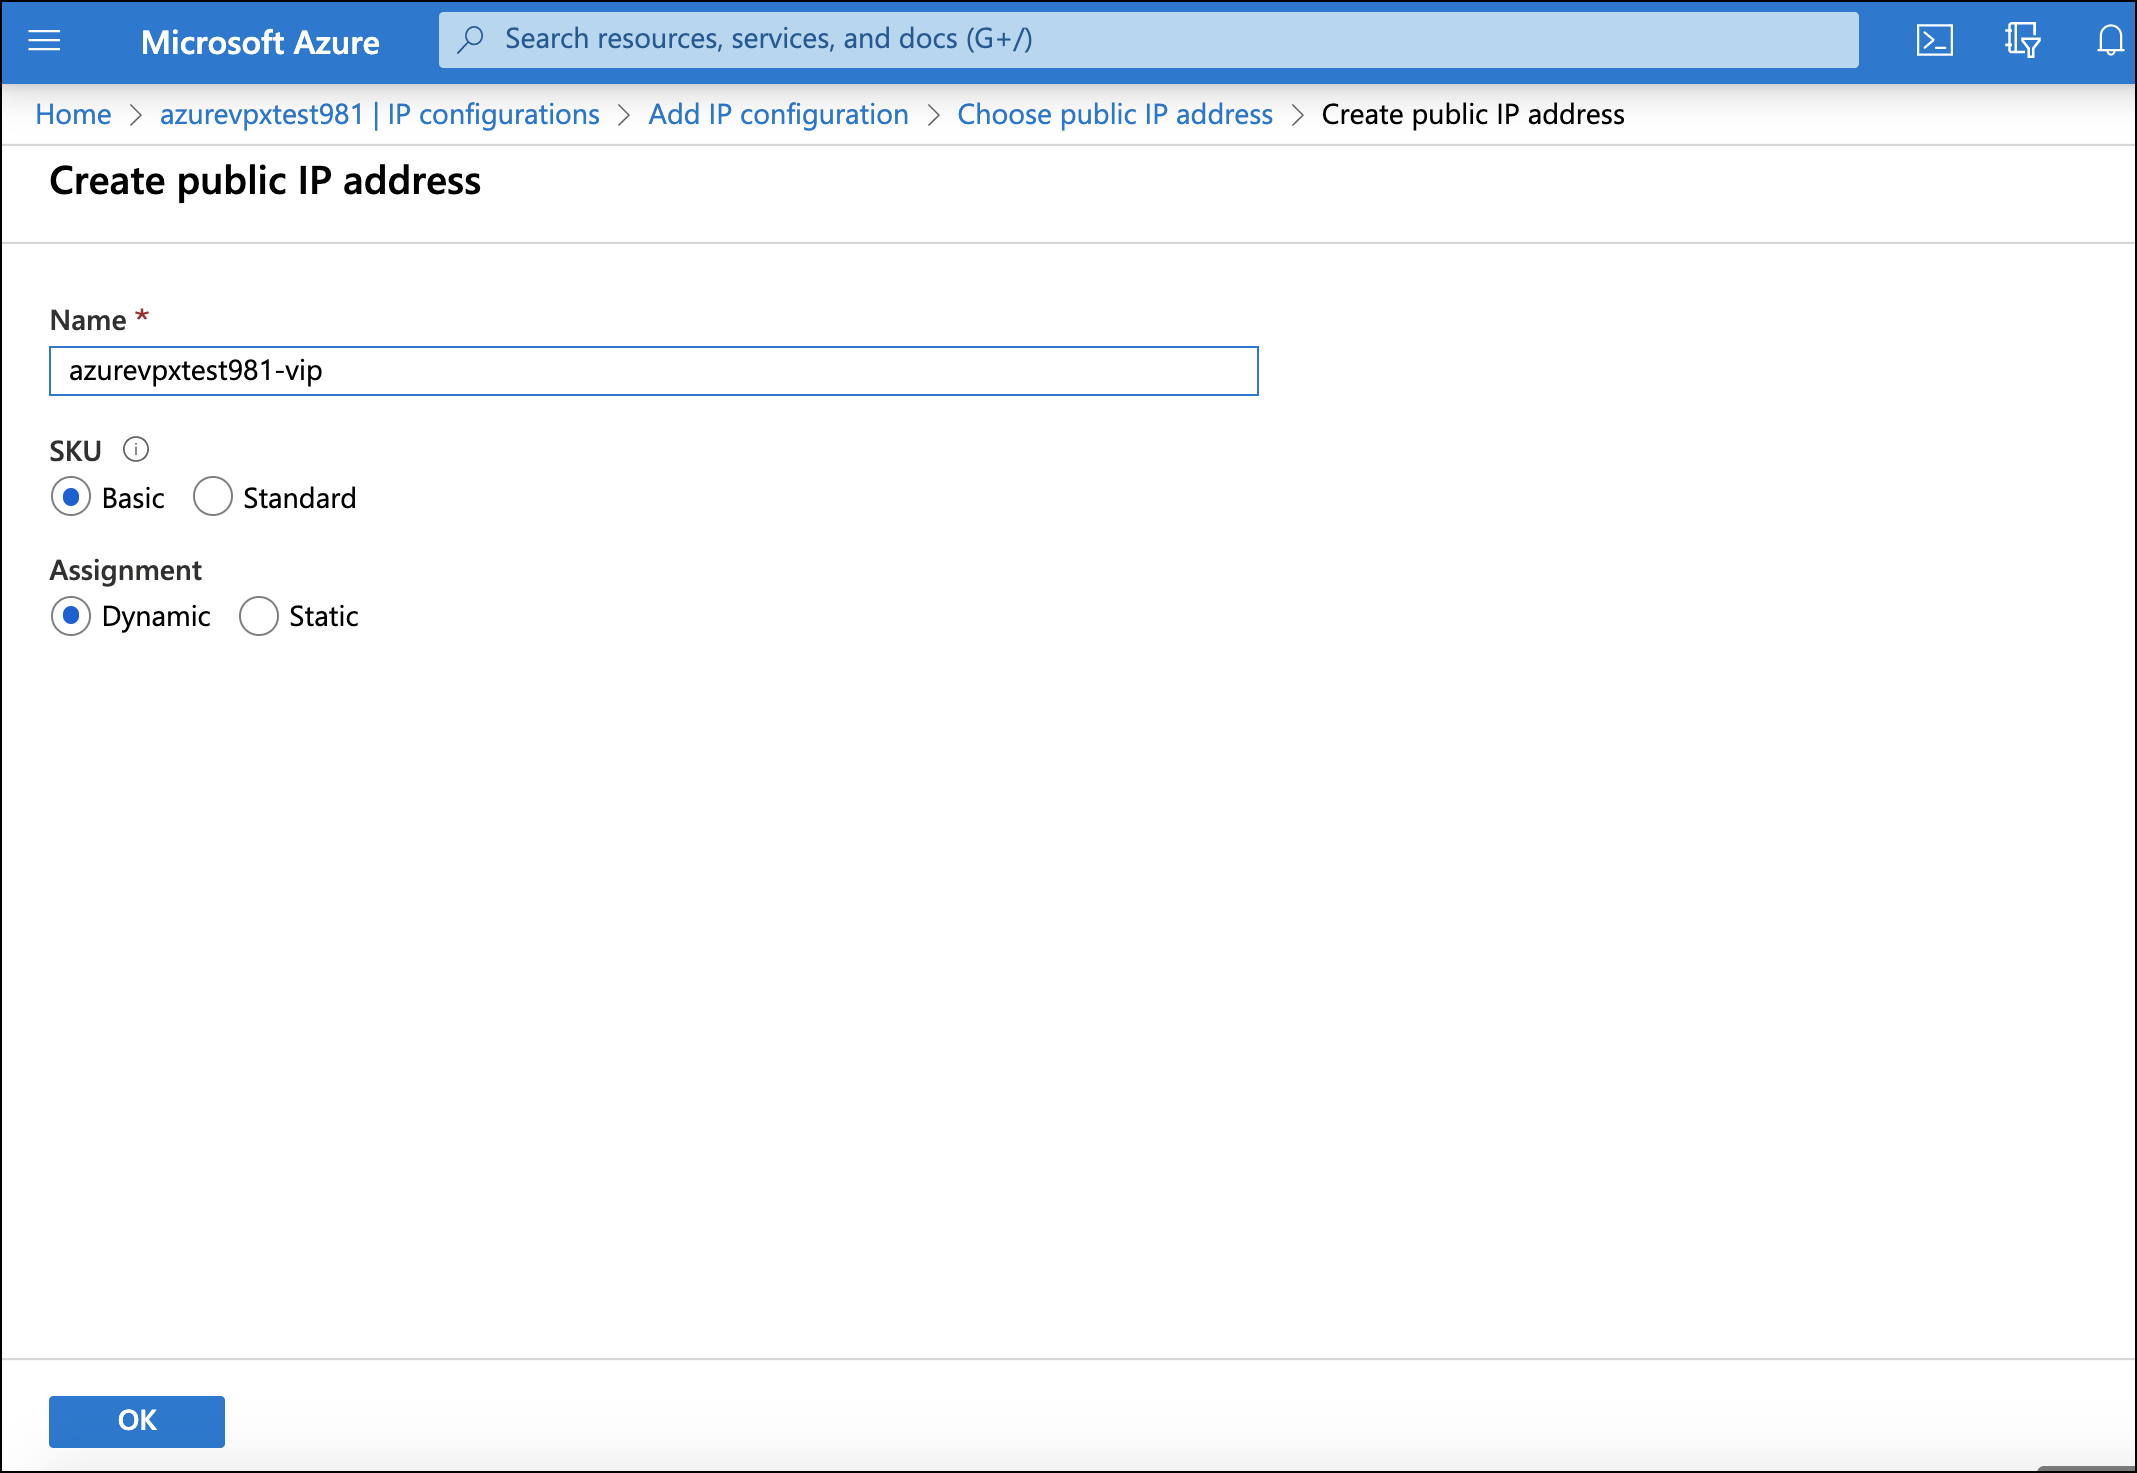
- Add an IP address for
VIP, specify aname, keep the allocation method asDynamic, and public IP address asEnabled.
- Verify all IP configurations and then set the IP forwarding as
Enabled.
- Add an IP address for
-
-
Verify if you are able to SSH into NetScaler VPX using the primary public IP address and the user name and password set during the NetScaler VPX deployment.
Note:
Before proceeding with the verification, make sure that all the necessary firewall settings are configured. Verify the SSH access and access to other ports like 80 and 443.
Share
Share
In this article
This Preview product documentation is Cloud Software Group Confidential.
You agree to hold this documentation confidential pursuant to the terms of your Cloud Software Group Beta/Tech Preview Agreement.
The development, release and timing of any features or functionality described in the Preview documentation remains at our sole discretion and are subject to change without notice or consultation.
The documentation is for informational purposes only and is not a commitment, promise or legal obligation to deliver any material, code or functionality and should not be relied upon in making Cloud Software Group product purchase decisions.
If you do not agree, select I DO NOT AGREE to exit.