Deploy NetScaler Cloud Controller using NetScaler Operator
Introduction
NetScaler Cloud Controller creates and maintains route entries for pod networks in the appropriate Azure route table.
Note:
NetScaler Cloud Controller only creates Azure routes between NetScaler and the Azure Red Hat OpenShift (ARO) cluster that resides in the same resource group.
This section provides information about deploying, configuring, and managing NetScaler Cloud Controller within Azure and ARO environments.
Prerequisites
-
An active Azure subscription.
Note down the subscription ID.
-
An Azure account with sufficient permissions to create and manage resources. You must have access to create resources within the resource group and manage service principals.
-
Note down the TENANT_ID, CLIENT_ID, and CLIENT_SECRET for your Azure account.
-
A running ARO cluster in Azure (version 4.11 or later).
-
The ARO cluster and the subnet to which the route needs to be established must be in the same VNet.
Note down the following details: Resource Group Name, VNet Name, and Subnet Name and Azure location where the ARO cluster and NetScaler® are located.
-
Create a secret as described in the namespace where you want to deploy NetScaler Cloud Controller.
oc create secret generic azsecret --from-literal=clientid='<CLIENT_ID>' --from-literal=clientsecret='<CLIENT_SECRET>' -n <namespace> <!--NeedCopy--> -
Create a service principal and assign a custom role to the service principal. For information, see Create service principal and assign a role.
-
Deploy NetScaler Operator. For information on how to deploy NetScaler Operator, see Deploy NetScaler Operator.
Create a service principal and assign a role
Create a service principal and assign a role to it to set up the authentication details for the NetScaler Cloud Controller to manage Azure resources. There are two scenarios to consider while creating a service principal and assigning a role to it described as the following.
Case I: The subnet on which the routes are to be created is not part of the ARO cluster
Follow the steps to create a service principal with the desired roles or add the roles to an existing service principal.
Note:
If a service principal exists, skip to step 9 to assign a role to the service principal.
-
Log in to Microsoft Azure Portal.
-
Go to the App registrations service.
-
Click New Registration.
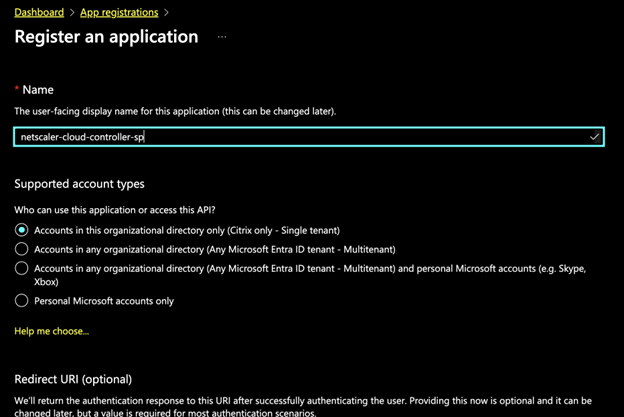
-
Enter the details such as name and supported account types.
-
Click Register to create your service principal.
Note down the clientID from your service principal details.
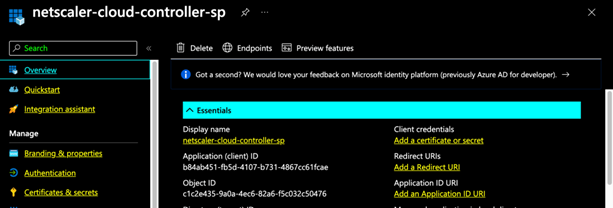
-
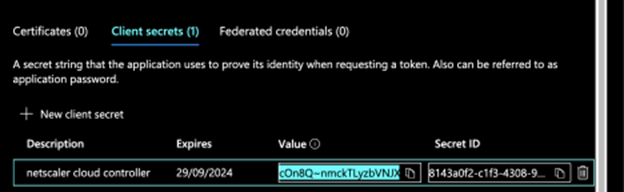
Click Certifications & Secrets in the left pane and click New client secret.
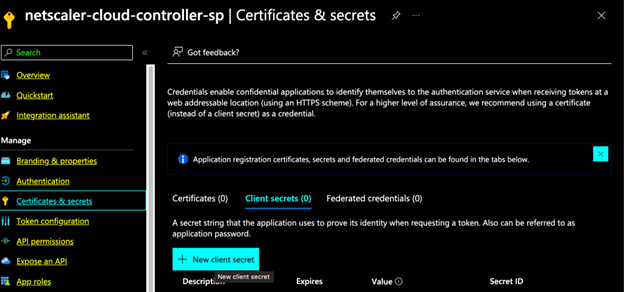
-
Enter a description and choose an expiry.
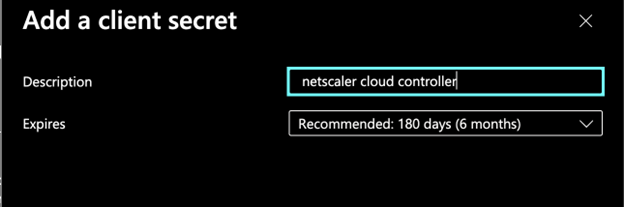
-
Note down the secret value. This value is clientSecret.
-
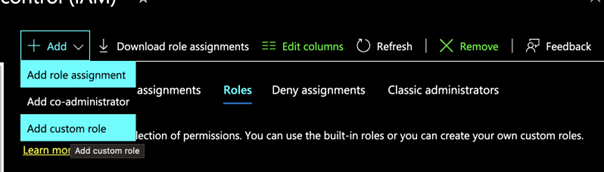
Go to Resource Group →
<Your Resource Group>→ Access Control (IAM).Select the resource group where the ARO cluster and the VNet exist.
-
Click Add and select Add custom role.
-
Add the following custom.JSON sample.
{ "properties": { "roleName": "NetScaler Cloud Controller Role", "description": "Allows managing cloud controller role", "assignableScopes": [ "/subscriptions/<SUBSCRIPTION_ID>/resourceGroups/<RESOURCE_GROUP_NAME>" ], "permissions": [ { "actions": [ "Microsoft.Network/routeTables/routes/write", "Microsoft.Network/routeTables/routes/read", "Microsoft.Network/routeTables/routes/delete", "Microsoft.Network/routeTables/delete", "Microsoft.Network/routeTables/write", "Microsoft.Network/routeTables/read", "Microsoft.Network/routeTables/join/action", "Microsoft.Network/networkSecurityGroups/join/action", "Microsoft.Network/virtualNetworks/subnets/read", "Microsoft.Network/virtualNetworks/subnets/write" ], "notActions": [], "dataActions": [], "notDataActions": [] } ] } } <!--NeedCopy--> -
Modify the
custom_role.jsonfile as per your desired settings.You must add your Resource Group and Subscription ID in the JSON file.
-
Select Start from JSON in Baseline Permissions and upload the modified
custom_role.jsonfile.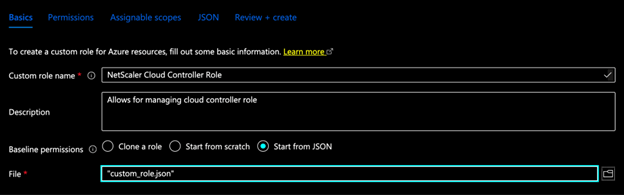
-
Click Review + Create.
-
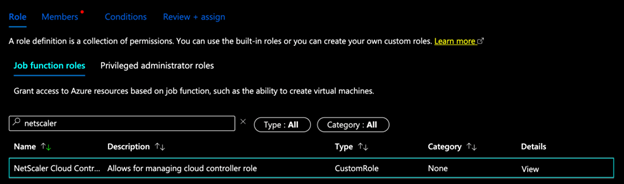
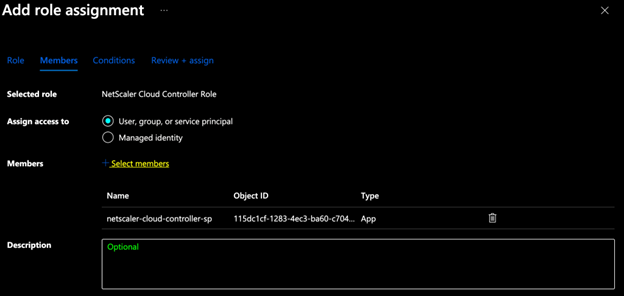
Go to Add role assignment.

-
Search for the custom role created in step 14.
-
Select the role, and press next.
-
Under Members, select the service principal created in step 5.
-
Click Review + Assign.
Case II: The subnet on which the routes are to be created is part of the ARO cluster
In this case, you must have access to the service principal created during the OpenShift installation. The automatically created service principal during the ARO installation has a aro-app- prefix.
-
Go to Resource Group →
<Your Resource Group>where the ARO cluster and the VNet exist. Go to Resource Group →<Your Resource Group>→ Access Control (IAM) -
Click
Addand selectAdd custom role. -
Copy the following in a JSON file named
custom_role.json.{ "properties": { "roleName": "NetScaler Cloud Controller Role", "description": "Allows managing cloud controller role", "assignableScopes": [ "/subscriptions/<SUBSCRIPTION_ID>/resourceGroups/<RESOURCE_GROUP_NAME>" ], "permissions": [ { "actions": [ "Microsoft.Network/routeTables/routes/write", "Microsoft.Network/routeTables/routes/read", "Microsoft.Network/routeTables/routes/delete", "Microsoft.Network/routeTables/delete", "Microsoft.Network/routeTables/write", "Microsoft.Network/routeTables/read", "Microsoft.Network/routeTables/join/action", "Microsoft.Network/networkSecurityGroups/join/action", "Microsoft.Network/virtualNetworks/subnets/read", "Microsoft.Network/virtualNetworks/subnets/write" ], "notActions": [], "dataActions": [], "notDataActions": [] } ] } } <!--NeedCopy--> -
Modify the
custom_role.jsonfile as per your desired settings.You must add your Resource Group and Subscription ID in the JSON file.
-
Select Start from JSON in Baseline Permissions and upload the modified
custom_role.jsonfile. -
Click Review + Create.
-
Click Add role assignment.
-
Search for the custom role created in step 4. Select the role, and click next.
-
In the Members section, select the service principal that is managing the OpenShift cluster.
-
Click Review + Assign.
Steps to deploy NetScaler Cloud Controller instance
-
Log in to the 4.x OpenShift console.
-
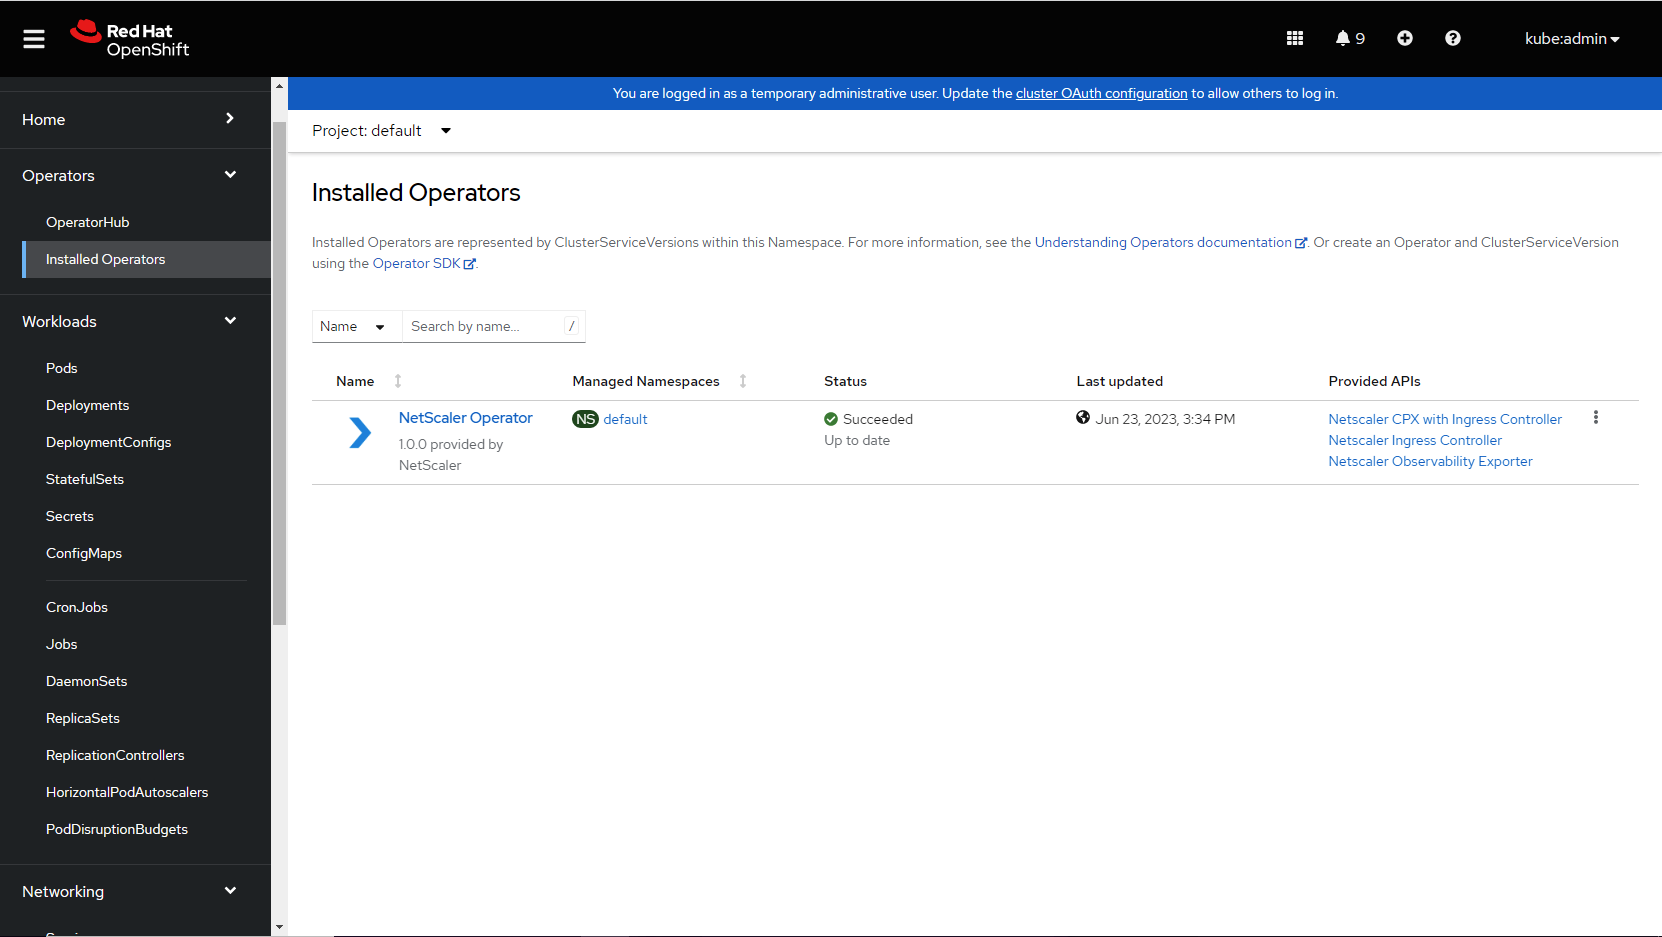
Navigate to Operators > Installed Operators and select NetScaler Operator.
-
Go to NetScaler Operator, click the
NetScaler Cloud Controllertab, and then click Create NetScaler Cloud Controller.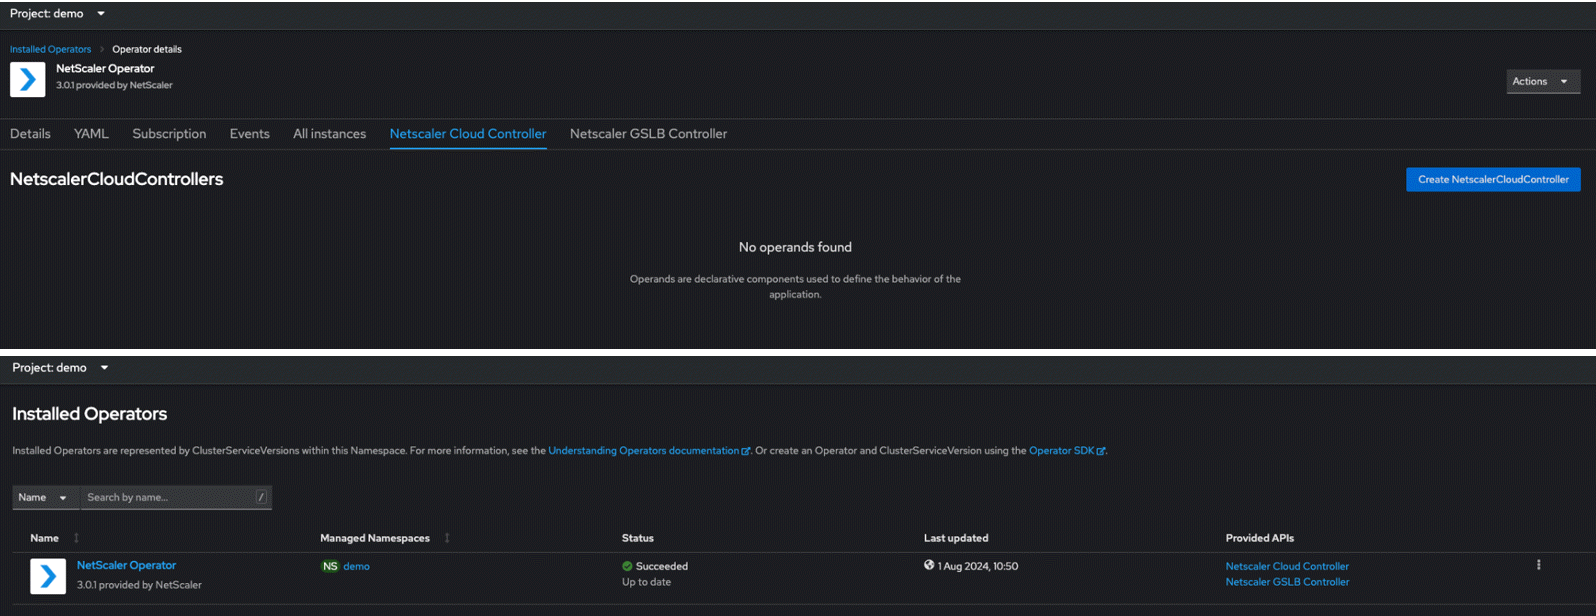
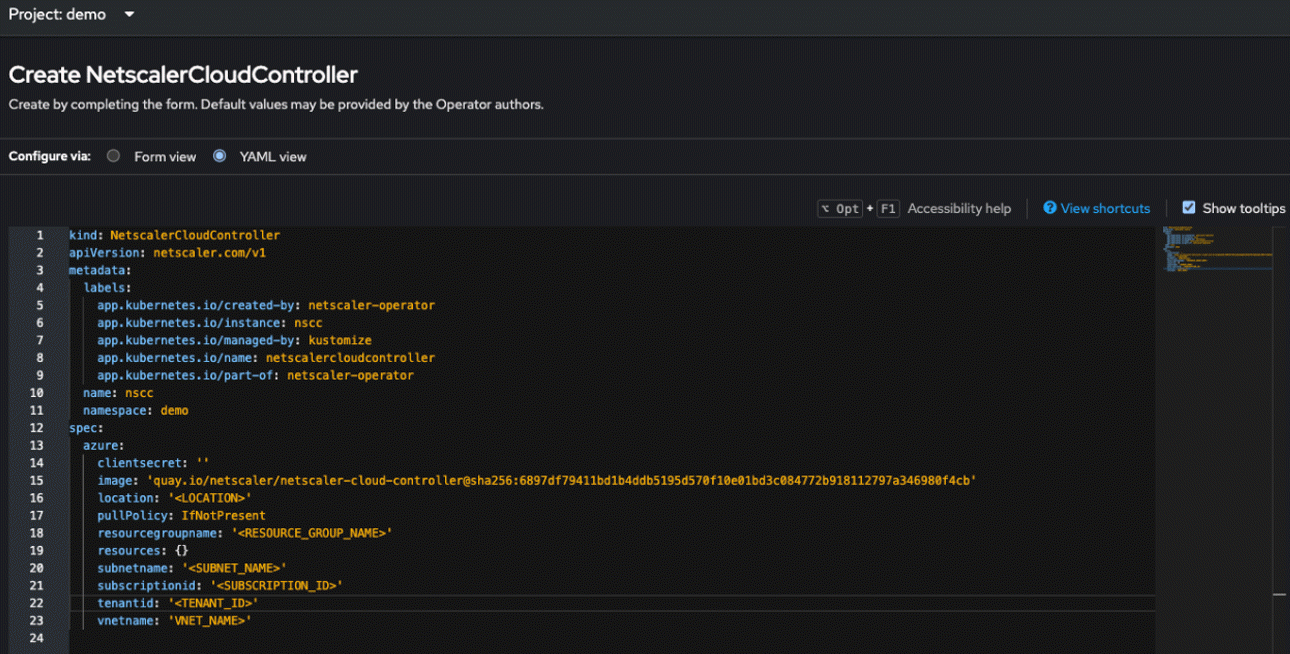
The YAML for NetScaler Cloud Controller CRD is displayed. Optionally, you can select
Form viewbutton and update the parameters in a form. -
Edit the .YAML file to add the following values obtained in the prerequisites section.
Refer to the following table for the descriptions of the fields in the displayed YAML.
Parameter Mandatory/Optional Default value Description name Mandatory netscalercloudcontroller-sample Name of the NetScaler Cloud Controller instance. acceptLicense Mandatory no Set this value to Yesto accept the NetScaler Cloud Controller EULA.affinity Optional N/A Affinity labels for pod assignment. nodeSelector Optional N/A The node label key:value pair to be used for nodeSelector option in NetScaler Cloud Controller deployment. podAnnotations Optional N/A Map of annotations to add to the pods. tolerations Optional N/A The tolerations for the NetScaler Cloud Controller deployment. Parameter Mandatory/Optional Default value Description azure clientsecret Mandatory N/A Secret name created in the prerequisites section. image Mandatory quay.io/netscaler/netscaler-cloud-controller@shavalue of latest releaseThe NetScaler Cloud Controller image hosted on Quay.io. location Mandatory N/A Azure location. pullPolicy Optional IfNotPresent The NetScaler Cloud Controller image pull policy. resourcegroupname Mandatory N/A Resource group name where the VNet exists. resources Optional N/A CPU/memory resources for a NetScaler Cloud Controller container. subnetname Mandatory N/A Azure VNet subnet name from where the route is to be established to the ARO cluster. This subnet and ARO Cluster must be in same VNET. subscriptionid Mandatory N/A Subscription ID for your Azure account. tenantid Mandatory N/A Tenant ID of the Azure service principal. vnetname Mandatory N/A Azure VNet name in which the required subnet and the OpenShift Cluster exists. -
After updating the values for the required parameters, click Create.
-
Navigate to the Workloads > Pods section and verify whether the NetScaler Cloud Controller pod is up and running.
After the controller pod is up and running, the required route table with the subnet is created.
Notes:
- The controller creates a route table and associates it with the given subnet if the route table does not exist. The format of the new table will be
<SUBNET_NAME>_<LOCATION>_rt.- To avoid conflicts with routes created/updated by the NetScaler Cloud Controller from other automation processes or users, the routes managed by NetScaler Cloud Controller start with the prefix NSCC_, followed by a hash value for tracking. Do not create routes with the same name prefixes to avoid conflicts.
The following roles are installed when NetScaler Cloud Controller is deployed. NetScaler Cloud Controller requires these roles to manage its CRD and get node-specific information.
| API Group | Resources | Verbs |
|---|---|---|
| rbac.authorization.k8s.io | clusterrolebindings | create, delete, get, list, patch, update, watch |
| rbac.authorization.k8s.io | clusterroles | create, delete, get, list, patch, update, watch |
| core | nodes | All |
| core | serviceaccounts | create, delete, get, list, patch, update, watch |
| apps | deployments | create, delete, get, list, patch, update, watch |
| core | pods | create, delete, get, list, patch, update, watch, serviceaccounts |