
Configuring or modifying a signatures object
You configure a signatures object after creating it, or modify an existing signatures object, to enable or disable signature categories or specific signatures, and configure how the Web App Firewall responds when a signature matches a connection.
To configure or modify a signatures object
-
Navigate to Security > NetScaler Web App Firewall > Signatures.
-
In the details pane, select the signatures object that you want to configure, and then click Open.
-
In the Modify Signatures Object dialog box, set the Display Filter Criteria options at the left to display the filter items that you want to configure.As you modify these options, the results that you requested are displayed in the Filtered Results window at the right.
-
To display only selected categories of signatures, check or clear the appropriate signature-category check boxes. From release 13.1 build 48.x, you can use CVE on the left panel to view the vulnerabilities published for the selected year. The signature categories are:
Name Type of Attack that this Signature Protects Against cgi CGI scripts. Includes Perl and UNIX shell scripts. client Browsers and other clients. coldfusion websites that use the Adobe Systems ColdFusion application server. frontpage websites that use Microsoft’s FrontPage server. iis websites that use the Microsoft Internet Information Server (IIS). misc Miscellaneous attacks. php websites that use PHP web-activex websites that contain ActiveX controls. web-struts websites that contain Apache struts, which are java-ee based applets. CVE Lists the CVEs that are published for the selected year. -
To display only signatures that have specific check actions enabled, select the ON check box for each of those actions, clear the ON check boxes for the other actions, and clear all of the OFF check boxes. To display only signatures that have a specific check action disabled, select their respective OFF check boxes and clear all of the ON check boxes. To display signatures regardless of whether they have a check action enabled or disabled, select or clear both the ON and the OFF check boxes for that action. The check actions are:
Criterion Description Enabled The signature is enabled. The Web App Firewall checks only for signatures that are enabled when it processes traffic. Block Connections that match this signature are blocked. Log A log entry is produced for any connection that matches this signature. Stats The Web App Firewall includes any connection that matches this signature in the statistics that it generates for that check. -
To further filter the details that are displayed in the result window, use the search bar above the result window and perform the following steps:
-
Select the properties that you want to filter in the search bar.
-
Type the value, and press the enter button. It further filters the content that are already displayed in the result window and lists the details based on the entered value.
-
Example: In the following image, web-CGI is selected as a category in the Display Filter Criteria options at the left. The web-CGI signature details are listed in the result window at the right. To further filter the details based on the severity, in the search bar, severity is selected as a property and medium is entered as a value. The web-CGI signature with medium severity are listed in the result window.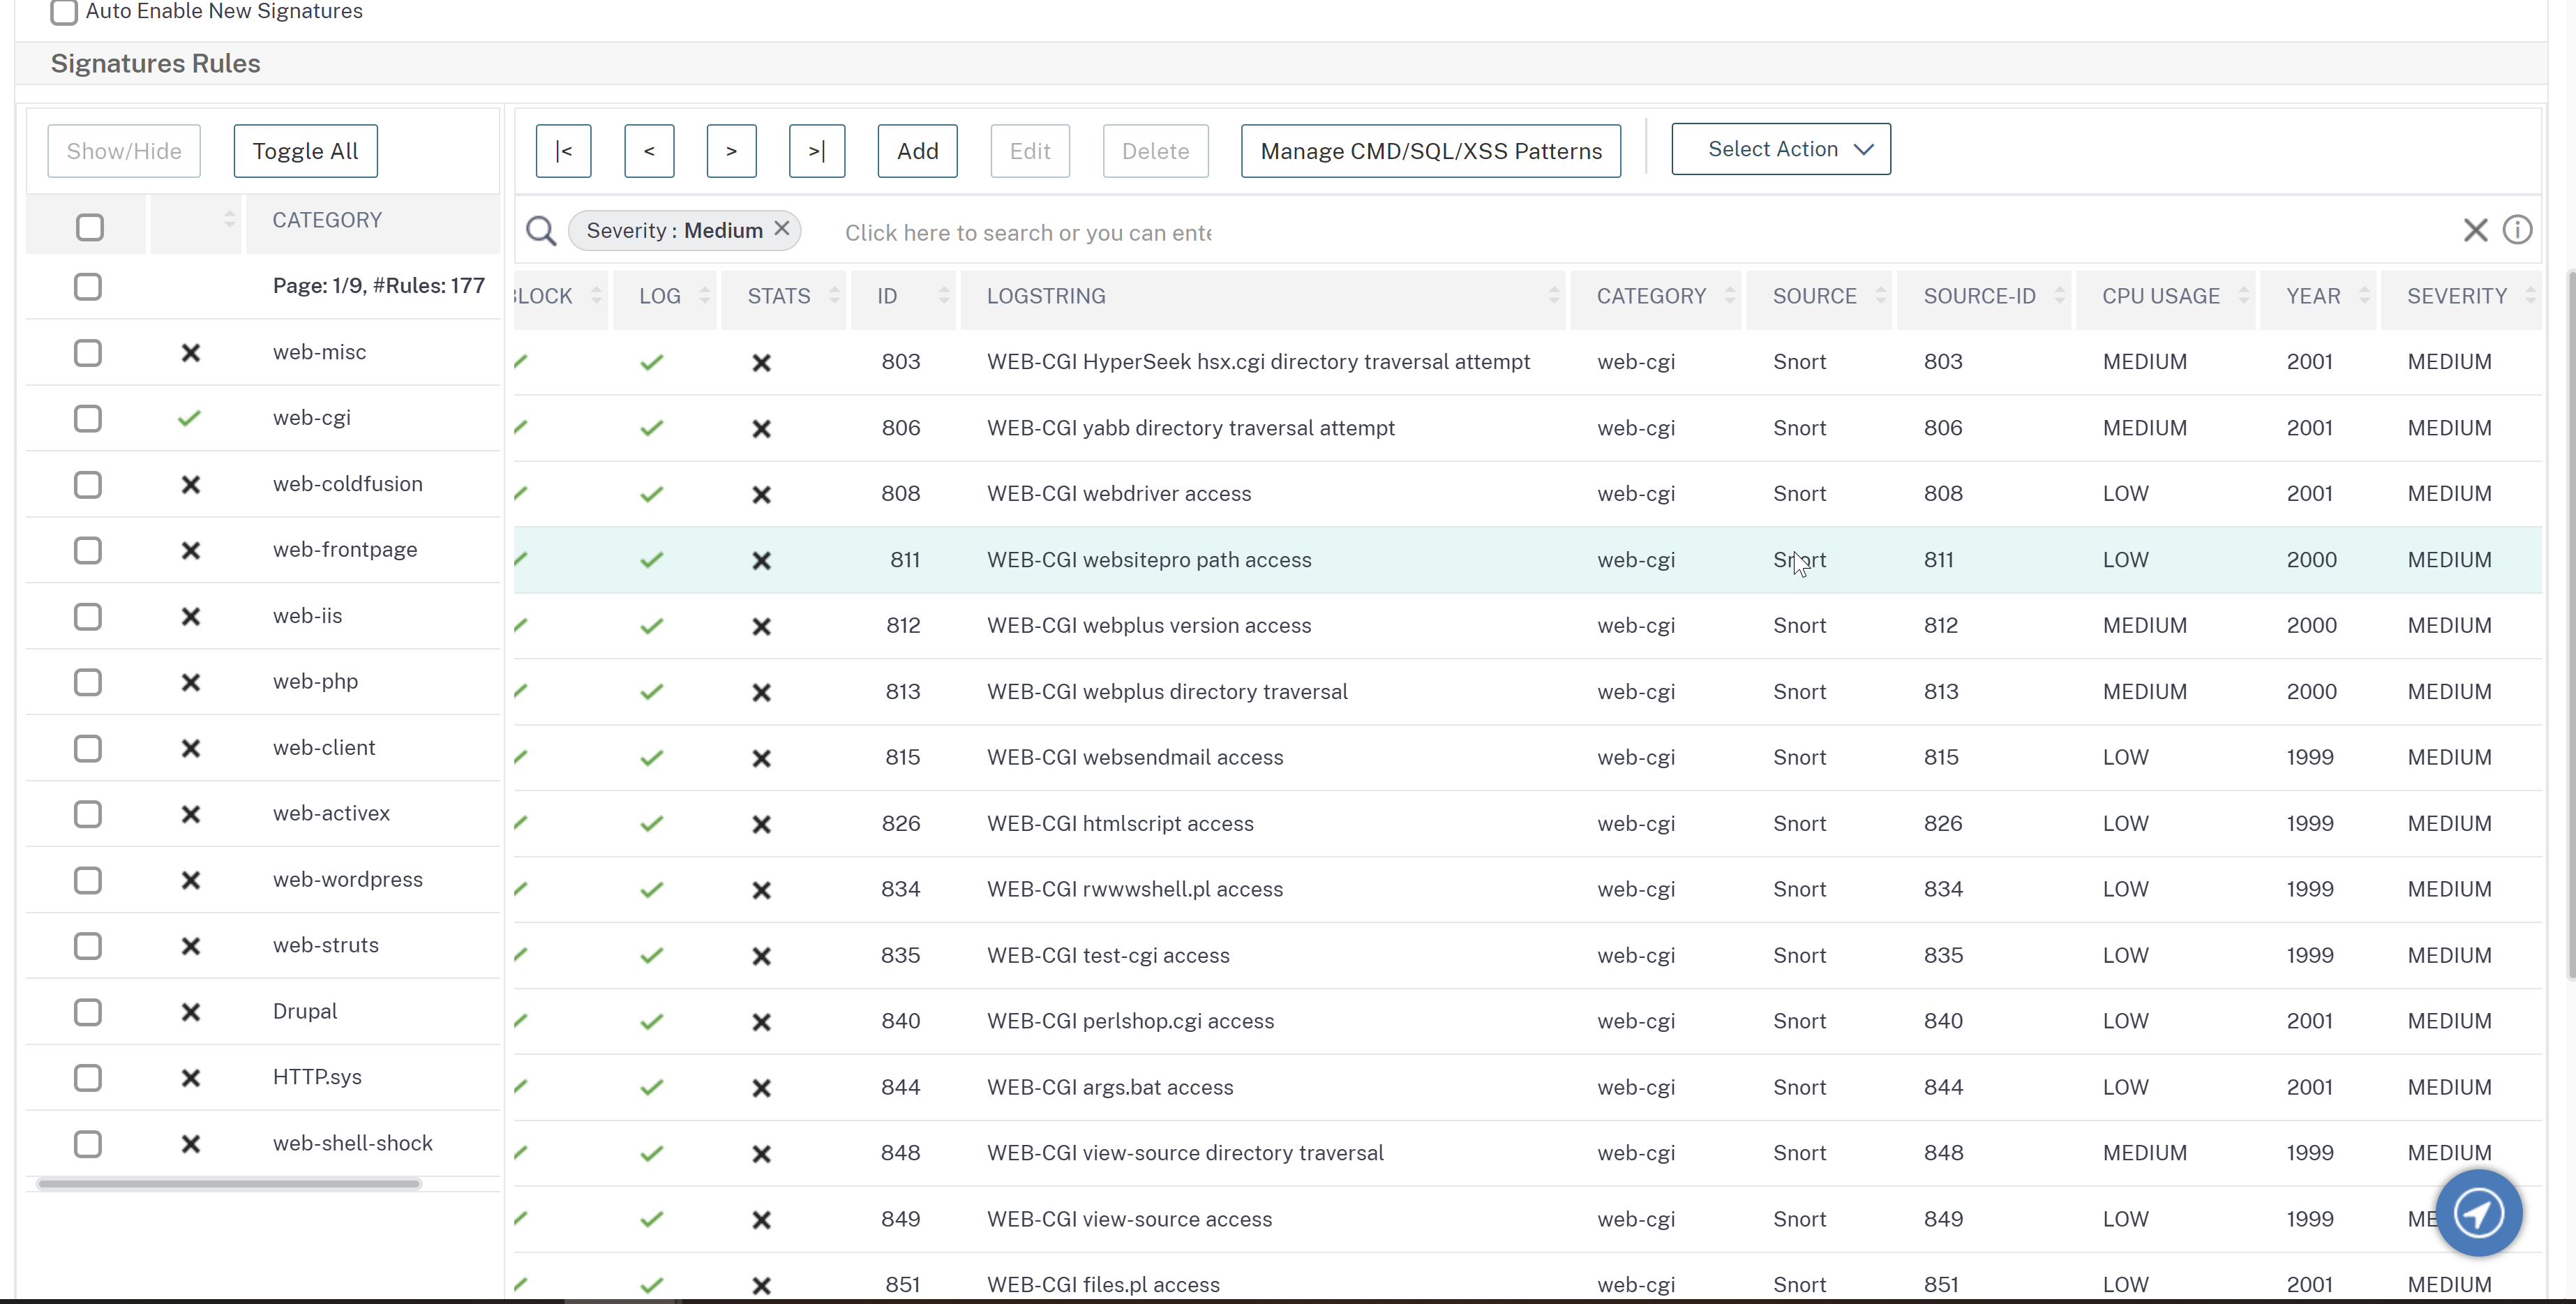
-
To reset all display filter criteria to the default settings and display all signatures, click Show All.
-
Note
The number of items listed in the filtered result window is 20. The pagination is available above the Display Filter Criteria options on the left.
-
For information about a specific signature, select the signature, and then click the blue double arrow in the More field. The Signature Rule Vulnerability Detail message box appears. It contains information about the purpose of the signature and provides links to external web-based information about the vulnerability or vulnerabilities that this signature addresses. To access an external link, click the blue double arrow to the left of the description of that link.
-
Configure the settings for a signature by selecting the appropriate check boxes.
-
If you want to add a local signature rule to the signatures object, or modify an existing local signature rule, see The Signatures Editor.
-
If you have no need for SQL injection, cross-site scripting, or Xpath injection patterns, click OK, and then click Close. Otherwise, in the lower left-hand corner of the details pane, click Manage SQL/cross-site scripting Patterns.
-
In the Manage SQL/cross-site scripting Patterns dialog box, Filtered Results window, navigate to the pattern category and pattern that you want to configure. For information about the SQL injection patterns, see HTML SQL Injection Check. For information about the cross-site scripting patterns, see HTML Cross-Site Scripting Check.
-
To add a new pattern:
-
Select the branch to which you want to add the new pattern.
-
Click the Add button directly below the lower section of the Filtered Results window.
-
In the Create Signature Item dialog box, fill in the Element text box with the pattern that you want to add. If you are adding a transformation pattern to the transform rules branch, under Elements, fill in the From text box with the pattern that you want to change and the To text box with the pattern to which you want to change the previous pattern.
-
Click OK.
-
-
To modify an existing pattern:
-
In the Filtered Results window, select the branch that contains the pattern that you want to modify.
-
In the detail window beneath the Filtered Results window, select the pattern that you want to modify.
-
Click Modify.
-
In the Modify Signature Item dialog box, Element text box, modify the pattern. If you are modifying a transformation pattern, you can modify either or both patterns under Elements, in the From and the To text boxes.
-
Click OK.
-
-
To remove a pattern, select the pattern that you want to remove, then click the Remove button below the details pane beneath the Filtered Results window. When prompted, confirm your choice by clicking Close.
-
To add the patterns category to the cross-site scripting branch:
-
Select the branch to which you want to add the patterns category.
-
Click the Add button directly below the Filtered Results window.Note: Currently you can add only one category, named patterns, to the cross-site scripting branch, so after you click Add,you must accept the default choice, which is patterns.
-
Click OK.
-
-
To remove a branch, select that branch, and then click the Remove button directly below the Filtered Results window. When prompted, confirm your choice by clicking OK.Note: If you remove a default branch, you remove all of the patterns in that branch. Doing so can disable the security checks that use that information.
-
When you are finished modifying the SQL injection, cross-site scripting, and XPath injection patterns, click OK, and then click Close to return to the Modify Signatures Object dialog box.
-
Click OK at any point to save your changes, and when you are finished configuring the signatures object, click Close.