NSX Manager: manual provisioning of NetScaler instances
NetScaler Application Delivery Management (ADM) integrates with VMware network virtualization platform to automate the deployment, configuration, and management of NetScaler services. This integration abstracts away the traditional complexities associated with physical network topology, enabling vSphere/vCenter admins to programmatically deploy NetScaler services faster.
This article provides you with a list of tasks that you have to perform on both VMware NSX Manager and on NetScaler® ADM.
Note
Ensure that VMware NSX for vSphere 6.2 and above is installed and configured, and the edge gateways, DLR, and virtual machines that have to be load balanced are already created.
Prerequisites
-
Install VMware ESXi version 4.1 or later with hardware that meets the minimum requirements.
-
Install VMware Client on a management workstation that meets the minimum system requirements.
-
Install VMware OVF Tool (required for VMware ESXi version 4.1) on a management workstation that meets the minimum system requirements.
-
Install NetScaler ADM on any of the supported hypervisors.
For tasks to install NetScaler ADM build 13.1, on any of the supported hypervisors, see Deploying NetScaler ADM.
VMware ESXi Hardware Requirements
The following table lists the virtual computing resources that you require on your VMware ESXi server to install a NetScaler ADM virtual appliance.
| Component | Requirement |
| RAM | 8 GB |
| Virtual CPU | 8 |
| Storage space | 500 GB |
| Virtual Network Interfaces | 1 |
| Throughput | 1 Gbps |
Note
The memory and hard disk requirements specified above are for deploying NetScaler ADM on VMware ESXi server, considering that there are no other virtual machines running on the host. The hardware requirements for VMware ESXi server depends on the number of virtual machines running on it.
Configuring VMware NSX
- Create a pool of NetScaler VPX instances of different capacities, which are added to the different service packages.
For example:
-
Create five NetScaler VPX instances of VPX1000 (1 Gbps). These instances are added to the Gold service package.
-
Create five NetScaler VPX instances of VPX10 (10 Mbps). These instances are added to the Bronze service package.
-
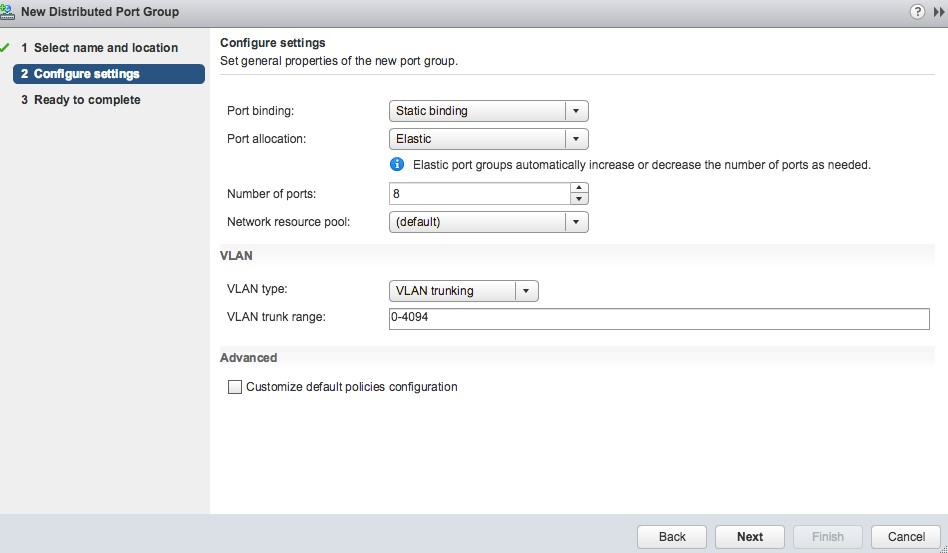
In vSphere client, navigate to Networking, and create a port group of type VLAN trunking with range, for example, 101-105 (you can even provide the full range, but create port group of type VLAN for only the required VLANs).
-
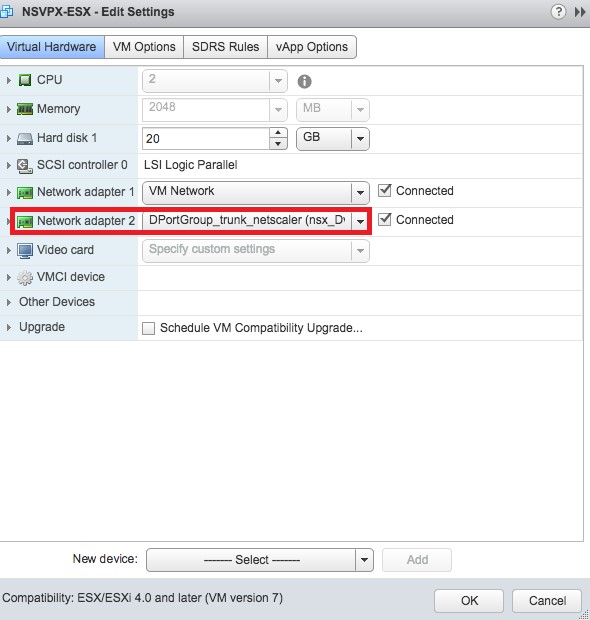
Create a new interface for each NetScaler VPX instance, and attach it to the VLAN range trunk port group that was created above.
-
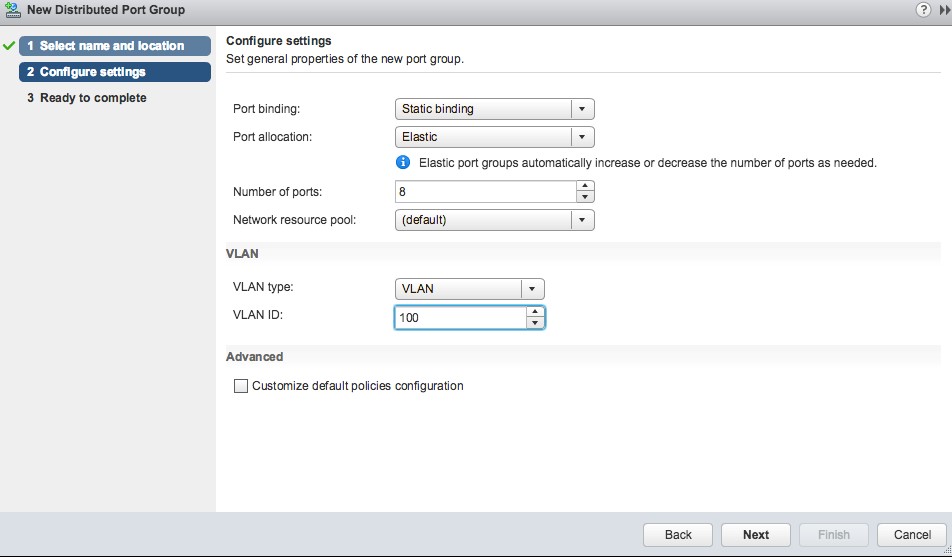
In vSphere client, navigate to Networking, and create a port group of type VLAN.
For example, If the initial trunked port group was created with range 101-105, create five VLAN port groups one per VLAN, that is a port group with VLAN 101, another with VLAN102, and so on, until VLAN 105.
Adding NetScaler VPX Instance in NetScaler ADM
Add NetScaler VPX instances in NetScaler ADM and specify the VLAN range of the trunked group for each device.
-
In NetScaler ADM, navigate to Infrastructure > Instances > NetScaler VPX, and click Add.
-
On the Add NetScaler VPX page, specify either the host names of the instances, the IP address of each instance, or a range of IP addresses, and then select an instance profile from the Profile Name list. You can also create a new instance profile by clicking the + icon.
-
Click OK.
-
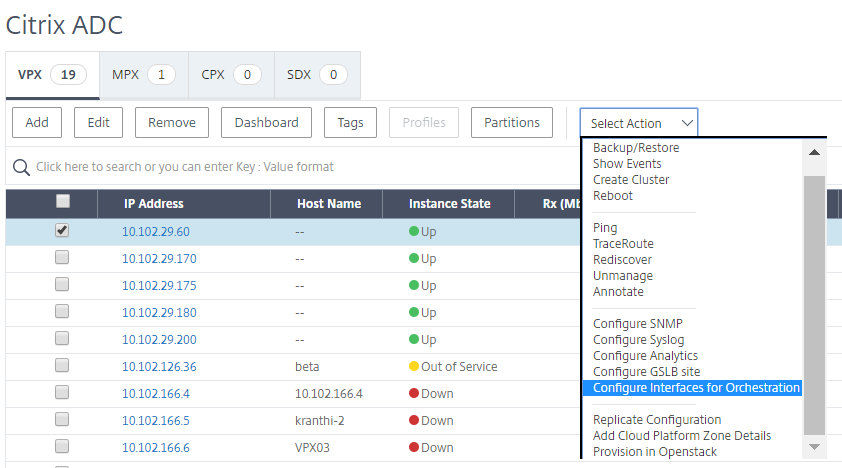
Select the newly added NetScaler VPX instance from the list on the NetScaler VPX page, and click the down arrow button in Action field. Select Configure Interfaces for Orchestration.
-
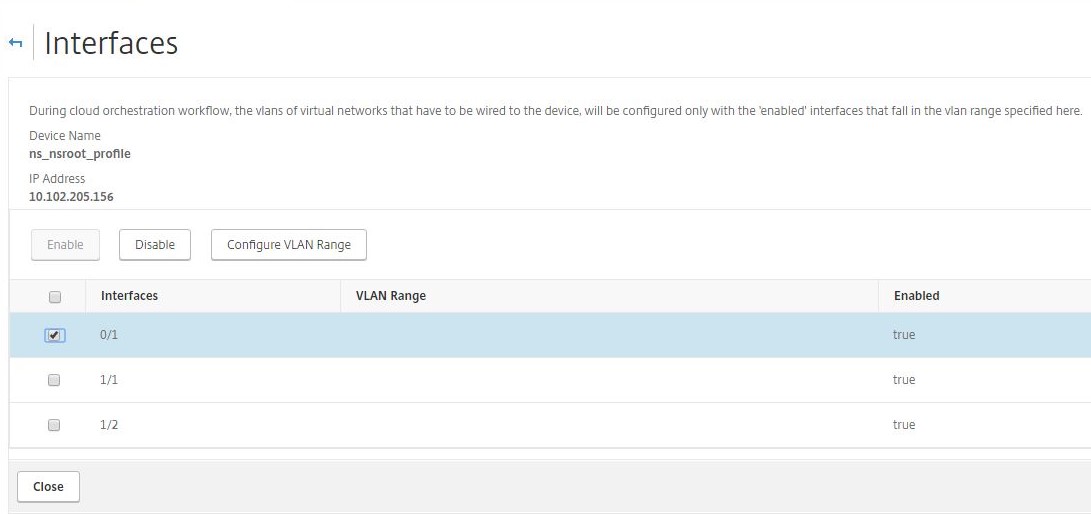
On the Interfaces page, select the management interface, and click Disable to disable VLAN from binding to the management interface.
-
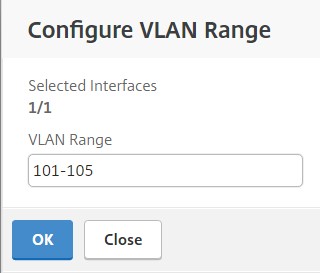
On the Interfaces page, select the required interface, and click Configure VLAN Range.
-
Enter the VLAN range configured in NSX Manager, click OK, and then click Close.
Registering VMware NSX Manager with NetScaler ADM
Register VMware NSX manager with NetScaler ADM to create a communication channel between them.
-
In NetScaler ADM, navigate to Orchestration > SDN Orchestration > VMware NSX Manager from the drop-down list, and click Configure NSX Manager Settings.
-
On Configure NSX Manager Settings page, set the following parameters:
-
NSX Manager IP Address - IP address of NSX Manager.
-
NSX Manager user name - Administrative user name of NSX Manager.
-
Password - Password of the administrative user of NSX Manager.
-
-
In NetScaler ADM account used by NSX Manager section, set the NetScaler Driver user name and Password for the NSX Manager. NetScaler ADM authenticates load balancer configuration requests from the NSX Manager by using these logon credentials.
-
Click OK.
-
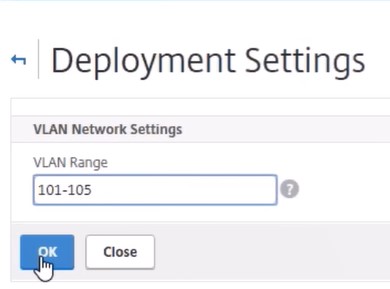
Navigate to Orchestration > System > Deployment Settings. Provide the VLAN range which was configured in trunked port group.
-
Log on to the NSX Manager on vSphere Web Client, and navigate to Service Definitions > Service Managers.
You can view Citrix NetScaler ADM as one of the service managers. This indicates that the registration is successful and a communication channel is established between the NSX manager and NetScaler ADM.

Creating a Service Package in NetScaler ADM
-
In NetScaler ADM, navigate to Orchestration > SDN Orchestration > VMware NSX Manager > Service Packages, and click Add to add a new service package.
-
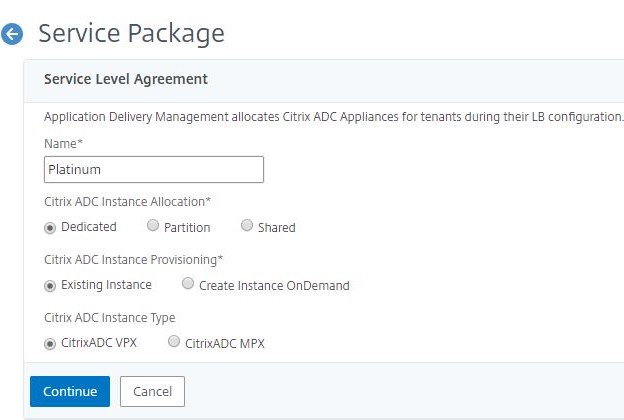
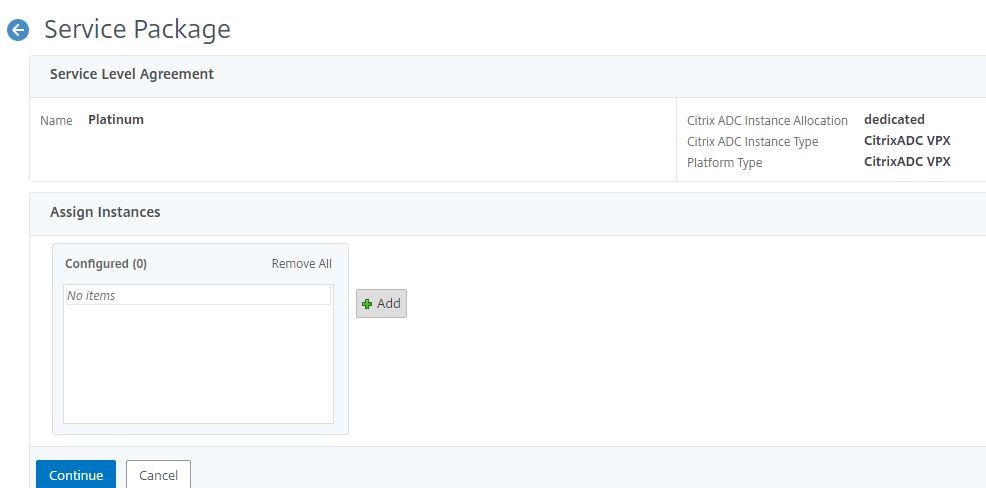
On Service Package page, in Basic Settings section, set the following parameters:
-
Name – type the name of a service package
-
Isolation Policy – by default, the isolation policy is set to Dedicated
-
Device Type – by default, the device type is set to NetScaler VPX
Note
These values are set by default in this version, and you cannot modify them.
-
Click Continue.
-
-
In Assign Devices section, select the pre-provisioned VPX for this package, and click Continue.
-
In Publish Service Package section, click Continue to publish the service package to VMware NSX, and then click Done.
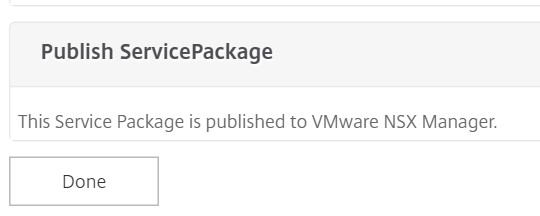
This procedure configures a service package in the NSX Manager. A service can have multiple devices added to it and multiple edges can use the same service package to offload the NetScaler VPX instance to NetScaler ADM.
-
Log on to the NSX Manager on vSphere Web Client, and navigate to Service Definitions > Services.
You can see that the NetScaler ADM service package is registered.

Performing Load Balancer Service Insertion for Edge
Perform load balancer service insertion on the previously created NSX Edge gateway (offload the load balancing function from NSX LB to NetScaler).
-
In NSX Manager, navigate to Home > NSX Edges, and select the edge gateway that you have configured.

-
Click Manage, and on the Load Balancer tab, select Global Configuration, and click Edit.

-
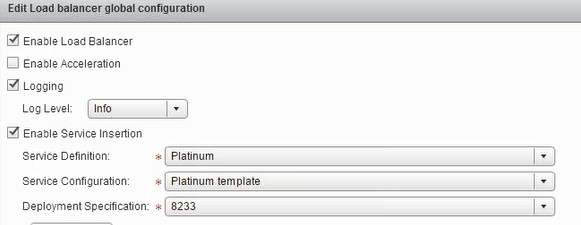
Select Enable Load Balancer, Logging, Enable Service Insertion to enable them.
-
In Service Definition, select the service package that was created in NetScaler ADM and published to NSX Manager.
-
-
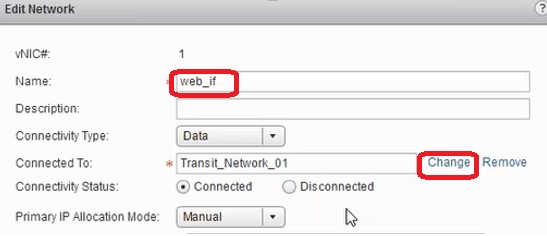
Select the existing runtime NICs and click the Edit icon to edit runtime NICs that have to be connected when NetScaler VPX is allocated.

-
Edit the name of the NIC, specify Connectivity Type as Data, and click Change.
-
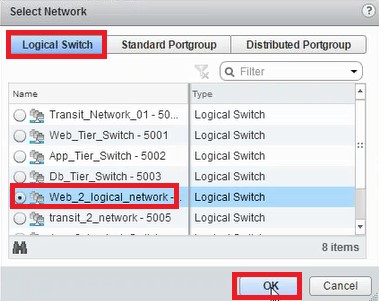
Select the appropriate web logical switch.
-
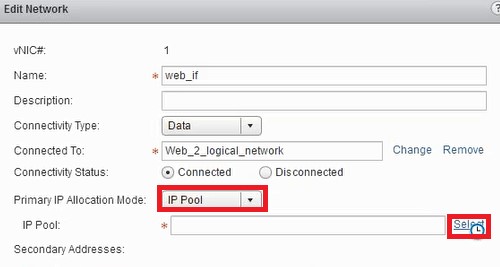
In Primary IP Allocation Mode, select IP Pool from the drop-down list, and click the down-arrow button on IP Pool field.
-
In the Select IP Pool window, select the appropriate IP pool, and click OK.
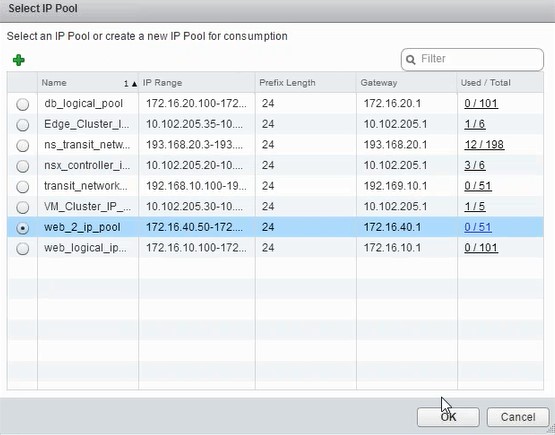
The IP address is acquired and is set as the source net IP address in the NetScaler VPX appliance. A L2 gateway is created in the NSX Manager to map the VXLAN to VLAN.
Note
All data interfaces are connected as run-time NICs, and they are part of interfaces for DLR.
-
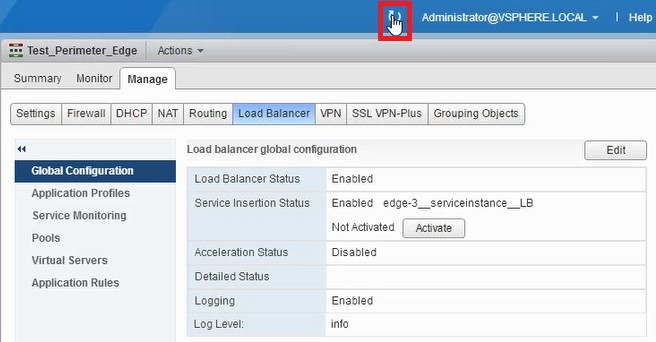
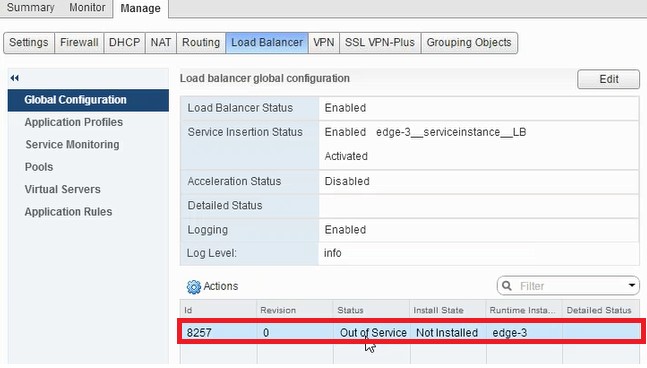
Refresh the view to see the creation of the run time.
-
After the VM has started, the value of Status changes to In Service and that of Install State changes to Enabled.

Note
In NetScaler ADM, navigate to Orchestration > Requests to see progress details of completion of LB service insertion.
Viewing L2 Gateway on NSX Manager
-
Log on to the NSX Manager on vSphere Web Client, navigate to NSX Edges, and select the DLR created.

-
In the DLR page, navigate to Manage > Bridging. You can see the L2 gateway displayed in the list.

Note
An L2 gateway gets created for each data interface.
Viewing Allotted NetScaler
-
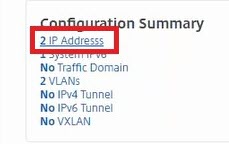
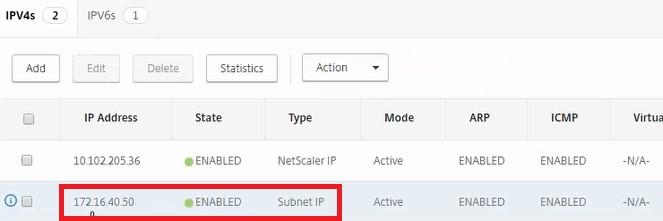
Log on to the NetScaler VPX instance using the IP address displayed in NetScaler ADM. Then, navigate to Configuration > System > Networking. In the right pane, you can see that the two IP address are added. Click the IP address hyperlink to see the details.
The subnet IP address is same as the IP address of the web interface added in the NSX.
-
Navigate to Configuration > System > Licenses to view the licenses that are applied to this instance.
Configuring NetScaler VPX Instance Using StyleBook
-
In NetScaler ADM, navigate to Orchestration > SDN Orchestration > Configure NSX Manager > Edge Gateways.
Make a note of the NetScaler instance IP that is allotted to the respective Edge Gateway on which Load Balancing configuration through StyleBooks has to be applied.
-
Create a new StyleBook. Navigate to Applications > Configuration, import the StyleBook, and select the StyleBook from the list.
To create a new StyleBook, see Create Your Own StyleBook.
-
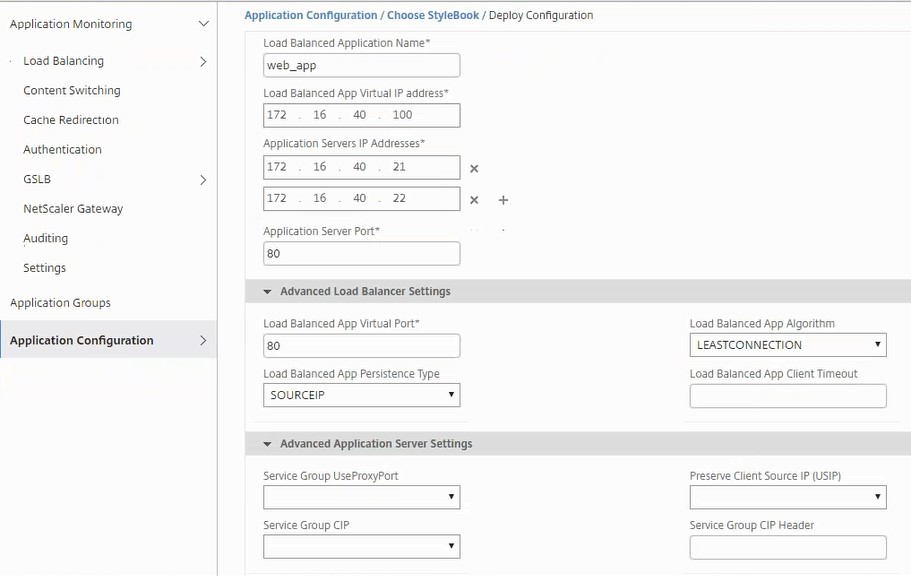
Specify values for all the required parameters.
-
Specify the NetScaler VPX instance on which you want to run these configuration settings.
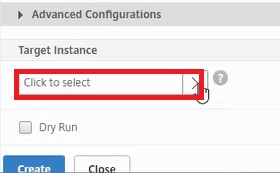
-
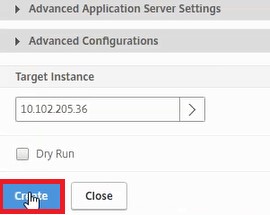
Select the IP instance noted earlier, and click Select.

-
Click Create to apply the configuration on the selected device.
Viewing Load Balancer Configuration
-
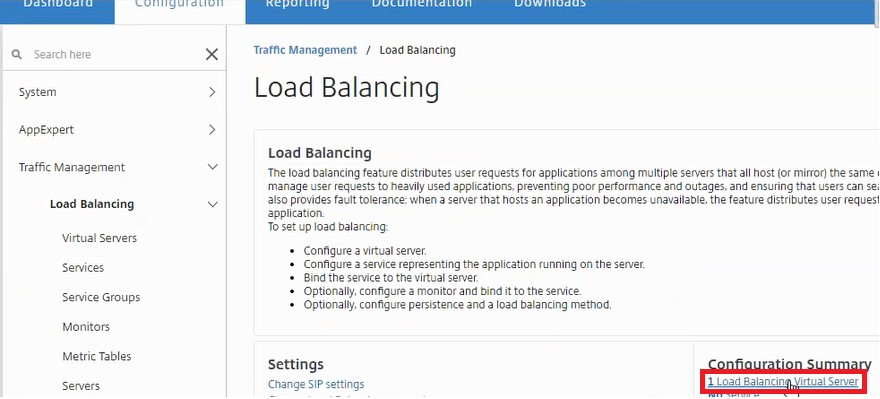
Log on to the NetScaler VPX instance, navigate to Configuration > Traffic Management > Load Balancing to view the load balancing virtual server that is created.
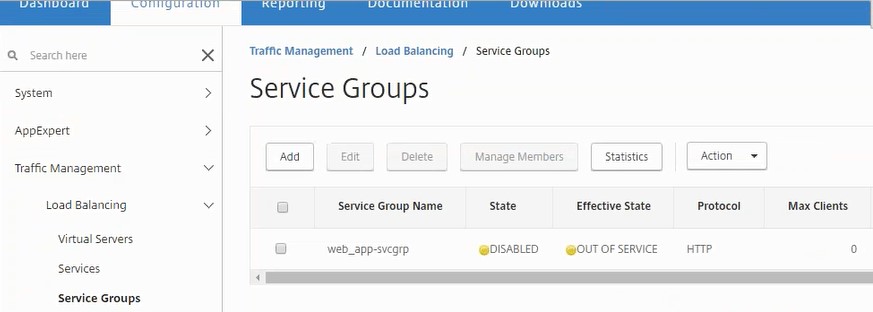
You can also view the service groups that are created.
-
Select the service group, and click Manage Members. The Configure Service Group Member page displays the members associated with the service group.

Deleting Load Balancer Service
-
In NetScaler ADM, navigate to Applications > Configuration, and click X icon to delete the application configuration.
-
Log on to the NSX Manager on vSphere Web Client and navigate to the edge gateway to which the NetScaler VPX instance is connected.
-
Navigate to the Manage > Load Balancer > Global Configuration, right-click on the runtime entry, and click Unprovision.
Note
Edge Gateways in NetScaler ADM corresponds to runtime entries in NSX manager.
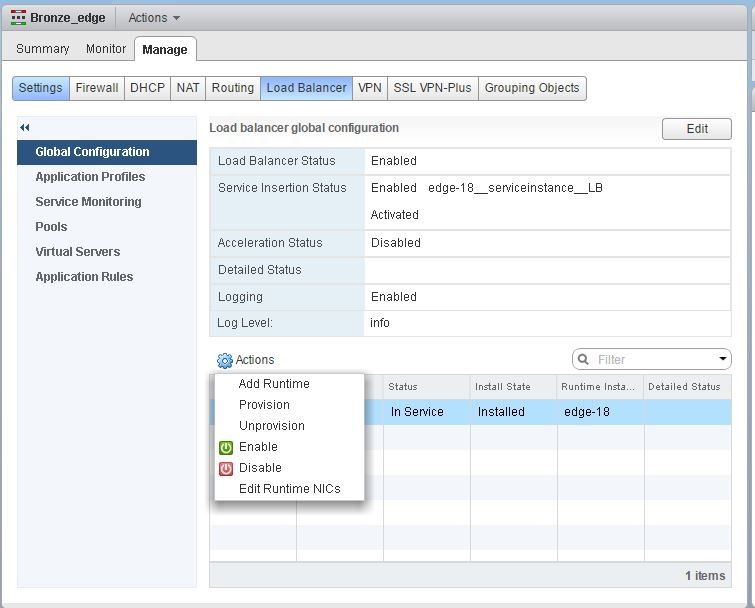
The NetScaler VPX instance is rendered out of service.
-
In NetScaler ADM, navigate to Orchestration > SDN Orchestration > Configure NSX Manager > Edge Gateways. Verify that the respective mapping of Edge Gateway to the deleted instance is not present.
In this article
- Prerequisites
- VMware ESXi Hardware Requirements
- Configuring VMware NSX
- Adding NetScaler VPX Instance in NetScaler ADM
- Registering VMware NSX Manager with NetScaler ADM
- Creating a Service Package in NetScaler ADM
- Performing Load Balancer Service Insertion for Edge
- Viewing L2 Gateway on NSX Manager
- Viewing Allotted NetScaler
- Configuring NetScaler VPX Instance Using StyleBook
- Viewing Load Balancer Configuration
- Deleting Load Balancer Service