Check in and check out NetScaler VPX and BLX licenses
Important:
File based licensing system (also referred to as manually managed entitlements), traditionally used for activating various on-premises components, will be End of Life (EOL) on April 15, 2026. License Activation Service (LAS) is the next generation technology for product activations across the suite of Citrix products. LAS will be the only way to activate and license NetScaler instances after April 15, 2026, supporting NetScaler Flexed licenses (CPL/UHMC), legacy NetScaler Pooled licenses, and NetScaler Fixed term Bandwidth licenses. To remain supported, your NetScaler and NetScaler Console deployments must be on a LAS compatible version.
The minimum required NetScaler® versions that are LAS compatible are:
NetScaler ADCs: 14.1-51.x, 13.1-60.x, 13.1-37.246 (FIPS), 14.1-66.68 (FIPS)
NetScaler SVM: 14.1-51.x, 13.1-60.x
NetScaler Console Service: will support LAS from early September.
All the other forms of legacy NetScaler licenses such as Pooled vCPU, CICO, perpetual will not be supported with LAS. NetScaler instances leveraging perpetual licenses without an active maintenance will become unlicensed upon upgrade to the above mentioned software versions.
LAS based licenses may not be available to customers where prohibited by law or regulations.
If you have questions or concerns, contact Customer Care. Citrix may limit or suspend your Citrix Maintenance for non-compliance with these requirements without liability in addition to any other remedies Citrix may have at law or equity. These requirements don’t apply where prohibited by law or regulation.
You can allocate VPX and BLX licenses to NetScaler instances on demand from NetScaler Application Delivery Management (ADM). The ADM software stores and manages the licenses, which have a licensing framework that provides scalable and automated license provisioning. An instance can check out the license from the NetScaler ADM when it is provisioned. When an instance is removed or destroyed, the instance checks back in its license to the NetScaler ADM software.
Prerequisites
Make sure that the following prerequisites are met:
- You are using a NetScaler VPX image running software version 12.0.
For example: NSVPX-ESX-12.0-xx.xx_nc.zip - You have installed NetScaler ADM running version 12.0.
For example: MAS-ESX-12.0-xx.xx.zip
Note
To manage existing VPX licenses by NetScaler ADM, you need to rehost the licenses to NetScaler ADM.
Installing Licenses in NetScaler ADM
Note
Before installing licenses, restart the NetScaler ADM virtual appliance if you have changed the software edition or bandwidth.
To install license files on NetScaler ADM:
-
In a web browser, type the IP address of the NetScaler ADM (for example, http://192.168.100.1).
-
In User Name and Password, enter the administrator credentials.
-
Navigate to Infrastructure > Pooled Licensing.
-
In the License Files section, select one of the following options:
-
Upload license files from a local computer - If a license file is already present on your local computer, you can upload it to the NetScaler ADM.
To add license files, click Browse and select the license file (.lic) that you want to add. Then click Finish. -
Use license access code - Citrix emails the license access code for the licenses that you purchase.
To add license files, enter the license access code in the text box and then click Get Licenses.
Note
Make sure you are connected to internet before using license access code for installing the licenses.
At any time, you can add more licenses to the NetScaler ADM from the License Settings page.
-
Verification
You can view the available and allocated licenses in the NetScaler ADM GUI.
To display the licenses:
-
In a web browser, type the IP address of NetScaler ADM (for example, http://192.168.100.1).
-
In User Name and Password, enter the administrator credentials.
-
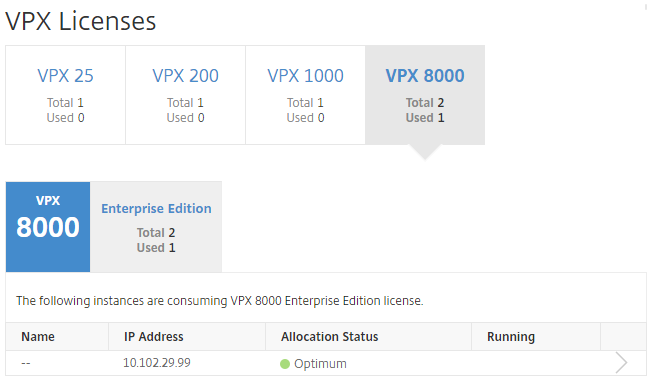
On the Configuration tab, navigate to Infrastructure > Pooled Licensing > VPX Licenses.
-
You can view the allocated licenses in the table under the available licenses section.
Allocate VPX and BLX Licenses to an ADC instance by using the NetScaler GUI
-
In a web browser, type the IP address of the NetScaler instance (for example, http://192.168.100.1).
-
In the User Name and Password fields, enter the administrator credentials.
-
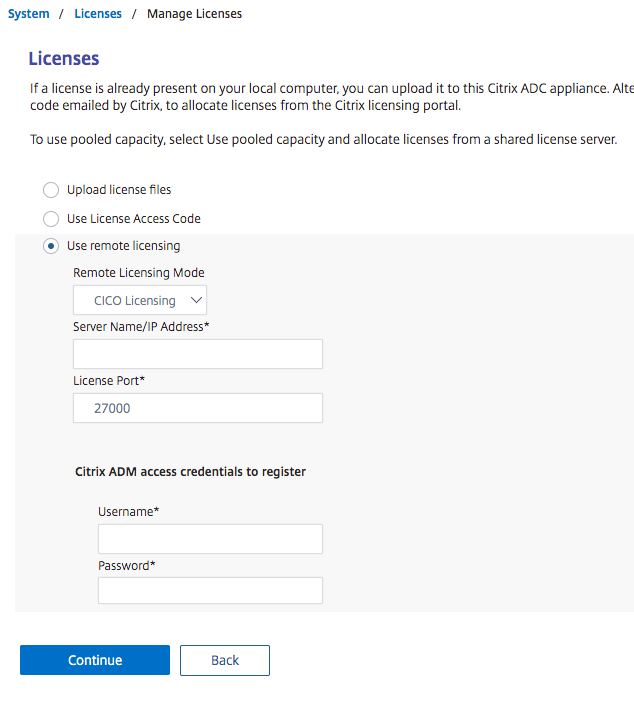
On the Configuration tab, navigate to Settings > Licenses > Manage Licenses, click Add New License, and select Use Remote Licensing > CICO Licensing.
-
Enter the details of the license server in the Server Name/IP Address field.
-
In the Username and Password fields on the above screen, enter NetScaler ADM credentials and click Continue.
-
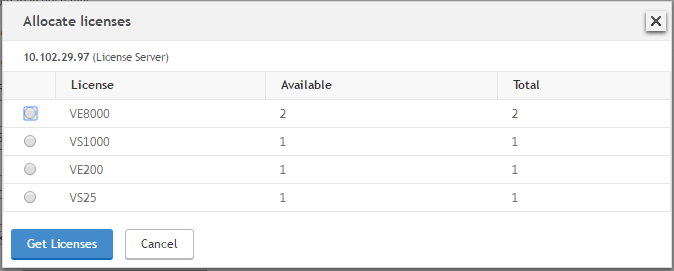
Select the license edition with the required bandwidth, click Get Licenses.
-
Click Reboot, your NetScaler instance reboots.
-
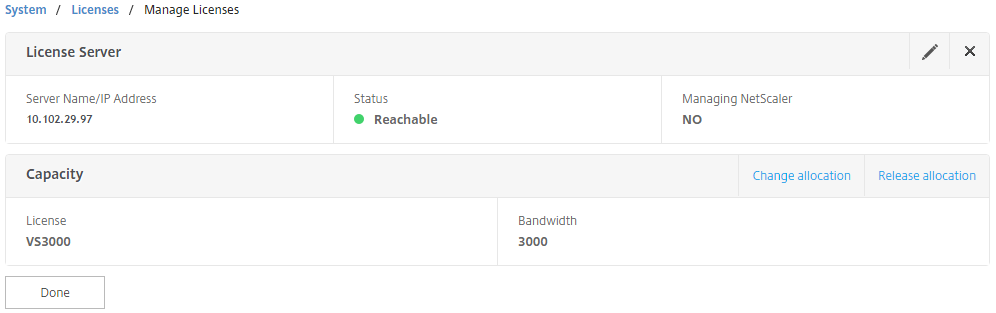
You can change or release the license allocation by navigating to System > Licenses > Manage Licenses, and selecting Change allocation or Release allocation.
-
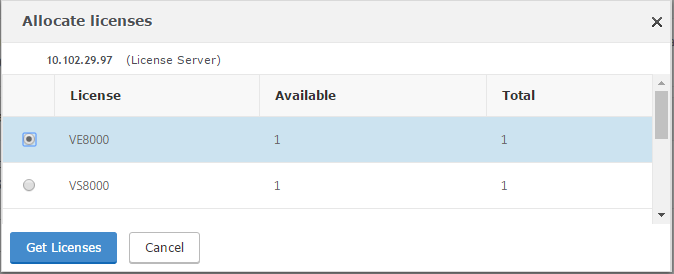
If you click Change allocation, a pop-up window shows the licenses available on the license server. Select the required license, click Get Licenses.
Allocate VPX and BLX Licenses to an ADC instance by using the NetScaler CLI
-
In an SSH client, enter the IP address of the NetScaler instance, and log on by using administrator credentials.
-
To add a licensing server, enter the following command:
add ns licenseserver (<licenseServerIP> | <serverName>) [-port <port number >]
<!--NeedCopy-->
-
To show the available licenses on the licensing server, enter the following command:
sh licenseserverpool
<!--NeedCopy-->
-
To assign a license to the NetScaler appliance, enter the following command:
set capacity –platform V\[S/E/P\]\[Bandwidth\]
<!--NeedCopy-->
Allocate VPX and BLX Licenses to an ADC instance by using API
In a web browser or an API client, log on to the NetScaler instance by using the administrator credentials.
To add a licensing server:
-
Set the request type to Post.
-
Set the path to /nitro/v1/config/nslicensingserver.
-
Set the payload as follows:
content-type: application/x-www-form-urlencoded\\r\\n
\\r\\n
object= {“params”;{warning”:”yes”},”nslicensing server”;{servername”:”\<NetScaler ADM IP\>”, “port”:”27000”}}\\r\\n
<!--NeedCopy-->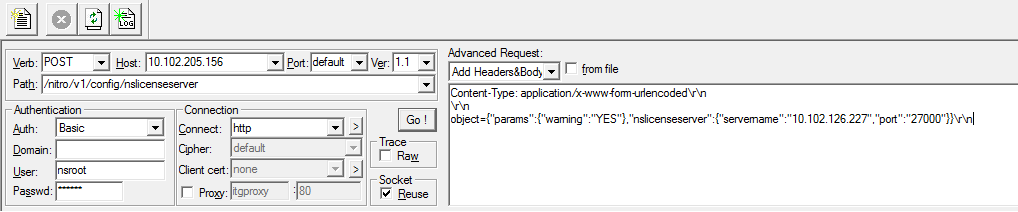
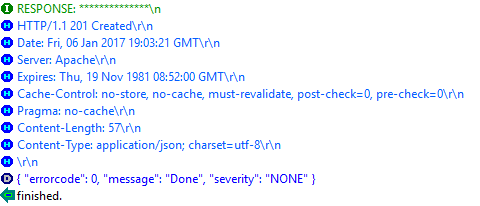
NetScaler ADM responds to the request. The following sample response shows success.
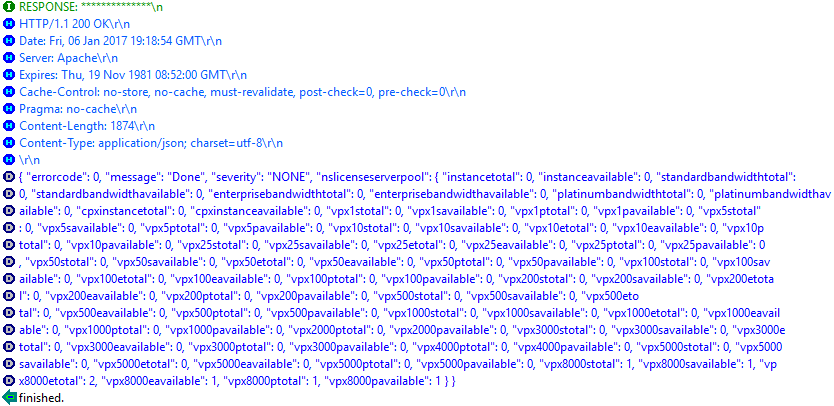
To view the available licenses on the licensing server:
-
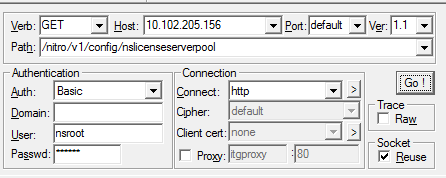
Set the request type to Get.
-
Set the path to /nitro/v1/config/nslicenseserverpool
NetScaler ADM responds to the request. The following sample response shows success, and the list of available licenses on the license server.
To assign a license to the NetScaler appliance:
-
Set the request type to Post.
-
Set the path to /nitro/v1/config/nscapacity.
-
Set the payload as follows:
content-type: application/x-www-form-urlencoded\\r\\n
\\r\\n
{“nscapacity:{“platform”:”VE8000”}}\\r\\n
<!--NeedCopy-->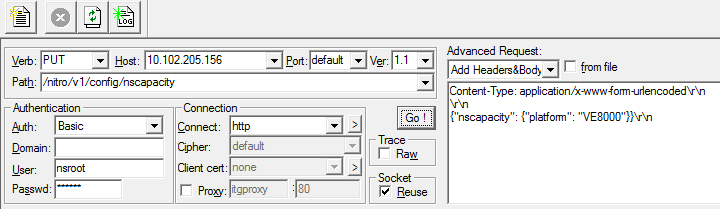
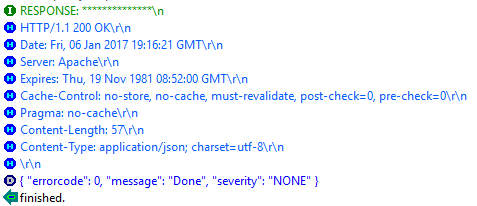
NetScaler ADM responds to the request. The following sample response shows success.
Update a licensing server IP address
You can update the licensing server IP address in the VPX and BLX instances, without any impact on the allocated license bandwidth on the instance and data loss.
Update using the CLI: To update the licensing server IP address using the CLI, type the following command on the instance:
add licenseserver <licensing server IP address> -forceUpdateIP
This command connects to the new server and release the resources associated with the previous licensing server.
Update using the GUI: To update the licensing server IP address using the GUI, navigate to System > Licenses > Manage Licenses, click Add New License For more information, see Allocate VPX and BLX Licenses to an ADC instance by using the NetScaler GUI.
Configure Expiry Checks for NetScaler VPX and BLX Check-In and Check-Out Licenses
You can now configure license expiry threshold for NetScaler VPX and BLX licenses. By setting thresholds, NetScaler ADM sends notifications via email or SMS when a license is due to expire. An SNMP trap and a notification are also sent when the license has expired on NetScaler ADM.
An event is generated when a license expiry notification is sent and this event can be viewed on NetScaler ADM.
To configure license expiry checks:
-
Navigate to Infrastructure > Pooled Licensing.
-
In the License Settings page, under the License Expiry Information section, you can find the details of the licenses that are going to expire:
-
Feature: Type of license that is going to expire.
-
Count: Number of virtual servers or instances that are affected.
-
Days to expiry: Number of days before license expiry.
-
-
In the Notification Settings section, click the Edit icon and specify the alert threshold. You can set a percentage of pooled licenses capacity to be used to notify administrators.
-
Choose the type of notification you want to send by selecting the appropriate check box. The notification types are as follows:
-
Email Profile: Specify a mail server and profile details. An email is triggered when your licenses are about to expire.
-
SMS Profile: Specify a Short Message Service (SMS) server and profile details. An SMS message is triggered when your licenses are about to expire.
-
-
Then, specify when you want to send the notification in terms of number of days before license expiry.
-
Click Save.
In this article
- Prerequisites
- Installing Licenses in NetScaler ADM
- Verification
- Allocate VPX and BLX Licenses to an ADC instance by using the NetScaler GUI
- Allocate VPX and BLX Licenses to an ADC instance by using the NetScaler CLI
- Allocate VPX and BLX Licenses to an ADC instance by using API
- Update a licensing server IP address
- Configure Expiry Checks for NetScaler VPX and BLX Check-In and Check-Out Licenses