Integration of Citrix SD-WAN Orchestrator™ with Check Point CloudGuard Connect
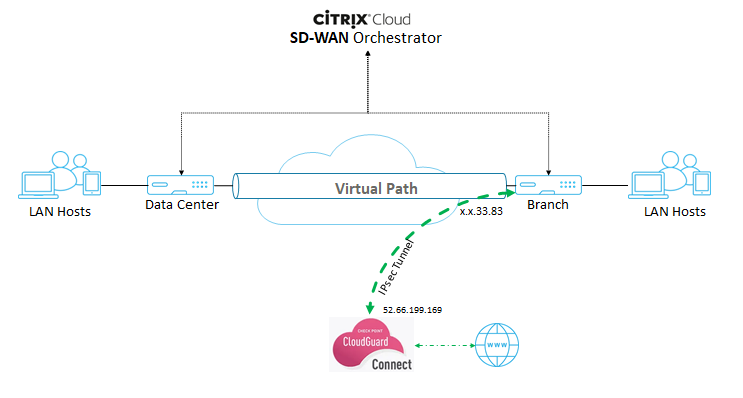
Integration topology
Configuration on Check Point portal
- Add a Site on the Check Point portal.
-
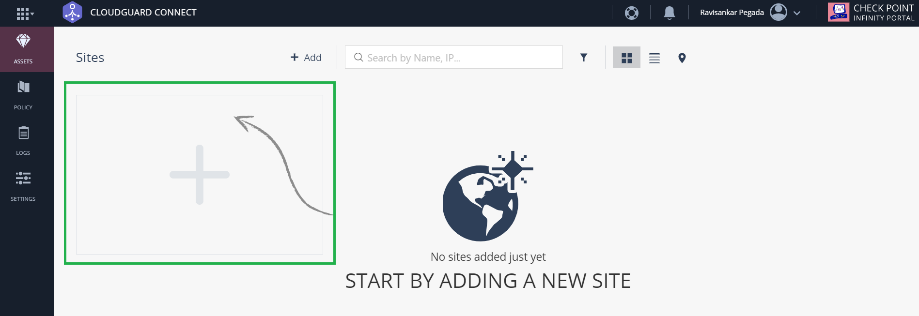
Log into the Check Point portal and add a site.
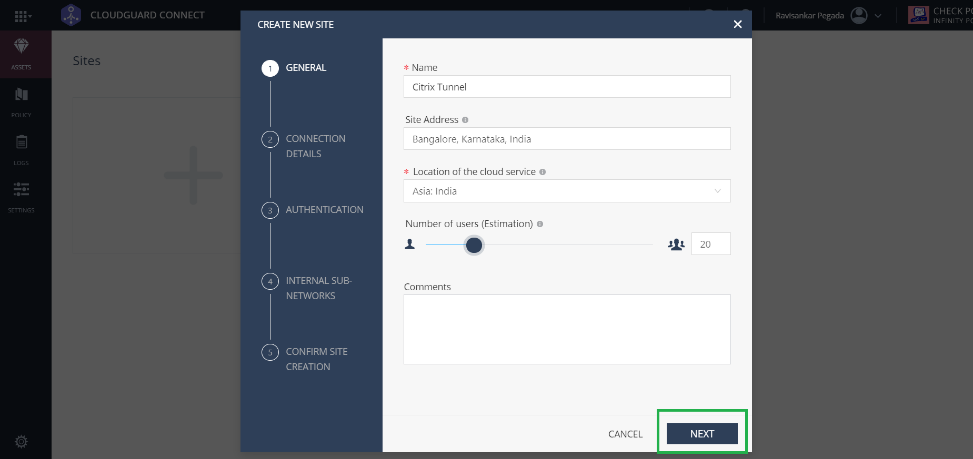
A pop-up window to create a site appears. Provide the required general details and click Next
-
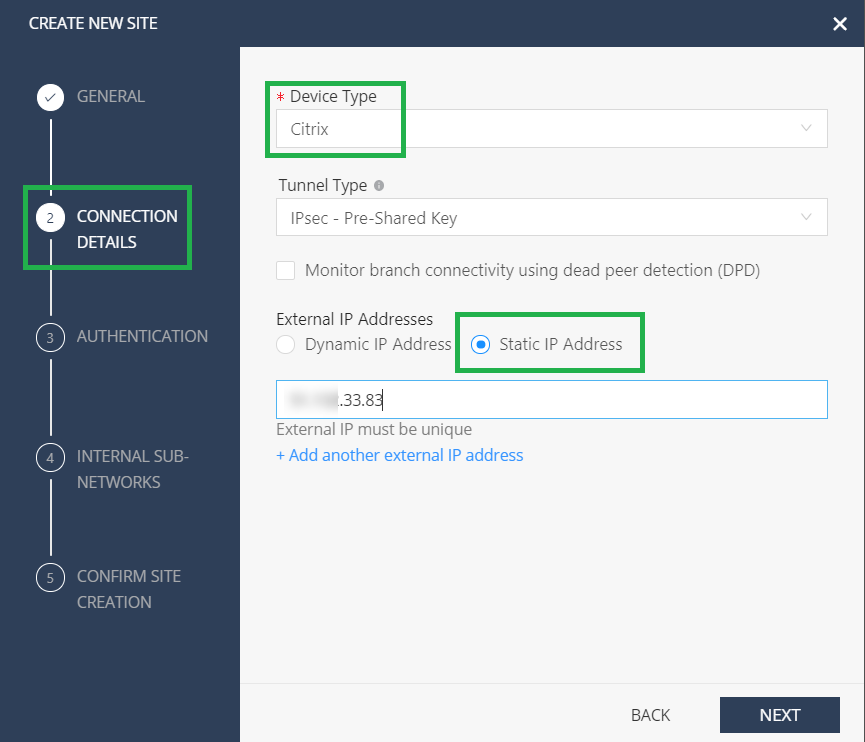
Provide the connection details. Select the Device Type as Citrix® and External IP addresses as Static IP Address.
Note
Provide the branch WAN Link public IP address as the External IP Address. It is “x.x.33.83” as per the topology.
If you are using multiple internet WAN links, click Add another external IP address to specify the Public IP address associated with those WAN links.
-
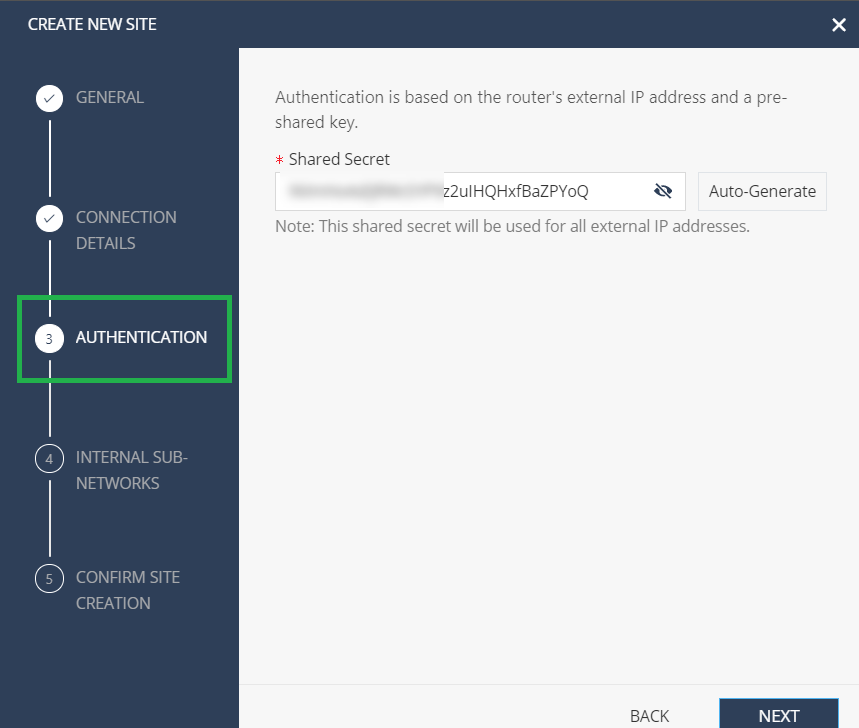
In the Authentication section, define the pre-shared key or auto-generated the key.
-
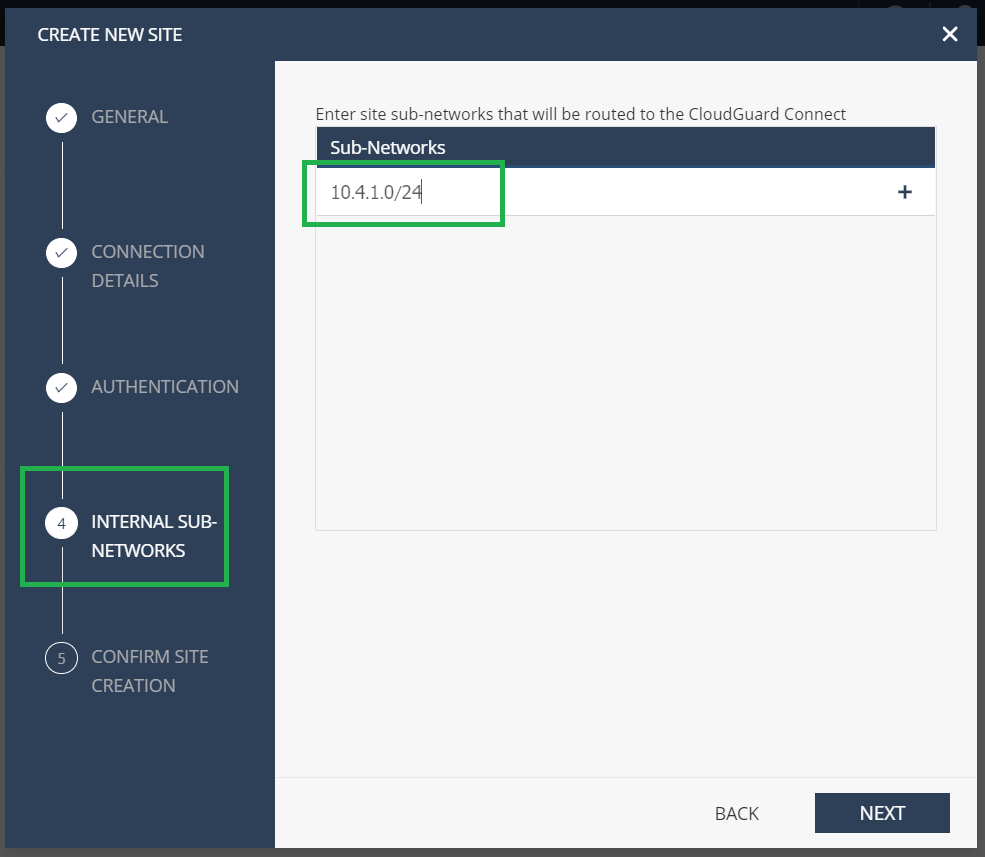
Provide the Internal subnetwork. It is the LAN subnets behind the SD-WAN appliance, which goes through the tunnel, called as Protected Networks in the Citrix SD-WAN Orchestrator service. It must match at both the Citrix SD-WAN Orchestrator service and the Check Point end to ensure that the tunnel is established.
-
Validate the configuration and click FINISH AND CREATE SITE.
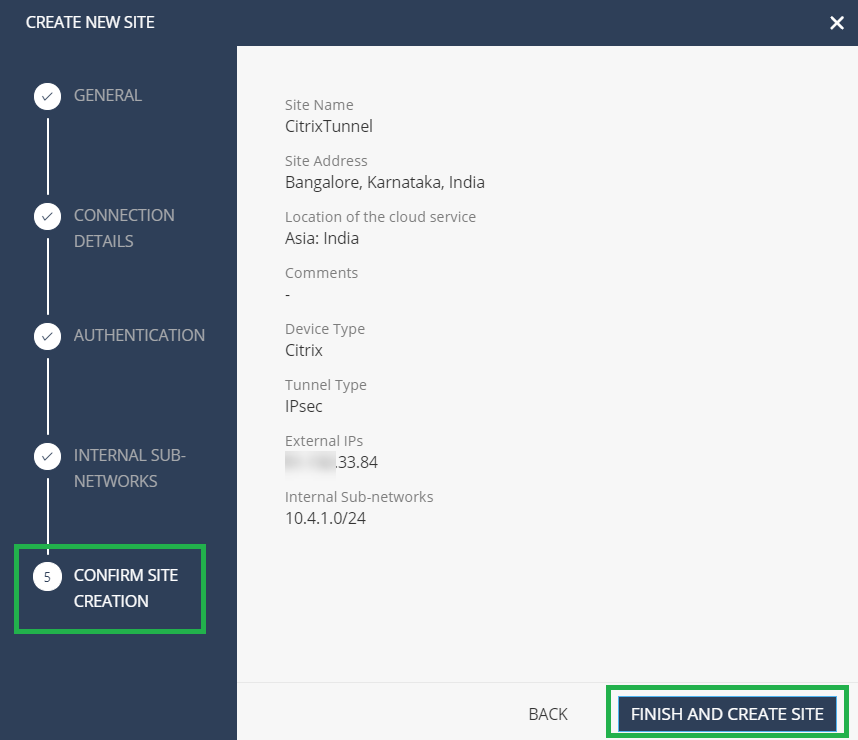
A site tile is added with the status GENERATING SITE.

Check Point takes around 20 minutes to generate a site. After the site is generated, the tile status changes to WAITING FOR TRAFFIC.

-
-
Click Configure branch device to view tunnel details. It includes details of the tWO IPsec tunnels towards Check Point Cloud.
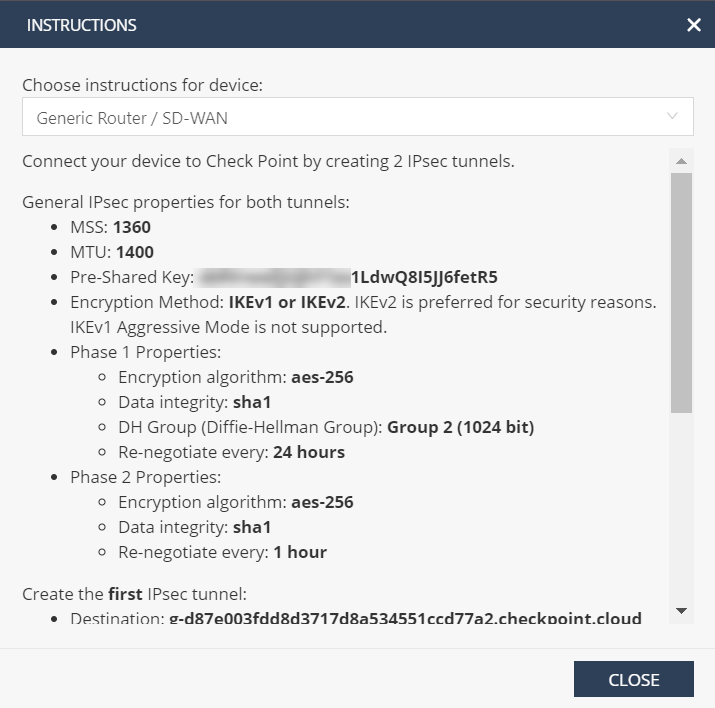
In this example, the tunnel destination is mentioned in FQDN format. Resolve this FQDN to get the tunnel destination IP address that can be used in the Citrix SD-WAN™ configuration.
For example- C:\Users\john>ns lookup g-d87e003fdd8d3717d8a534551ccd77a2.checkpoint.cloud Server: router Address: 192.168.0.1
Non-authoritative answer: Name: g-d87e003fdd8d3717d8a534551ccd77a2.checkpoint.cloud Address: 52.66.199.169
Configuration on Citrix SD-WAN Orchestrator service
Use the Tunnel destination and IPsec parameters to build a configuration on the Citrix SD-WAN Orchestrator service.
- Create an IPsec encryption profile.
-
In the Citrix SD-WAN Orchestrator service UI, at the network level, navigate to Configuration > IPsec Encryption Profiles and click +IPsec Encryption Profile.

-
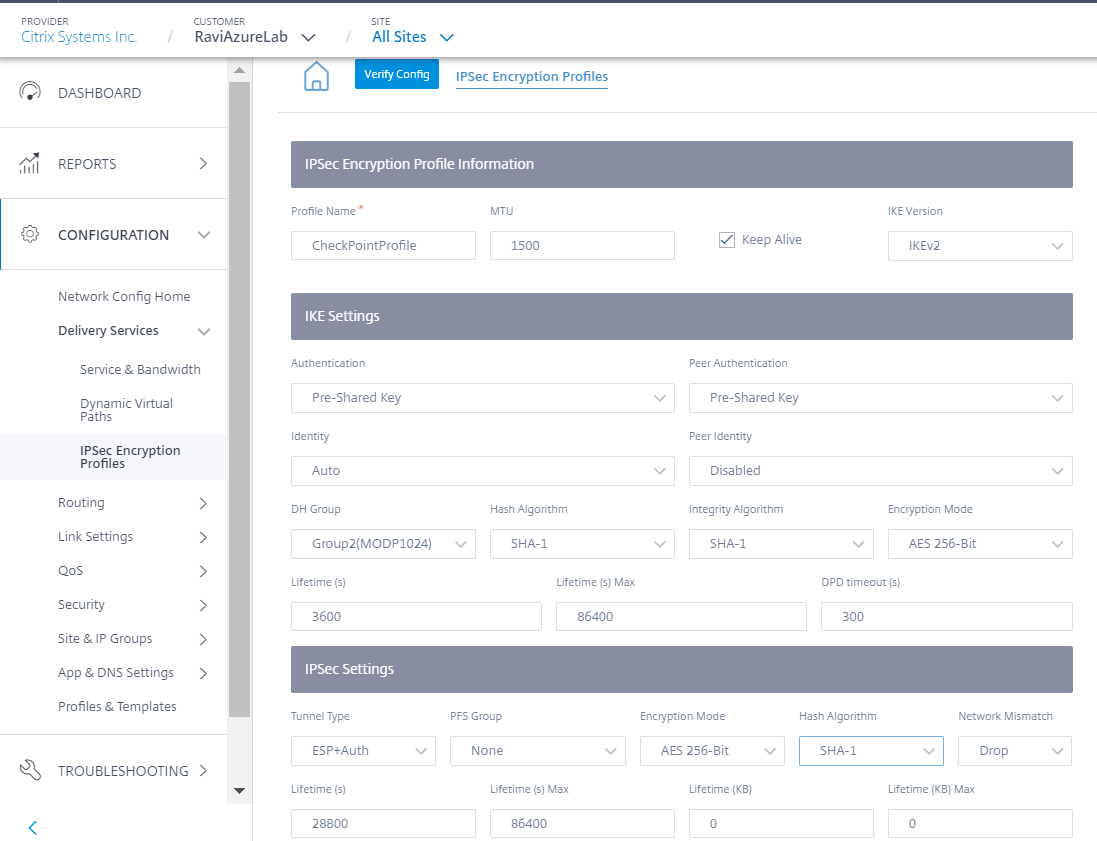
Configure the IKE and IPsec settings as per the Check Point configuration.
-
-
Add IPsec tunnel towards Check Point Cloud.
-
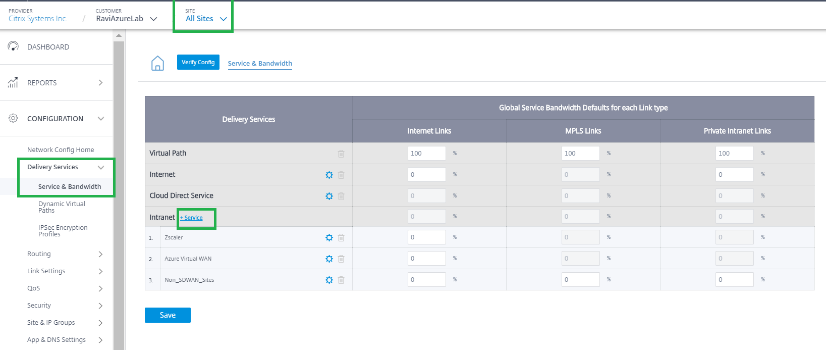
Navigate to Configuration > Delivery Services > Service & Bandwidth and add an Intranet service.
-
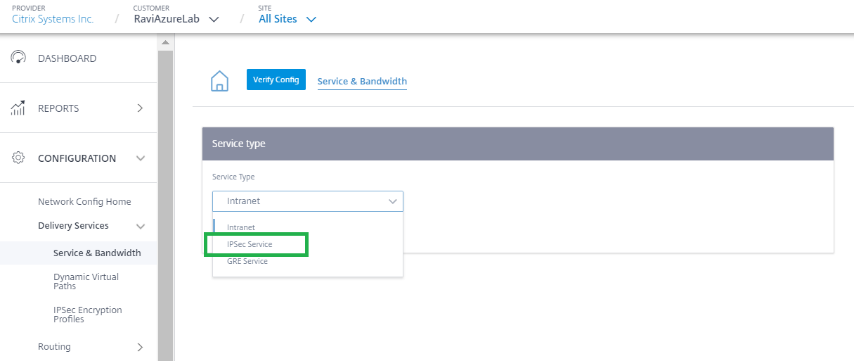
Select the Service type as IPsec Service.
-
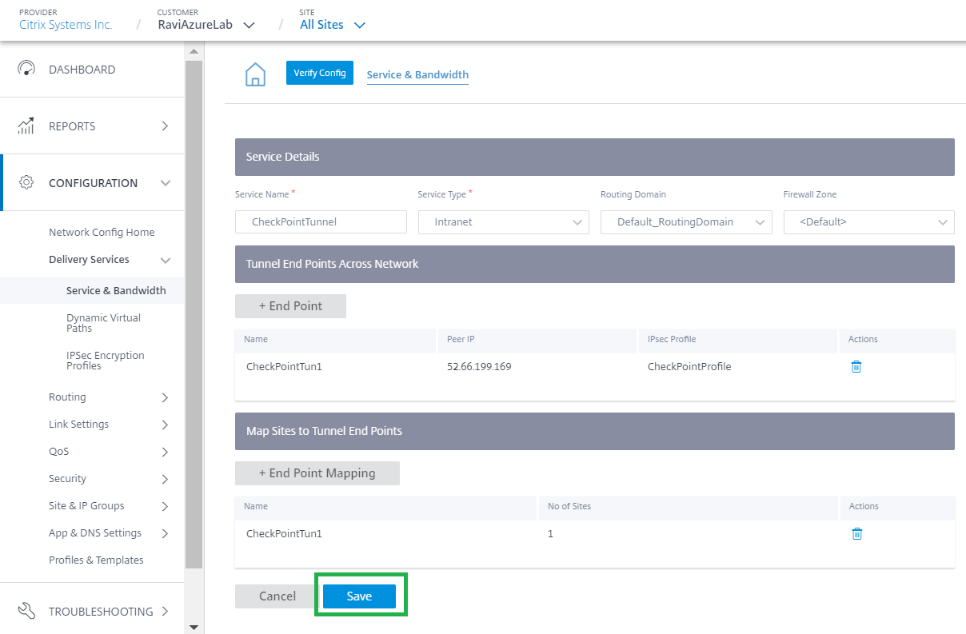
Configure IPsec Tunnel towards Check Point Cloud. Click +End Point to add the Check Point end point information.
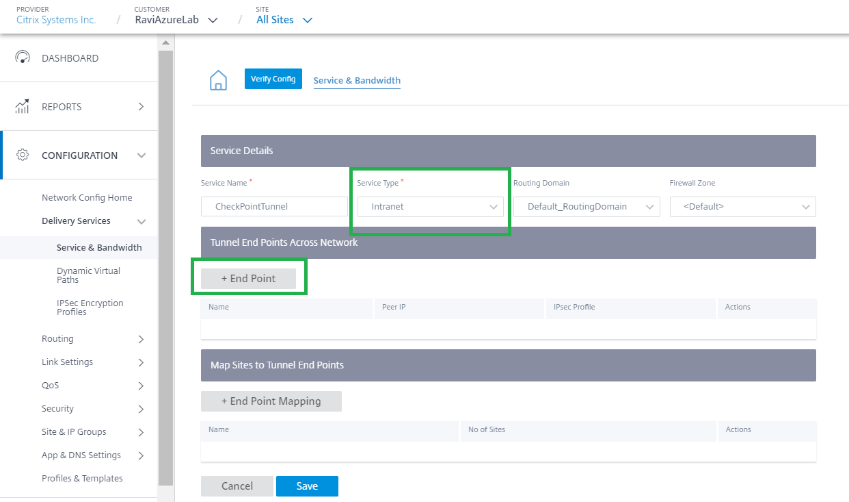
- Provide the following details:
- Peer IP(Check Point FQDN IP address that was resolved)
- IPsec Profile that we have created in the previous step
- Pre-shared key that you got from Check Point.
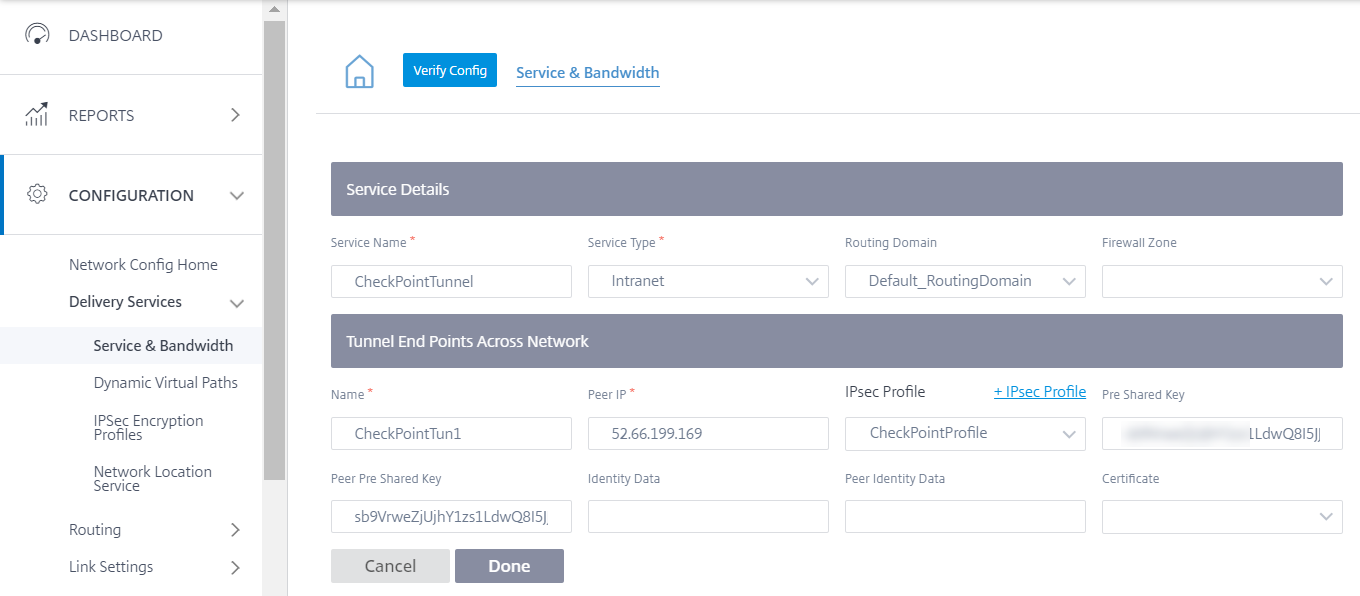
Similarly, add the second tunnel end point towards Check Point cloud for redundancy.
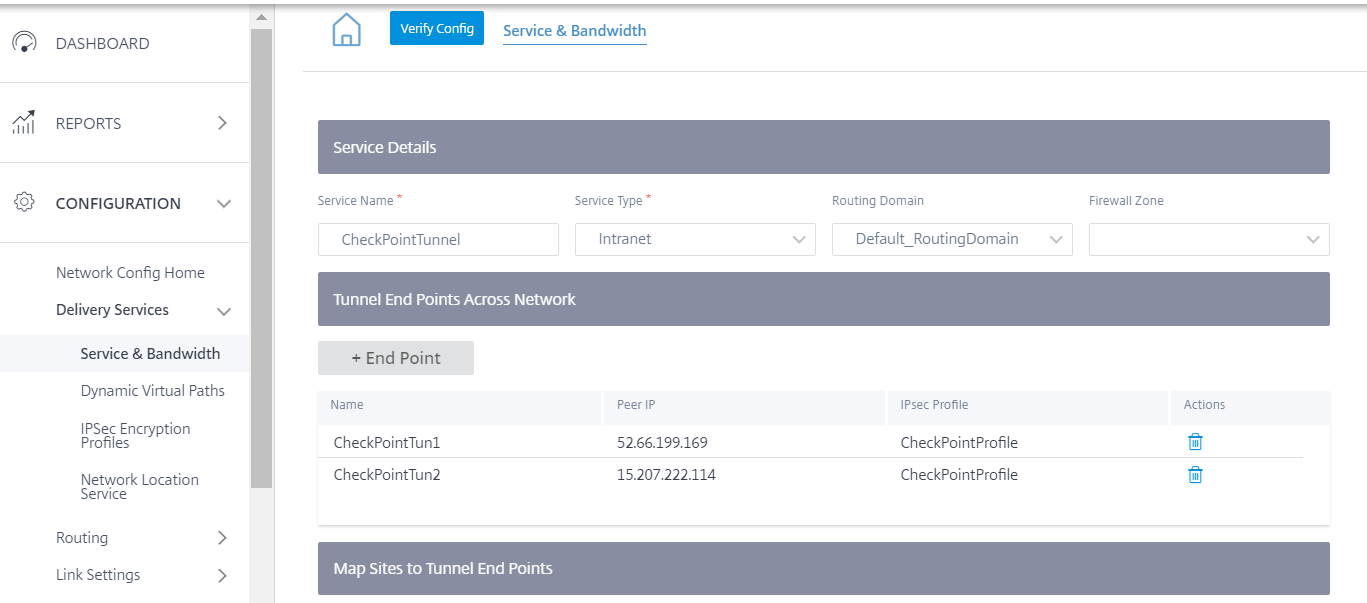
-
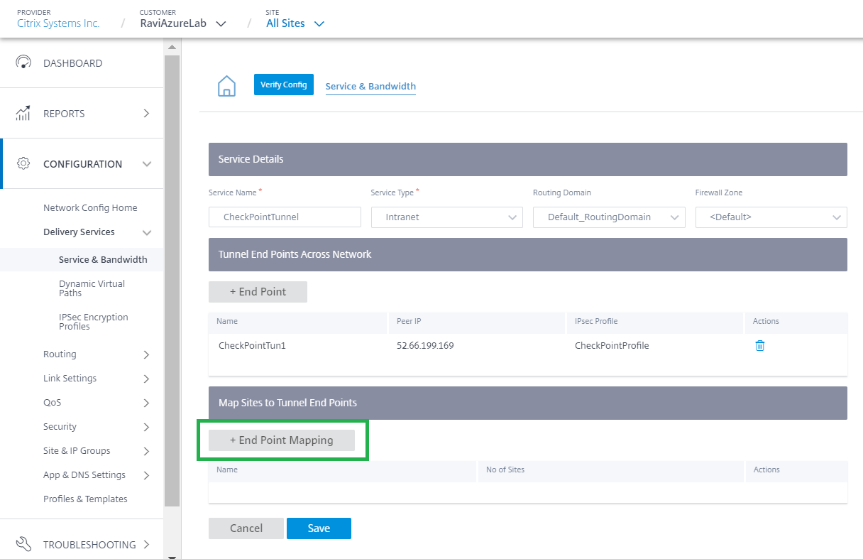
Click + End Point Mapping to add an End Point mapping.
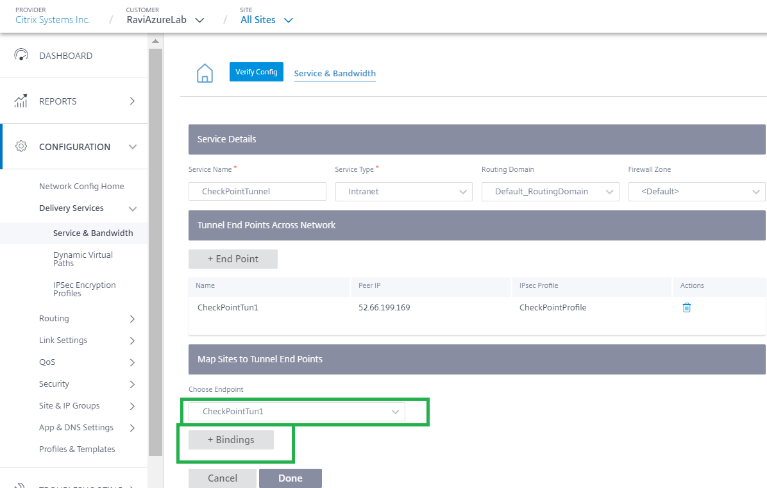
Choose the End Point as CheckPointTun1, the one created in the previous step and click + Bindings to bind a site. Similarly, add CheckPointTun2 as the second end point.
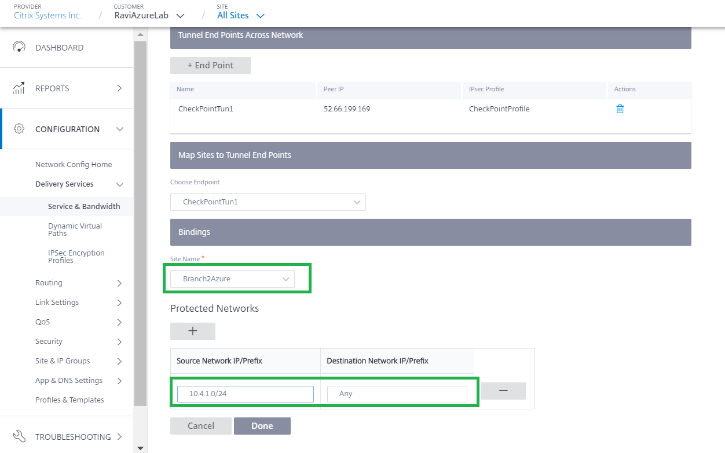
Bind the tunnel to a branch site (For example- BranchAzure) and provide the protected network details.
Note
The protected network has to be the branch site that is configured in the Check Point portal. The Public IPs must match.
In this case, the protected network’s source network is the LAN network of the branch and the destination as is any. The source network must match the network configured in the Check Point portal. Click Done.
Click Save to save IPsec Tunnel configuration. check-point-generating-site.png
-
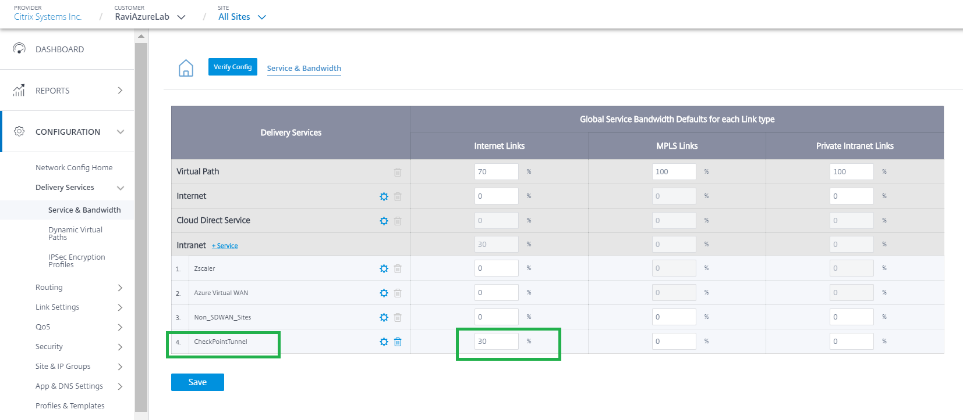
After the CheckPointTunnel delivery service is added, allocate the bandwidth share for the service to be applied to the site to which the end point is mapped.
Note
The bandwidth percentage allocated here is the guaranteed bandwidth share for this Checkpoint Delivery service when in contention.
-
-
Deploy the configuration on the Citrix SD-WAN Orchestrator service through staging and activation.
-
Check the Tunnel status towards Check Point Cloud from the branch site.

Monitoring
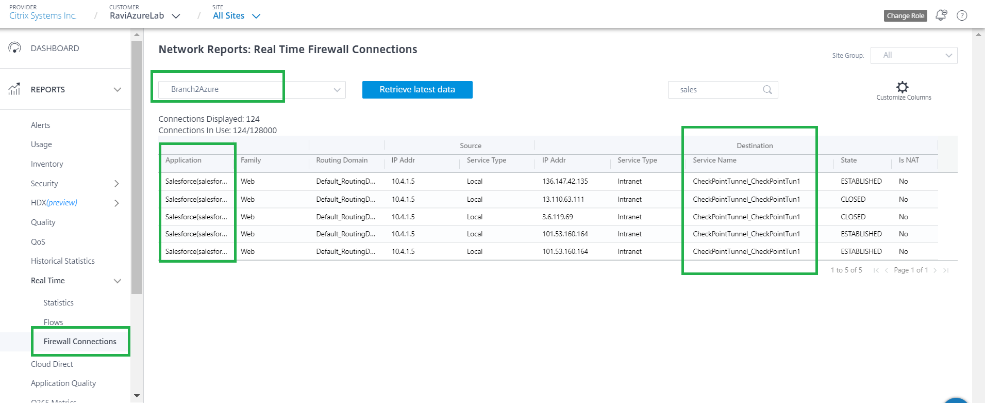
Access Internet from a branch site host through the Check Point Cloud over the IPsec Tunnel. For example, try accessing salesforce.com.
This application is reported in firewall connections with the destination service as CheckPointTunnel_CheckPointTun.
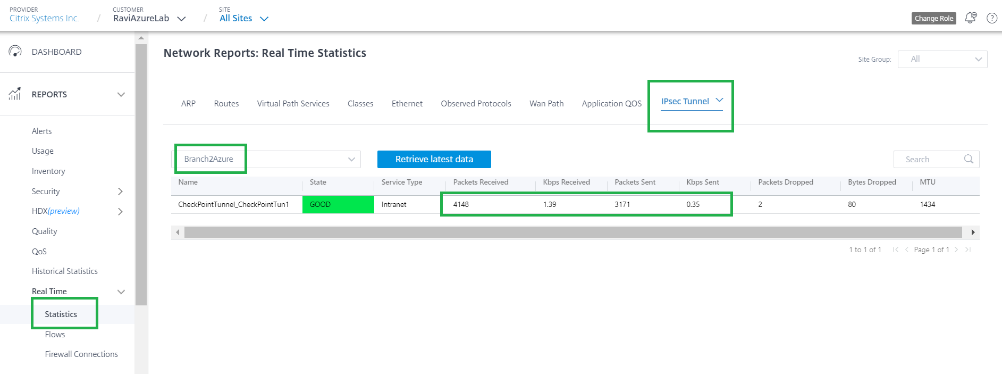
This traffic is updated in the IPsec Tunnel statistics (Packets sent and received).
Logs
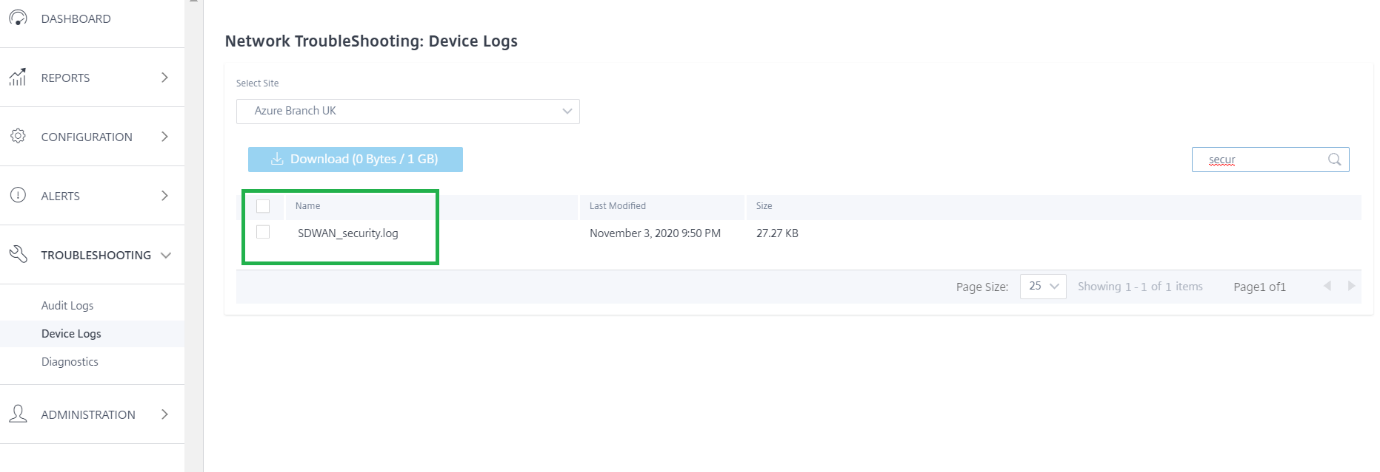
Logs related to IPsec Tunnel creation can be found in the SDWAN_security.log file.
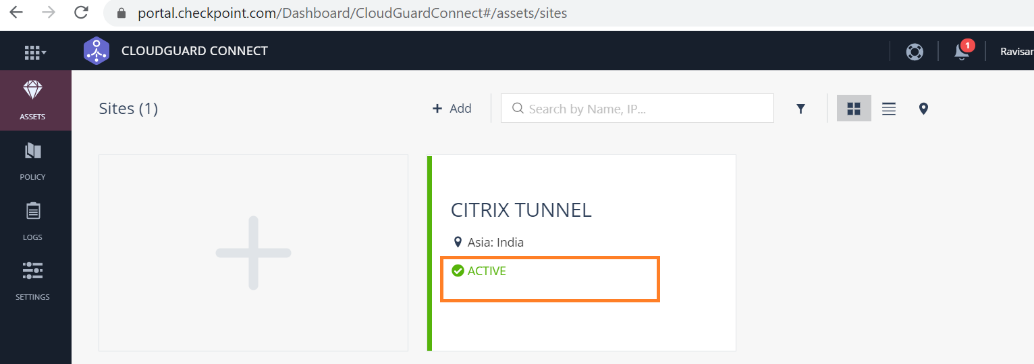
The site status on the Check Point portal is updated as Active.
Try to access a website (for example - Facebook.com) you can able access through Check Point Cloud. You can now modify the Check Point Access Control policies by adding a policy to block the Facebook application.
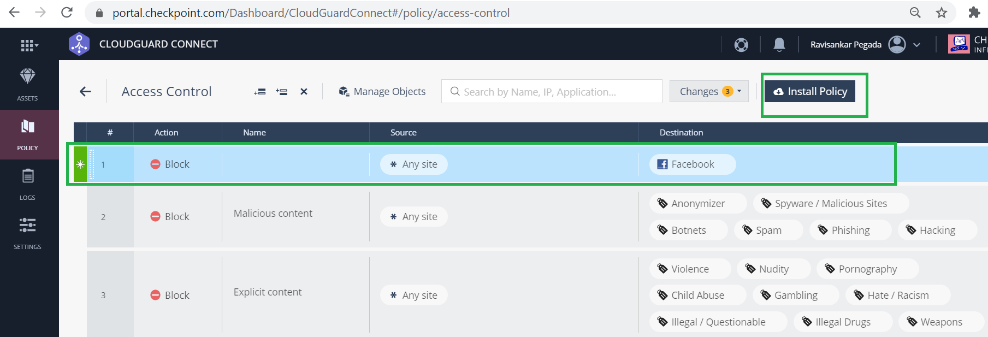
After the policy is installed, Facebook.com is blocked.
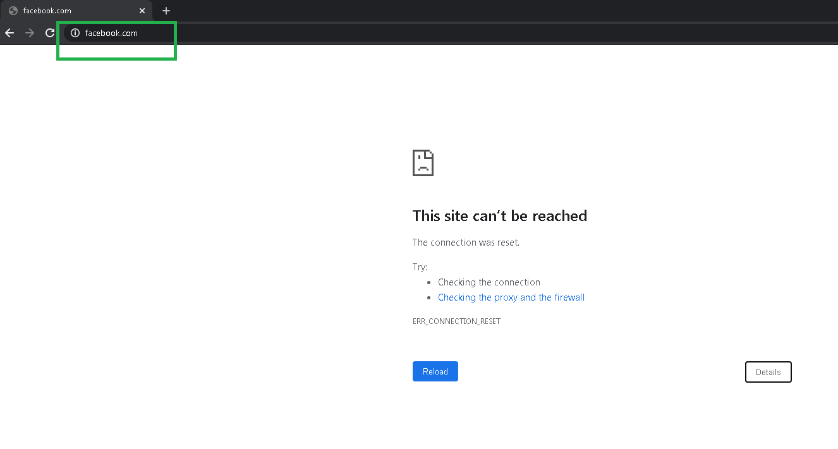
It shows that the Internet traffic is redirected from SD-WAN, towards the Check Point Cloud through the IPsec tunnel. The action was taken as per the policy definition on the Check Point Cloud.