Configure LTE functionality on 210 SE LTE
You can connect a Citrix SD-WAN 210-SE LTE appliance to your network using an LTE connection. This topic provides details on configuring mobile broadband settings, configuring the data center and branch appliances for LTE and so on. For more information on Citrix SD-WAN 210-SE LTE hardware platform, see Citrix SD-WAN 210 Standard Edition Appliances.
Getting started with Citrix SD-WAN™ 210-SE LTE
- Insert the SIM card into the SIM card slot of the Citrix SD-WAN 210-SE LTE.
Note: Only a standard or 2FF SIM card (15x25 mm) is supported.
- Fix the antennas to the Citrix SD-WAN 210-SE LTE appliance. For more information, see Installing the LTE antennas.
-
Power on the appliance.
Note
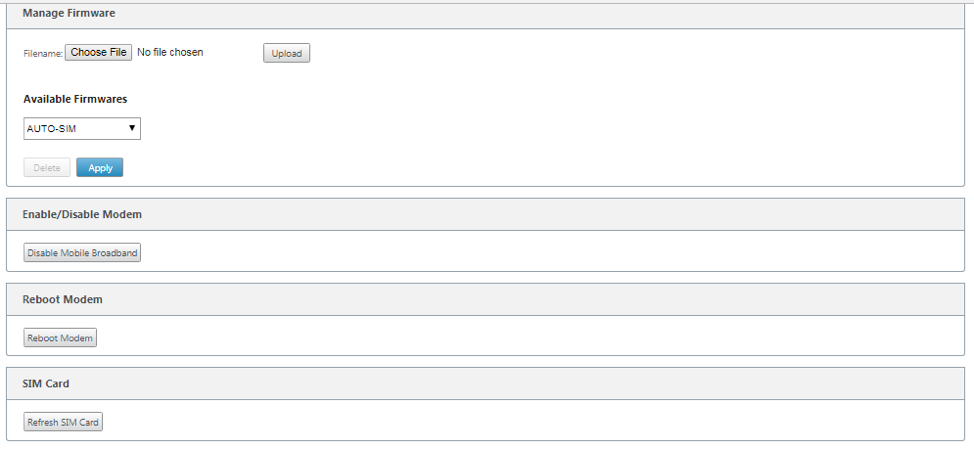
If you have inserted the SIM into an appliance that is already powered ON and booted up, navigate to Configuration > Appliance Settings > Network Adapters > Mobile Broadband > SIM Card and click Refresh SIM Card.

-
Configure the APN settings. In the SD-WAN GUI navigate to Configuration > Appliance Settings > Network Adapters > Mobile Broadband > APN settings.
Note: Obtain the APN information from the carrier.
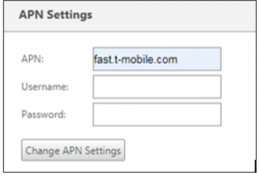
- Enter the APN, Username, and Password provided by the carrier.
-
Click Change APN Settings.
-
In the SD-WAN appliance GUI, navigate to Configuration > Appliance Settings > Network Adapters > Mobile Broadband.
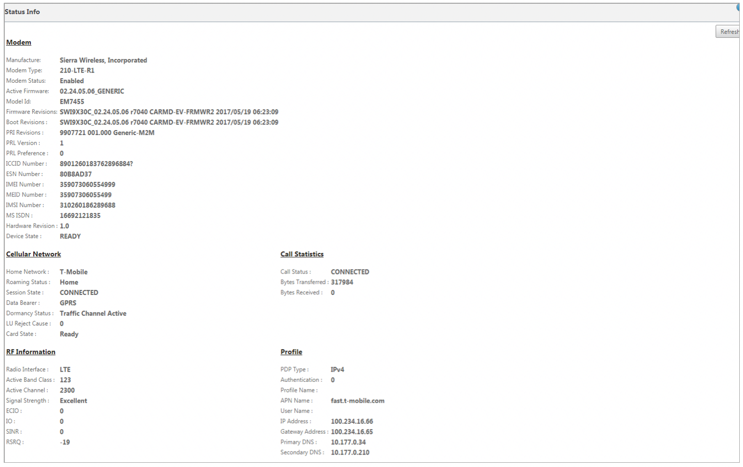
You can view the Mobile broadband settings status information.

The following are some useful status information:
- Status: Enabled indicates that the modem tries to establish the data session.
- Card state: Present indicates that SIM is properly inserted.
- Signal strength: Quality of signal strength - excellent, good, fair, poor, or no signal.
- Home network: Carrier of the inserted SIM.
- APN name: The access point name used by the LTE modem.
- Session state: Connected indicates that the device has joined the network. If the session state is disconnected, check with the carrier whether the account has been activated of if the data plan is enabled.
SIM PIN
If you have inserted a SIM card that is locked with a PIN, the SIM status will be Enabled and Not Verified state. You cannot use the SIM card until it is verified using SIM PIN. You can obtain the SIM PIN from the carrier.
To perform SIM PIN operations, navigate to Configuration > Appliance Settings > Network Adapters > Mobile Broadband > SIM PIN.

Click Verify PIN. Enter the SIM PIN provided by the carrier and click Verify PIN.
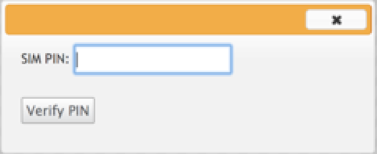
The status changes to Enabled and Verified.

Disable SIM PIN
You can choose to disable SIM PIN functionality for a SIM for which SIM PIN is enabled and verified.


Click Disable PIN. Enter the SIM PIN and click Disable.
Enable SIM PIN
SIM PIN can be enabled for the SIM for which it is disabled.

Click Enable PIN. Enter the SIM PIN provided by the carrier and click Enable.

If the SIM PIN state changes to Enabled and Not Verified, it means that the PIN is not verified and you cannot perform any LTE related operations until the PIN is verified.

Click Verify PIN. Enter the SIM PIN provided by the carrier and click Verify PIN.

Modify SIM PIN
Once the PIN is in Enabled and Verified state you can choose to change the PIN.

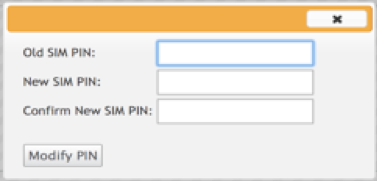
Click Modify PIN. Enter the SIM PIN provided by the carrier. Enter the new SIM PIN and confirm it. Click Modify PIN.
Unblock SIM
The SIM card gets blocked with three unsuccessful attempts of SIM PIN entry and you will not have access to LTE functionality. You can unblock the SIM using the SIM PUK obtained from the carrier.

To unblock a SIM, click Unblock. Enter the SIM PIN and SIM PUK obtained from the carrier and click Unblock.
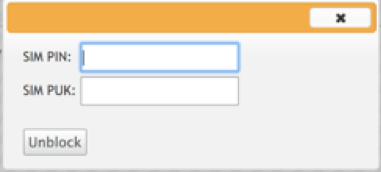
Note: The SIM card gets permanently blocked with 10 unsuccessful attempts of PUK, while unblocking the SIM. You need to contact the carrier service provider for a new SIM card.

Manage Firmware
Every appliance that has LTE enabled will have a set of available firmware. You can select from the existing list of firmware or upload a firmware and apply it.
If you are unsure of which firmware to use, select the AUTO-SIM option to allow the LTE modem to choose the most matching firmware based on the inserted SIM card.

NOTE
With 10.2.6 release, the LTE active firmware is updated as part of the single step upgrade package. To upgrade, you need to update the schedule window using the Change Management Setting page or wait for the default scheduled time to upgrade the LTE firmware (daily at 21:20:00).
Enable/Disable modem
Enable/disable modem depending on your intent to use the LTE functionality. By default, the LTE modem is enabled.
Reboot modem
Reboots the modem. It can take up to 3-5 minutes for the reboot operation to complete.
Refresh SIM
Use this option when you hot swap the SIM card to detect the new SIM card by the 210-SE LTE modem.
You can remotely view and manage all the LTE sites in your network using Citrix SD-WAN Center. For more information see, Remote LTE site management.
Configure the LTE functionality using CLI
To configure 210-SE LTE modem using the CLI.
- Log into the Citrix SD-WAN appliance console.
- At the prompt, type the user name and password to gain CLI interface access.
- At the prompt, type the command lte. Type >help. This displays the list of LTE commands available for configuration.
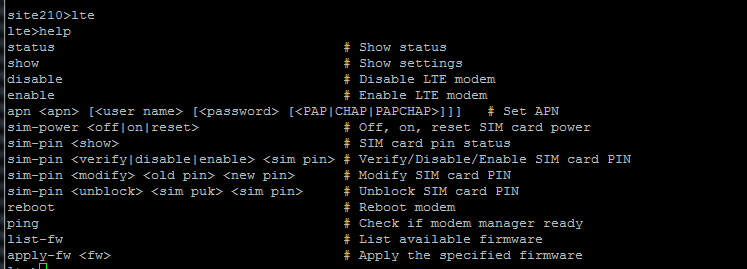
The following table lists the LTE command descriptions.
| Command | Description |
|---|---|
| Help {lte>help} | Lists the available LTE commands and parameters |
| Status {lte>status} | Displays LTE connectivity status |
| Show {lte>show} | Displays LTE settings |
| Disable {lte>disable} | Disables LTE modem |
| Enable {lte>enable} | Enables LTE modem |
| Apn {lte>apn} | Configures APN settings information |
| Sim-power off, on, reset>{lte>sim-power off,on,reset} | Powers off sim card, Power on sim card, Refresh sim card |
| SIM PIN {lte>sim-pin} | SIM PIN related operations |
| Reboot {lte>reboot} | Restarts LTE modem |
| Ping {lte>ping} | Pings LTE modem |
| List-fw {lte>list-fw} | Lists firmware available on the R1 or R2 LTE modems |
| Apply-fw |
Applies firmware specific to a carrier |
Configure MCN for LTE
To configure an MCN:
-
Log in to the SD-WAN appliance GUI. Go to Configuration Editor. Complete configuration for the MCN site, see Configure MCN.
-
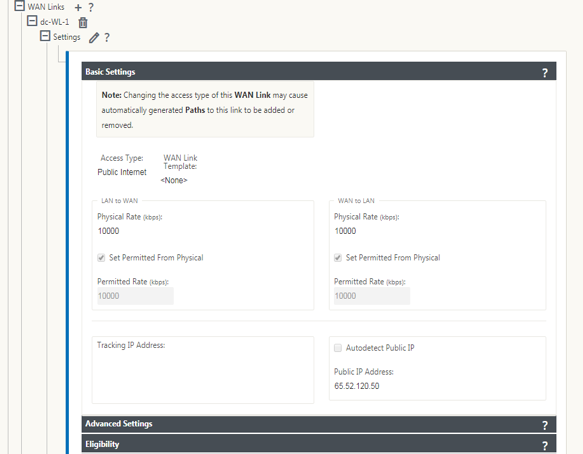
Ensure that you provide routable public IP address as part of WAN link configuration. You do not have to configure public IP address for client appliances.
Configure branch for LTE
To configure the 210-SE LTE appliance as a branch site:
- In the SD-WAN appliance GUI, go to configuration editor. See Configure Branch.
- Create Interface Groups.
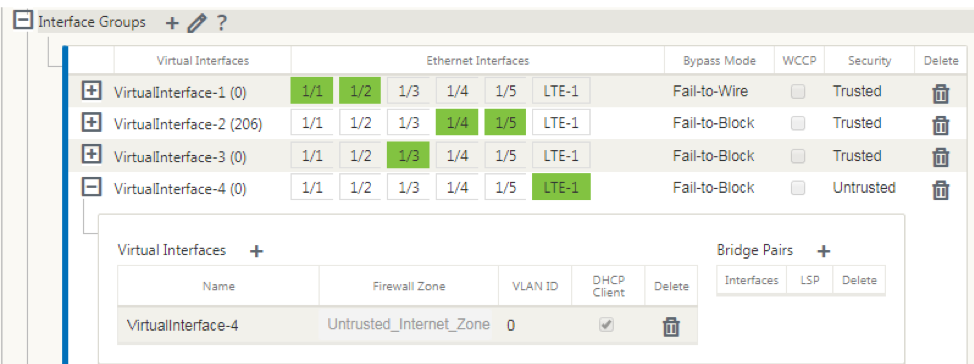
- Create up to one Virtual Interface and one Interface Group for the LTE adapter to configure WAN link by selecting the following:
- Ethernet Interface – LTE 1
- Security – untrusted (default)
- DHCP Client – Enabled (default)
-
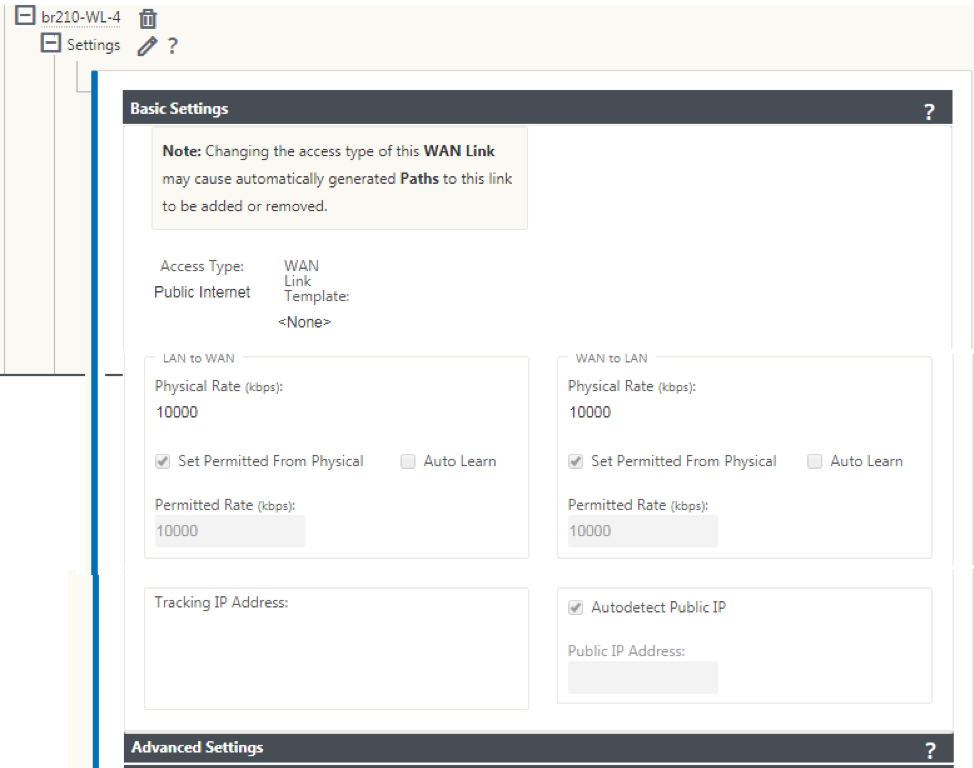
Enable AutoDetect Public IP for WAN link configuration when configuring WAN link using the virtual interface created for LTE interface.
-
By default, when you try to configure WAN link using LTE interface, the WAN link is marked as Metered link and Last Resort Standby mode. You can change these default settings, if necessary.
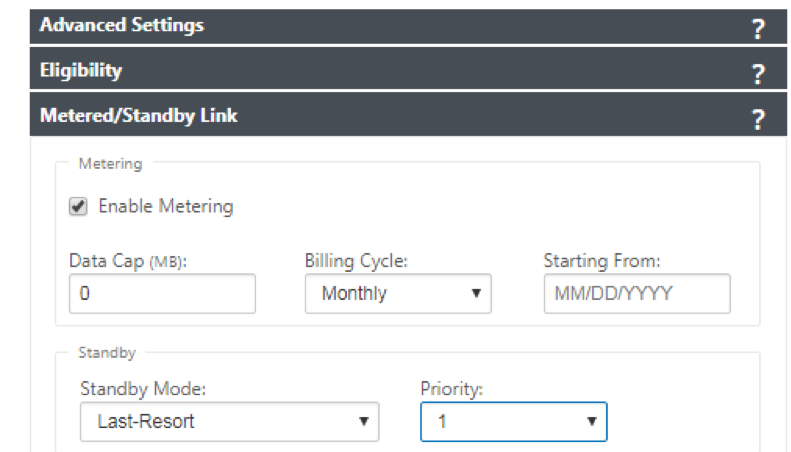
The IP address and gateway address for the Access Interface of the WAN link need not be configured because it receives that information from the carrier through DHCP.

-
Complete rest of the required Branch configuration for the 210-SE LTE appliance. See configure Branch.
-
Perform Change Management by uploading the SD-WAN software. See the Change Management procedure.
- Activate configuration through the Local Change Management process. When you perform Change Management, configuration is activated and required configuration is applied.
Zero-touch deployment over LTE
Pre-requisites for enabling zero-touch deployment service over LTE
- Install antenna and the SIM card for the 210-SE LTE appliance.
- Ensure that the SIM card has an activated data plan.
- Ensure that the management port is not connected.
- If the management port is connected, disconnect the management port and then restart the appliance.
- If a static IP address on the Management Interface is configured, you need to configure the Management Interface with DHCP, apply the configuration, and then disconnect the Management port, and restart the appliance.
- Ensure the 210-SE appliance configuration has internet service defined for LTE interface.
When the appliance is powered on, the zero-touch deployment service uses the LTE port to obtain the latest SD-WAN software and SD-WAN configuration only when the management port has not been connected.
You can use the SD-WAN Center GUI to deploy and configure 210-SE LTE appliance for the zero-touch deployment service.
See the zero-touch deployment procedure for more information about deploying and configuring 210-SE LTE appliance using SD-WAN Center.
Zero-touch deployment Service over management interface for 210-SE LTE appliance
Connect the Management Port and use the standard zero-touch deployment procedure that is supported on all other non-LTE platforms.
LTE REST API
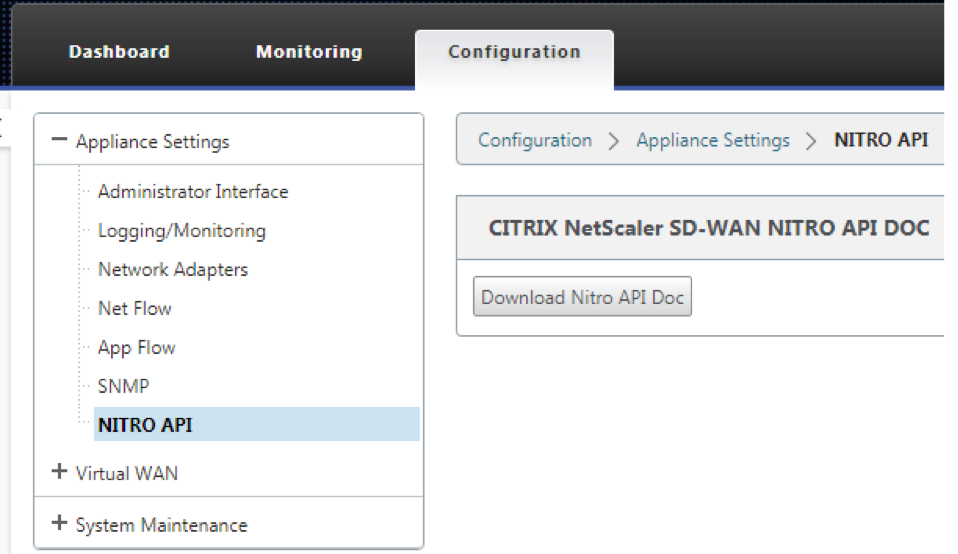
For information about LTE REST API, navigate to the SD-WAN GUI and go to Configuration > Appliance Settings >NITRO API. Click Download Nitro API Doc.
