Upgrade
Each NetScaler ADM release offers new and updated features with increased functionality. Citrix recommends you upgrade NetScaler ADM to the latest release to avail of the new features and bug fixes. A comprehensive list of enhancements, known issues, and bug fixes is included in the release notes accompanying every release announcement. It is also important to understand the licensing framework and the types of licenses that can be used before you start to upgrade. For NetScaler ADM licensing information, see Licensing.
The Upgrade path information is also available in the Citrix Upgrade Guide.
Before you upgrade
Download the upgrade package from the NetScaler ADM Downloads page and follow the instructions in this article to upgrade your system to the latest 13.1 build. After the upgrade process begins, ADM restarts and the existing connections are terminated and reconnected when the upgrade completes. The existing configuration is preserved, but NetScaler ADM does not process any data until the upgrade completes.
Important
The NetScaler ADM version and build should be equal to or higher than your NetScaler version and build. For example, if you have installed NetScaler ADM 12.1 Build 50.39, then ensure you have installed NetScaler 12.1 Build 50.28/50.31 or earlier.
Points to note before upgrading to 13.1:
-
If you upgrade from version 11.1 or version 12.0 56.x and previous builds, perform the following steps:
-
Upgrade from the existing version to 12.0 build 57.24.
-
Upgrade to the latest build of version 12.1.
-
Upgrade to version 13.1.
-
-
If you upgrade from 12.0 build 57.24 and higher, first upgrade to 12.1 and then to 13.1.
-
If you upgrade from 12.1, you can directly upgrade to 13.1.
-
If you upgrade from versions lower than 13.0 64.xx, for better user experience, first upgrade to 13.0 64.xx and then to 13.1.
Important points to note before upgrading to 13.1-xx.xx and later
When you upgrade the ADM software to version 13.1-xx.xx, your ADM database is also migrated. This data migration happens because ADM now uses PostgreSQL version 10.11.
Note
Downgrading the ADM software is unsupported. Do not attempt to downgrade.
Recommended precautions:
-
Take a snapshot of the NetScaler ADM server if you are upgrading to 13.1-xx.xx and later.
-
Back up the NetScaler® ADM server before you upgrade.
-
After the upgrade, you might have to reestablish connections between the NetScaler ADM server and the managed instances. A confirmation prompt warns you that connections can fail if you proceed.
-
If you upgrade to any version between 13.1.9.x and 13.1.30.x, NetScaler ADM rolls back the existing StyleBooks ConfigPacks to its earlier version.
To avoid this issue, upgrade to 13.1.33.50 build.
-
For NetScaler ADM servers in high availability setup, when upgrading, do not make any configuration changes on either of the nodes.
Warning
Do not refresh the browser until the upgrade process is successfully completed. Check the GUI for the approximate time for the upgrade to complete.
-
After upgrade, the active node can change in a high availability pair.
Upgrade a single NetScaler ADM server to 13.1-12.x
-
Log on to NetScaler ADM with administrator credentials.
-
Navigate to Settings > Administration. Under System Maintenance, click Upgrade NetScaler ADM.

-
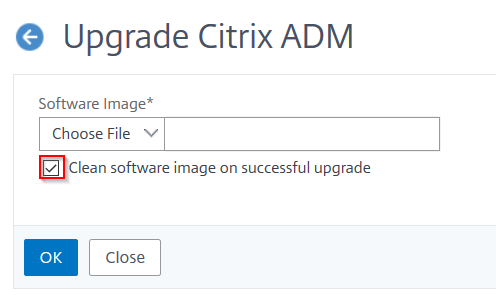
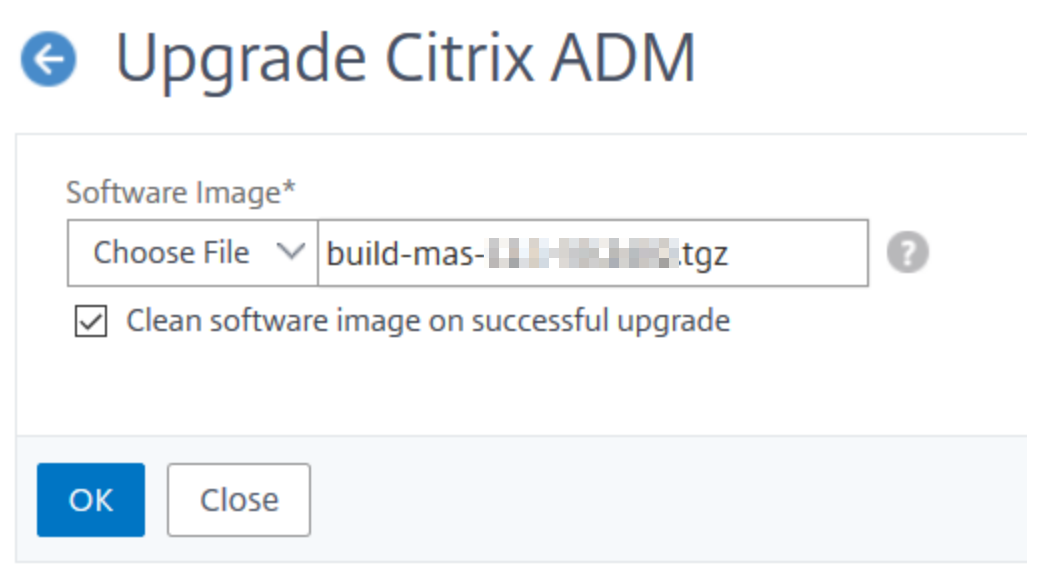
On the Upgrade NetScaler ADM page, select the Clean software image on successful upgrade check box to delete image files after upgrade. Selecting this option removes the NetScaler ADM image files automatically upon upgrade.
Note
This option is selected by default. If you do not select this check box before starting the upgrade process, you must manually delete the images.
-
You can then upload a new image file by selecting either Local (your local machine) or Appliance. The build file must be present on the NetScaler ADM virtual appliance.
-
Click OK.
-
The Upgrade ADM page displays few details such as file name, selected version, estimated time to complete. Click Upgrade.

The upgrade process starts.
After your configuration is migrated, you can log on to the ADM GUI. Upon logon, the historical data starts to migrate at the background while you can continue to work on ADM.
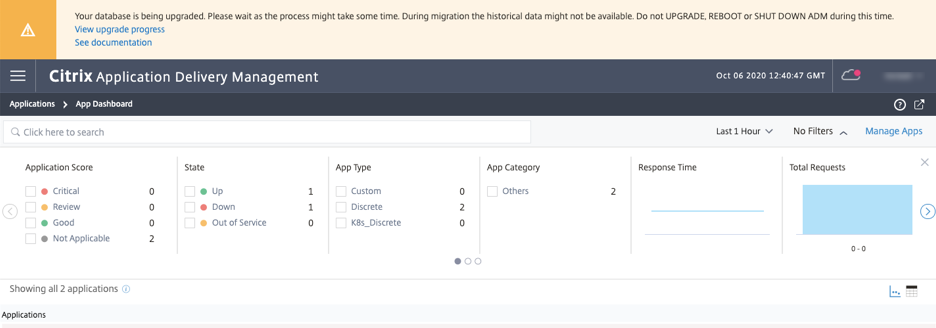
During historical data migration, some of the old data might not be available. The time taken to migrate your database depends on the size of data and the number of tables.
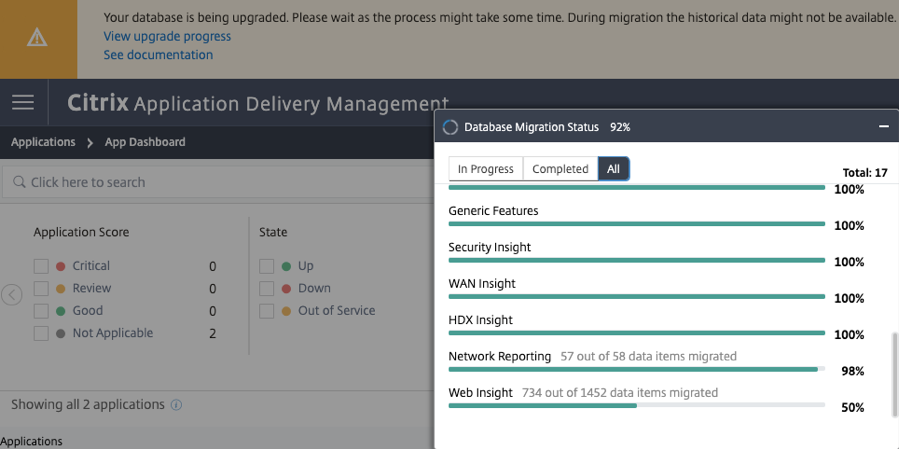
You can monitor the database migration using the ADM GUI. Click View upgrade progress and the Database Migration Status appears.
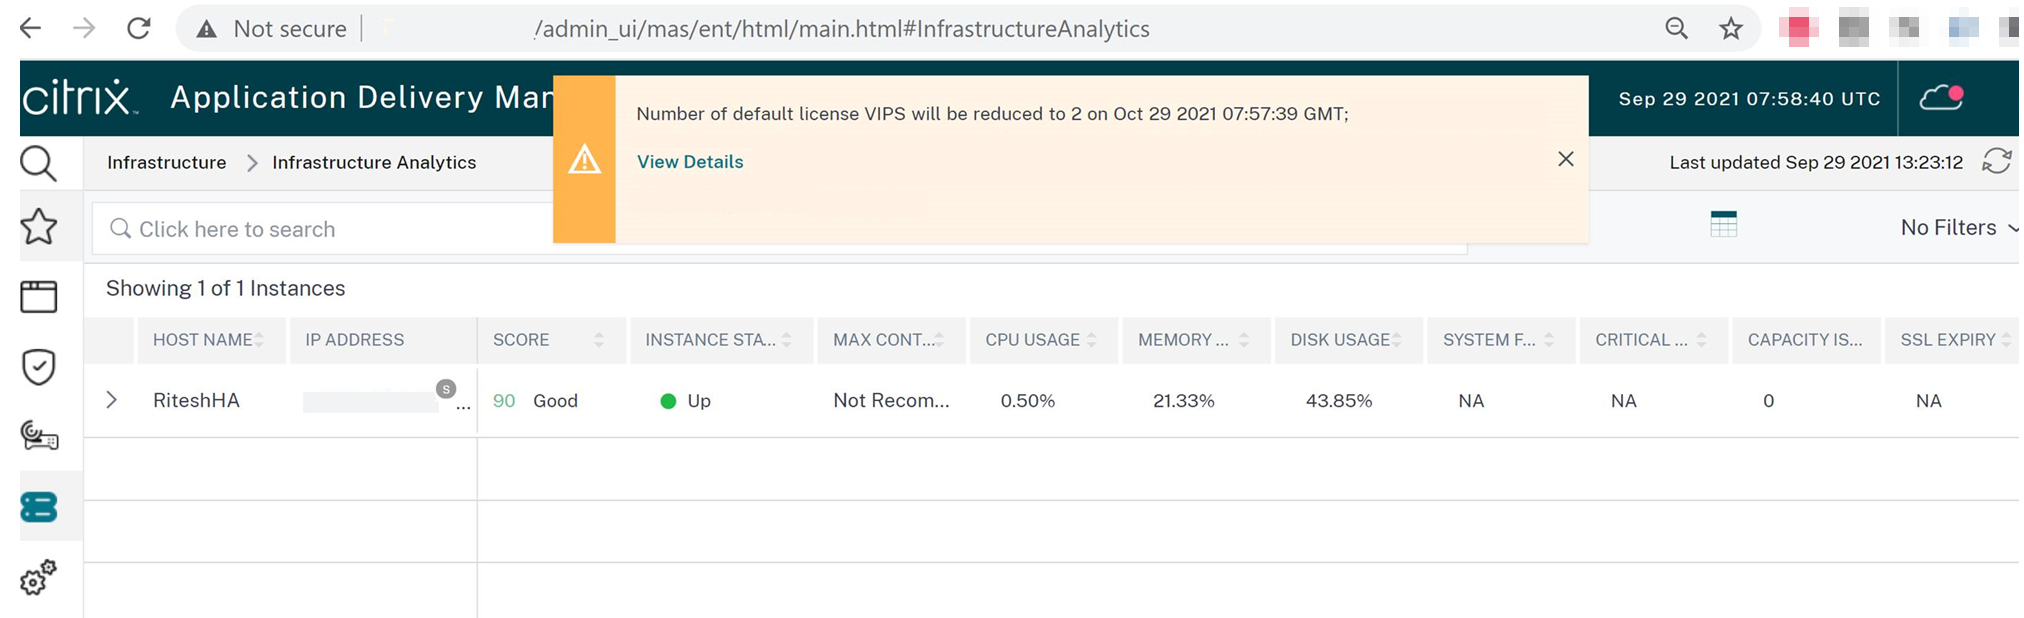
After the upgrade is complete, you can view the message that the default free licenses get reduced to two. Click View Details for more information.
Upgrade a single NetScaler ADM server to 13.1-4.x or 13.1-9.x
-
Log on to NetScaler ADM with administrator credentials.
-
Navigate to System > System Administration. Under the System Administration subheading, click Upgrade NetScaler ADM.

-
On the Upgrade NetScaler ADM page, select the Clean software image on successful upgrade check box to delete image files after upgrade. Selecting this option removes the NetScaler ADM image files automatically upon upgrade.
Note
This option is selected by default. If you do not select this check box before starting the upgrade process, you must manually delete the images.
-
You can then upload a new image file by selecting either Local (your local machine) or Appliance. The build file must be present on the NetScaler ADM virtual appliance.
-
Click OK.
The Confirm dialog box is displayed. Click Yes.
The upgrade process starts.
After your configuration is migrated, you can log on to the ADM GUI. Upon logon, the historical data starts to migrate at the background while you can continue to work on ADM.
During historical data migration, some of the old data might not be available. The time taken to migrate your database depends on the size of data and the number of tables.
You can monitor the database migration using the ADM GUI. Click View upgrade progress and the Database Migration Status appears.
Troubleshooting database migration issues
During the upgrade process to 13.1-xx.xx and later, sometimes the migration of Web Insight historical data might appear to be stuck. In such cases, to check details of data migration, do the following.
Log on to the ADM shell prompt and run the following command to see the granular details of the progress.
    cat /var/mps/log/db_upgrade/web_insight_mapping_migration_status

<!--NeedCopy-->
Here’s an example output
    bash-3.2# cat /var/mps/log/db_upgrade/web_insight_mapping_migration_status
    Tue Oct  6 07:41:55 GMT 2020
    157 out of 127346 done in 54 seconds
    File
     /var/mps/db_upgrade/hist_table_mig_data/Web_Insight/af_app_client_server_resp_second_l3p_d7_dump
    bash-3.2#

 <!--NeedCopy-->
In this example, af_app_client_server_resp_second_l3p_d7 is the entry that is being upgraded. And 157 entries out of 127,346 is migrated in 54 seconds.
Upgrade a high availability pair from 12.1 release to 13.1 release
For NetScaler ADM servers in a high availability mode, you can upgrade by either accessing the active node or the floating IP address. Both the NetScaler ADM servers are automatically upgraded to the latest build once you initiate the upgrade process in either of the servers.
Upgrade NetScaler ADM disaster recovery deployment
Upgrading NetScaler ADM disaster recovery deployment is a two-step process:
-
Upgrade the NetScaler ADM nodes configured in high availability mode in the primary site. Later you must upgrade the disaster recovery node.
-
Ensure that you have upgraded the NetScaler ADM servers that are deployed in high availability, before upgrading the disaster recovery node.
Upgrade the NetScaler ADM disaster recovery node
-
Download NetScaler ADM upgrade image file from NetScaler site.
-
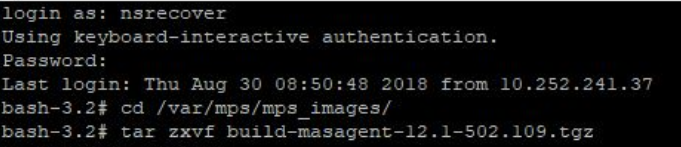
Upload this file to the disaster recovery node using
nsrecovercredentials. -
Log on to the disaster recovery node using the
nsrecovercredentials. -
Navigate to the folder where you placed the image file and unzip the file.
-
Run the following script:
./installmas

Upgrade on-prem agents for multisite deployment
Upgrading NetScaler agent deployment is a three-step process. Ensure that you have completed the following tasks before upgrading the on-prem agents:
-
Upgrade the NetScaler ADM servers that are deployed in high availability.
-
Upgrade the NetScaler ADM disaster recovery node.
For more information, see Upgrade NetScaler ADM disaster recovery deployment.
Upgrade the on-prem agent
-
Download NetScaler agent upgrade image file from NetScaler site.
-
Upload this file to the agent node using
nsrecovercredentials. -
Ensure that you download the correct agent upgrade image.
-
Log on to the on-prem agent using the
nsrecovercredentials. -
Navigate to the folder where you placed the image file and unzip the file.
-
Run the following script:
./installmasagent
Add an extra disk to the NetScaler ADM server
If your NetScaler ADM storage requirement exceeds the default disk space (120 GB), you can attach an extra disk. You can attach more disk in both single-server and high availability deployments.
When you upgrade NetScaler ADM from release version 12.1–13.1Œ, the partitions that you had created on the additional disk in the earlier version remain the same. The partitions are not removed or resized.
The procedure to attach more disk remains the same in the upgraded build. You can now use the new disk partitioning tool in NetScaler ADM to create partitions in the newly added disk. You can also use the tool to resize the partitions in the existing more disk. For more information on how to attach more disks and to use the new disk partitioning tool, see How to attach an extra disk to NetScaler ADM.
Provision NetScaler instances in OpenStack using StyleBooks
From NetScaler ADM 12.1 build 49.23 onwards, the architecture of an OpenStack orchestration workflow has been updated. The workflow now uses NetScaler ADM StyleBooks to configure NetScaler instances. If you upgrade to NetScaler ADM 13.1 from version 12.0 or 12.1 build 48.18, you must run the following migration script:
/mps/scripts/migration_scripts/migrate_configurations.py
<!--NeedCopy-->
For more information about the os-cs-lb-mon StyleBook and the migration script, see Provisioning of NetScaler VPX instance on OpenStack using StyleBook
In this article
- Before you upgrade
- Upgrade a single NetScaler ADM server to 13.1-12.x
- Upgrade a single NetScaler ADM server to 13.1-4.x or 13.1-9.x
- Upgrade a high availability pair from 12.1 release to 13.1 release
- Upgrade NetScaler ADM disaster recovery deployment
- Upgrade on-prem agents for multisite deployment
- Add an extra disk to the NetScaler ADM server
- Provision NetScaler instances in OpenStack using StyleBooks