Security
You can configure the security settings such as network encryption, virtual path IPsec, firewall, and certificates that are applicable to all the appliances across the network.
Firewall zones
You can configure zones in the network and define policies to control how traffic enters and leaves the zones. The following zones are available by default:
- Default_LAN_Zone: Applies to traffic to or from an object with a configurable zone, where the zone has not been set.
- Internet_Zone: Applies to traffic to or from an Internet service using a trusted interface.
- Untrusted_Internet_Zone: Applies to traffic to or from an Internet service using an untrusted interface.
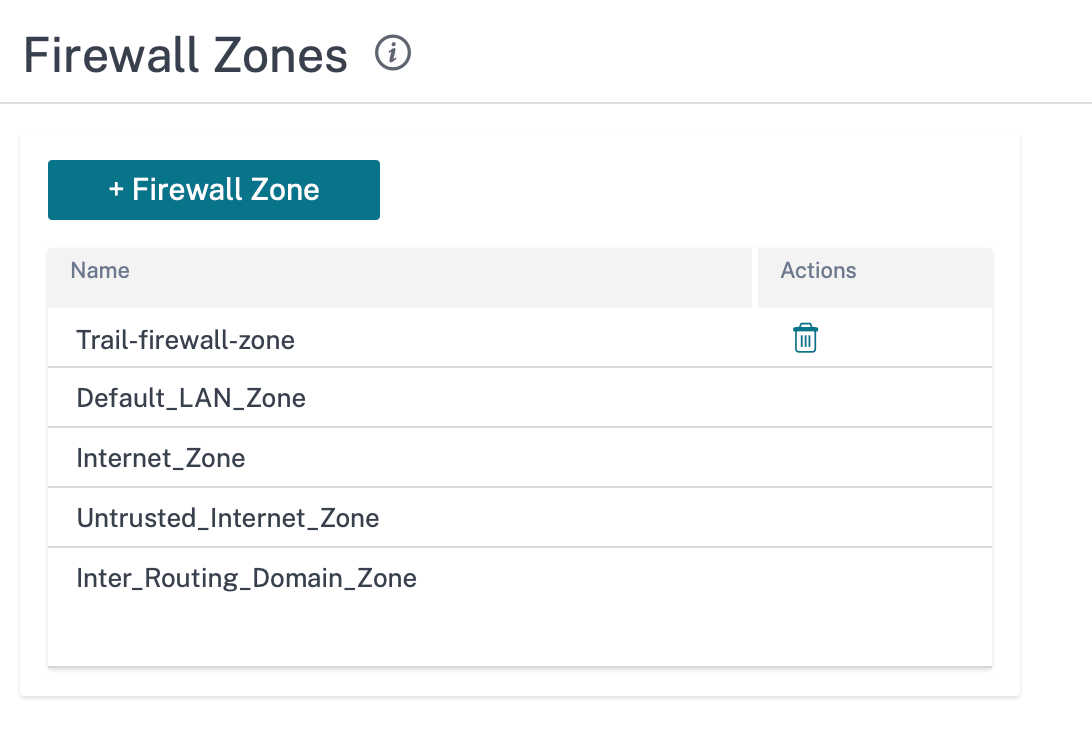
You can also create your own zones and assign them to the following types of objects:
- Virtual Network Interfaces
- Intranet Services
- GRE Tunnels
- LAN IPsec Tunnels
Click Verify Config to validate any audit error.
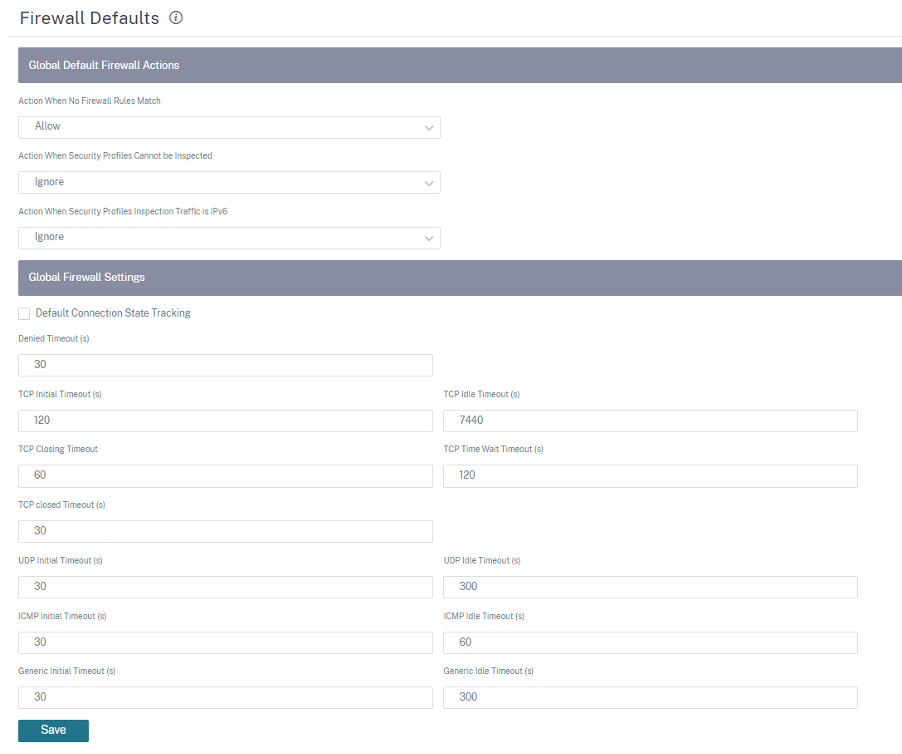
Firewall defaults
You can configure the global default firewall actions and global firewall settings that can be applied to all the appliances in the SD-WAN network. The settings can also be defined at the site level which overrides the global setting.
-
Action When No Firewall Rules Match: Select an action (Allow or Drop) from the list for the packets that do not match a Firewall policy.
-
Action When Security Profiles Cannot be Inspected: Select an action (Ignore or Drop) for the packets that match a firewall rule and engage a security profile but temporarily cannot be inspected by the Edge Security subsystem. If you select Ignore, then the relevant firewall rule is treated as not matched and the next firewall rule in order is evaluated. If you select Drop, the packets matching the relevant firewall rule, are dropped.
-
Default Firewall Action: Select an action (Allow/Drop) from the list for packets that do not match a policy.
-
Action When Security Profiles Inspection Traffic is IPv6: Select an option (Ignore or Drop) for the traffic that match the inspect firewall policies.
-
If you select the Ignore option, it allows to bypass the traffic through Citrix SD-WAN™ network and send it to respective service.
-
If you select the Drop option, IPv6 packets matching the Inspect firewall policies are dropped.
Note
If the INSPECT firewall policies are configured and matching criteria explicitly includes IPv6, an audit error is thrown as shown in the following screenshot:
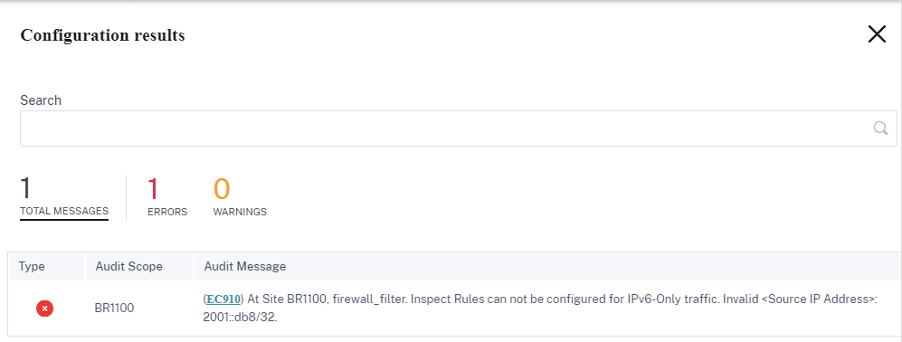
For example, you can explicitly select the source/destination IP as IPv6 with inspect (for IP Protocol) action while creating a firewall policy and save it. When you click Verify Configuration, an audit error appears.
-
-
Default Connection State Tracking: Enables directional connection state tracking for TCP, UDP, and ICMP flows that do not match a filter policy or NAT rule.
Note
Asymmetric flows are blocked when Default Connection State Tracking is enabled even when there are no Firewall policies defined. If there is the possibility of asymmetric flows at a site, the recommendation is to enable it at a site or policy level and not globally.
-
Denied Timeout (s): Time (in seconds) to wait for new packets before closing denied connections.
-
TCP Initial Timeout (s): Time (in seconds) to wait for new packets before closing an incomplete TCP session.
-
TCP Idle Timeout (s): Time (in seconds) to wait for new packets before closing an active TCP session.
-
TCP Closing Timeout: Time (in seconds) to wait for new packets before closing a TCP session after a terminate request.
-
TCP Time Wait Timeouts (s): Time (in seconds) to wait for new packets before closing a terminated TCP session.
-
TCP Closed Timeout (s): Time (in seconds) to wait for new packets before closing an aborted TCP session.
-
UDP Initial Timeout (s): Time (in seconds) to wait for new packets before closing the UDP session that has not seen traffic in both directions.
-
UDP Idle Timeout (s): Time (in seconds) to wait for new packets before closing an active UDP session.
-
ICMP Initial Timeout (s): Time (in seconds) to wait for new packets before closing an ICMP session that has not seen traffic in both directions
-
ICMP Idle Timeout (s): Time (in seconds) to wait for new packets before closing an active ICMP session.
-
Generic Initial Timeout (s): Time (in seconds) to wait for new packets before closing a generic session that has not seen traffic in both directions.
-
Generic Idle Timeout (s): Time (in seconds) to wait for new packets before closing an active generic session.
Click Verify Config to validate any audit error.
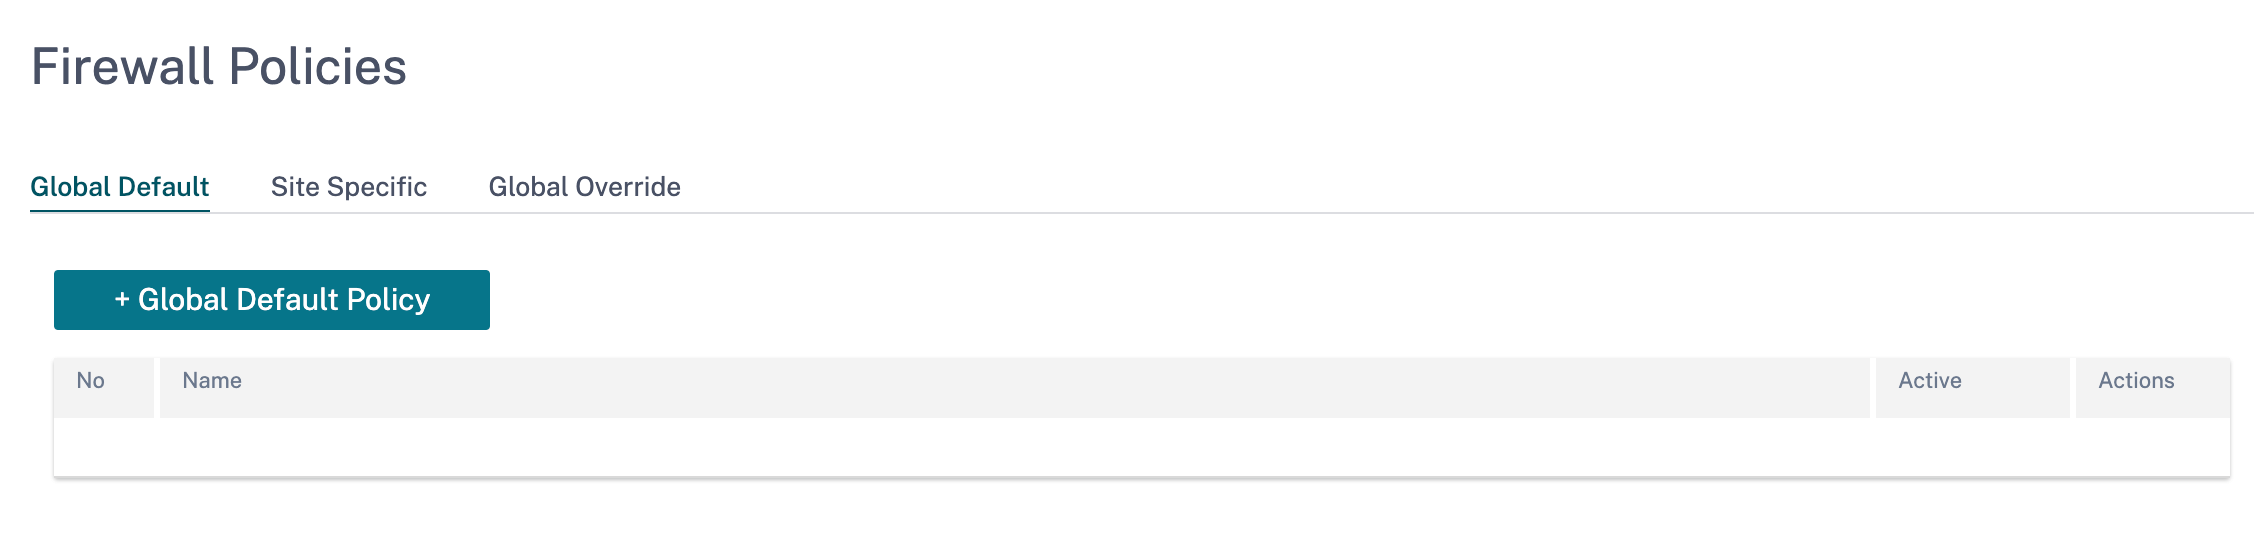
Firewall policies
Firewall policies provide security by ensuring that network traffic is restricted only to a specific firewall rule depending on the match criteria and by applying specific actions. The Firewall Policies contains three sections.
- Global Default – Global default policy is an aggregation of a couple of firewall rules. The policy that you create under the Global Default section is applied across all the sites in the network.
- Site Specific – You can apply the defined firewall rules on certain specific sites.
- Global Override – You can override both global and site-specific policies using Global Override Policy.
You can define firewall rules and place it based on the priority. You can choose the priority order to begin from the top of the list, bottom of the list, or from a specific row.
It is recommended to have more specific rules for applications or subapplications at the top, followed by less specific rules for the ones representing broader traffic.
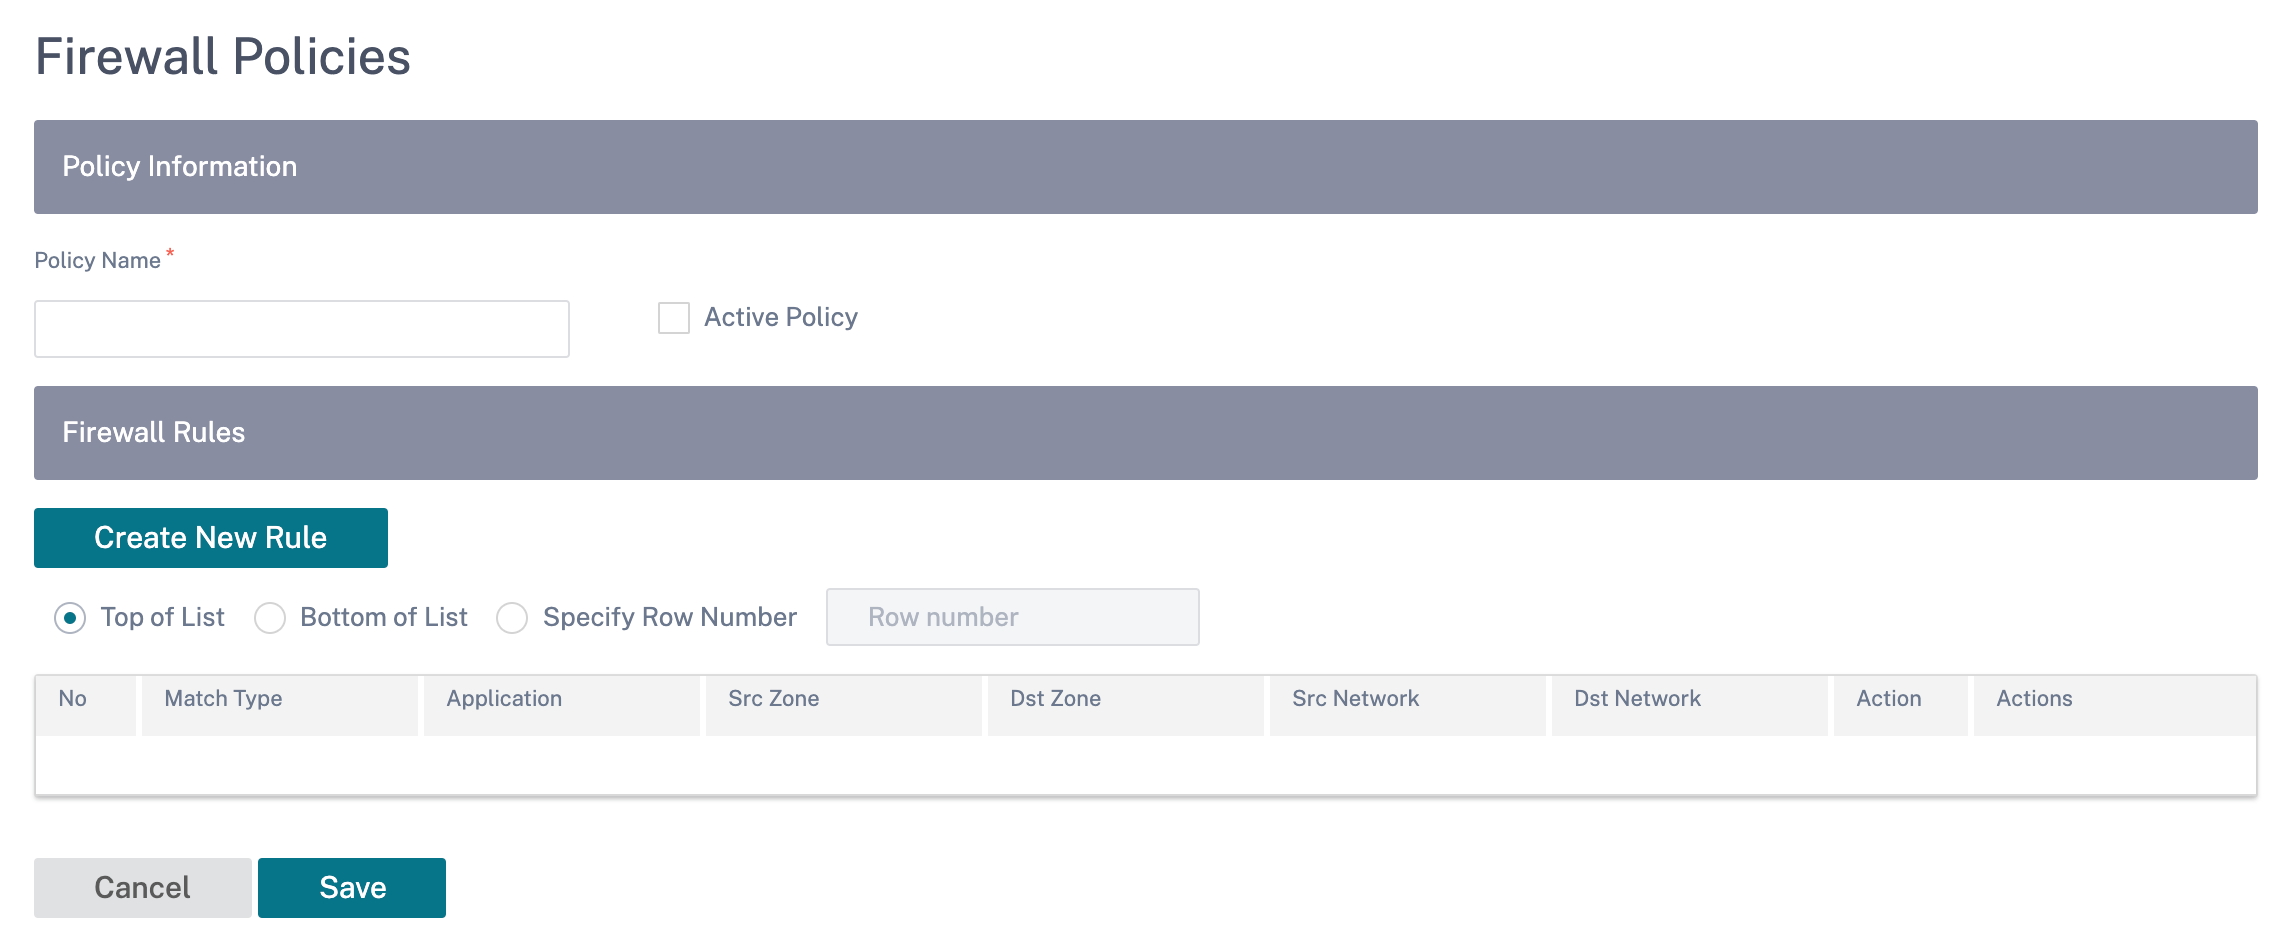
To create a firewall rule, click Create New Rule.
- Provide a policy name and select the Active Policy check box if you want to apply all the firewall rules.
-
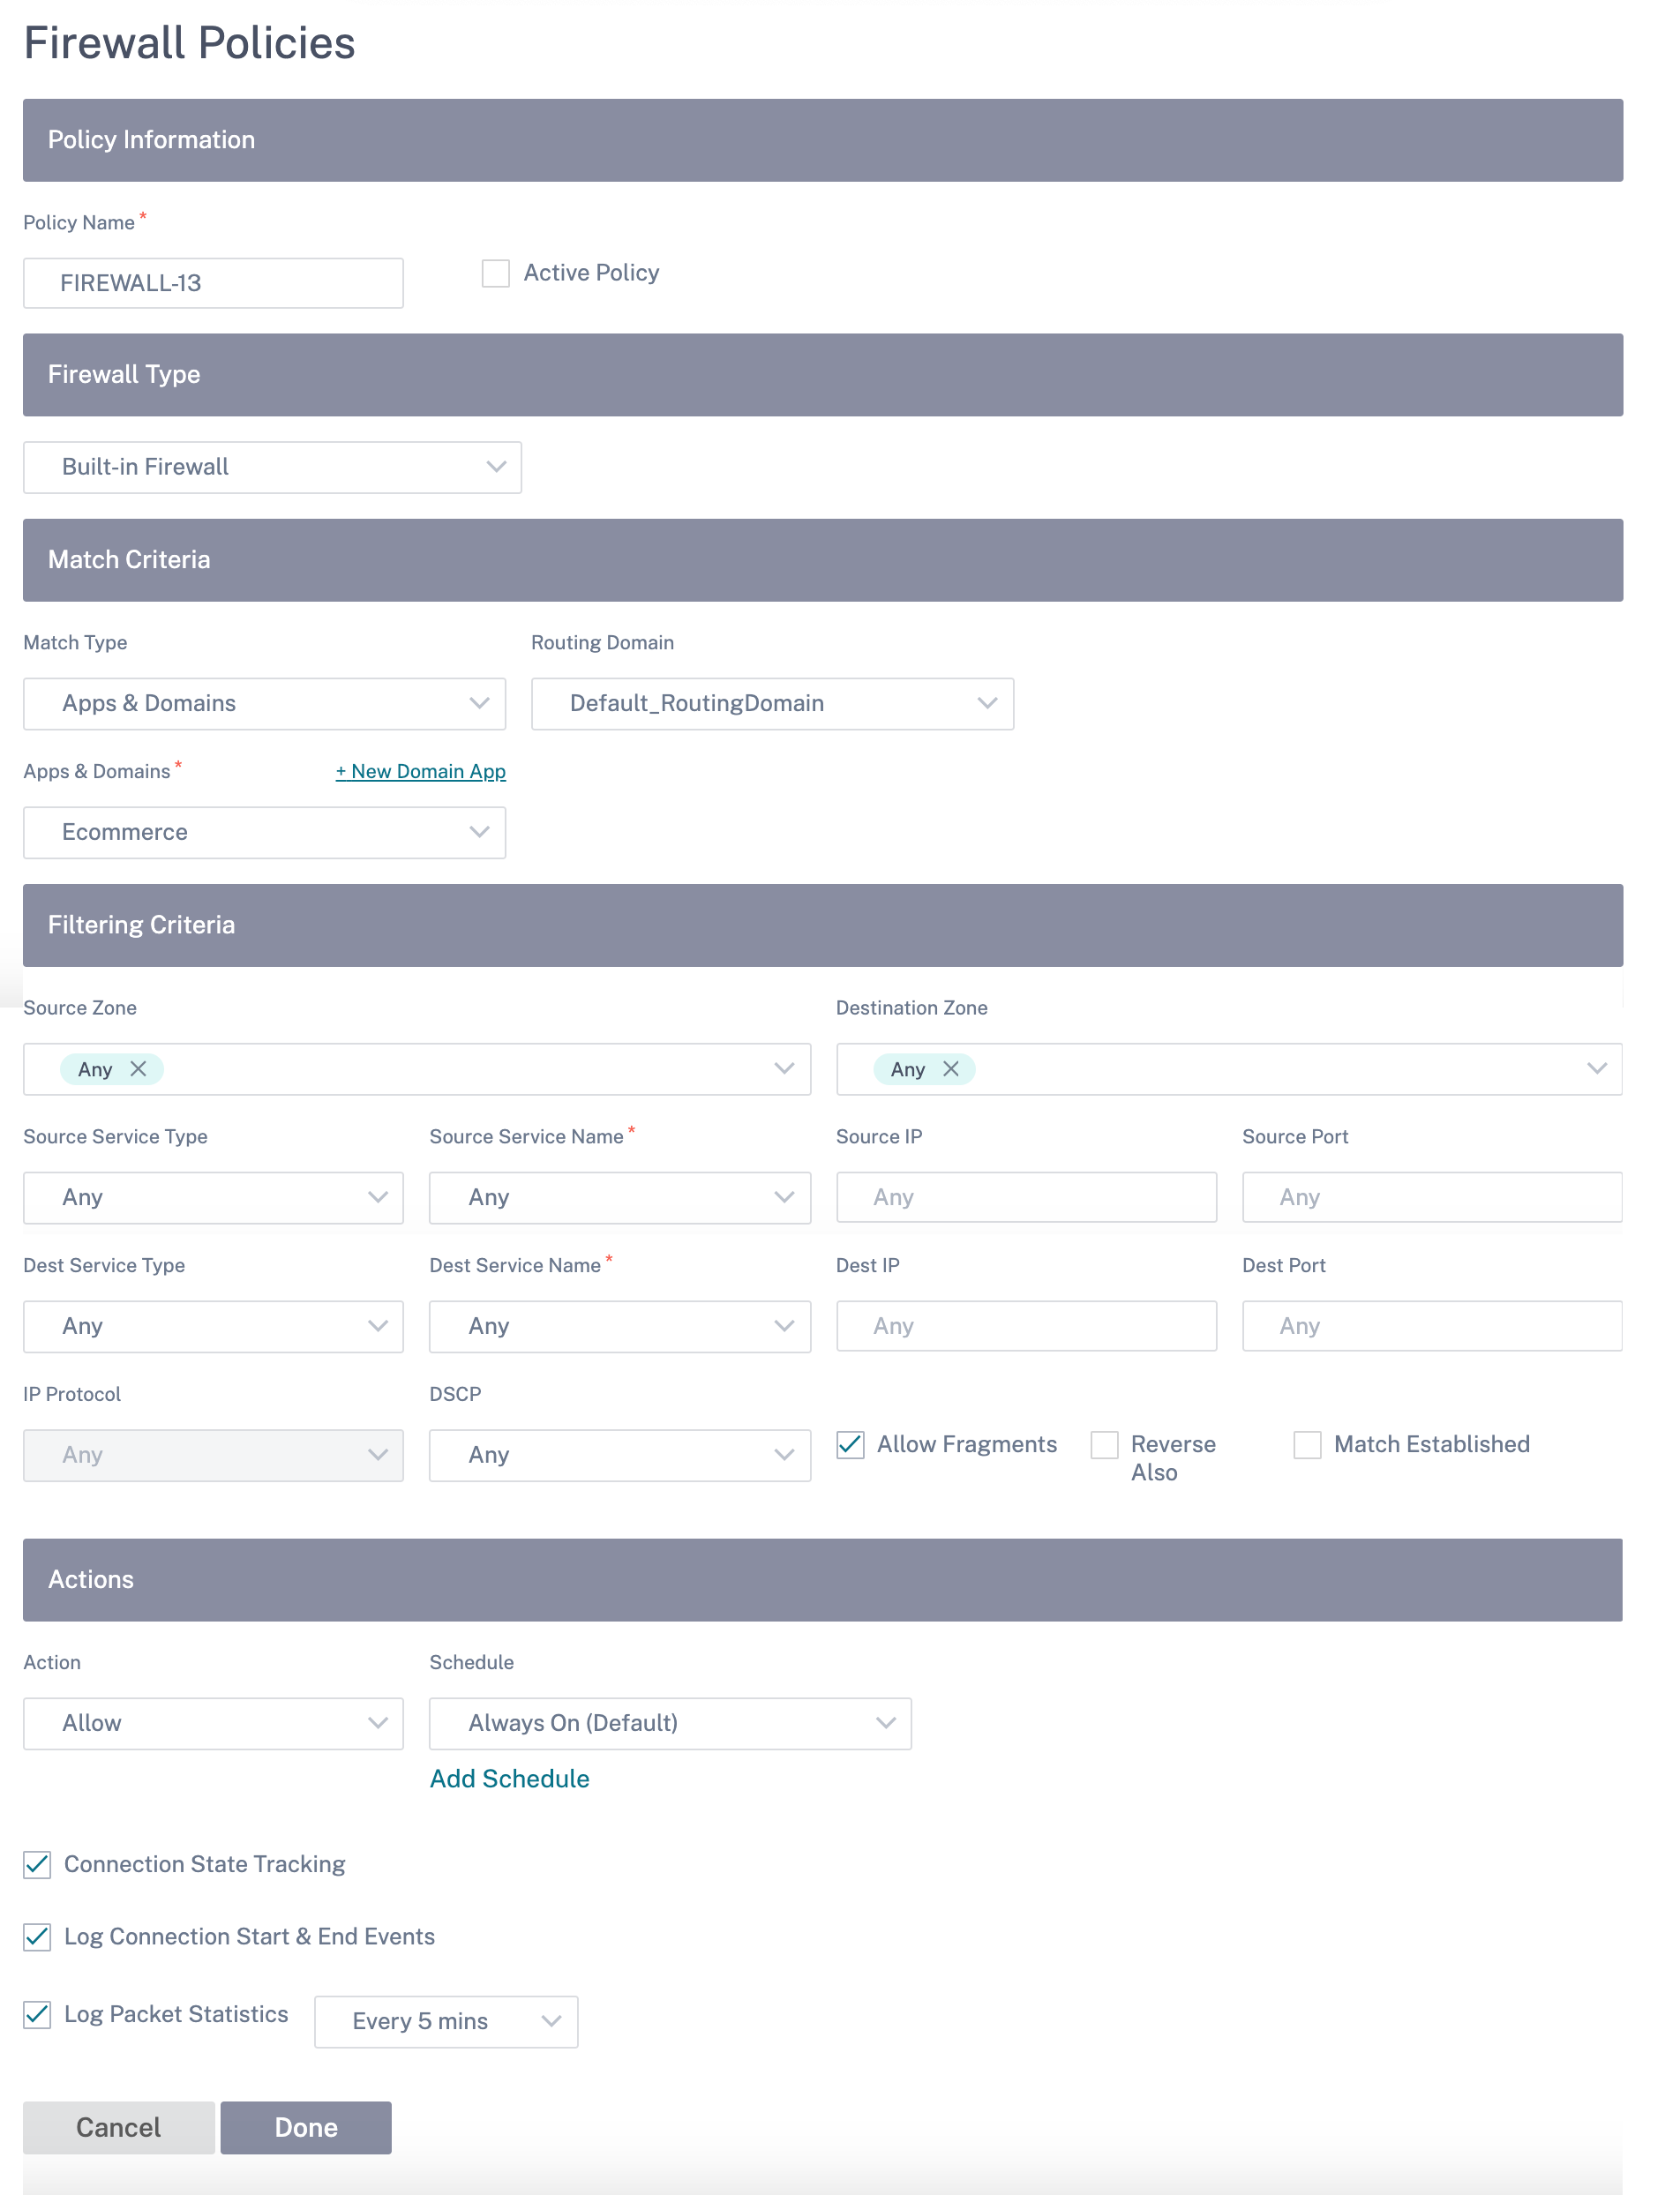
The match criteria defines the traffic for the rule such as, a domain name-based application, a custom defined application, group of applications, application family, or IP protocol based.
-
Filtering criteria:
-
Source Zone: The source firewall zone.
-
Destination Zone: The destination firewall zone.
-
Source Service Type: The source SD-WAN service type – Local, Virtual Path, Intranet, IP Host, or Internet are examples of Service Types.
-
Source Service Name: The name of a service tied to the service type. For example, if the virtual path is selected for Source Service type, it would be the name of the specific virtual path. This is not always required and depends on the service type selected.
-
Source IP: The IP address and subnet mask the rule uses to match.
-
Source Port: The source port the specific application uses.
-
Dest Service Type: The destination SD-WAN service type – Local, Virtual Path, Intranet, IP Host, or Internet are examples of service types.
-
Dest Service Name: Name of a service tied to the service type. This is not always required and depends on the service type selected.
-
Dest IP: The IP address and subnet mask the filter use to match.
-
Dest Port: The destination port the specific application uses (that is, HTTP destination port 80 for the TCP protocol).
-
IP Protocol: If this match type is selected, select an IP protocol that the rule matches with. Options include ANY, TCP, UDP ICMP and so on.
-
DSCP: Allow the user to match on a DSCP tag setting.
-
Allow Fragments: Allow IP fragments that match this rule.
-
Reverse Also: Automatically add a copy of this filter policy with source and destination settings reversed.
-
Match Established: Match incoming packets for a connection to which outgoing packets were allowed.
-
-
The following actions can be performed on a matched flow:
-
Allow: Permit the flow through the Firewall.
-
Drop: Deny the flow through the firewall by dropping the packets.
-
Reject: Deny the flow through the firewall and send a protocol specific response. TCP sends a reset, ICMP sends an error message.
-
Count and Continue: Count the number of packets and bytes for this flow, then continue down the policy list.
-
Apart from defining the action to be taken, you can also select the logs to be captured.
Network security
Select the encryption mechanism to be used across the network. You can configure the global security settings that secure the entire SD-WAN network.
Network Encryption mode defines the algorithm used for all encrypted paths in the SD-WAN network. It is not applicable for non–encrypted paths. You can set the encryption as AES-128 or AES-256.
FIPS compliance
FIPS mode enforces users to configure FIPS compliant settings for their IPsec Tunnels and IPsec settings for Virtual Paths.
Enabling FIPS mode offers the following capabilities:
- Displays the FIPS compliant IKE Mode.
- Displays a FIPS Compliant IKE DH Group from which users can select the required parameters for configuring the appliance in FIPS compliant mode (2,5,14 – 21).
- Displays the FIPS compliant IPsec Tunnel Type in IPsec settings for Virtual Paths
- IKE Hash and (IKEv2) Integrity mode, IPsec auth mode.
- Performs audit errors for FIPS based Lifetime Settings.
To enable FIPS compliance on Citrix SD-WAN Orchestrator™ service:
-
Go to Configuration > Security > Network Security.
-
In the Network Security Settings section, click the Enable FIPS Mode check box.
Enabling FIPS mode enforces checks during configuration to ensure that all IPsec related configuration parameters adhere to the FIPS standards. You are prompted through audit-errors and warnings to configure IPsec.

If the IPsec configuration does not comply with FIPS standards when it is enabled, an audit error might be triggered. Following are the type of audit errors that are displayed when you click Verify Config on the Citrix SD-WAN Orchestrator service UI.
- When FIPS mode is enabled and Non-FIPS compliant option is selected.
- When FIPS mode is enabled and incorrect lifetime value is entered.
- When FIPS mode is enabled and IPsec settings for virtual path default set is also enabled, and incorrect Tunnel mode is selected (ESP vs ESP_Auth / AH).
- When FIPS mode is enabled, IPsec settings for virtual path default set are also enabled, and incorrect lifetime value is entered.
Enable Encryption Key Rotation: When enabled, encryption keys are rotated at intervals of 10–15 minutes.
Enable Extended Packet Encryption Header: When enabled, a 16 bytes encrypted counter is prepended to encrypted traffic to serve as an initialization vector, and randomize packet encryption.
Enable Extended Packet Authentication Trailer: When enabled, an authentication code is appended to the contents of the encrypted traffic to verify that the message is delivered unaltered.
Extended Packet Authentication Trailer Type: This is the type of trailer used to validate packet contents. Select one of the following from the drop-down menu: 32-Bit Checksum or SHA-256.
SSL inspection
Secure Sockets Layer (SSL) inspection is a process of intercepting, decrypting, and scanning the HTTPS and secure SMTP traffic for malicious content. SSL inspection provides security to the traffic flowing to and from your organization. You can generate and upload your organization’s root CA certificate and perform the man-in-the-middle inspection of the traffic.
NOTE
SSL inspection is supported from Citrix SD-WAN 11.3.0 release onwards.
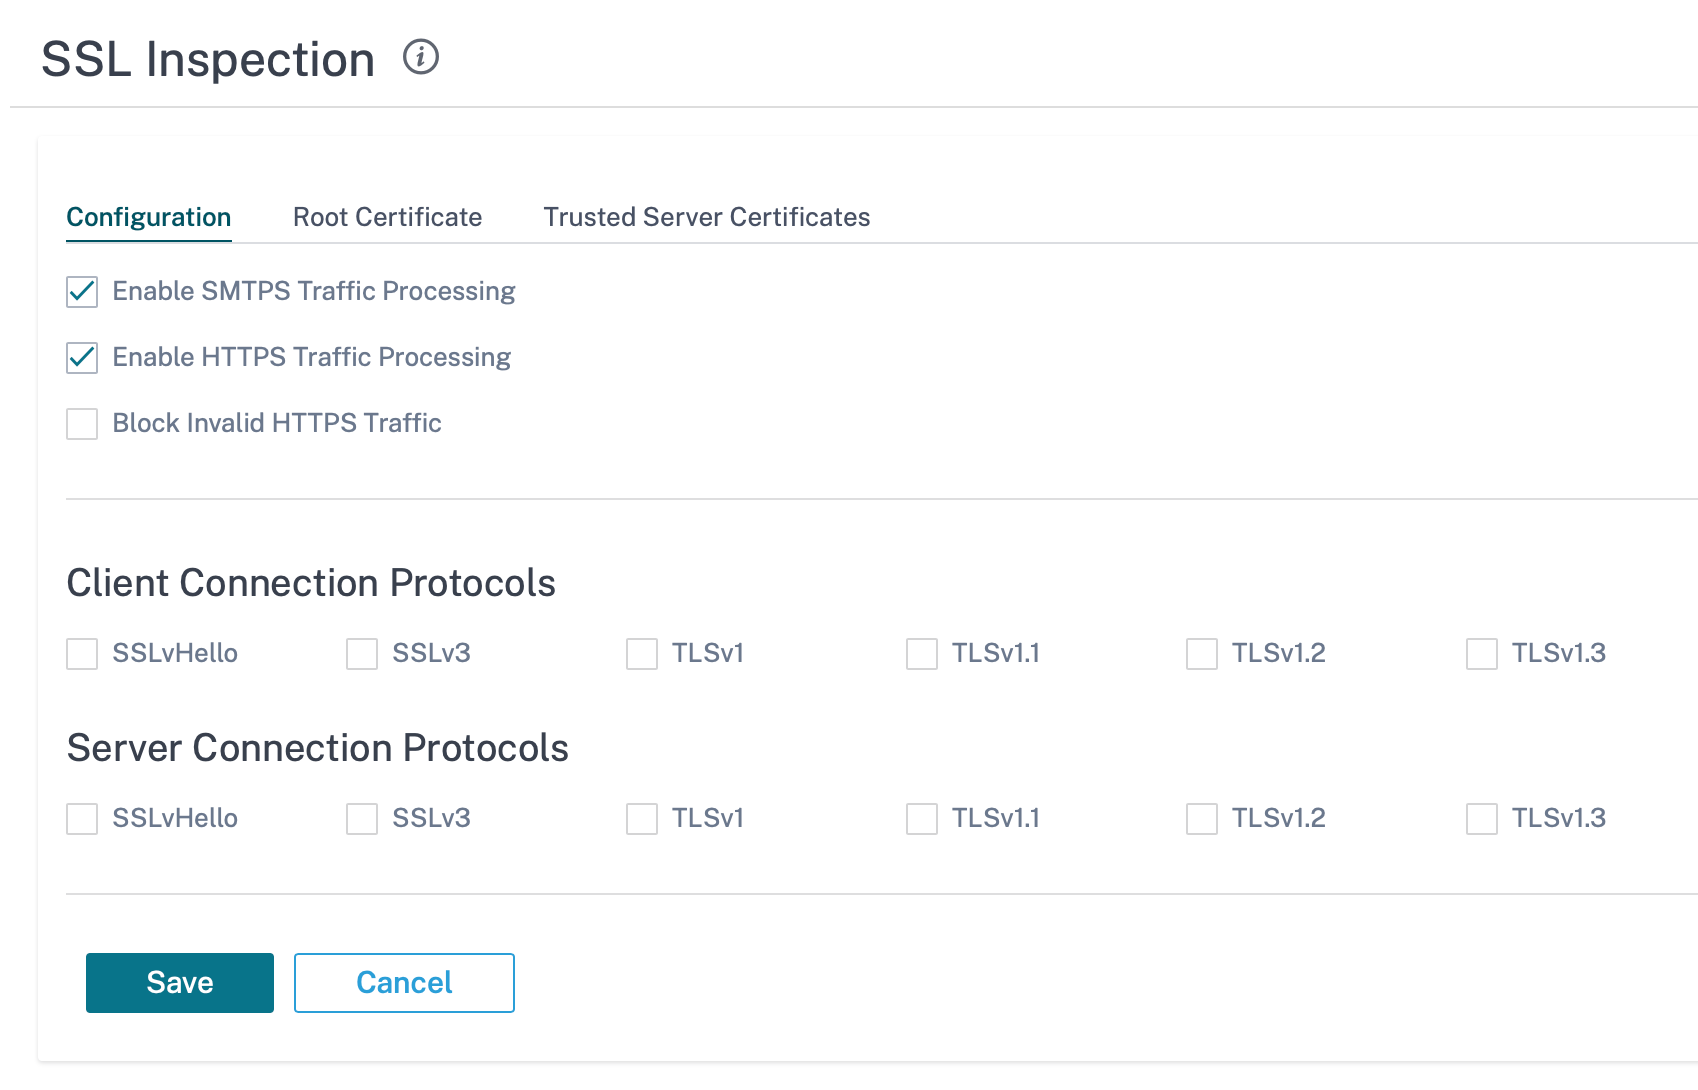
To enable SSL inspection, at the network level, navigate to Configuration > Security > SSL Inspection > Configuration and define the following SSL configuration settings.
- Enable SMTPS Traffic Processing: The secure SMTP traffic undergoes SSL inspection.
- Enable HTTPS Traffic Processing: The HTTPS traffic undergoes SSL inspection.
- Block Invalid HTTPS Traffic: By default, when the Block Invalid HTTPS Traffic check box is cleared, non-HTTPS traffic on port 443 is ignored and allowed to flow unimpeded. When Block Invalid HTTPS Traffic is selected, non-HTTPS traffic is blocked for SSL inspection. Enabling this option may result in otherwise legitimate traffic getting blocked, that is, HTTP traffic on port 443 or HTTPS traffic from sites with an expired certificate.
- Client Connection Protocols: Select the required client protocols. The protocols available are SSLvHello, SSLv3, TLSv1, TSLv1.1, TLSv1.2, and TLSv1.3.
- Server Connection Protocols: Select the required server protocols. The protocols available are SSLvHello, SSLv3, TLSv1, TSLv1.1, TLSv1.2, and TLSv1.3.
NOTE
The versions older than TLSv1.2 are considered vulnerable and must not be enabled, unless backward compatibility is important.
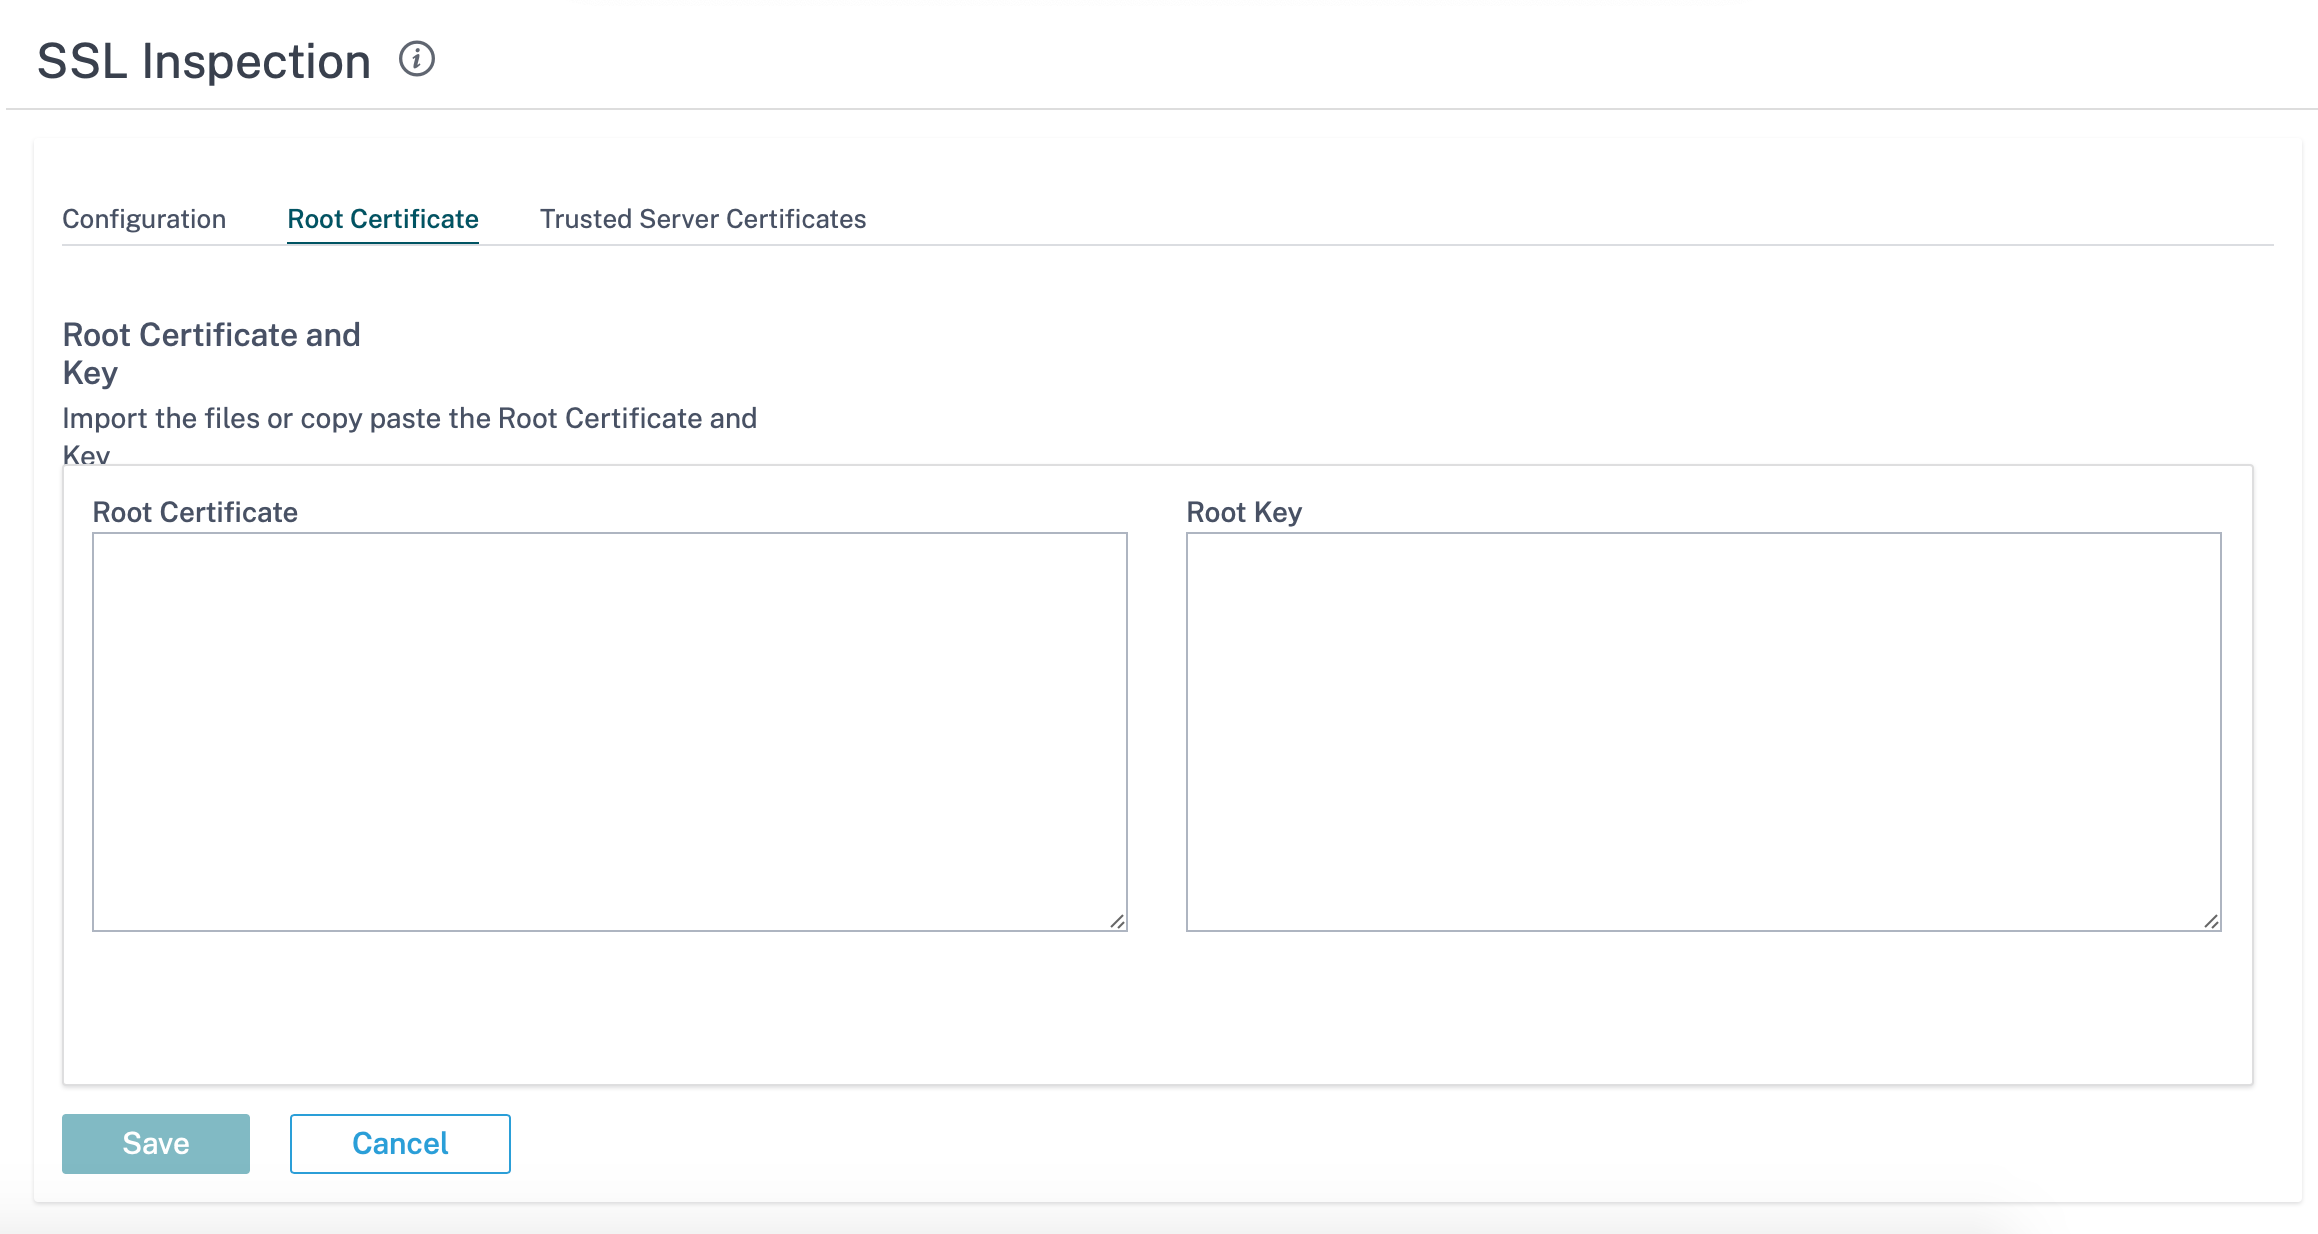
On the Root Certificate tab, copy and paste the root certificate and key of your organization root certificate authority (CA) in PKCS#8 format. The root CA is used to create and sign a forged copy of the certificates of the original sites, so that SSL inspection can be performed. Ιt is implicitly assumed that the root CA certificate is installed on all client workstations and devices that can have their traffic SSL inspected.
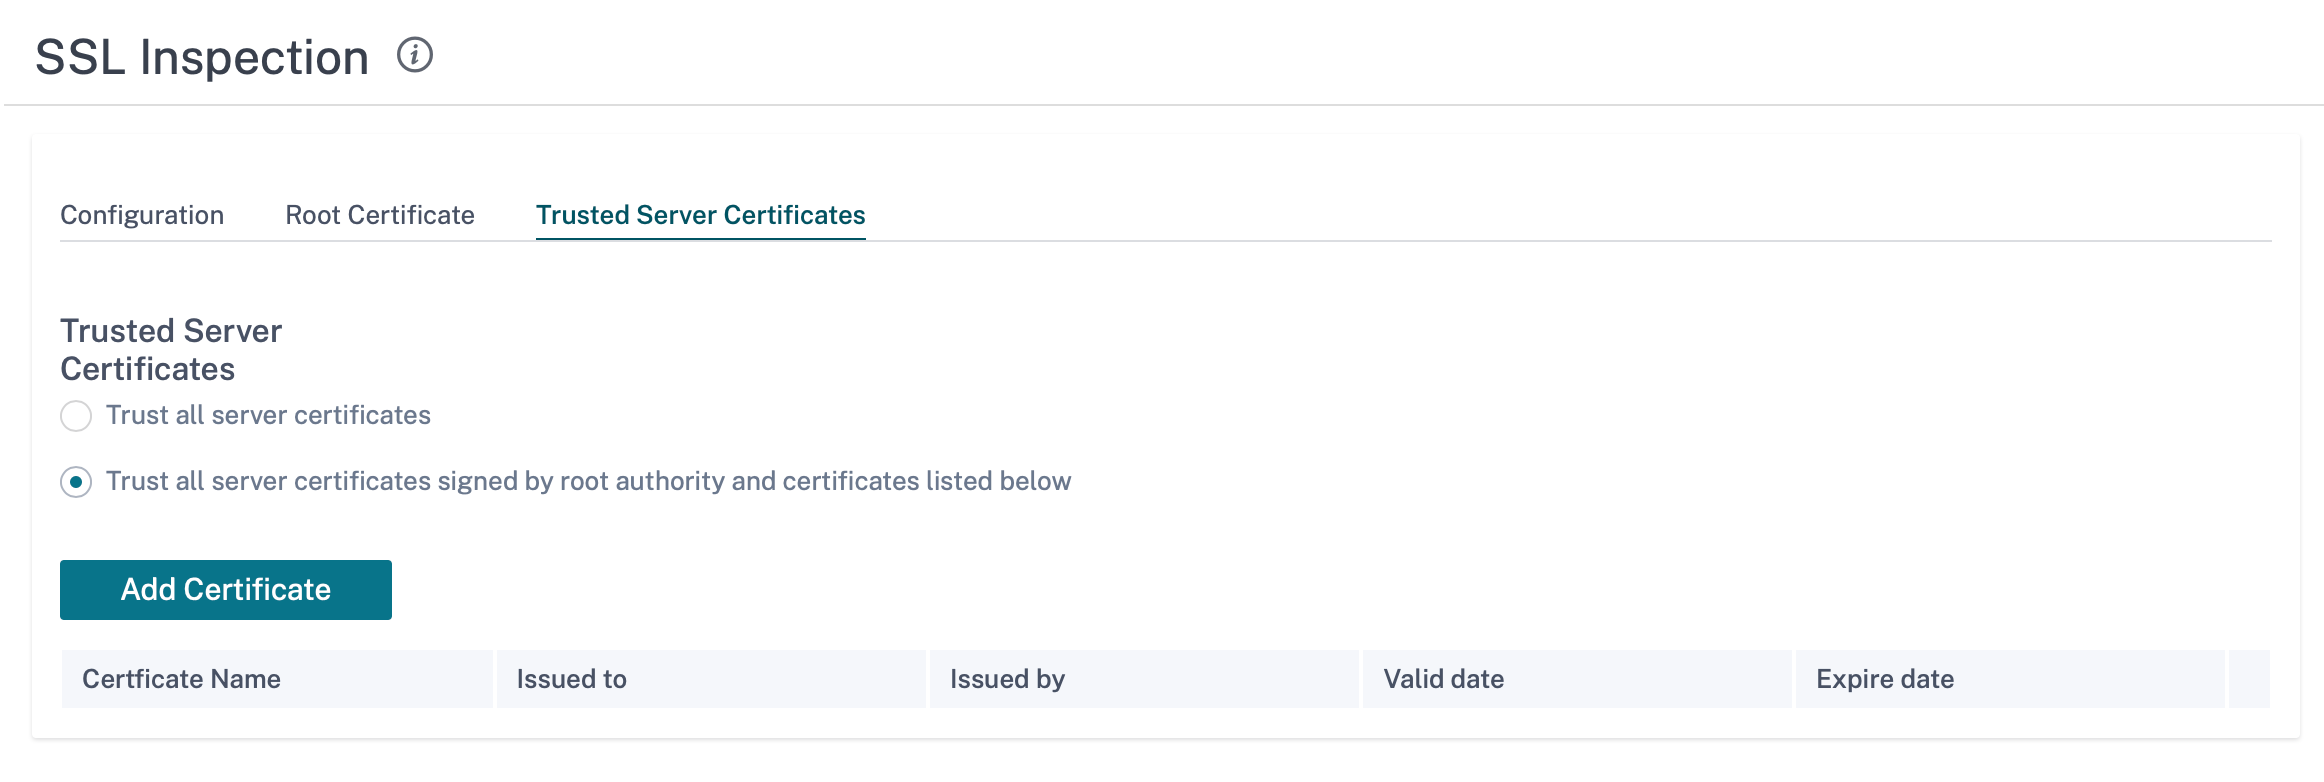
The default, Trust all server certificates signed by root authority and certificates listed below option results in SD-WAN validating all server certificates against the standard list of root CAs and the root CA previously configured. It also discards servers that have an invalid certificate. To override this behavior, upload the SSL self-signed certificate of internal servers on the Trusted Server Certificates tab. Click Add Certificate and provide a name, browse for the certificate, and upload it. Alternately, if you select Trust all server certificates, all the servers are considered as trusted by Citrix SD-WAN, regardless of their certificate validation status.
As part of security profiles, you can create SSL rules and enable them for SSL inspection. For more information on creating SSL rules for a security profile, see Edge security.
Intrusion prevention
Intrusion Prevention System (IPS) detects and prevents malicious activity from entering your network. IPS inspects the network traffic and takes automated actions on all incoming traffic flows. It includes a database of over 34,000 signature detections and heuristic signatures for port scans, allowing you to effectively monitor and block most suspicious requests.
IPS uses signature based detection, which matches the incoming packets against a database of uniquely identifiable exploit and attack patterns. The signature database is automatically updated daily. Since there are thousands of signatures, the signatures are grouped into Category and Class types.
You can create IPS rules and enable only the signature categories or class types that your network requires. Since intrusion prevention is a compute sensitive process, use only the minimal set of signature categories or class types that are relevant for your network.
You can create an IPS profile and enable a combination of IPS rules. These IPS profiles can then be associated globally with the entire network or with only specific sites.
Each rule can be associated with multiple IPS profiles and each IPS profile can be associated with multiple sites. When an IPS profile is enabled, it inspects the network traffic for the sites with which the IPS profile is associated and for the IPS rules enabled within that profile.
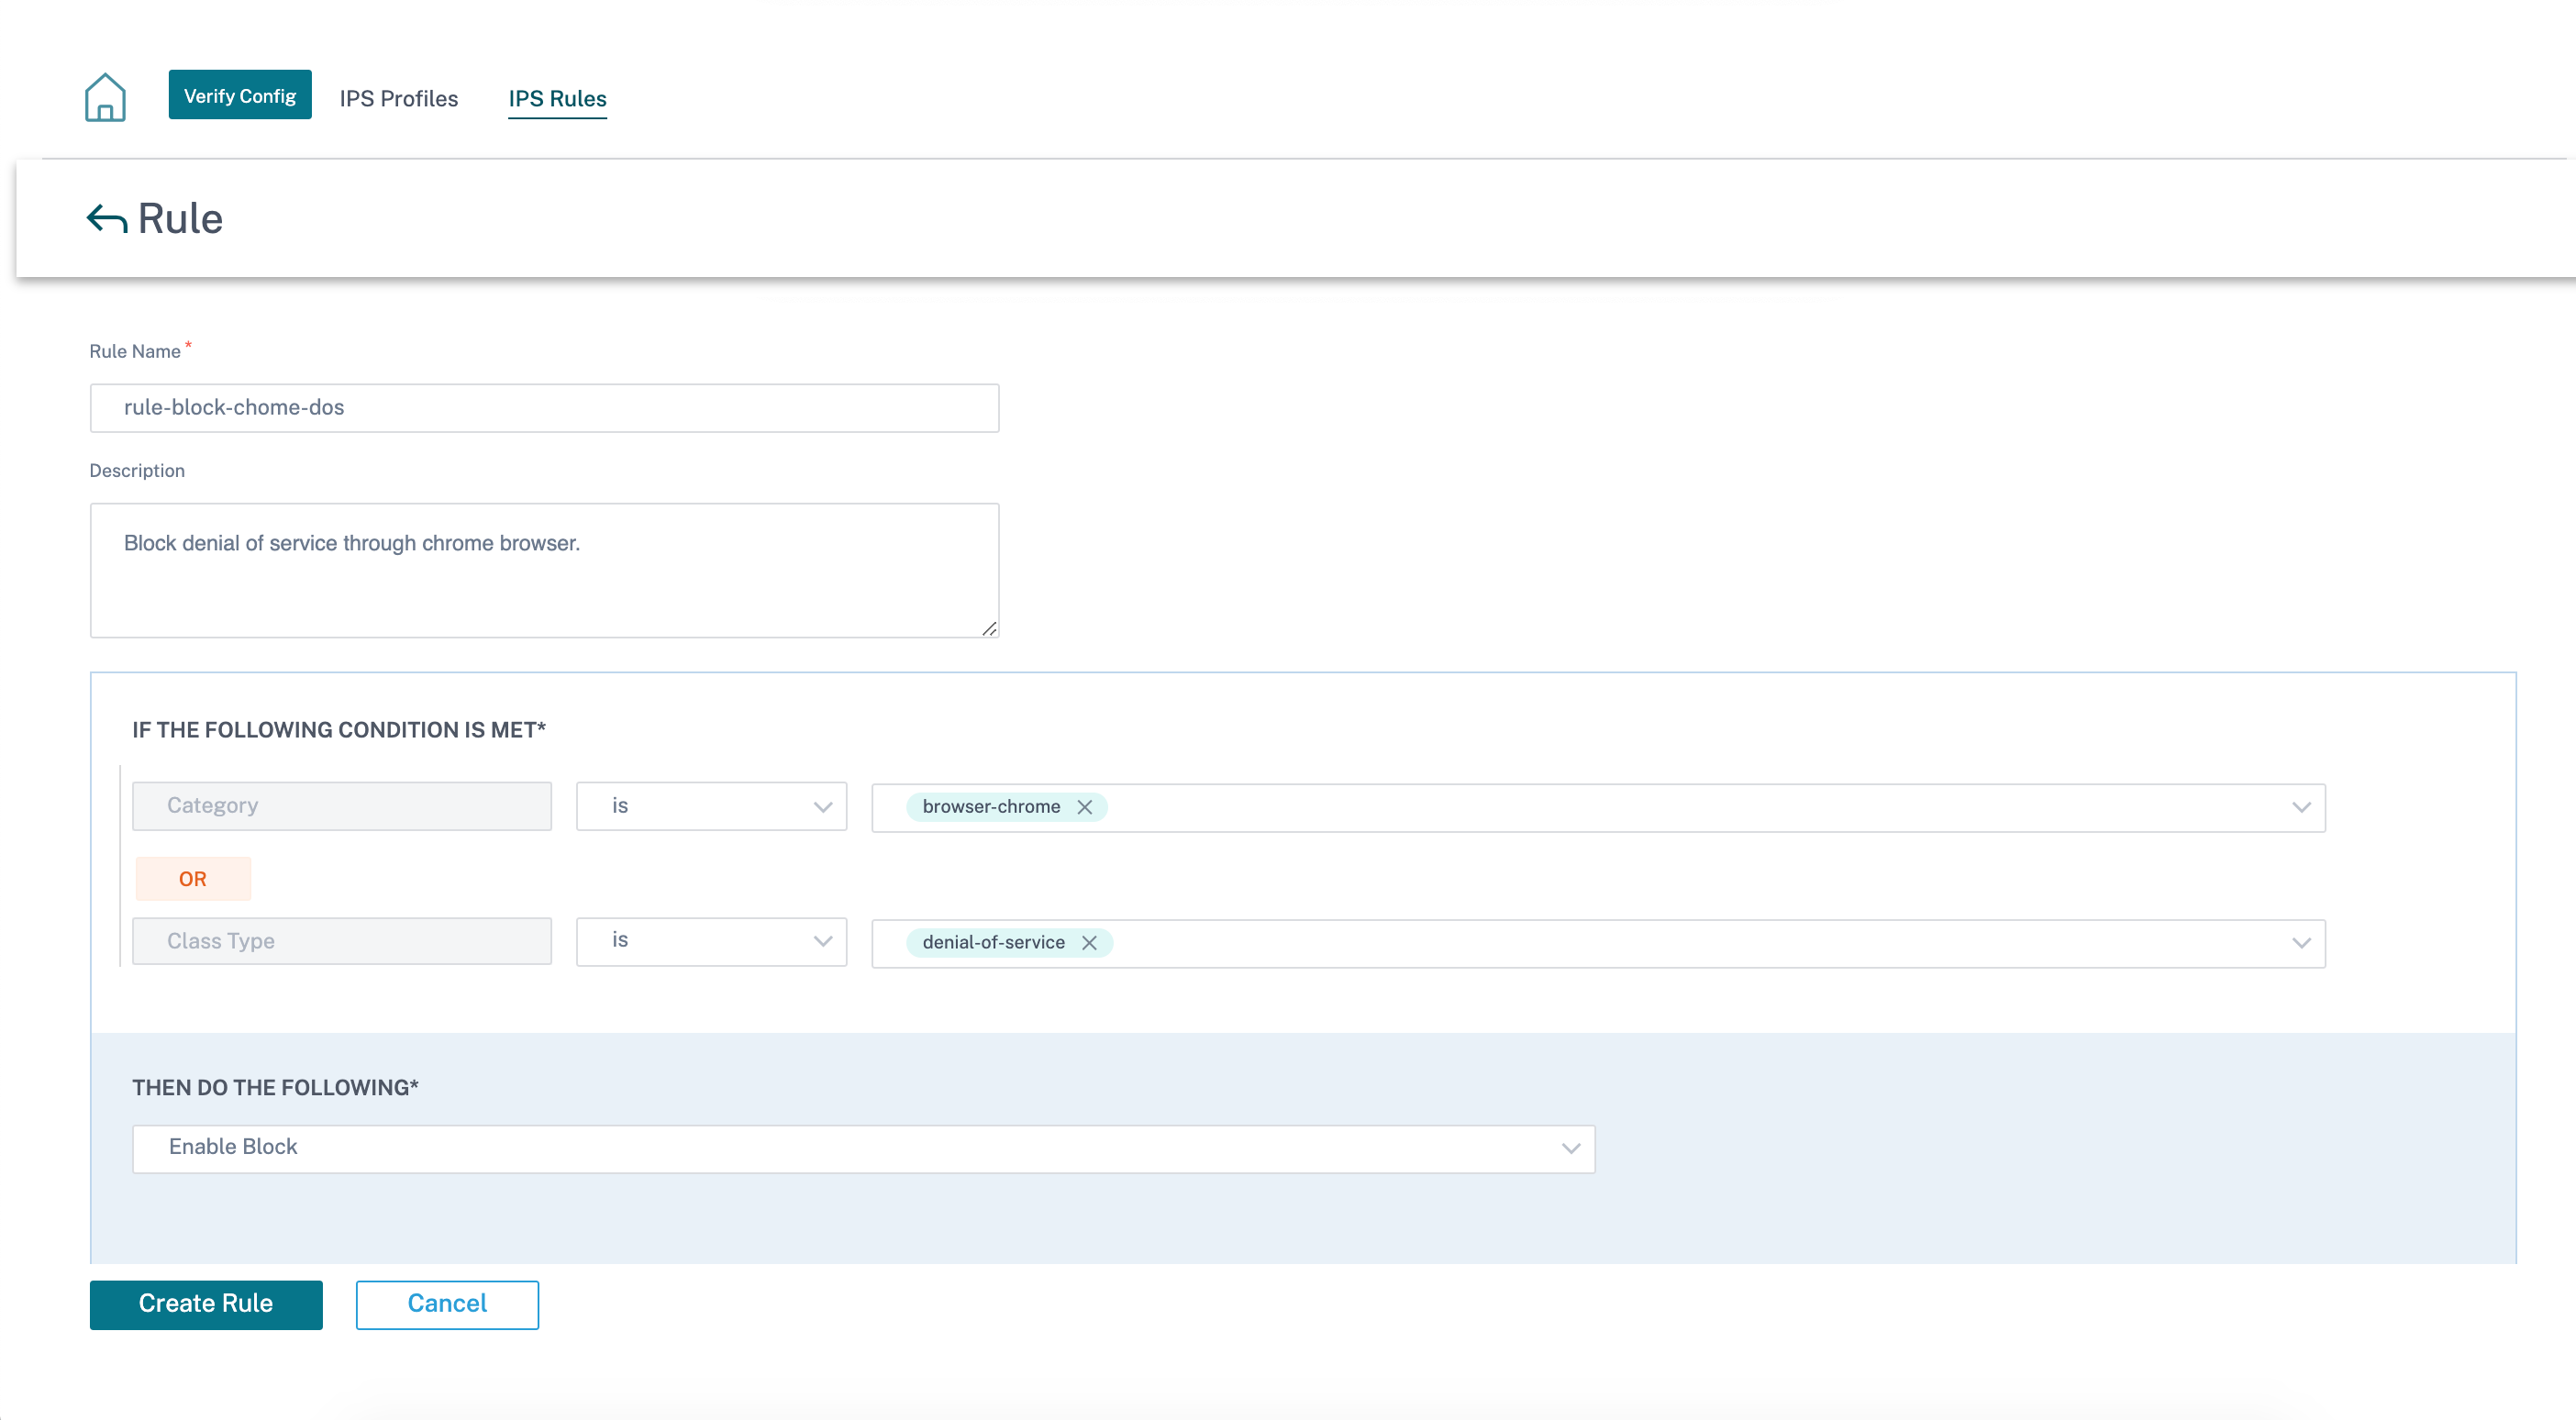
To create IPS rules, at the network level, navigate to Configuration > Security > Intrusion Prevention > IPS Rules and click New Rule.
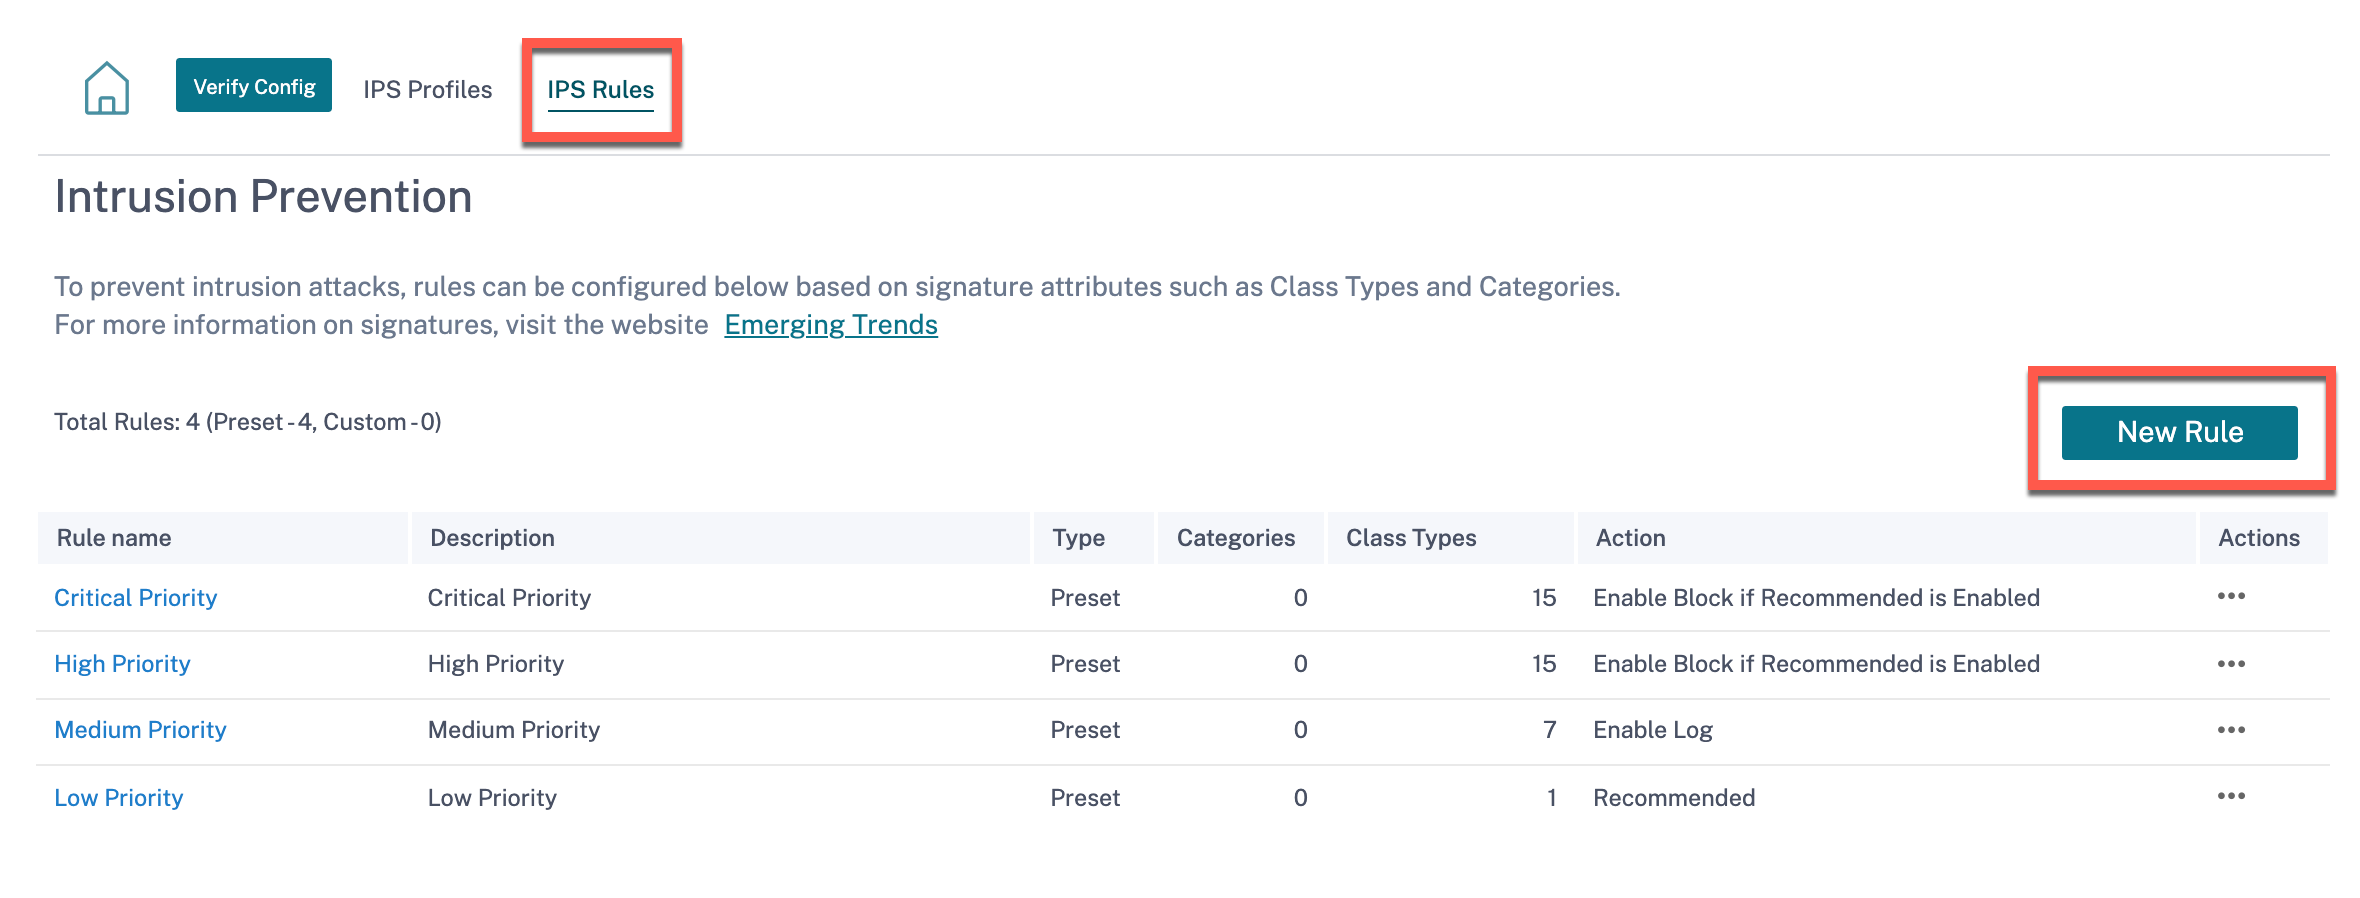
Provide a rule name and description. Select the match category or class type signature attributes, select an action for the rule, and enable it. You can choose from the following rule actions:
| Rule Action | Function |
|---|---|
| Recommended | There are recommended actions defined for each signature. Perform the recommended action for the signatures. |
| Enable Log | Allow and log the traffic matching any of the signatures in the rule. |
| Enable Block if Recommended is Enabled | If the rule action is Recommended and the signature’s recommended action is Enable Log, drop the traffic matching any of the signatures in the rule. |
| Enable Block | Drop the traffic matching any of the signatures in the rule. |
Note
- Since Intrusion Prevention is a compute sensitive process use only the minimal set of signature categories that are relevant to your edge security deployments.
- The SD-WAN firewall drops the traffic on all WAN L4 ports that are not port-forwarded and are not visible in the IPS engine. This provides an extra security layer against trivial DOS and scan attacks.
To create IPS profiles, at the network level, navigate to Configuration > Security > Intrusion Prevention > IPS Profiles and click New Profile.
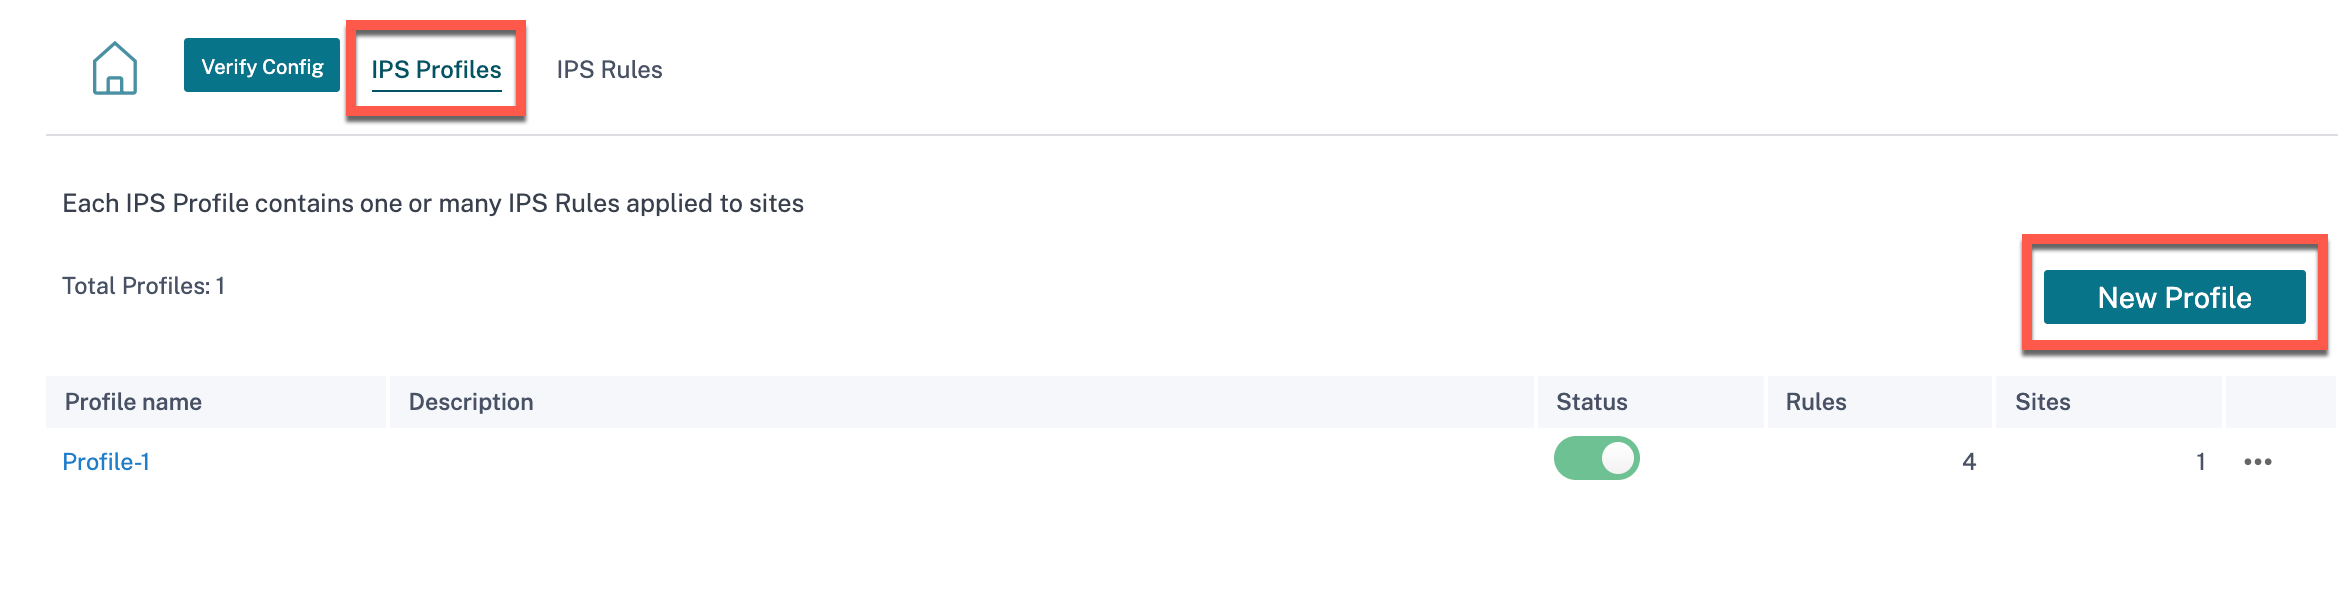
Provide a name and description for the IPS profile. On the IPS Rules tab, enable the required IPS Rules and turn on Enable IPS Profiles.
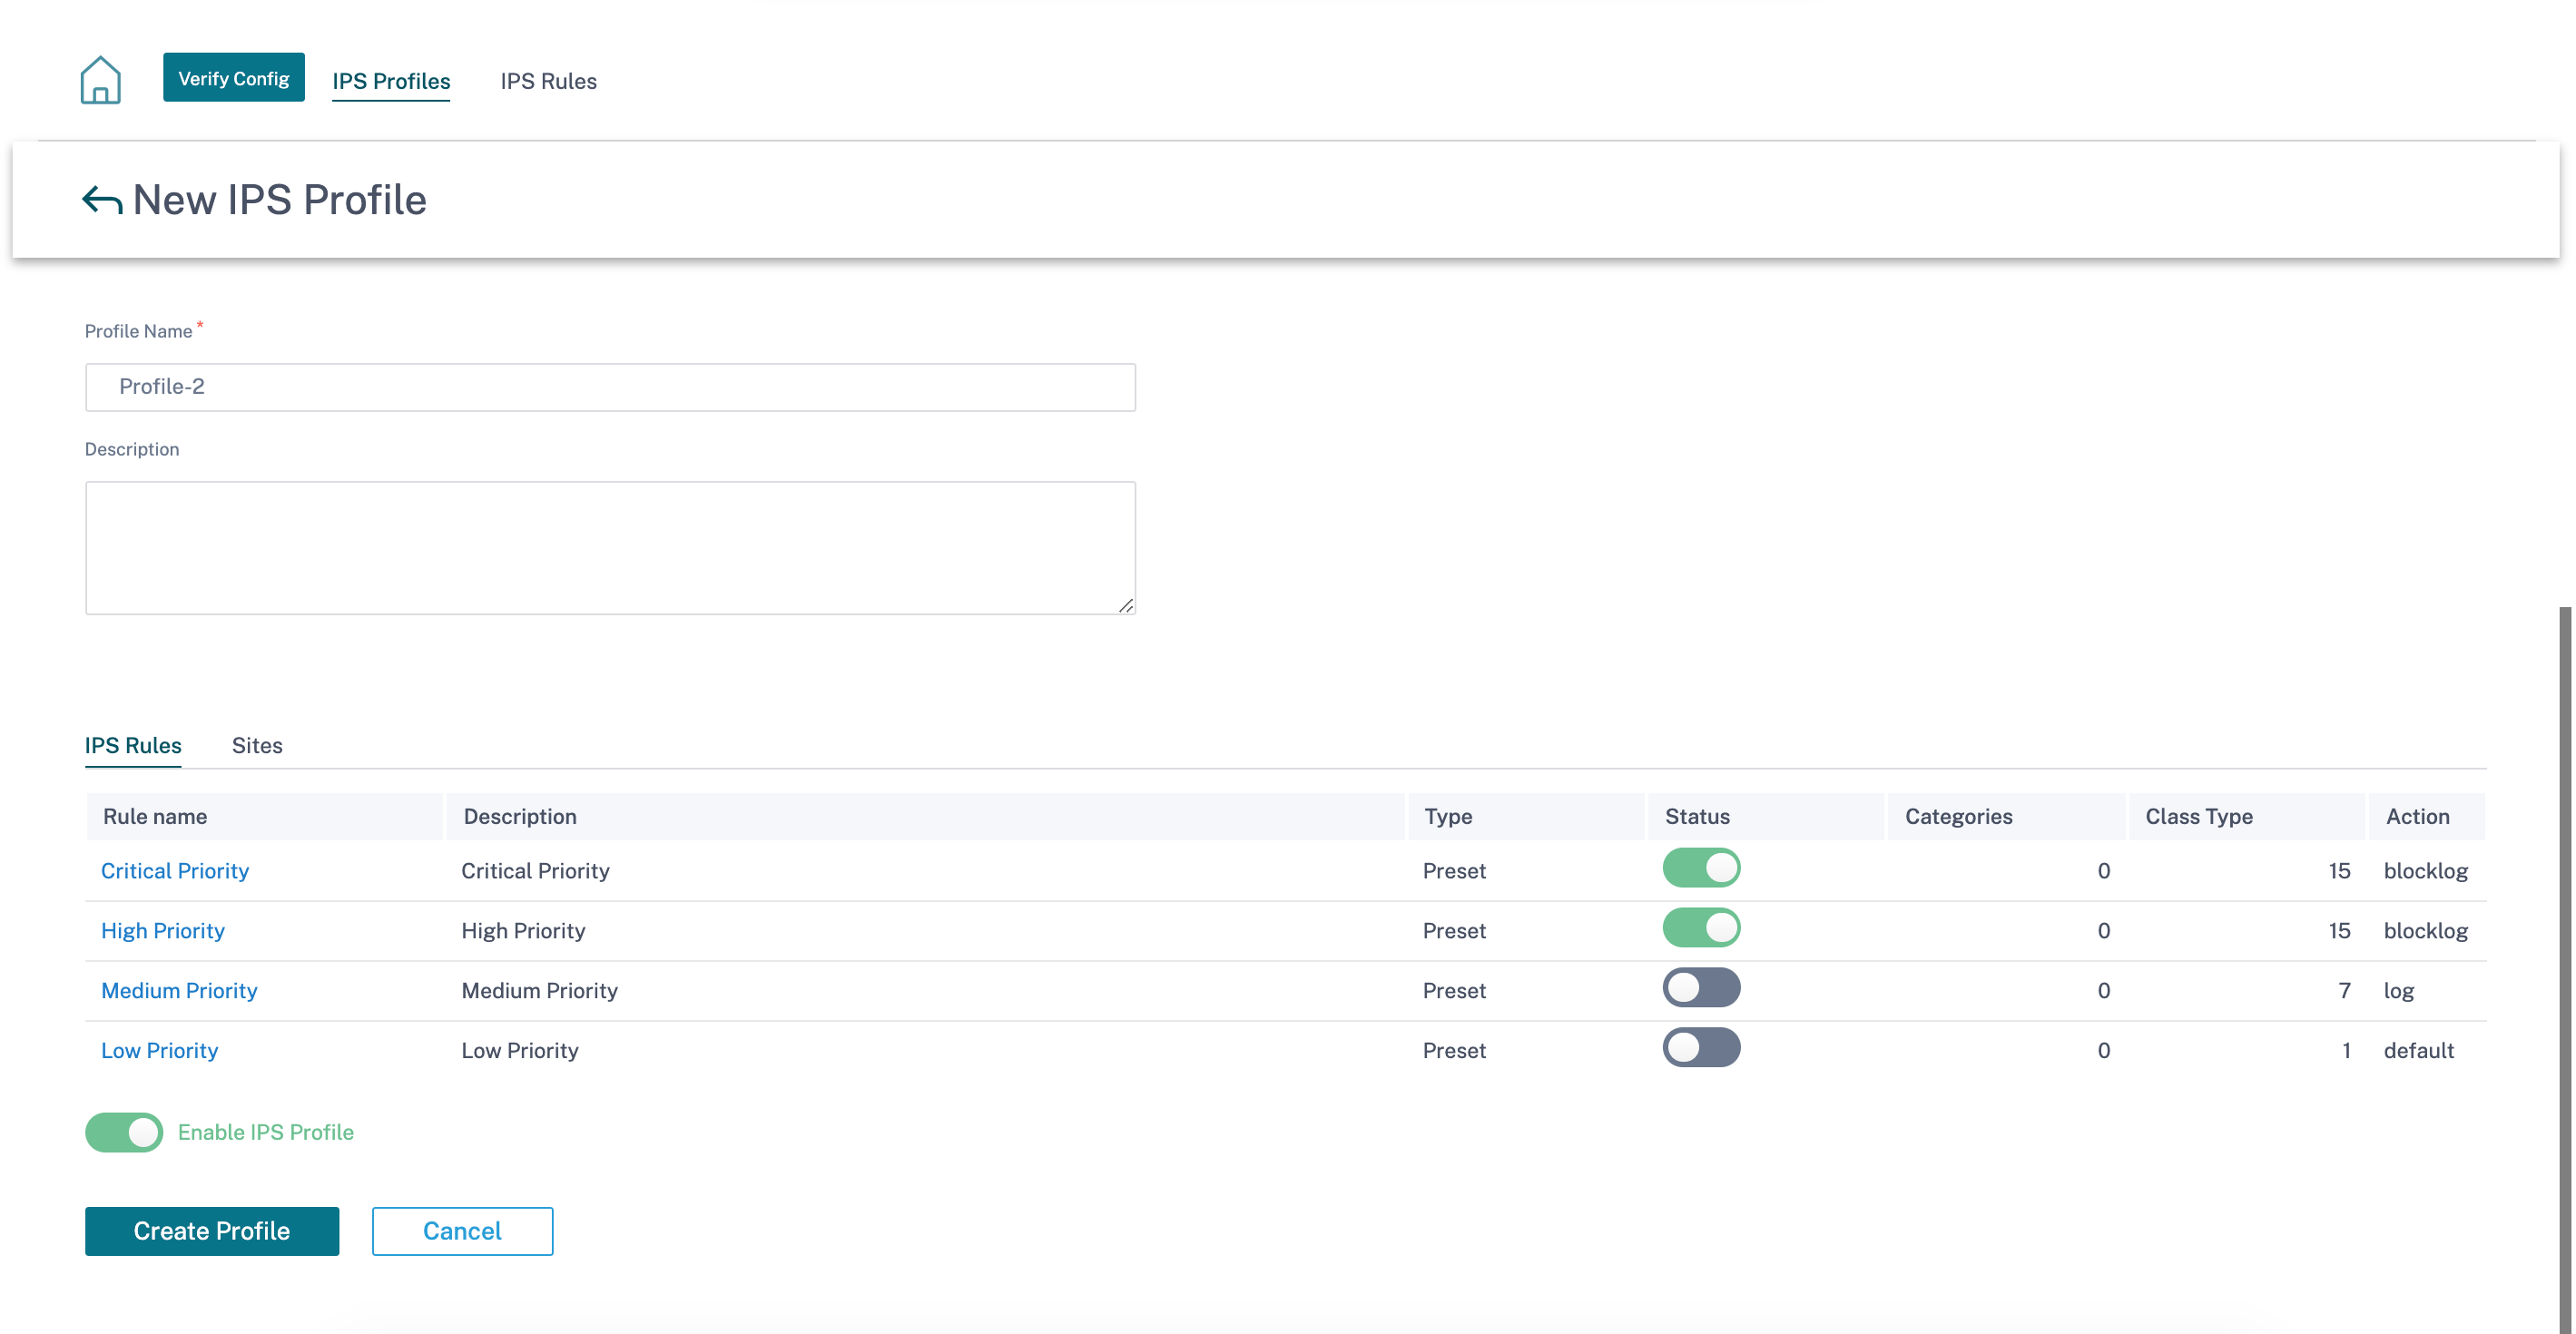
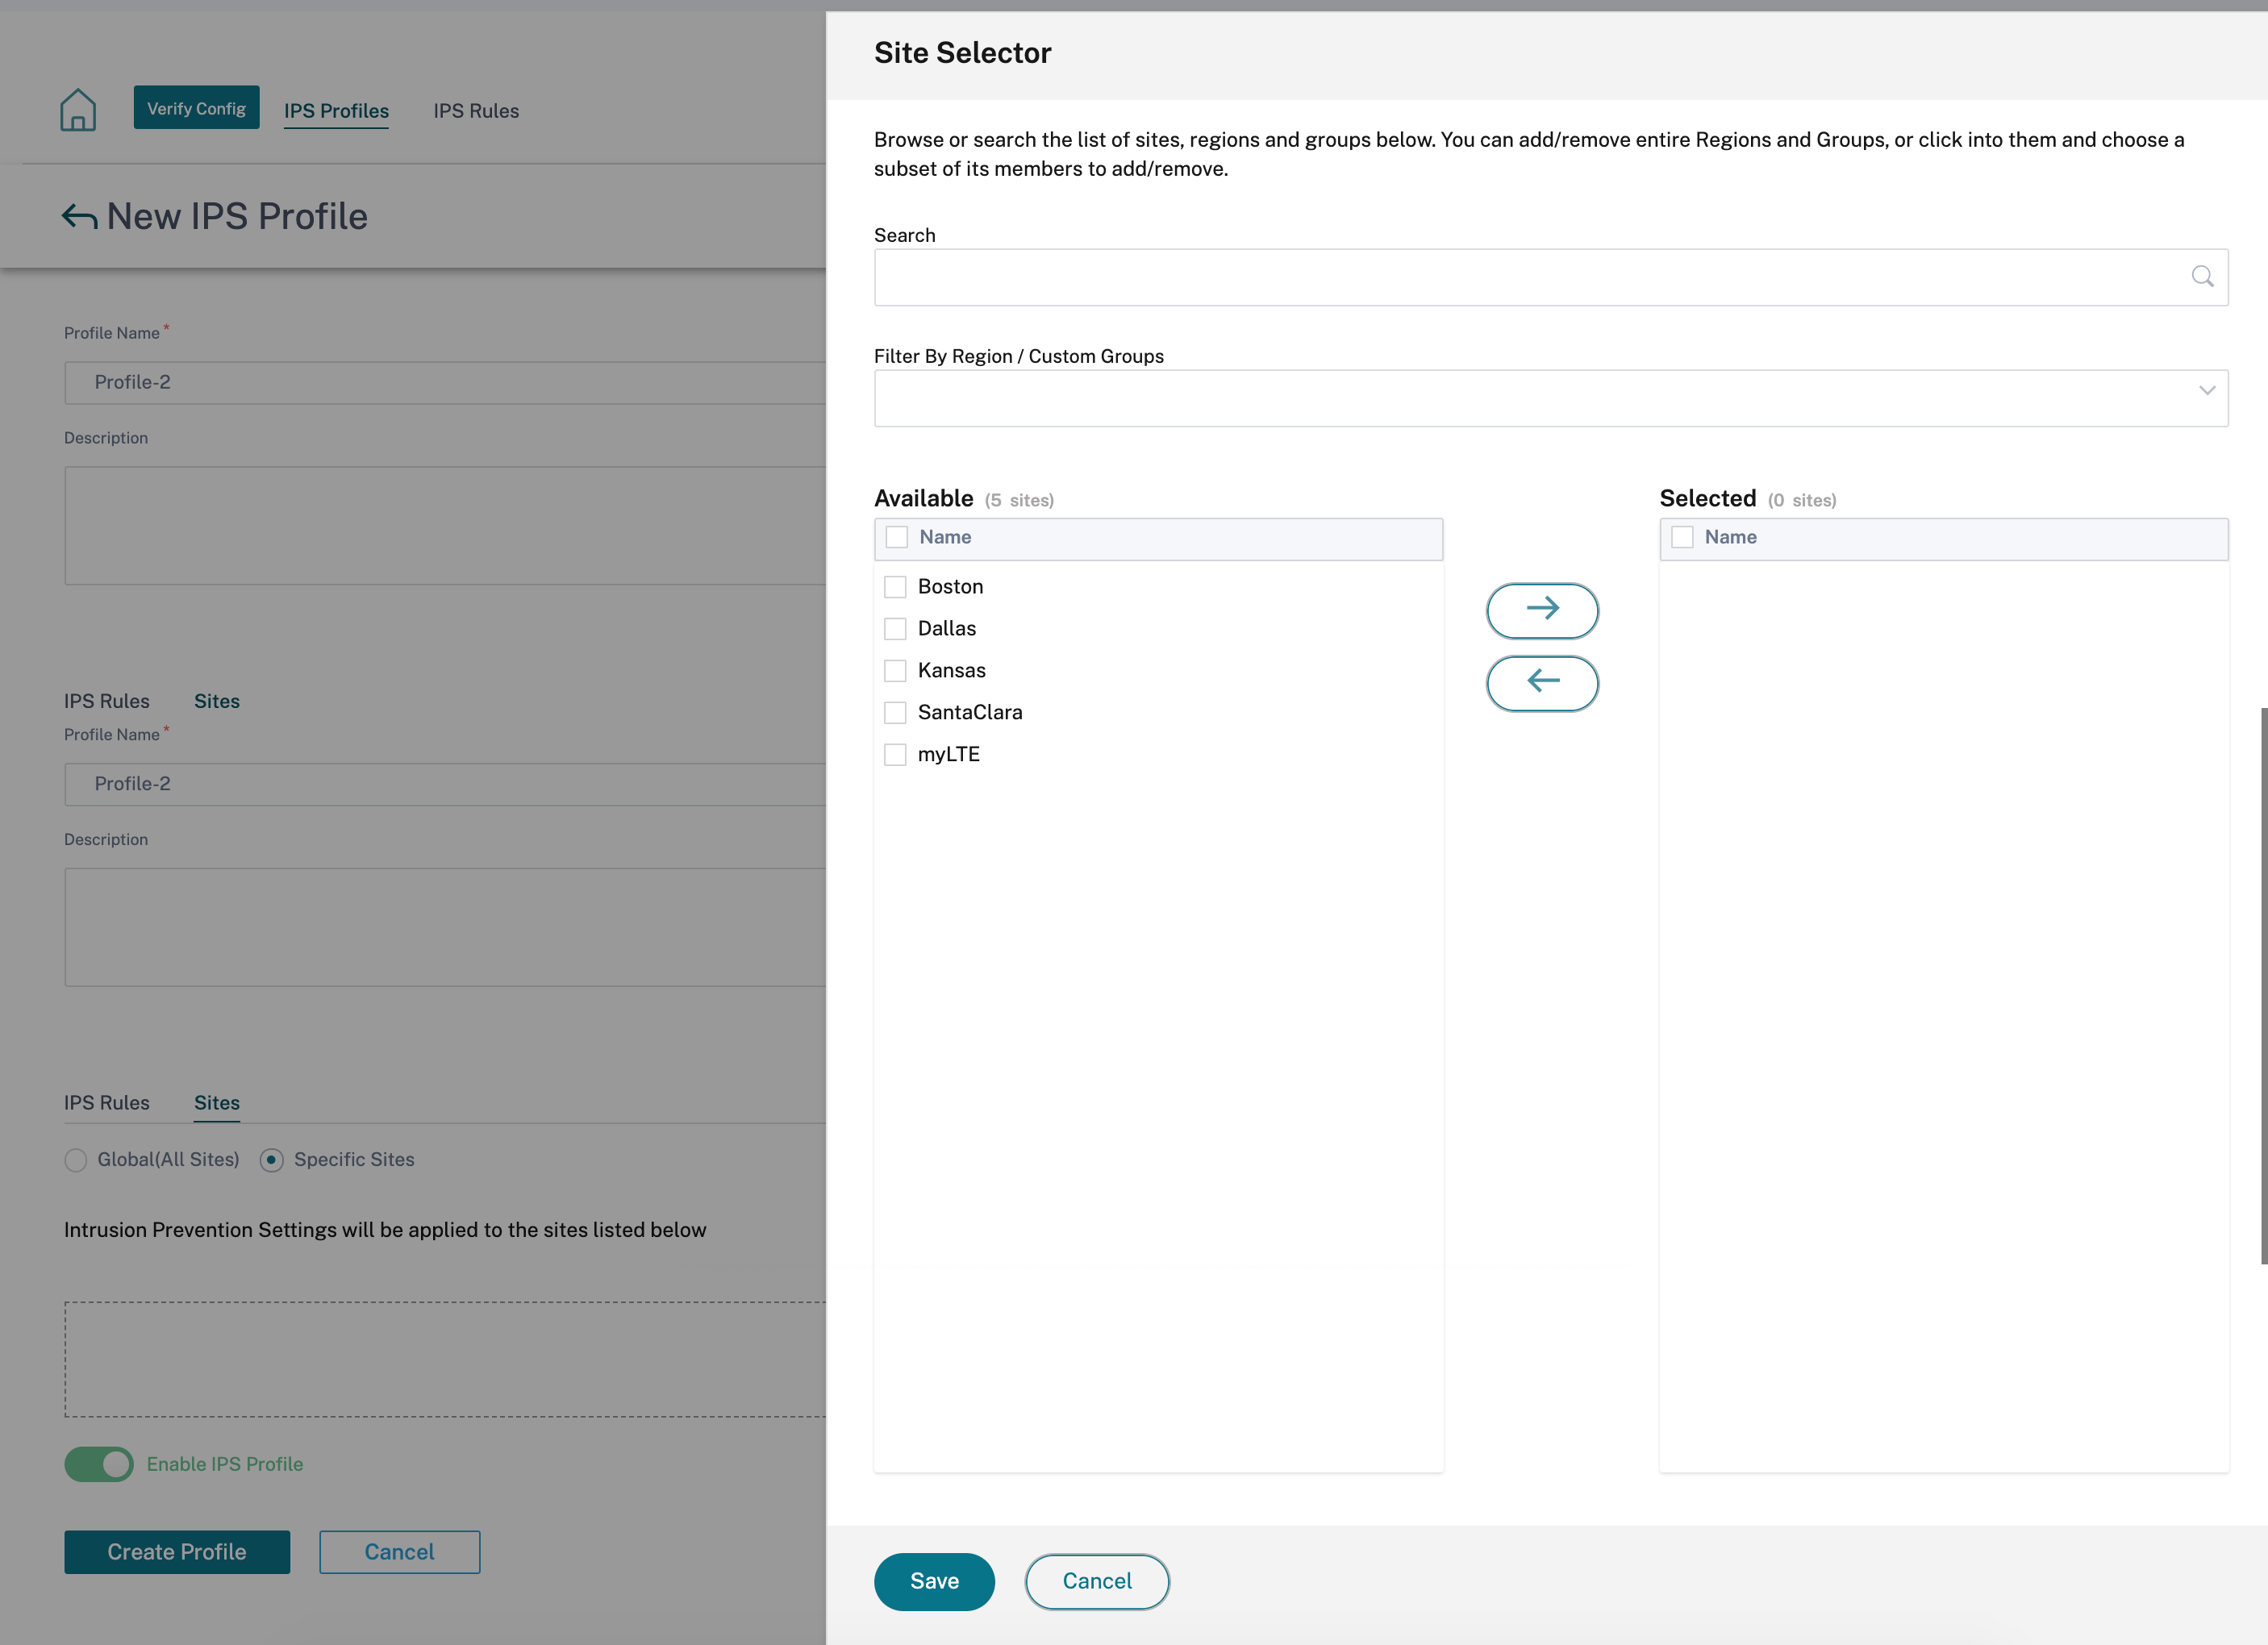
On the Sites tab, click Select Sites. Select the sites and click Save. Click Create Profile.
You can enable or disable these IPS profiles while creating security profiles. The security profiles are used to create firewall rules. For more information, see Security profile – Intrusion Prevention.
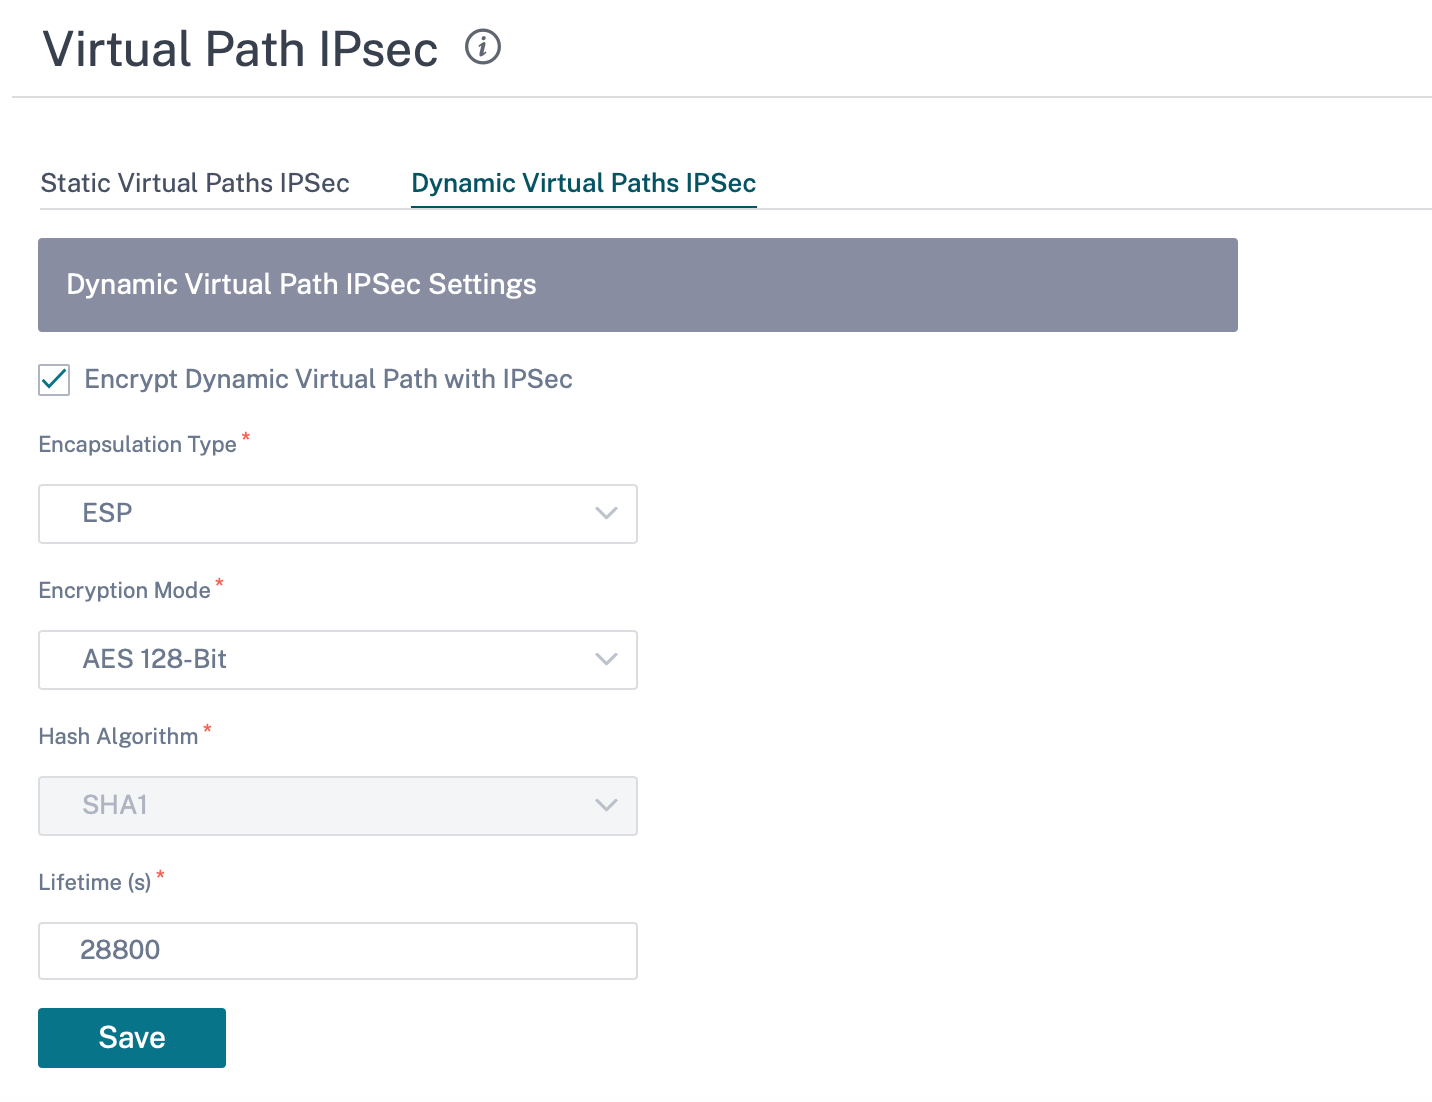
Virtual path IPsec
Virtual Path IPsec defines the IPsec tunnel settings to ensure secure transmission of data over the Static Virtual Paths and Dynamic Virtual Paths. Select the Static Virtual Paths IPSec or Dynamic Virtual Paths IPSec tab to define the IPsec tunnel settings.
-
Encapsulation Type: Choose one of the following security types:
- ESP: Data is encapsulated and encrypted.
- ESP+Auth: Data is encapsulated, encrypted, and validated with an HMAC.
- AH: Data is validated with an HMAC.
- Encryption Mode: The encryption algorithm used when ESP is enabled.
- Hash Algorithm: The hash algorithm used to generate an HMAC.
- Lifetime (s): The preferred duration, in seconds, for an IPsec security association to exist. Enter 0 for unlimited.
For information on configuring IPsec service, see IPsec service.
Click Verify Config to validate any audit error
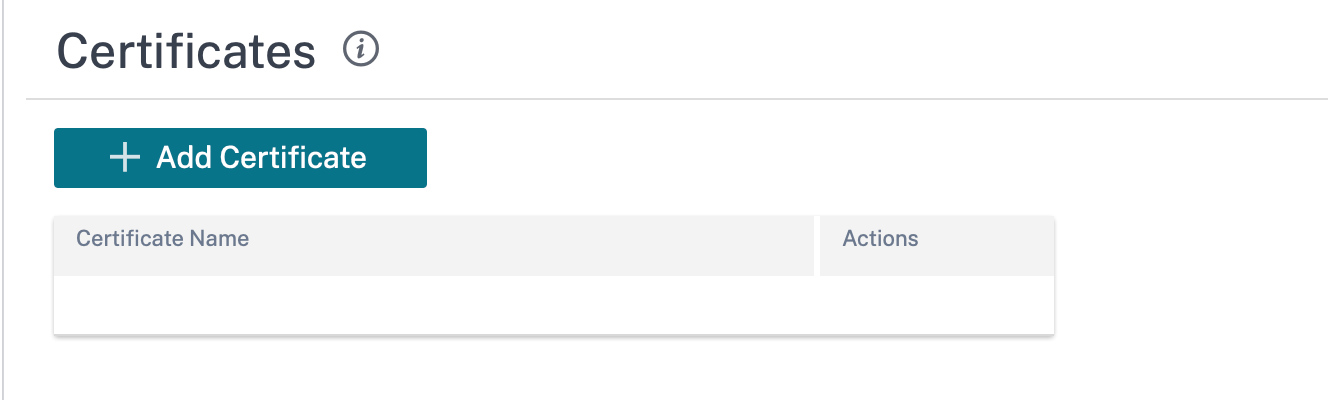
Certificates
There are two types of certificates: Identity and Trusted. Identity Certificates are used to sign or encrypt data to validate the contents of a message and the identity of the sender. Trusted Certificates are used to verify message signatures. Citrix SD-WAN appliances accept both Identity and Trusted Certificates. Administrators can manage certificates in the Configuration Editor.
Click Verify Config to validate any audit error
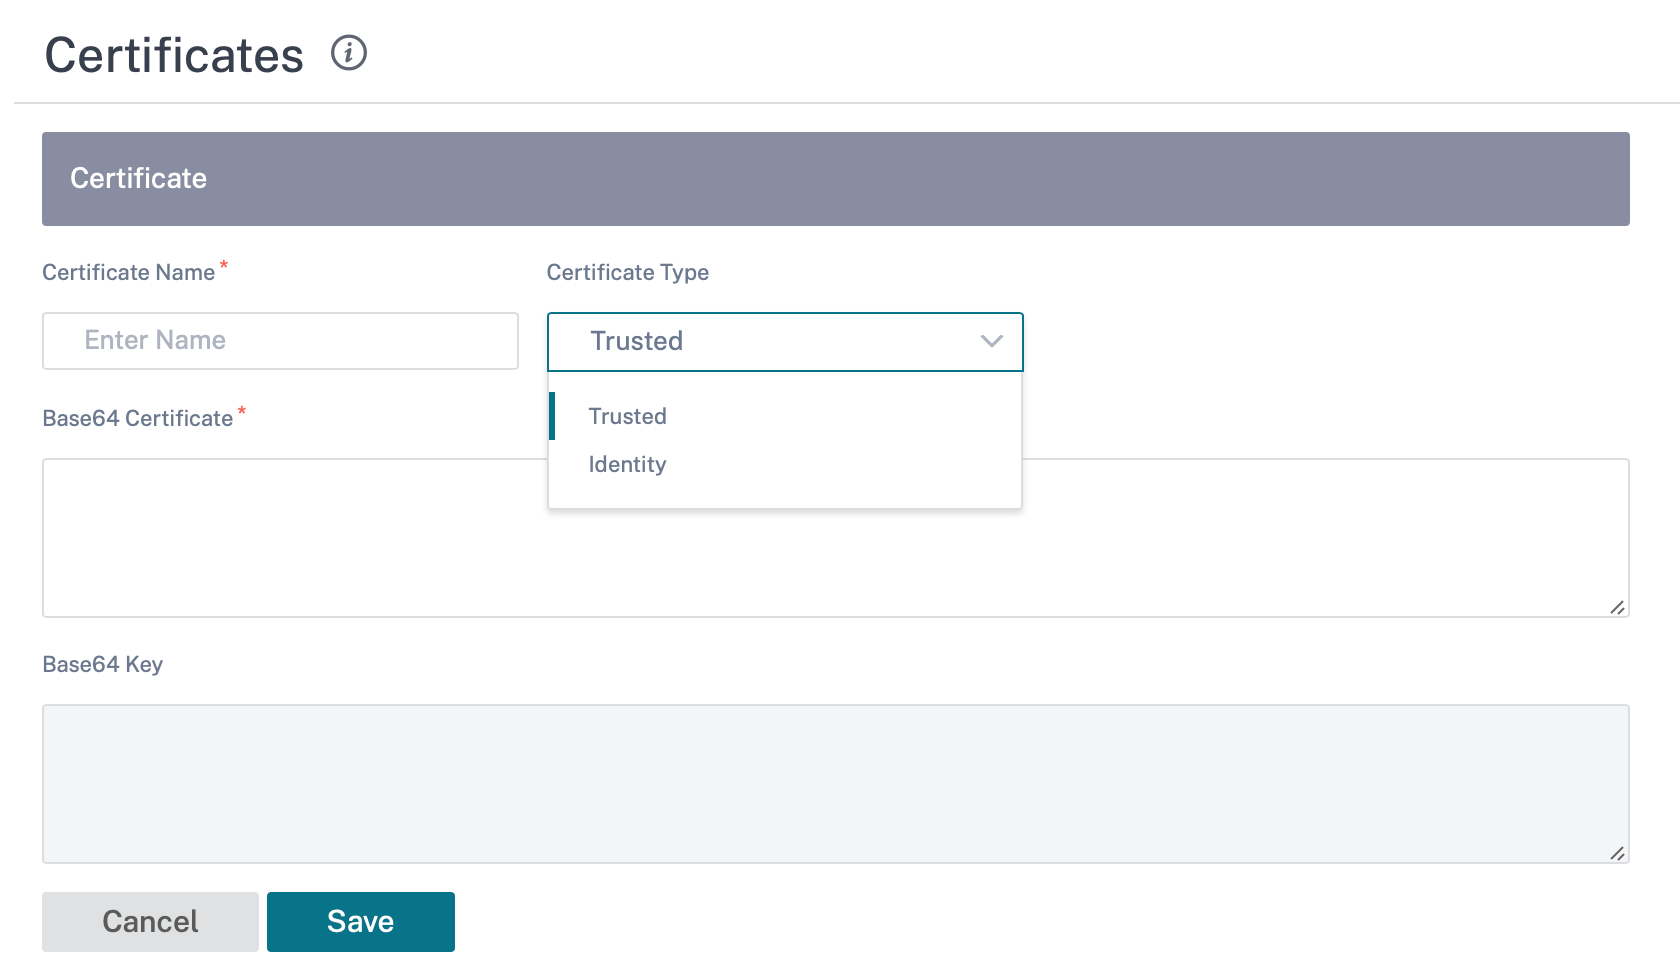
To add a certificate click Add Certificate.
-
Certificate Name: Provide the certificate name.
-
Certificate Type: Select the certificate type from the drop-down list.
-
Identity Certificates: Identity certificates require that the certificate’s private key be available to the signer. Identity Certificates or their certificate chains that are trusted by a peer to validate the contents and identity of the sender. The configured Identity Certificates and their respective Fingerprints are displayed in the Configuration Editor.
-
Trusted Certificates: Trusted Certificates are self-signed, intermediate certificate authority (CA) or root CA certificates used to validate the identity of a peer. No private key is required for a Trusted Certificate. The configured Trusted Certificates and their respective Fingerprints are listed here.
-
Hosted firewalls
Citrix SD-WAN Orchestrator service supports the following hosted firewalls:
- Palo Alto Networks
- Check Point
Palo Alto Networks
Citrix SD-WAN Orchestrator service supports hosting Palo Alto Networks Next-Generation Virtual Machine (VM)-Series Firewall on the SD-WAN 1100 platform. The following are the supported virtual machine models:
- VM 50
- VM 100
The Palo Alto Network virtual machine series firewall runs as a virtual machine on SD-WAN 1100 platform. The firewall virtual machine is integrated in Virtual Wire mode with two data virtual interfaces connected to it. Required traffic can be redirected to the firewall virtual machine by configuring policies on SD-WAN Orchestrator.
Check Point
Citrix SD-WAN Orchestrator service supports hosting Check Point CloudGuard Edge on SD-WAN 1100 platform.
The Check Point CloudGuard Edge runs as a virtual machine on SD-WAN 1100 platform. The firewall virtual machine is integrated in Bridge mode with two data virtual interfaces connected to it. Required traffic can be redirected to the firewall virtual machine by configuring policies on SD-WAN Orchestrator.
Benefits
The following are the primary goals or benefits of Palo Alto Networks integration on the SD-WAN 1100 platform:
-
Branch device consolidation: A single appliance that does both SD-WAN and advanced security
-
Branch office security with on-prem NGFW (Next Generation Firewall) to protect LAN-to-LAN, LAN-to-Internet, and Internet-to-LAN traffic
Perform the following steps for provisioning the firewall virtual machine through SD-WAN Orchestrator:
-
From Citrix SD-WAN Orchestrator service GUI, navigate to Configuration > Security > select Hosted Firewall.
-
To upload the software image, go to VM Images tab. Select the Vendor name as Palo Alto Networks/Check Point from the drop-down list. Click or drop the software image file in the box and click Upload.
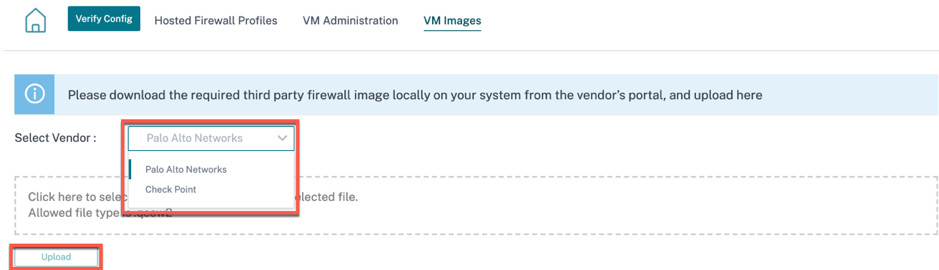
A status bar appears with the ongoing upload process. Do not click Refresh or perform any other action until the image file shows 100% uploaded.
After the image is successfully uploaded, it will be available to use and can be selected when initiating the virtual machine provisioning.
-
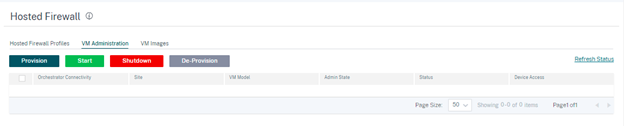
Go to VM Administration tab and click Provision.
-
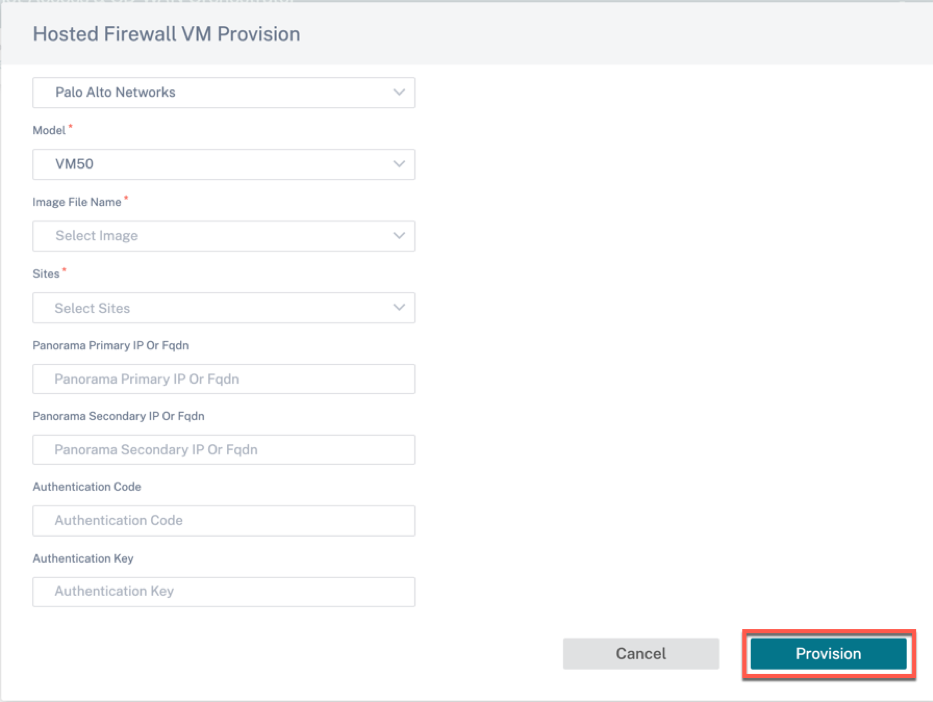
Provide the following details:
-
Vendor: Select the vendor name as Palo Alto Networks/Check Point.
-
Model: Select the virtual machine model number from the drop-down list.
-
Image File Name: Select the software image from the uploaded files to provision Hosted Firewall virtual machine.
Note
The software image is provided by the vendors (Palo Alto Networks/Check Point).
-
Sites: Select sites from the drop-down list where Hosted Firewall virtual machine has to be provisioned.
-
Panorama Primary IP or FQDN: Enter the management server primary IP address or fully qualified domain name (Optional).
-
Panorama Secondary IP or FQDN: Enter the management server secondary IP address or fully qualified domain name (Optional).
-
Authentication Code: Enter the virtual authentication code to be used for licensing.
-
Authentication Key: Enter the virtual authentication key to be used in the management server.
Virtual Machine Authentication Key is needed for automatic registration of the Palo Alto Networks virtual machine to the Panorama.
- Click Provision.
-
Once the virtual machine is provisioned on the SD-WAN 1100 platform, you can Start, Shutdown, or completely De-Provision that hosted firewall virtual machine.
Traffic redirection
-
For traffic redirection, go to Hosted Firewall Profiles tab and click Add Profile.
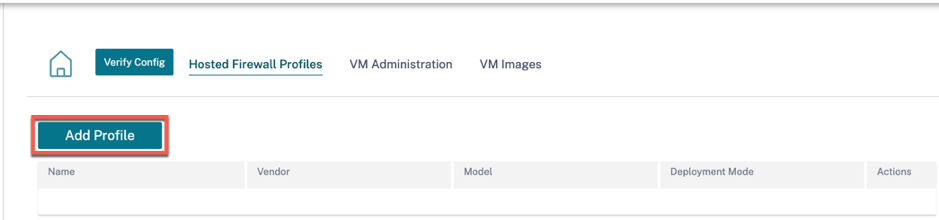
-
Provide the required information to add the Hosted Firewall template and click Add.
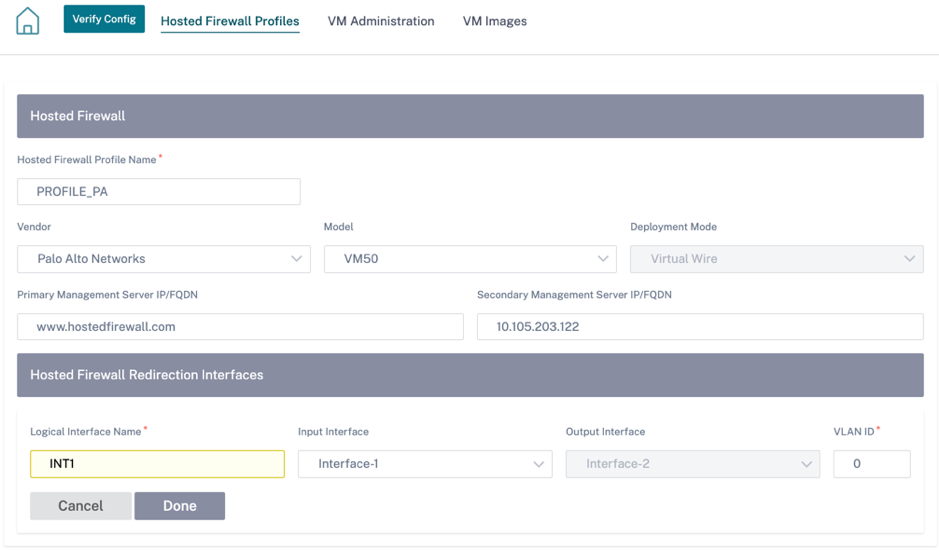
The Hosted Firewall Template allows you to configure the traffic redirection to the Firewall virtual machine hosted on SD-WAN Orchestrator. The following inputs are required to configure the template:
-
Hosted Firewall Profile Name: Name of the hosted firewall template.
-
Vendor: Name of the firewall vendor.
-
Model: Virtual Machine model of the hosted firewall. You can select the virtual machine model number as VM 50/VM 100.
-
Deployment Mode: The Deployment Mode field is auto populated and grayed out. For the Palo Alto Networks vendor, the deployment mode is Virtual Wire and for the Check Point vendor, the deployment mode is Bridge.
-
Primary Management Server IP/FQDN: Primary management server IP/ fully qualified domain name of Panorama.
-
Secondary Management Server IP/FQDN: Secondary management server IP/ fully qualified domain name of Panorama.
-
Hosted Firewall Redirection Interfaces: These are logical interfaces used for traffic redirection between SD-WAN Orchestrator and hosted firewall.
Interface-1, Interface-2 refers to first two interfaces on the hosted firewall. If VLANs are used for traffic redirection then, same VLANs must be configured on the hosted firewall. VLANs configured for traffic redirection are internal to the SD-WAN Orchestrator and hosted firewall.
Note
Redirection input interface has to be selected from connection initiator direction. The redirection interface is automatically chosen for the response traffic. For Example, if outbound internet traffic is redirected to hosted firewall on Interface-1 then, response traffic is automatically redirected to hosted firewall on Interface-2. There is no need of Interface-2, if there is no internet inbound traffic.
Only two physical interfaces are assigned to host the Palo Alto Networks firewall and two data interfaces are assigned to Check Point virtual machine.
If traffic from multiple zones must be redirected to the hosted firewall then, multiple sub interfaces can be created using internal VLANs and associated to different firewall zones on the hosted firewall.
Note
SD-WAN firewall policies are auto created to Allow the traffic to/from hosted firewall management servers. This avoids redirection of the management traffic that is originated from (or) destined to hosted firewall.
Traffic redirection to firewall virtual machine can be done using SD-WAN firewall policies.
-
-
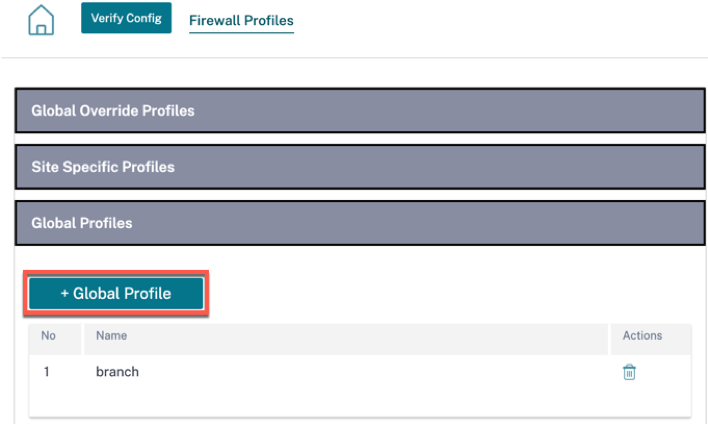
Navigate to Configuration > Security > Firewall Profiles > go to Global Profiles section. Click + Global Profile.
-
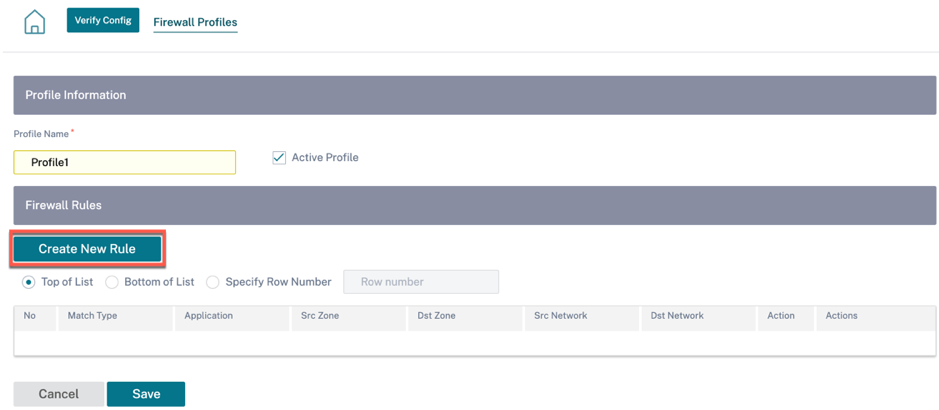
Provide a profile name and select the Active Profile check box. Click Create New Rule.
-
Change the Policy Type to Hosted Firewall. The Action field is auto filled to Redirect to Hosted Firewall. Select the Hosted Firewall Profile and the Hosted Firewall Redirection Interface from the drop-down list.
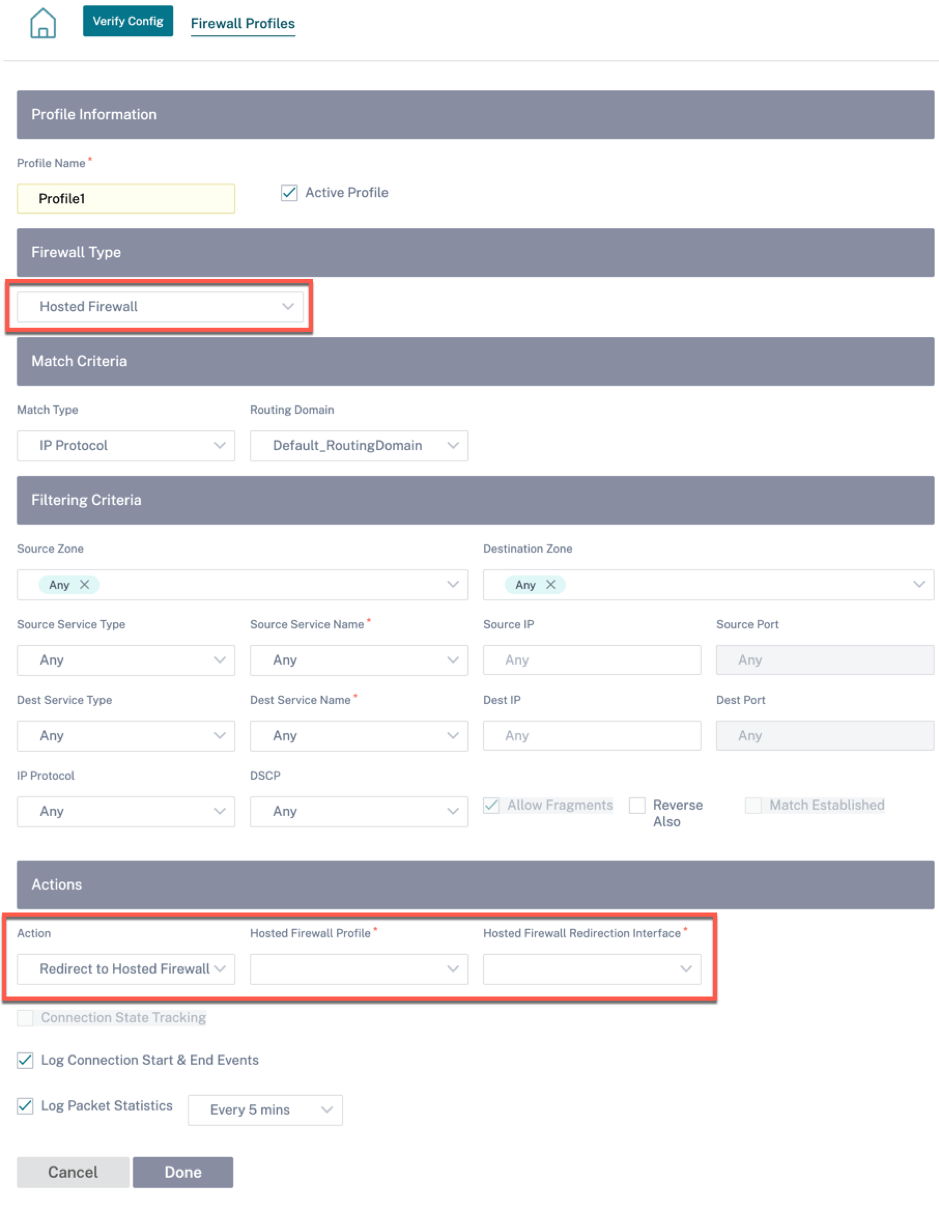
-
Fill the other match criteria as required and click Done.