-
-
Citrix SD-WAN 1000, 2000, and 2100 SE
-
Citrix SD-WAN 1000 SE
-
-
-
-
-
XenServer 6.5 Upgrade for SD-WAN Standard Edition Appliances
-
SD-WAN Standard Edition Virtual Appliance (VPX) in Hypervisor on HyperV 2012 R2 and 2016
-
Install SD-WAN SE Virtual Appliances (VPX) in Linux-KVM Platform
-
Deploy Citrix SD-WAN Standard Edition Instance on Azure - Release Version 10.2 and above
-
SD-WAN Standard Edition Virtual Appliance (VPX) High Availability support for AWS
-
Deploy a Citrix SD-WAN VPX instance on a Citrix® ADC SDX appliance
-
This content has been machine translated dynamically.
Dieser Inhalt ist eine maschinelle Übersetzung, die dynamisch erstellt wurde. (Haftungsausschluss)
Cet article a été traduit automatiquement de manière dynamique. (Clause de non responsabilité)
Este artículo lo ha traducido una máquina de forma dinámica. (Aviso legal)
此内容已经过机器动态翻译。 放弃
このコンテンツは動的に機械翻訳されています。免責事項
이 콘텐츠는 동적으로 기계 번역되었습니다. 책임 부인
Este texto foi traduzido automaticamente. (Aviso legal)
Questo contenuto è stato tradotto dinamicamente con traduzione automatica.(Esclusione di responsabilità))
This article has been machine translated.
Dieser Artikel wurde maschinell übersetzt. (Haftungsausschluss)
Ce article a été traduit automatiquement. (Clause de non responsabilité)
Este artículo ha sido traducido automáticamente. (Aviso legal)
この記事は機械翻訳されています.免責事項
이 기사는 기계 번역되었습니다.책임 부인
Este artigo foi traduzido automaticamente.(Aviso legal)
这篇文章已经过机器翻译.放弃
Questo articolo è stato tradotto automaticamente.(Esclusione di responsabilità))
Translation failed!
Citrix SD-WAN™ 1000 SE
The SD-WAN 1000-SE with platform has a quad-core processor and 32 GB of memory. This platform has a bandwidth of up to 100 Mbps.
The following figure shows the front panel of an SD-WAN 1000-SE appliance.
Figure 1. Citrix SD-WAN 1000-SE front panel

The front panel of the SD-WAN 1000-SE appliance has a power button and five LEDs. The power button is used to switch the appliance on or off. The reset button restarts the appliance.
The LEDs provide critical information related to different parts of the appliance.
- Power Fail – Indicates the power supply unit has failed.
- Information LED – Indicates the following:
| Status | Description |
|---|---|
| Continuously ON and red | The appliance is overheated. (This might be a result of cable congestion.) |
| Blinking red (1Hz) | Fan failure, check for an inoperative fan. |
| Blinking red (0.25Hz) | Power failure, check for the non-operational power supply. |
| Solid blue | Local UID has been activated. Use this function to locate the server in a rack mount environment. |
| Blinking blue (300 m/s) | Remote UID is on. Use this function to identify the server from a remote location. |
- NIC1 and NIC2 – Indicate network activity on the LAN1 and WAN1 ports.
- HDD – Indicates the status of the hard disk drive.
- Power – Indicates that the power supply units are receiving power and operating normally.
The following figure shows the back panel of an SD-WAN 1000-SE appliance.
Figure 2. Citrix SD-WAN 1000-SE appliance, back panel
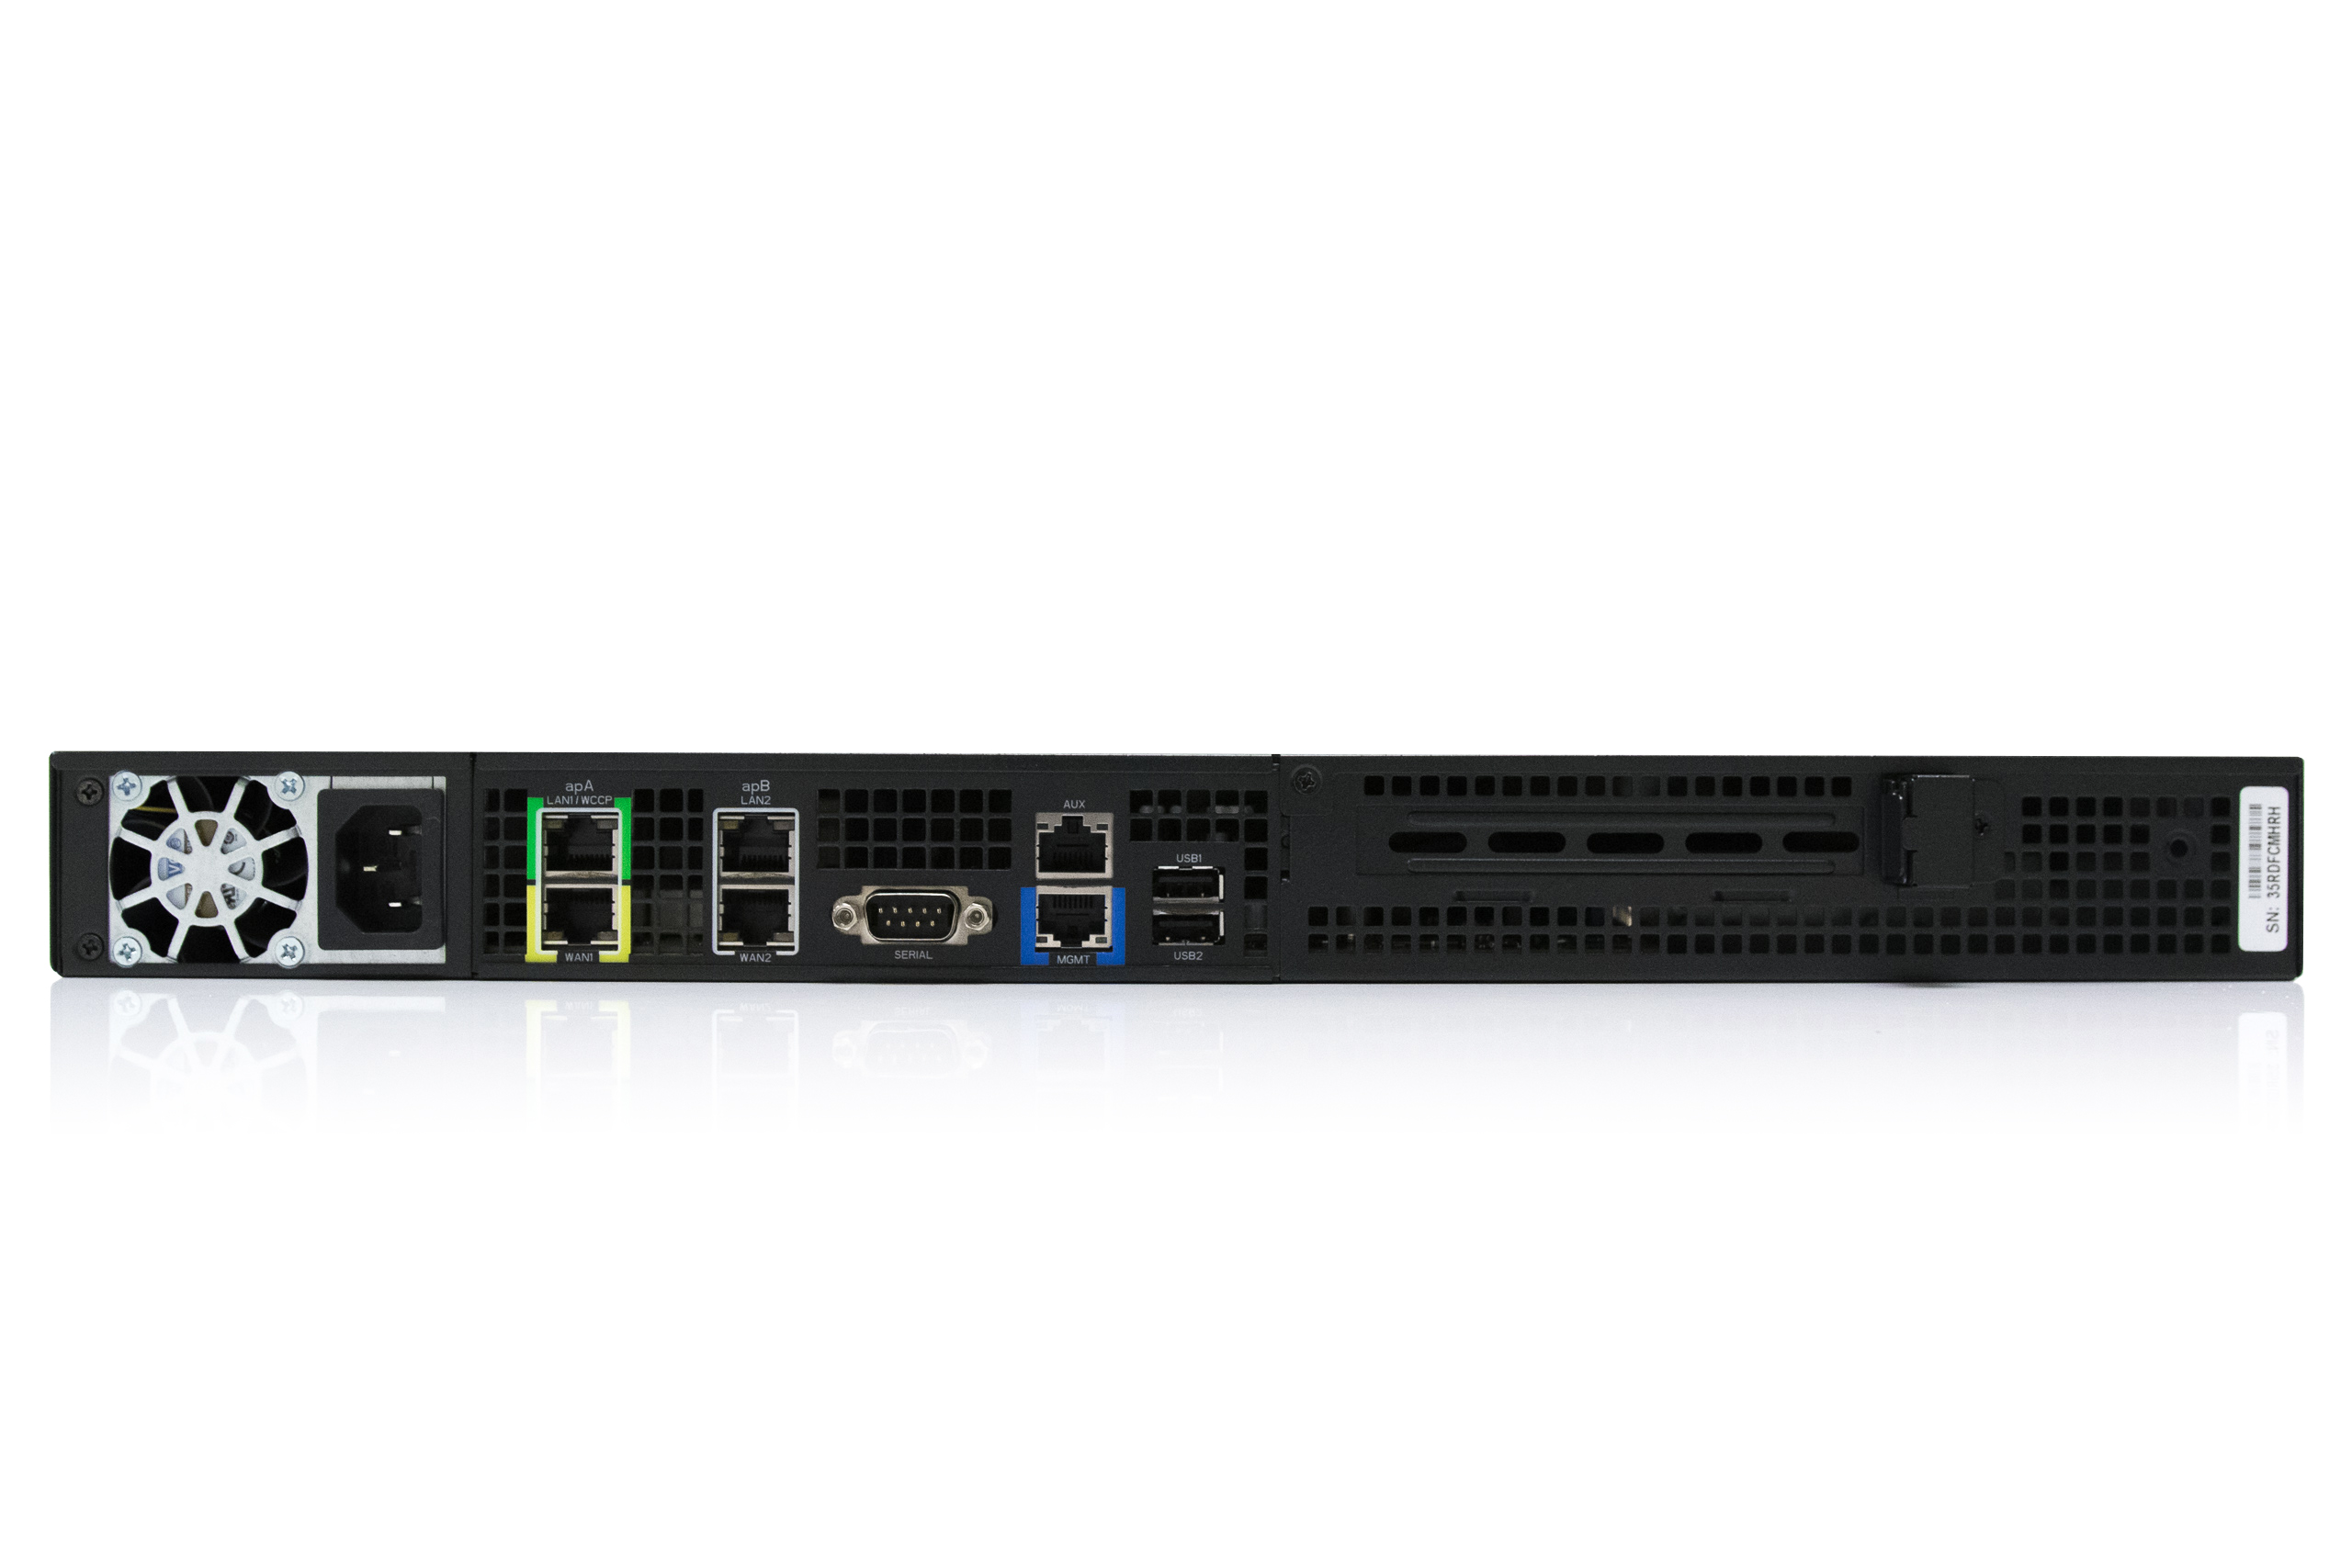
The following components are visible on the back panel of an SD-WAN 1000-SE appliance:
- Cooling fan.
- Single power supply, rated at 200 watts, 110–240 volts.
- Accelerated pairs of Ethernet ports (apA and apB).
- RS-232 serial console port.
- One AUX Ethernet port and one management port.
- Two USB ports.
Power on Appliance After a Graceful Shut Down
To power on the appliance after a graceful shut-down:
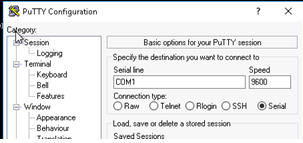
- Connect a Serial console cable to the rear of the appliance and to the serial port on a management laptop.

- On the management laptop, restart a putty session using the following configuration settings:
- Serial line: COM1
- Speed: 9600
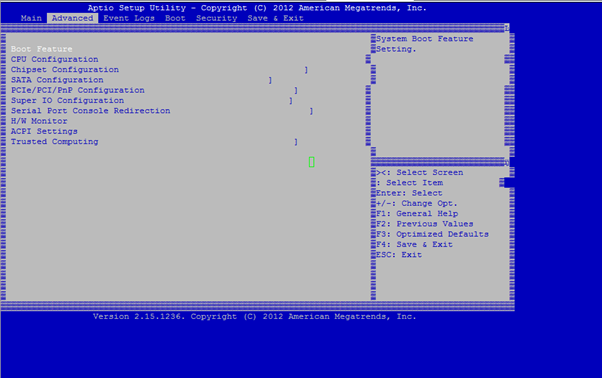
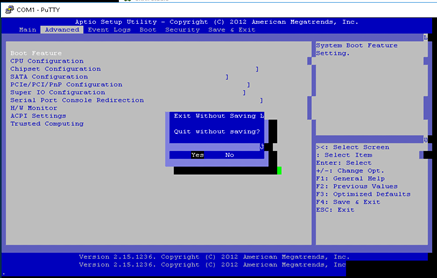
- Power on the appliance and as it is booting, press the following key in the Putty session to enter the BIOS configuration screen. Keypress: DEL
- When in the BIOS, navigate to,
- Advanced Tab > Select
- Boot Feature > Enter
- When in the Boot Feature screen, change the value of the parameter Restore on AC Power Loss; from Last State > Power ON.
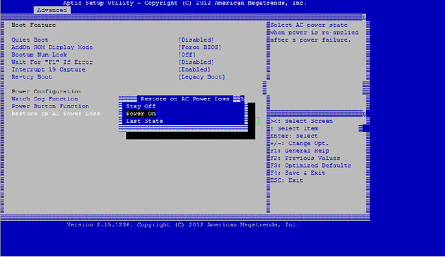
- Navigate to Save and Exit.
- Select Save changes and Reset
- Select Yes
Allow the system to restart. This takes approximately five minutes.
- After the appliance is powered on, login to the appliance management instance (SVM). The default IP address for the appliance is: 192.168.100.1, user name is: admin/password.
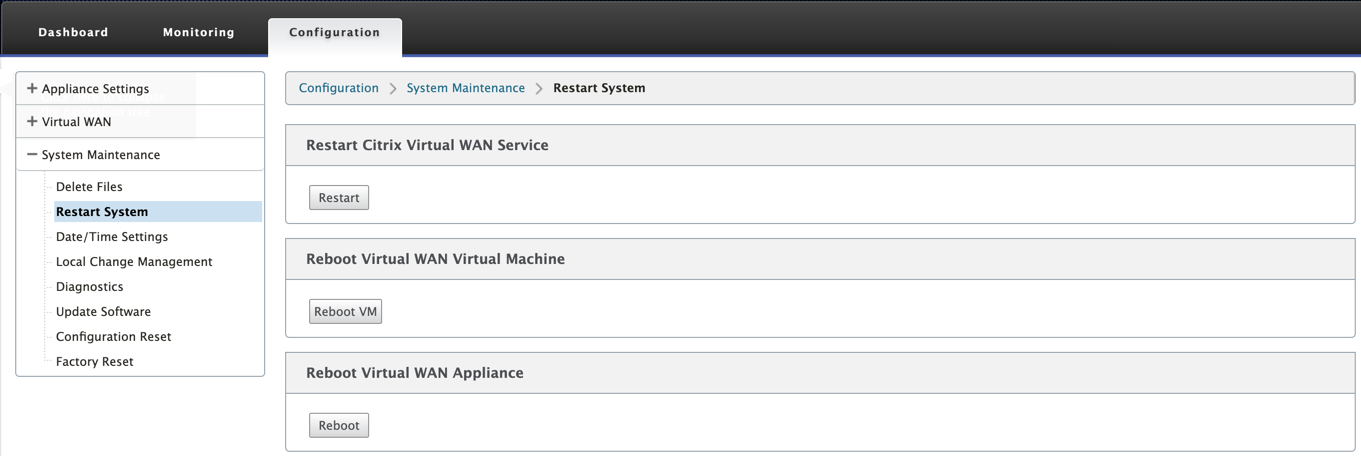
- In the SD-WAN appliance GUI, navigate to Configuration > System Maintenance > Restart System and click Reboot. Allow the appliance to fully shut down. Ensure that there are no power lights on the appliance when the shut-down process has completed.
- Power on the appliance to confirm that the BIOS configuration change has been applied successfully. This can be either done through the APC intelligent PDU Web Management console or by physically pulling the power cable out of the shut-down SD-WAN appliance, waiting for 10 seconds and then plugging it back in again. The appliance power ups automatically from all shut-down scenarios.
Share
Share
In this article
This Preview product documentation is Cloud Software Group Confidential.
You agree to hold this documentation confidential pursuant to the terms of your Cloud Software Group Beta/Tech Preview Agreement.
The development, release and timing of any features or functionality described in the Preview documentation remains at our sole discretion and are subject to change without notice or consultation.
The documentation is for informational purposes only and is not a commitment, promise or legal obligation to deliver any material, code or functionality and should not be relied upon in making Cloud Software Group product purchase decisions.
If you do not agree, select I DO NOT AGREE to exit.