Install Citrix SD-WAN™ SE VPX on Google Cloud Platform
Deploying Citrix SD-WAN SE VPX on GCP enables organizations to establish a direct and highly secure connection between branches and applications hosted on GCP. It eliminates the need to backhaul cloud bound traffic through the Data Center. The key benefits of using Citrix SD-WAN on GCP are:
-
Create direct connections from every branch site to GCP.
-
Ensure an always-on connection to GCP.
-
Extend your secure perimeter to the cloud.
-
Evolve to a simple and easy to manage the branch network.
Citrix SD-WAN Standard Edition for GCP logically bonds multiple network links into a single secure logical virtual path. The solution enables organizations to use variety of connections from different service providers to get highly resilient virtual WAN paths. These virtual paths function as an overlay to seamlessly aggregate bandwidth capacities across multiple links and deliver consistent user experience even if some of the member links go down or suffer degradation. This is enabled by the per-packet load balancing and monitoring capabilities of Citrix SD-WAN.
Summary of deployment steps
-
Choose a region where you want to deploy the instance and create three VPCs in different subnets. Optionally, you can create another VPC for HA if needed.
NIC Associated network NIC 0 (default) Management subnet NIC 1 LAN subnet NIC 2 WAN subnet NIC 3 HA subnet (optional) Note
If you are creating a new management subnet, allow port 443 in its firewall rules.
-
Create a Citrix SD-WAN SE instance and associate the interfaces with the VPCs.
-
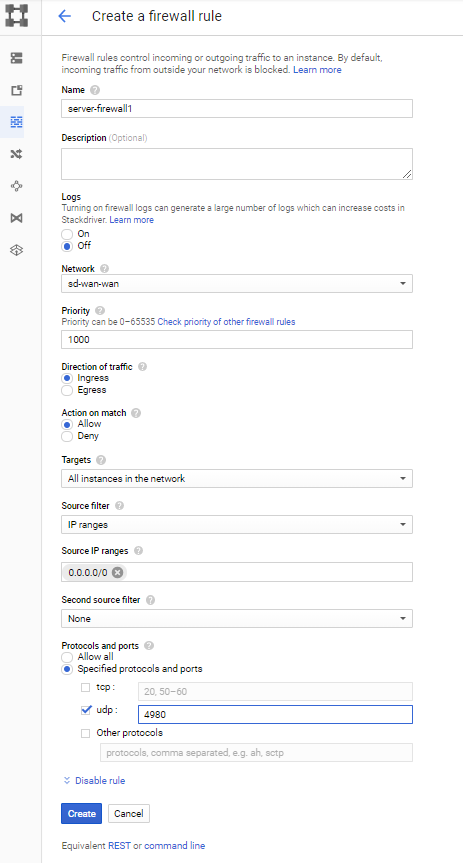
Create firewall rules on WAN subnet VPC to enable ingress on UDP port 4980. It is used by Citrix SD-WAN instance to create the virtual path.
-
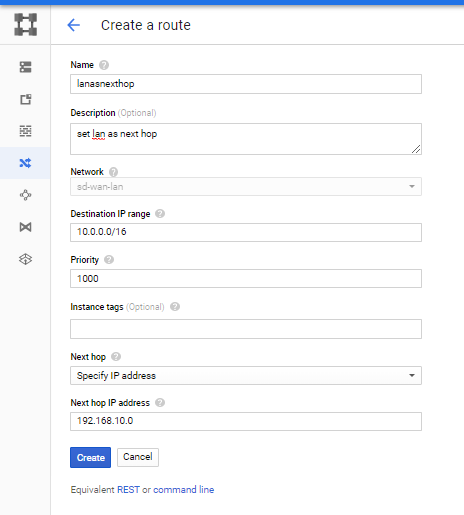
Create a route on LAN subnet VPC to intercept all the traffic generated from LAN.
-
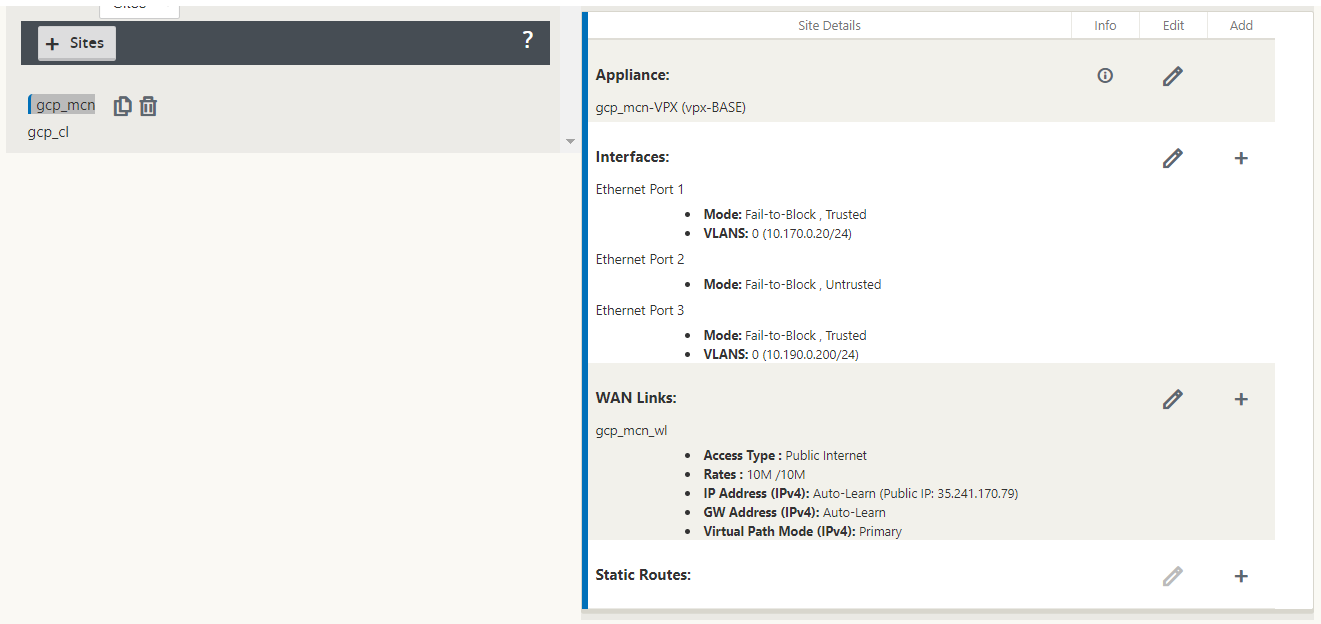
Access the Citrix SD-WAN SE VPX using the management IP address.
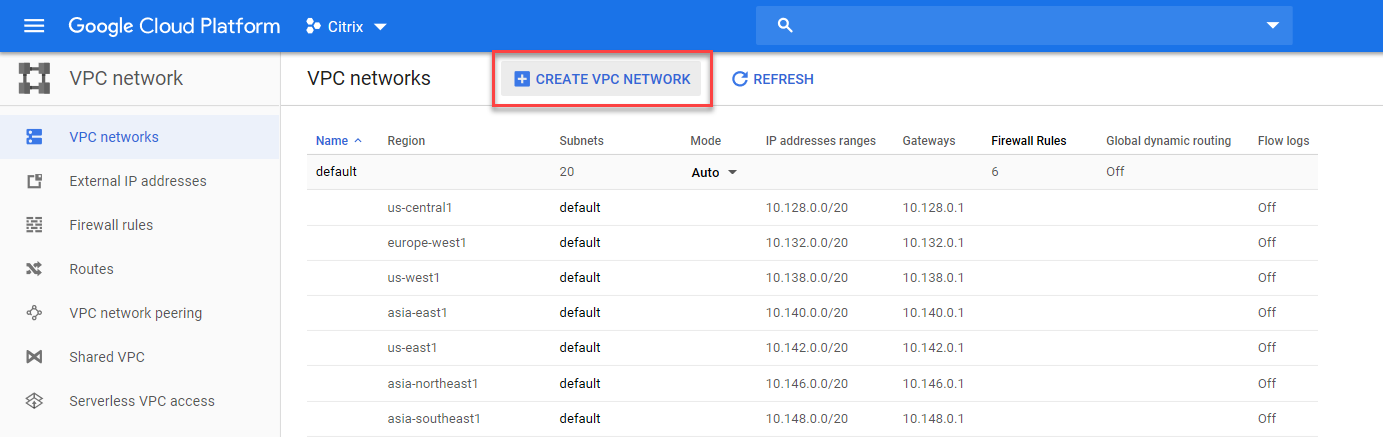
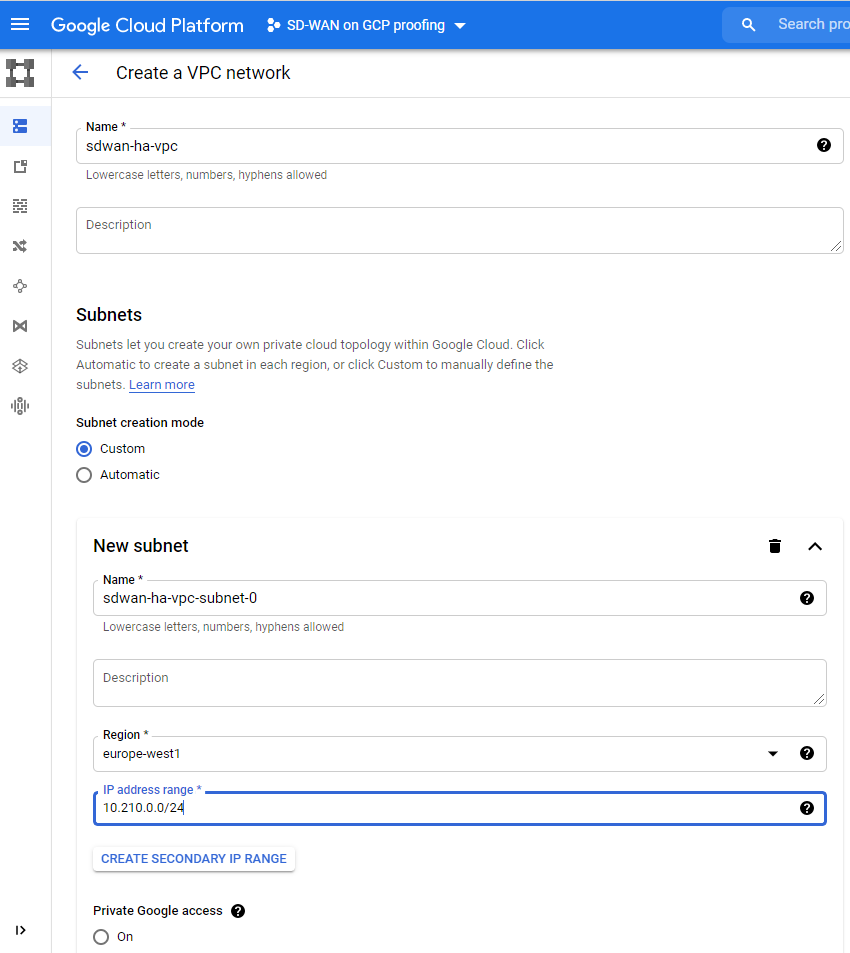
Create VPC networks
Create VPC networks that will be associated with the management subnet, LAN subnet, and WAN subnet. While creating an image a default interface is available, this can be used as the management interface. Create two VPC network for LAN and WAN subnet.
-
To create a VPC network, in the GCP console navigate to VPC network > VPC networks > Create VPC Network.
-
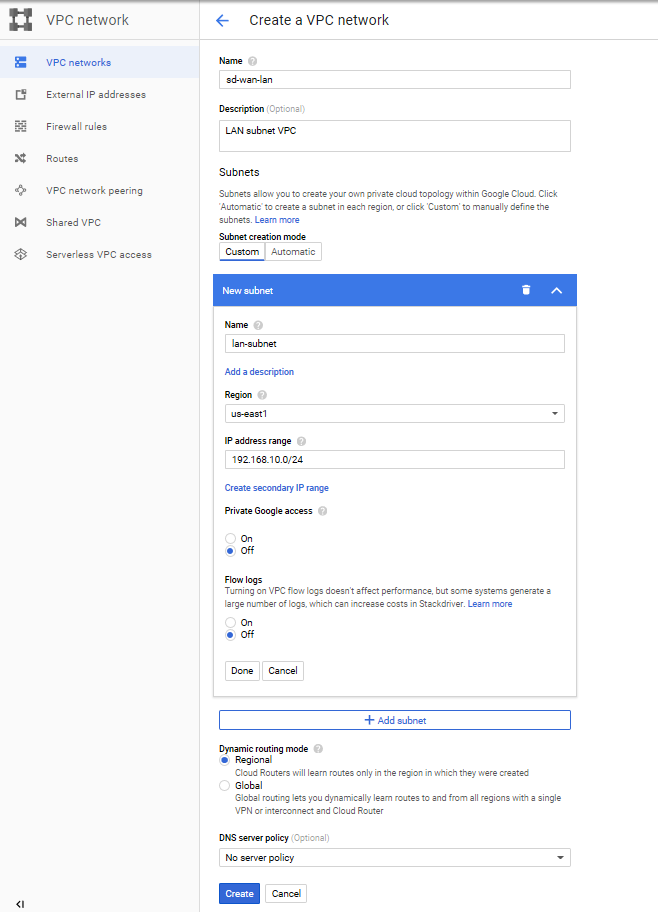
Specify the name, description, region subnet IP address and create a LAN VPC network.
-
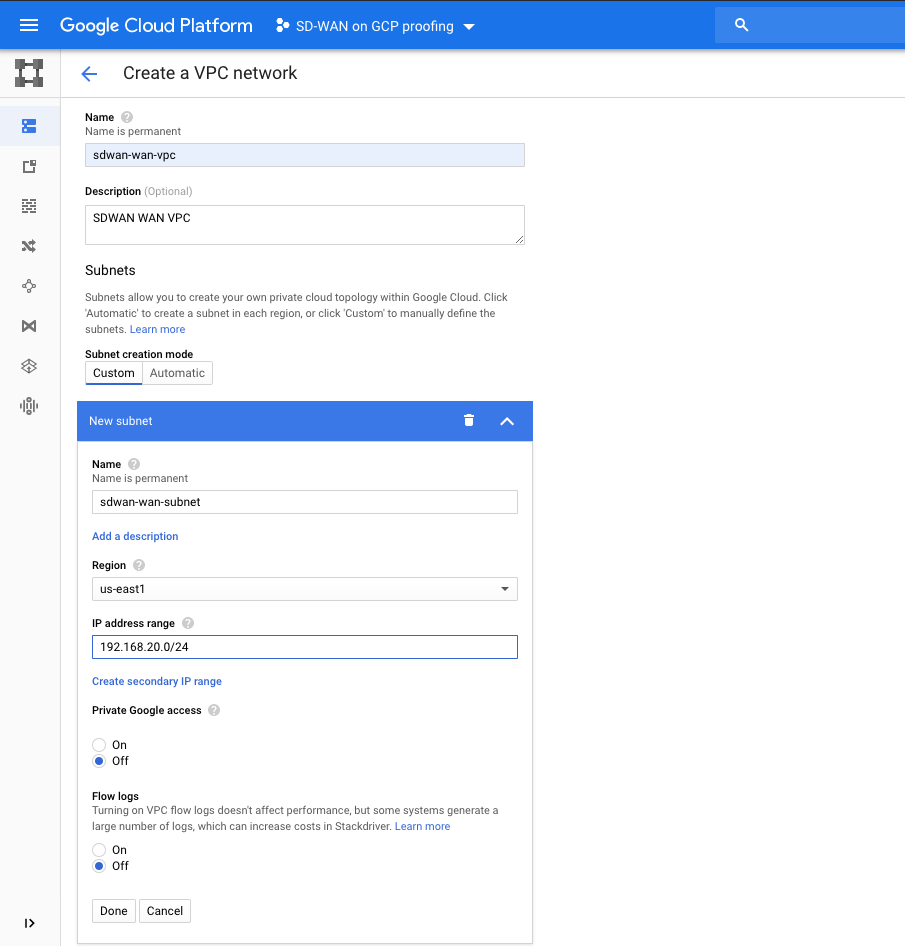
Similarly create a WAN VPC network.
-
Optionally, for HA deployment create an HA VPC network.
Note
All four VPC networks must be in the same region.
-
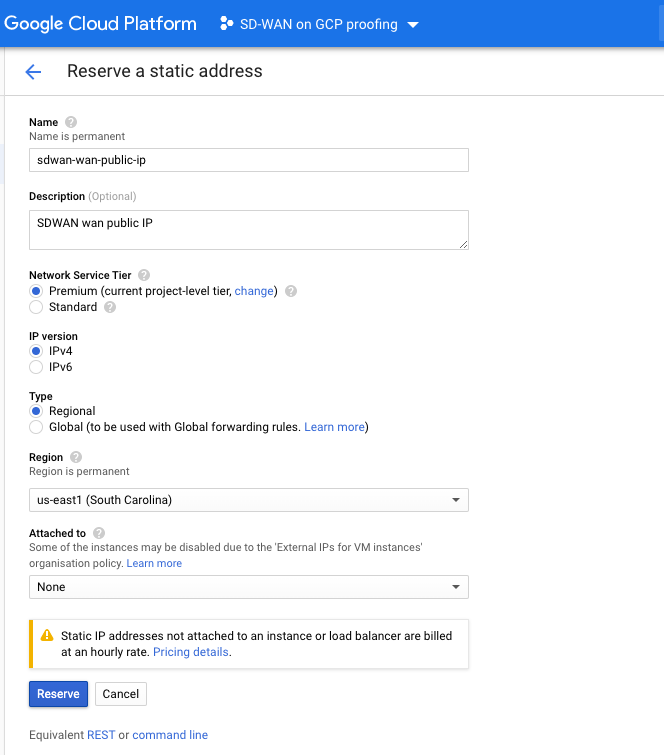
Create WAN link public IP.
-
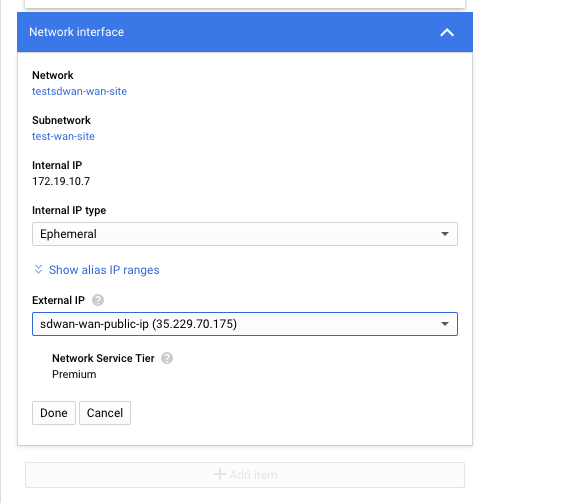
Associate the WAN Public IP to WAN subnet after creating the instance.
Note
For the HA secondary instance you do not have to associate the WAN Public IP.
Create the Citrix SD-WAN SE VPX instance
-
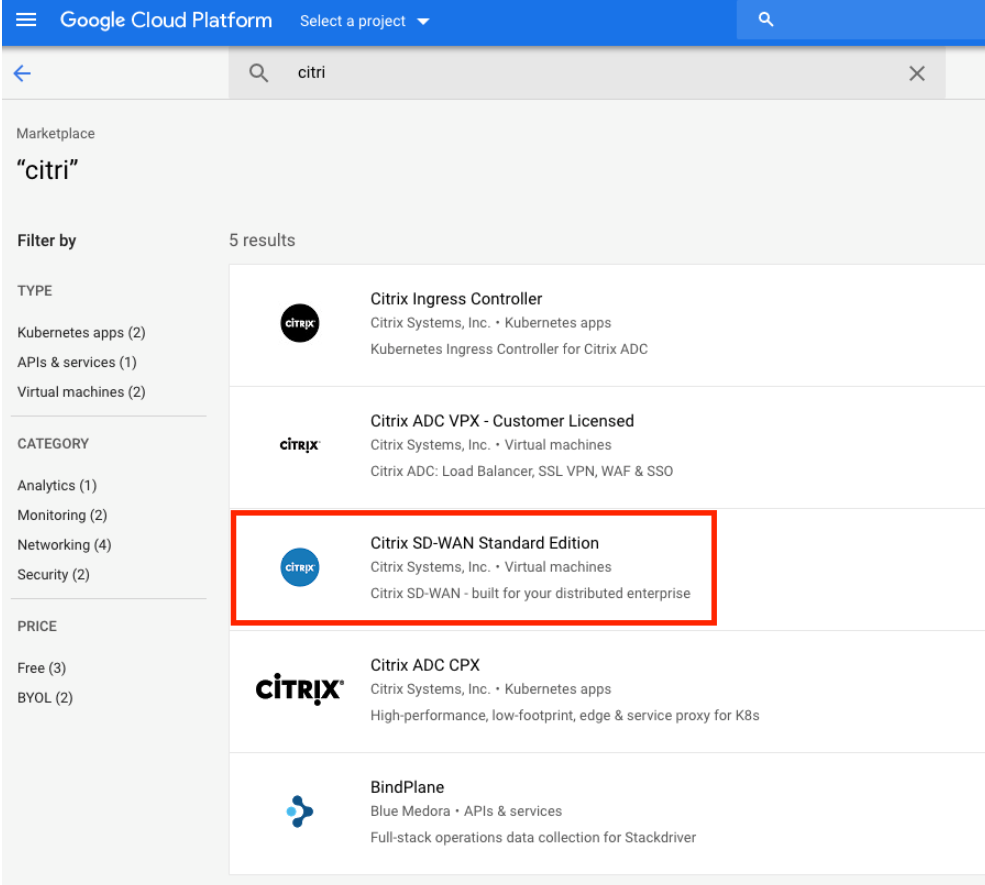
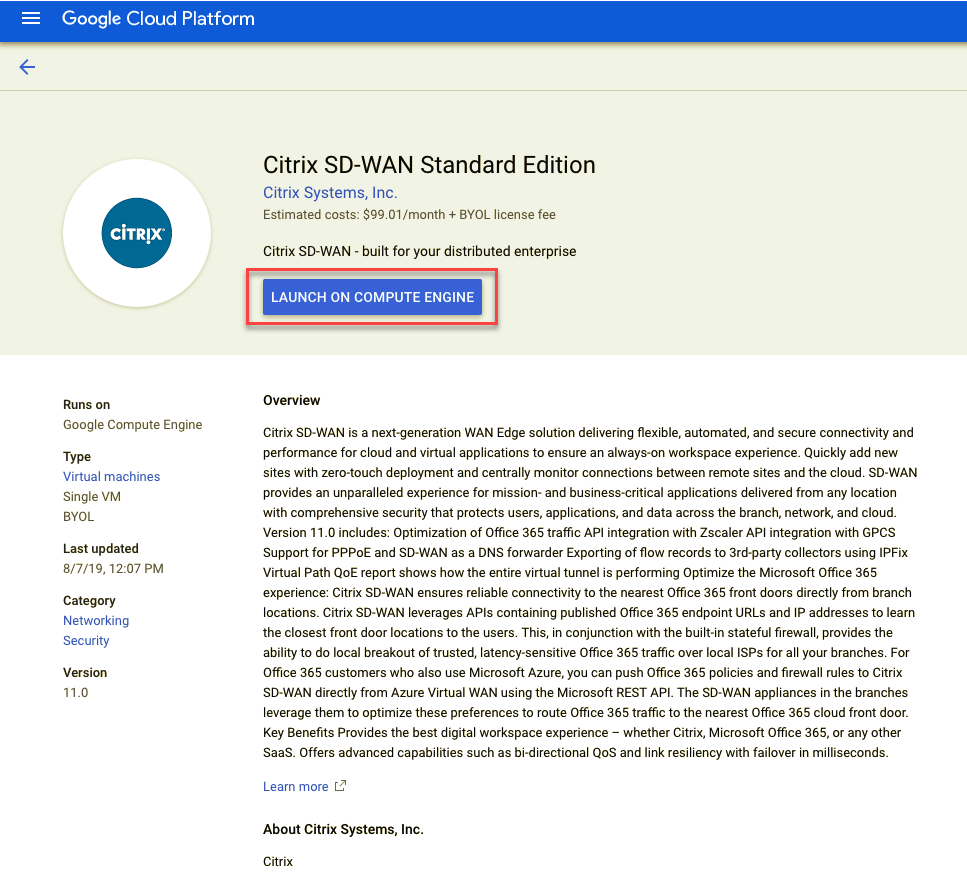
In GCP Marketplace search for Citrix SD-WAN Standard Edition, open it, and click LAUNCH ON COMPUTE ENGINE.
-
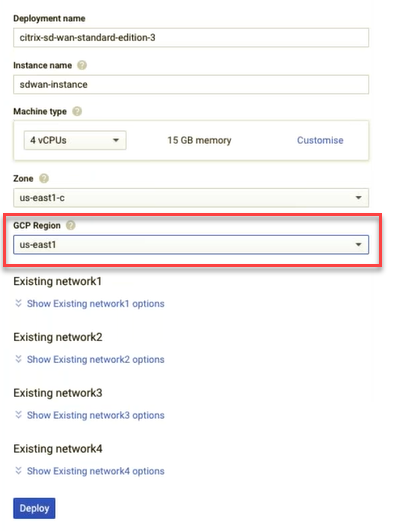
The required vCPU’s and memory are selected by default. Select the GCP Region.
Note
The GCP region must be same as the region of the VPC networks.
-
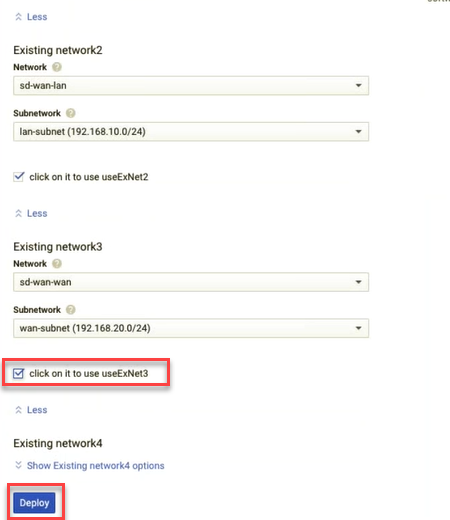
From Existing network1 list select default, this is the management interface. Similarly, for Existing network2 and Existing network3 select the LAN and WAN subnets respectively. Ensure that useExNet is selected for all the three networks and click Deploy.
Note
If you are creating a new management subnet, allow port 443 in its firewall rules.
-
Optionally, create another instance for HA as described in the previous steps. Ensure that the LAN and WAN network and subnets are the same for both the HA instances.
-
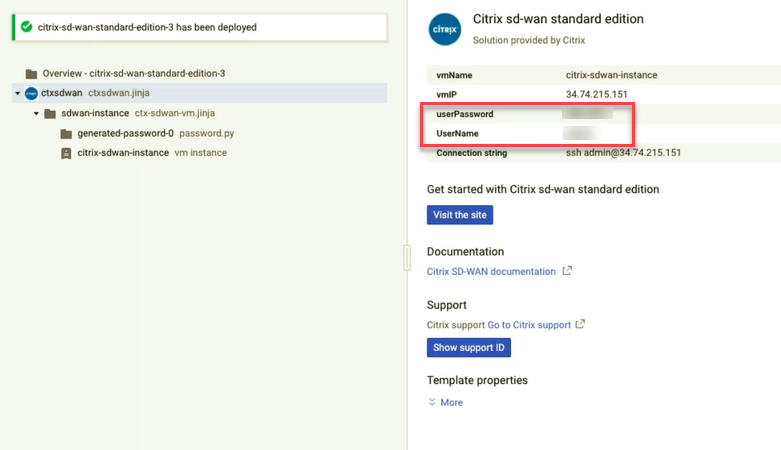
After the SD-WAN SE VPX instance is deployed, use the default user name and password provided by GCP to log in into the SD-WAN SE VPX.
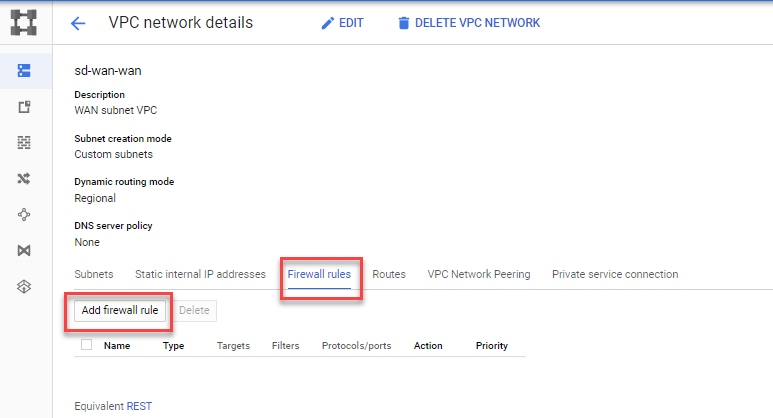
Create firewall rule on WAN subnet VPC
-
Navigate to VPC Network > VPC Networks > WAN subnet VPC. In the Firewall rules tab, click Add firewall rule.
-
Allow ingress for all instances on UDP port 4980. This port is used by the SD-WAN instance to create an overlay network.
-
Optionally, for HA deployment ensure that the same firewall rule is created on HA subnet VPC as well and the UDP port number 4980 is allowed.
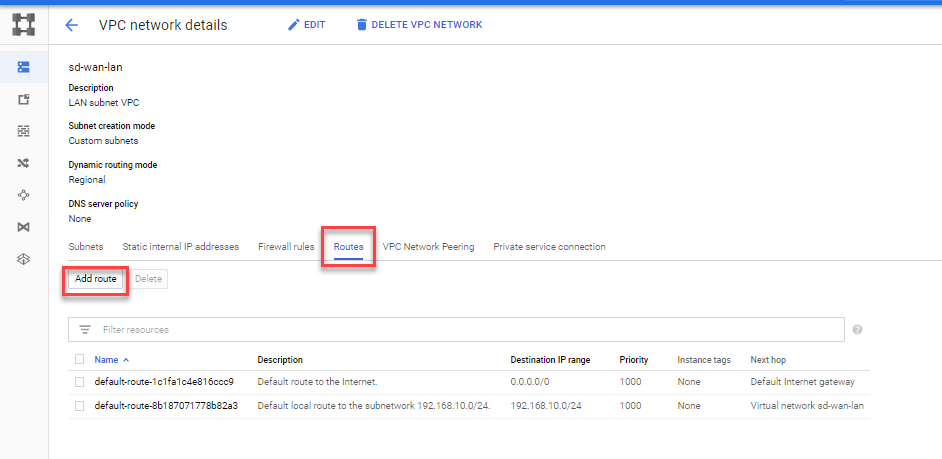
Create a route on LAN subnet VPC
Create a route on LAN subnet VPC to intercept all the traffic generated from LAN.
-
Navigate to VPC Network > VPC Networks > LAN subnet VPC. In the Routes tab, click Add route.
-
Enter the Destination IP range, the LAN network of the other end. In the Next Hop field, select Specify IP address and in the Next hop IP address specify the SD-WAN LAN interface IP.
-
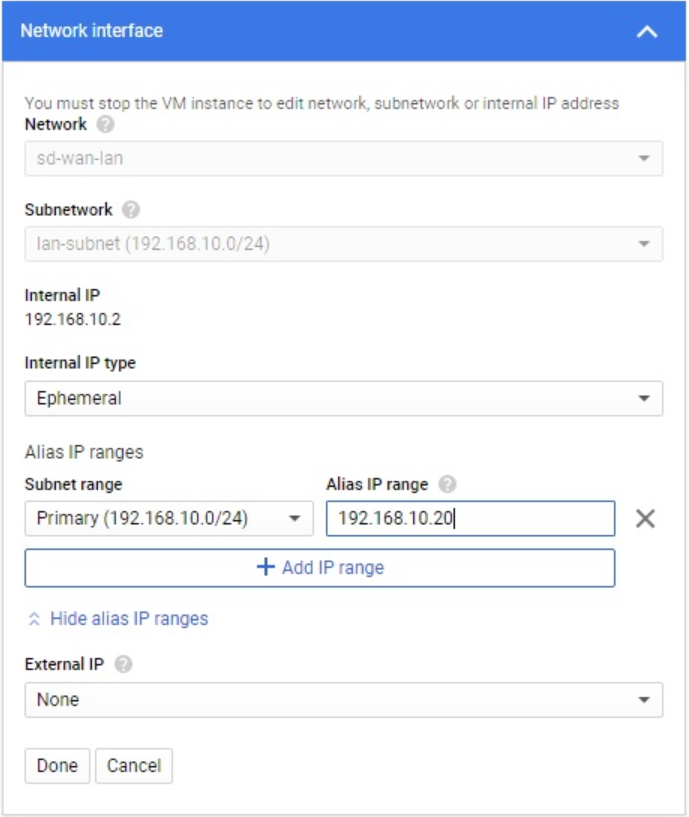
Optionally, for HA deployment, on the primary instance configure the Alias IP. This is used as the LAN interface IP in SD-WAN configuration.
Access the SD-WAN SE VPX instance
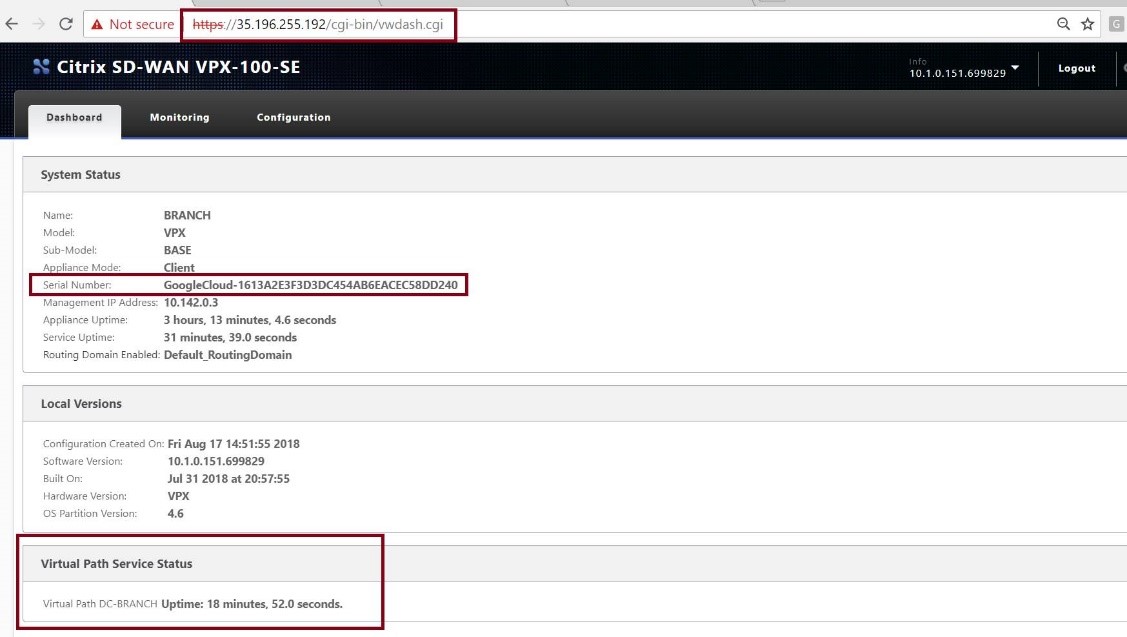
Use the management interface IP address to access the GUI of the SD-WAN SE VPX instance. Use the default user name and password provided by GCP to log into the SD-WAN SE VPX.
NOTE
From 10.2.6 and 11.0.3 release onwards, it is mandatory to change the default admin user account password while provisioning any SD-WAN appliance or deploying a new SD-WAN SE VPX. This change is enforced using both CLI and UI.
A system maintenance account - CBVWSSH, exists for development and debugging and has no external login permissions. The account can only be accessed through a regular administrative user’s CLI session.
For HA to work, ensure that in the SD-WAN configuration the WAN interface is configured with DHCP. Use the alias IP to configure the LAN interface.