Deploy Citrix SD-WAN Standard Edition Instance on Azure - Release Version 10.2 and above
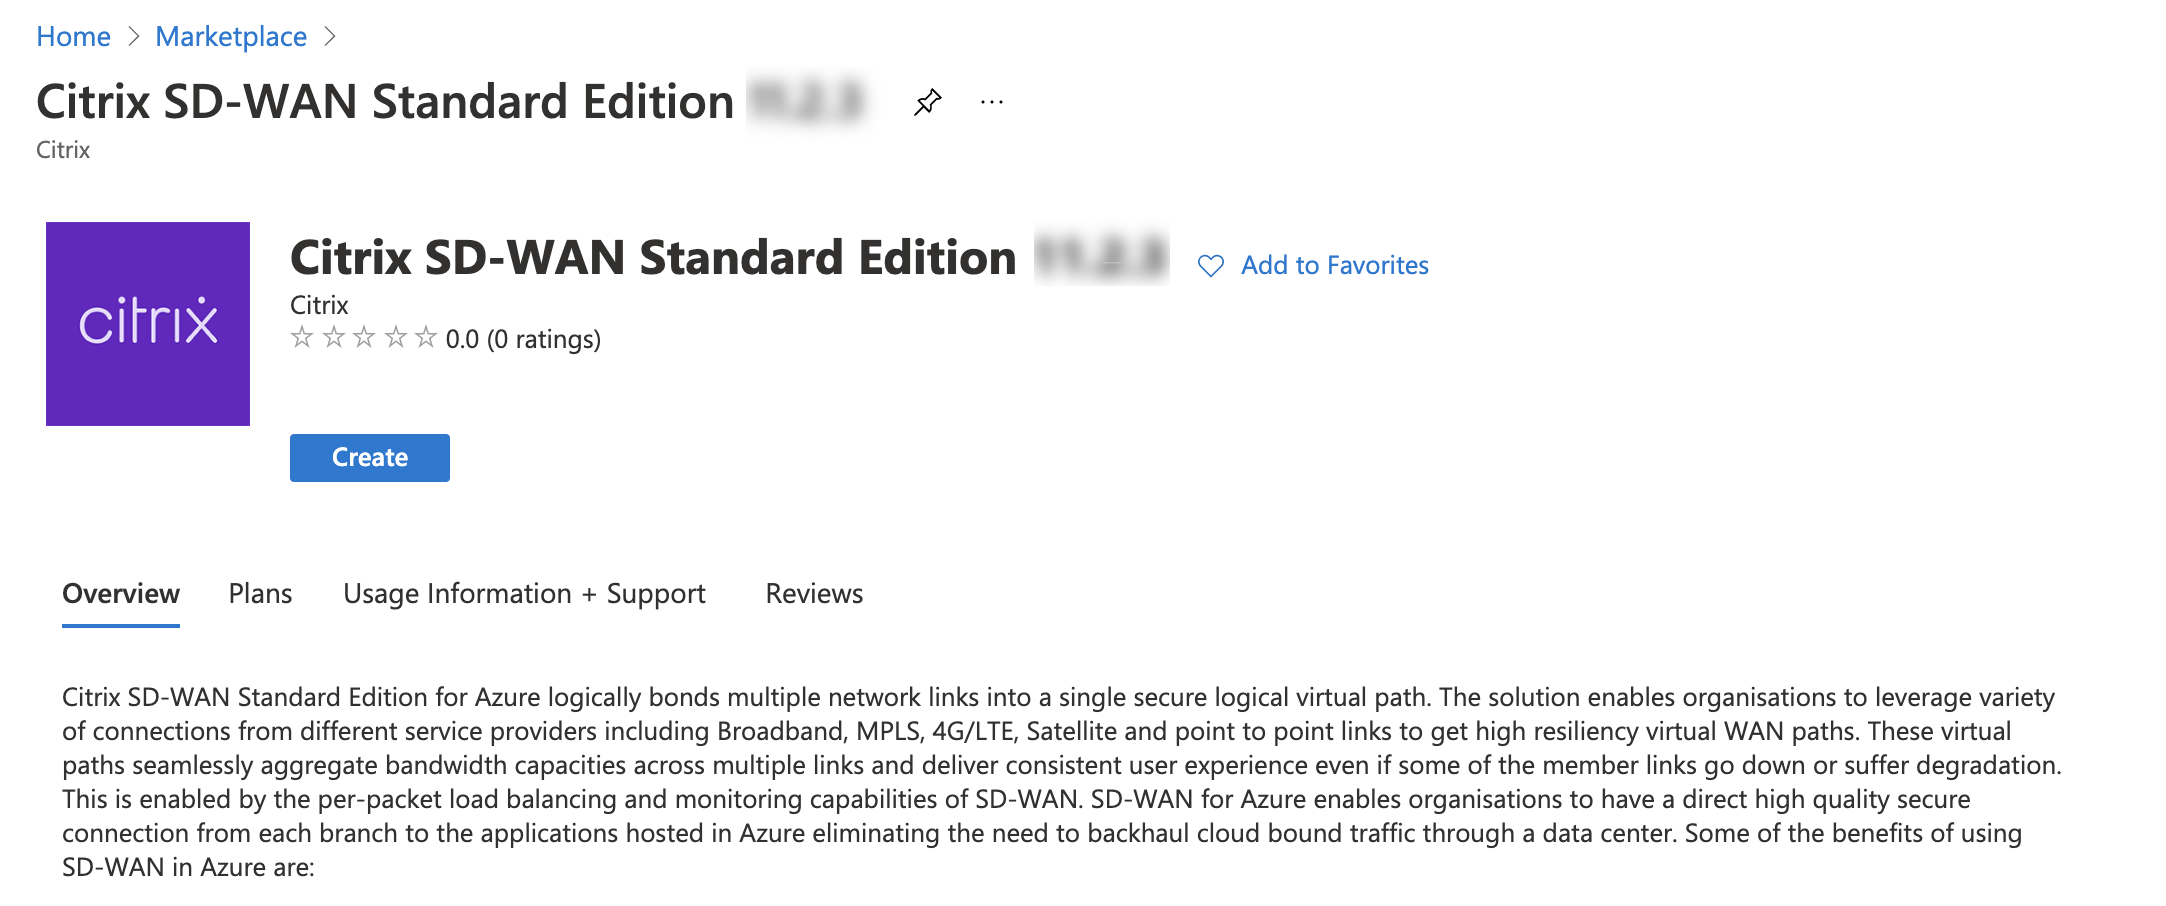
Citrix SD-WAN Standard Edition for Azure logically bonds multiple network links into a single secure logical virtual path. The solution enables organizations to use connections from different service providers including Broadband, MPLS, 4G/LTE, Satellite, and point-to-point links to get high resiliency virtual WAN paths. Citrix SD-WAN for Azure enables organizations to have a direct secure connection from each branch to the applications hosted in Azure eliminating the need to backhaul cloud bound traffic through a data center. Some of the benefits of using Citrix SD-WAN in Azure are:
- Create direct connections from every location to Azure.
- Ensure an always on connection to Azure.
- Extend your secure perimeter to the cloud.
- Evolve to a simple, easy to manage branch network.
Note
Earlier, 128 virtual paths were supported in Azure. With 11.2 release onwards, 256 virtual parts are supported with SD-WAN SE in Azure.
Topology - SD-WAN in Azure
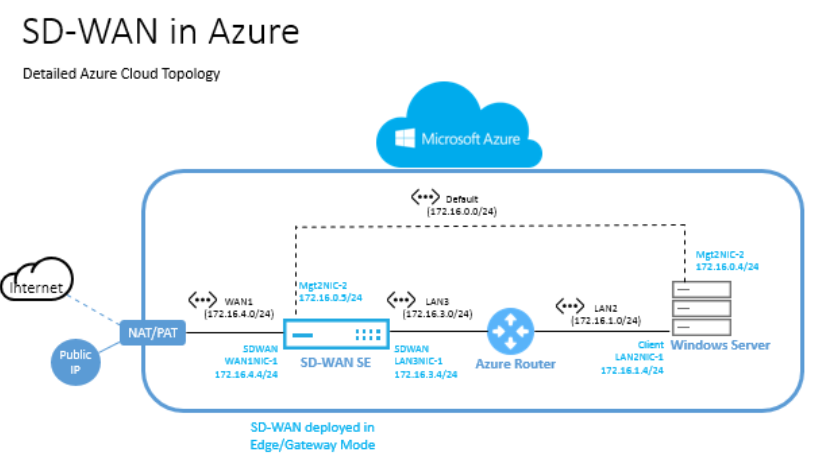
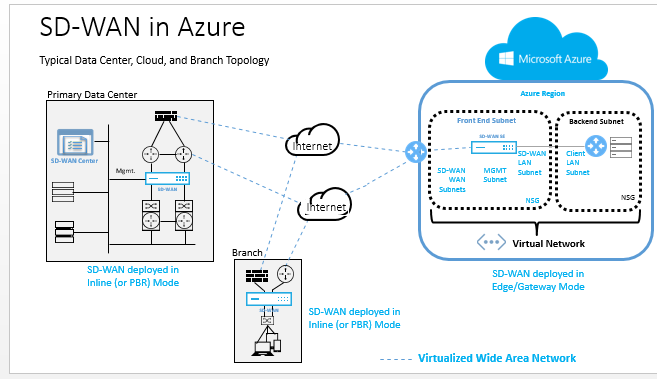
Citrix SD-WAN Standard Edition can only be deployed in Gateway deployment mode in Azure. A Public IP address (Static/Dynamic) is assigned to the WAN facing interface of SD-WAN and one public IP is assigned to the management interface to access the management interface in Azure.
Use case
An Azure VM is deployed within a specified region and can be connected to multiple branch locations through MPLS, Internet, or 4G/LTE. Within a Virtual Network (VNET) infrastructure, SD-WAN Standard Edition VM is deployed in Gateway mode. The VNET has routes towards the Azure Gateway. The SD-WAN instance has a route towards the Azure Gateway for internet connectivity.
Connectivity between Data Center, Branch, and Cloud is achieved by using different transports methods utilizing multiple WAN paths simultaneously.
To deploy Citrix SD-WAN™ standard edition in Microsoft Azure
-
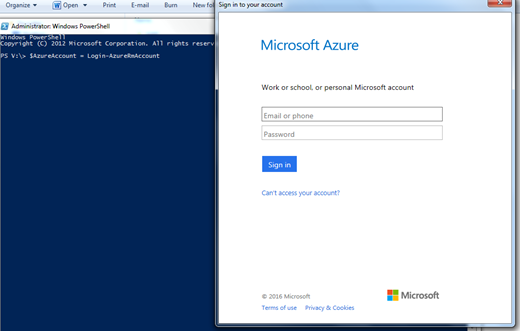
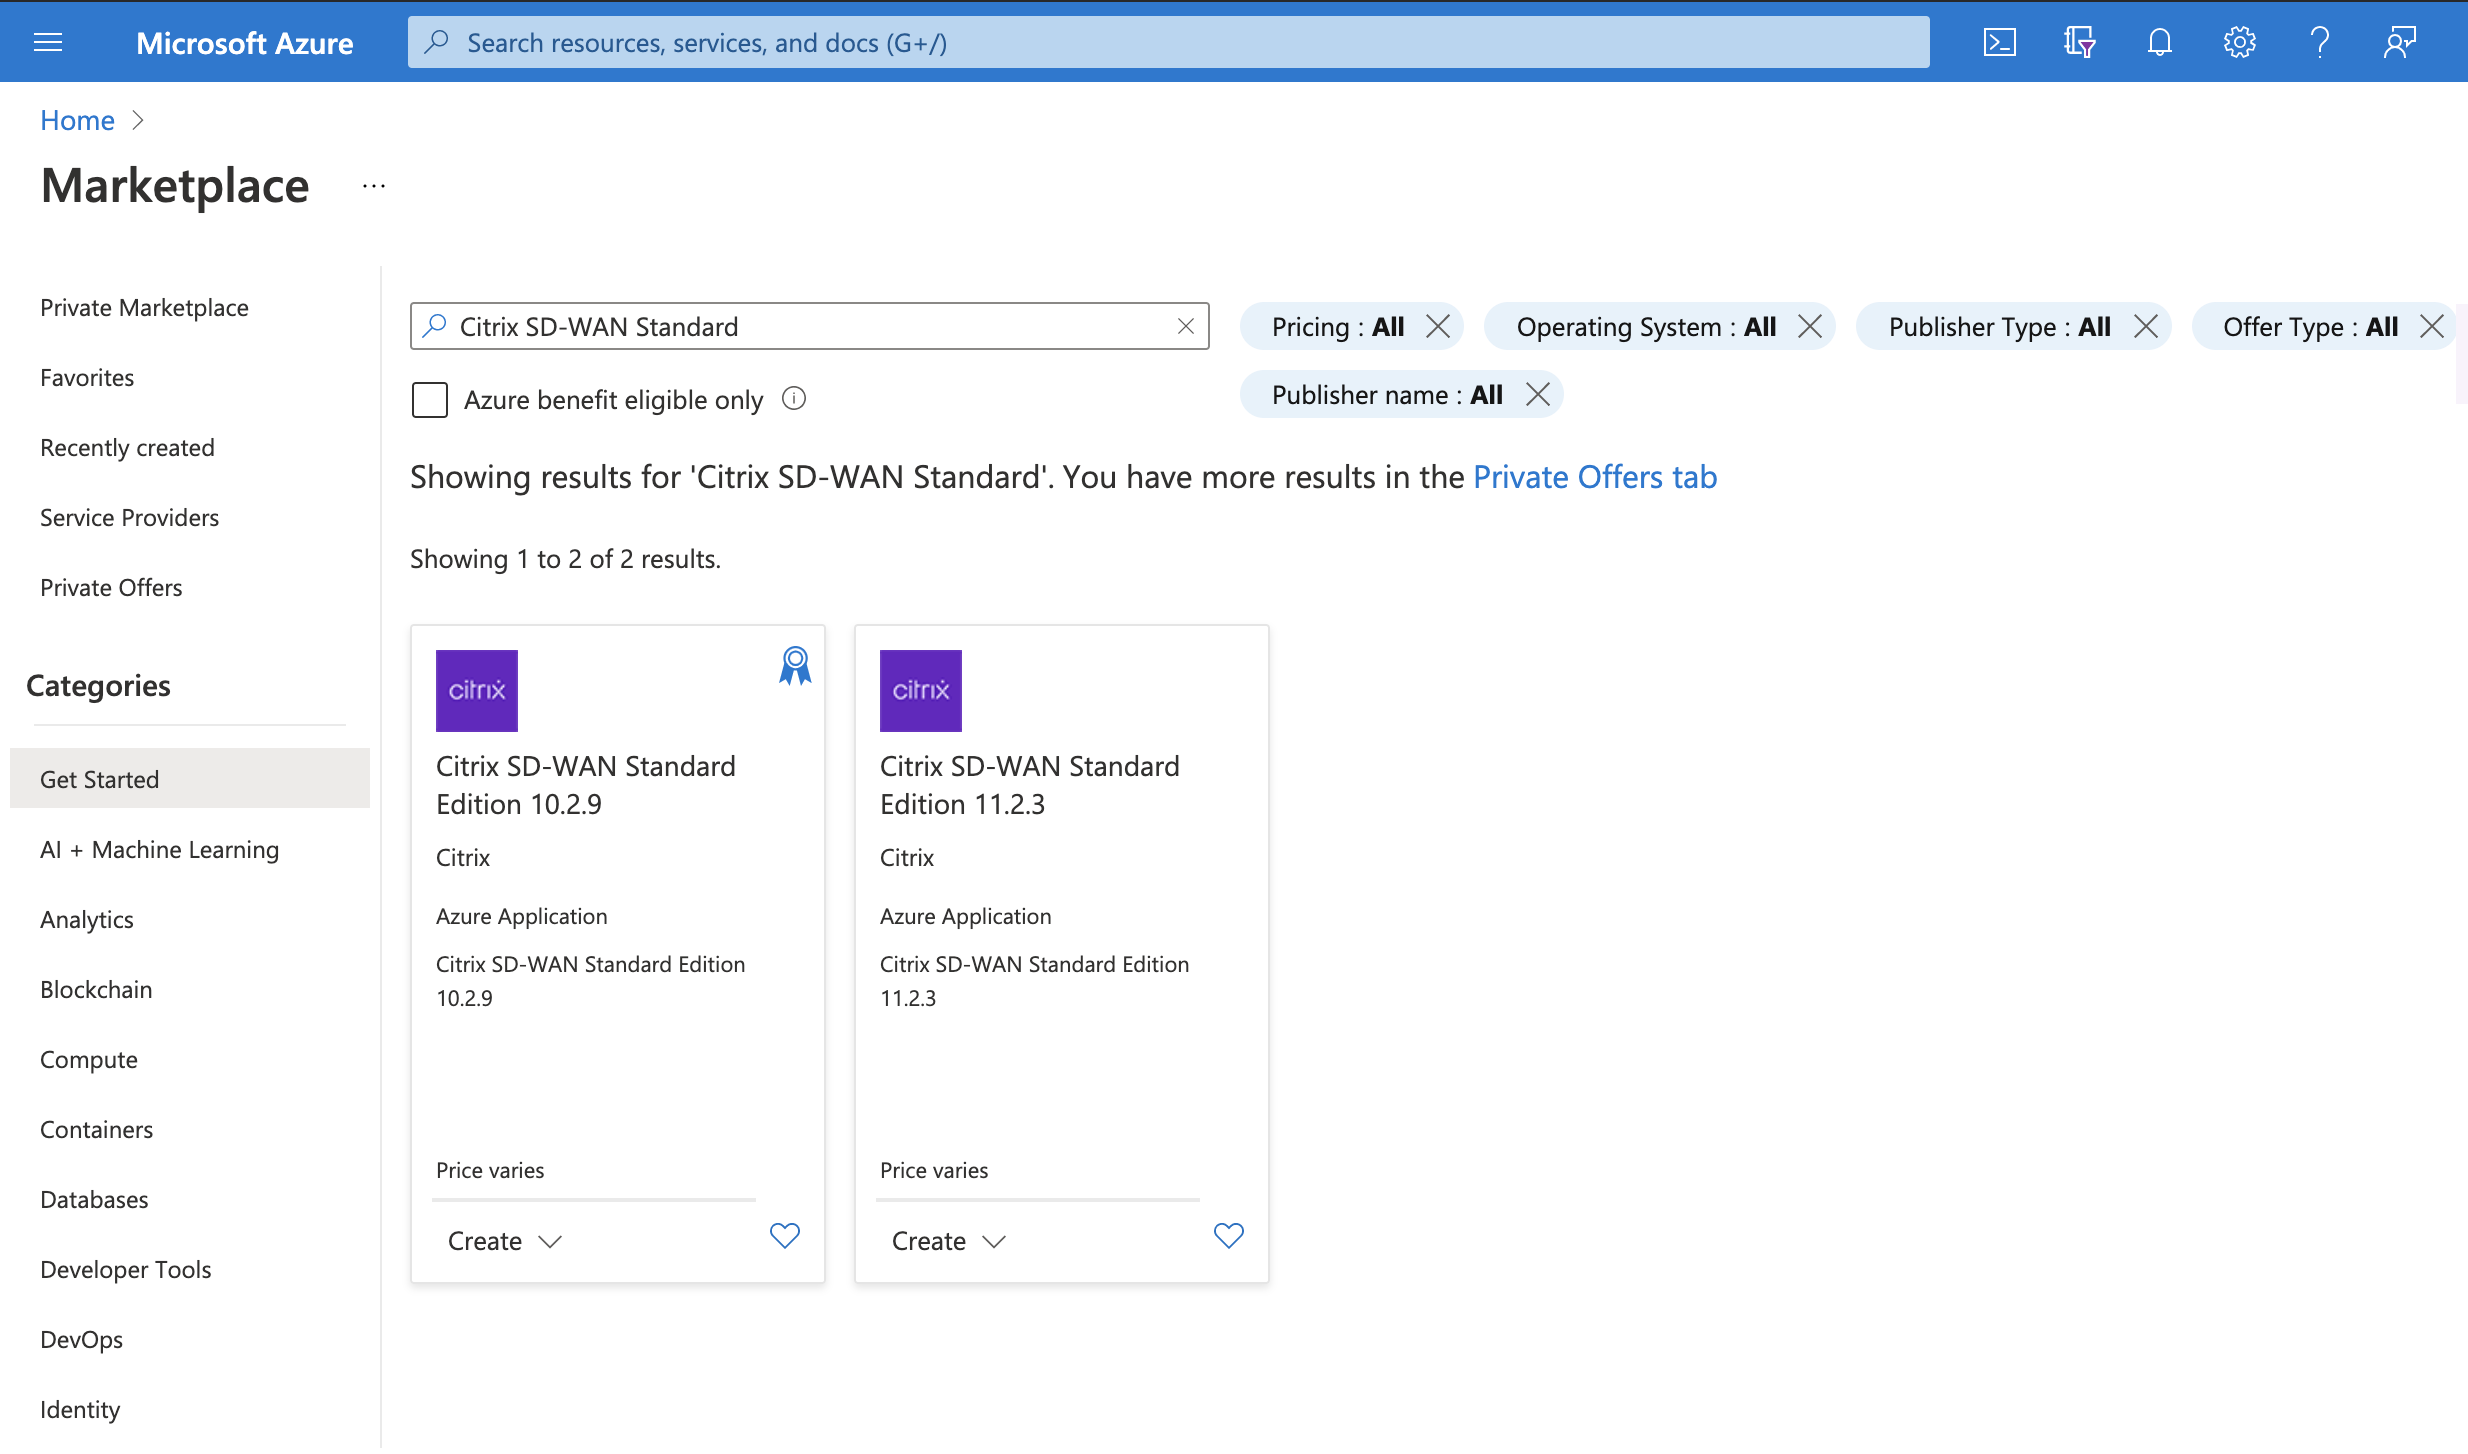
In a web browser, type https://portal.azure.com/. Log into Microsoft Azure account. Search for Citrix SD-WAN Standard Edition.
-
In the search results window, choose the following solution. Click create after going through the description and making sure the solution chosen is correct.
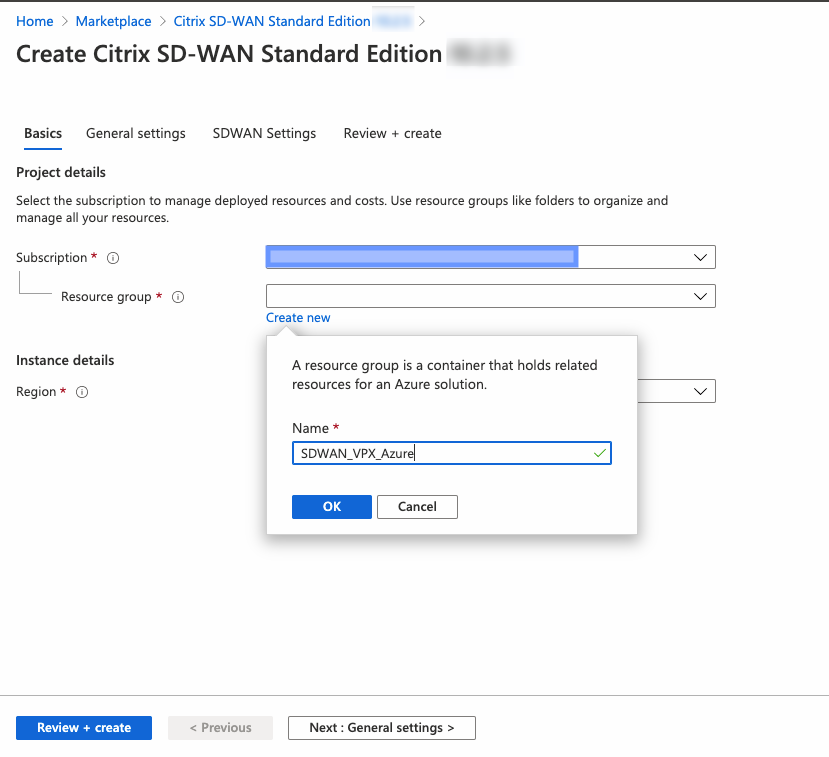
- After you click Create, a wizard prompting for details necessary to create the virtual machine in Azure appears. In the first step, choose the resource group in which you like to deploy the solution. A resource group is a container that holds related resources for an Azure solution. The resource group can include all the resources for the solution, or only those resources that you want to manage as a group. You can decide how you want to allocate resources to resource groups based on your deployment. Some important points to consider when defining your resource group are:
- If one resource, such as a database server must exist on a different deployment cycle, then it can be in another resource group.
- Each resource can only exist in one resource group.
- You can add or remove a resource to another resource group at any time.
- You can move a resource from one resource group to another resource group
- A resource group can contain resources that reside in different regions.
- A resource group can be used to scope access control for administrative actions.
- A resource can interact with resources in other resource groups. This interaction is common when the two resources are related but do not share lifecycle (for example, web apps connecting to a database). In the following image, choose Create New. Under Location, choose the region in which you want to deploy the solution. When creating a resource group, you must provide a location for that resource group. The resource group stores metadata about the resources that you are creating. Therefore, when you specify a location for the resource group, you are specifying where that metadata is stored.
Note
Azure mandates creating a resource inside either a new resource group or an empty resource group, you won’t be able to deploy the SD-WAN instance in a non-empty resource group.
-
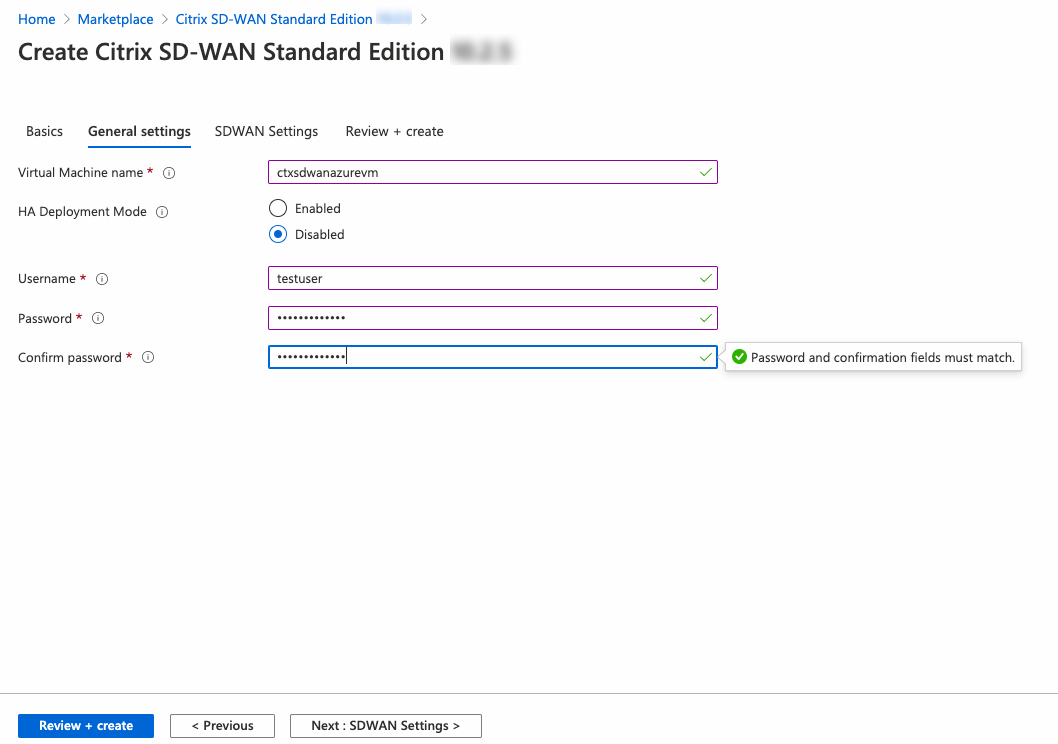
Provide a name for the Virtual Machine. Choose a user name and strong password. The password must consist of an upper case letter, special character and must be more than nine characters. Click OK. This password is required to log in to the management interface of the instance.
Note
You cannot provision the instance with the user name admin as it is a reserved name. However, to get admin access after provisioning the instance, use admin as the user name and the password created while provisioning the instance. If you use the user name created while provisioning the instance, you get read only access.
-
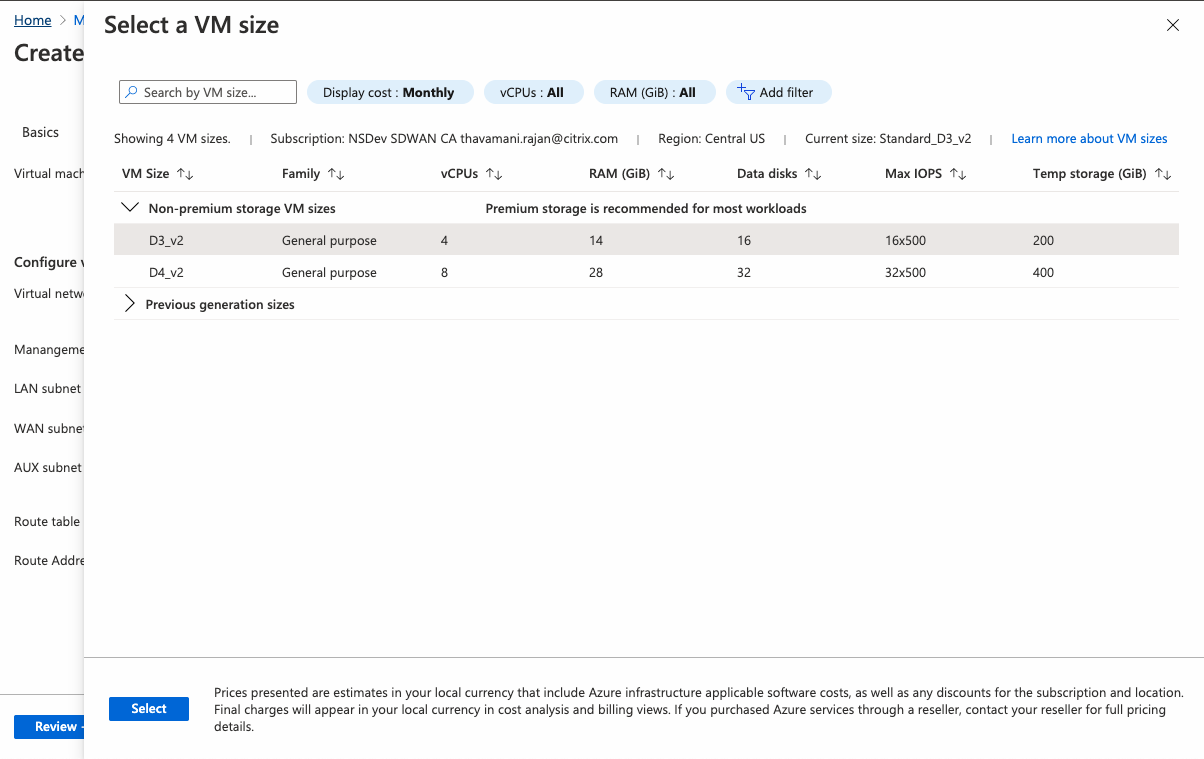
Choose the instance in which you want to run the image. Choose the instance type depending on your requirement as shown in the following.
- Instance type D3_V2 for max uni-directional throughput of 200 Mbps with 16 max virtual paths/branches.
- Instance type D4_V2 for max uni-directional throughput of 500 Mbps with 16 max virtual paths/branches.
- Instance type F8 standard for max uni-directional throughput of 1 Gbps with 64 max virtual paths/branches.
- Instance type F16 standard for max uni-directional throughput of 1 Gbps with 128 max virtual paths/branches.
-
From Citrix SD-WAN 11.0.3 release onwards, by default 120 GB of OS Disk Size is allocated. If necessary, you can modify the disk size to a value between 40 GB to 999 GB.
-
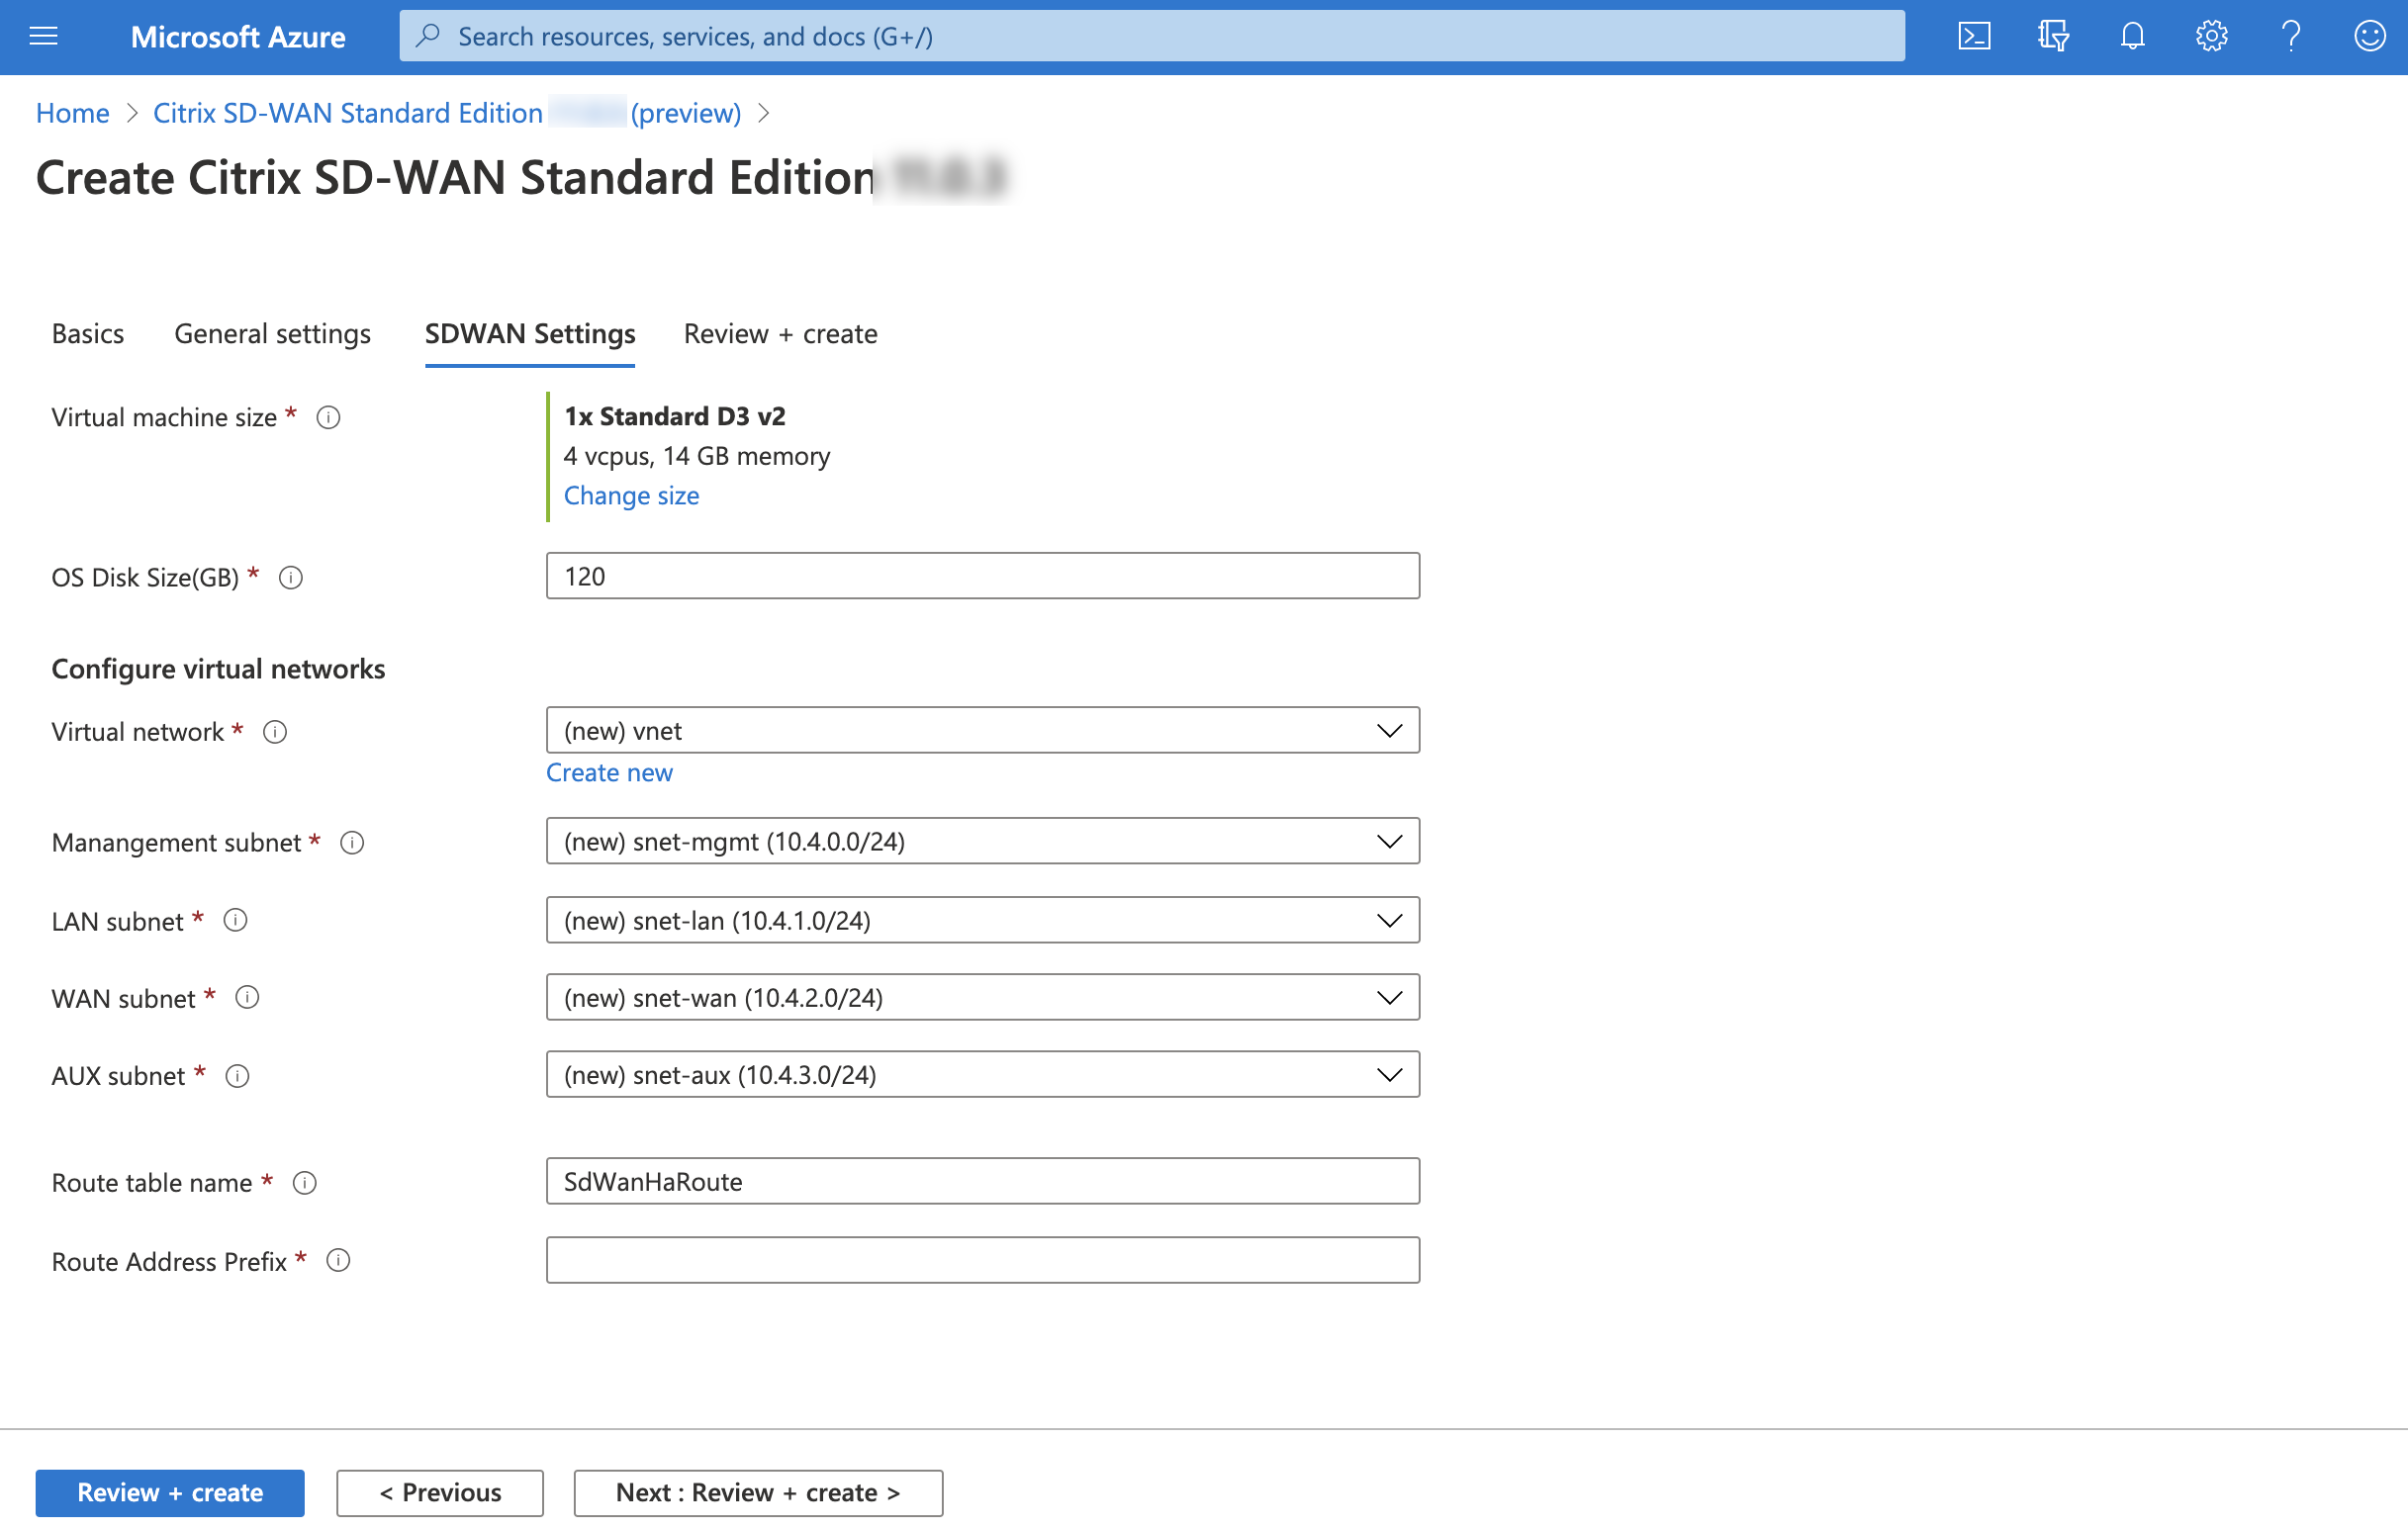
Create a new Virtual Network (VNET) or use an existing VNET. It is the most critical step for deployment as this step chooses the subnets to be assigned to the interfaces of the SD-WAN VPX VM.

-
You can assign the required subnets to each of the interfaces in the VM. The ordering for assigning subnets is Management, LAN, WAN, and AUX respectively. Choose as required and click OK. In the following image, you are assigning the subnets to each of the interfaces.
NIC Associated network NIC 0 (default) Management subnet NIC 1 LAN subnet NIC 2 WAN subnet -
Click Review+Create and ensure the validation is passed.
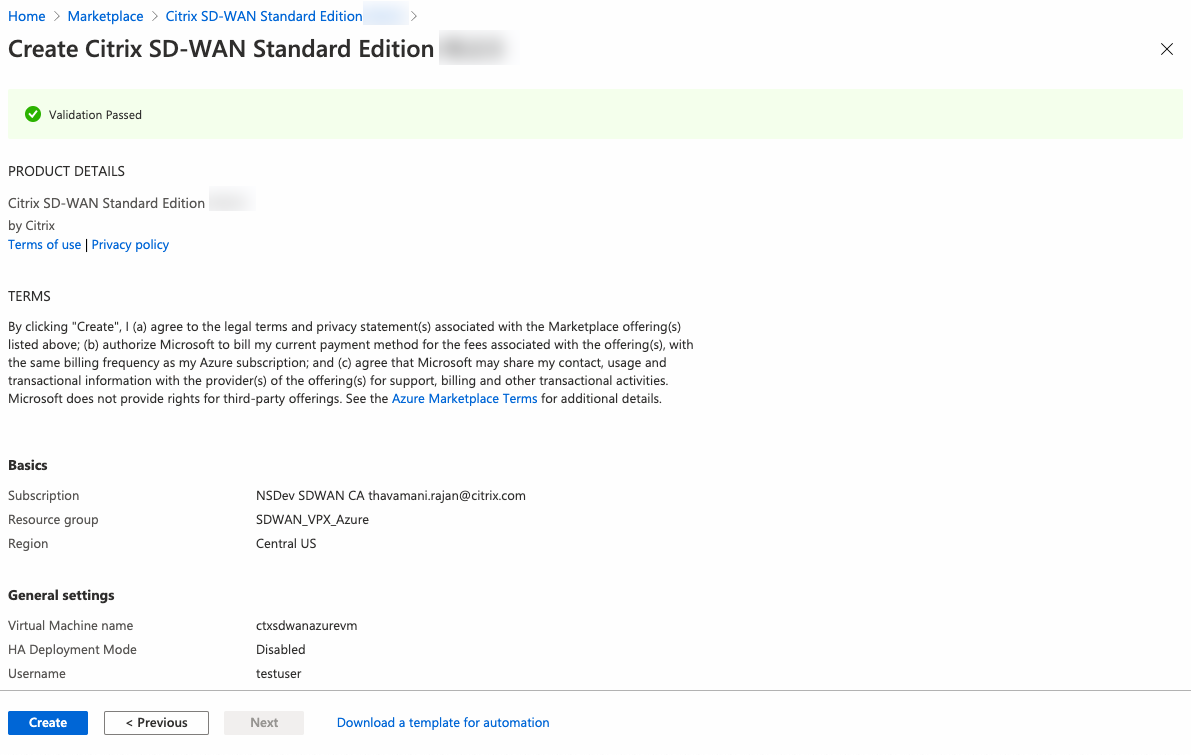
The deployment starts and you can view the status in the notifications section.
-
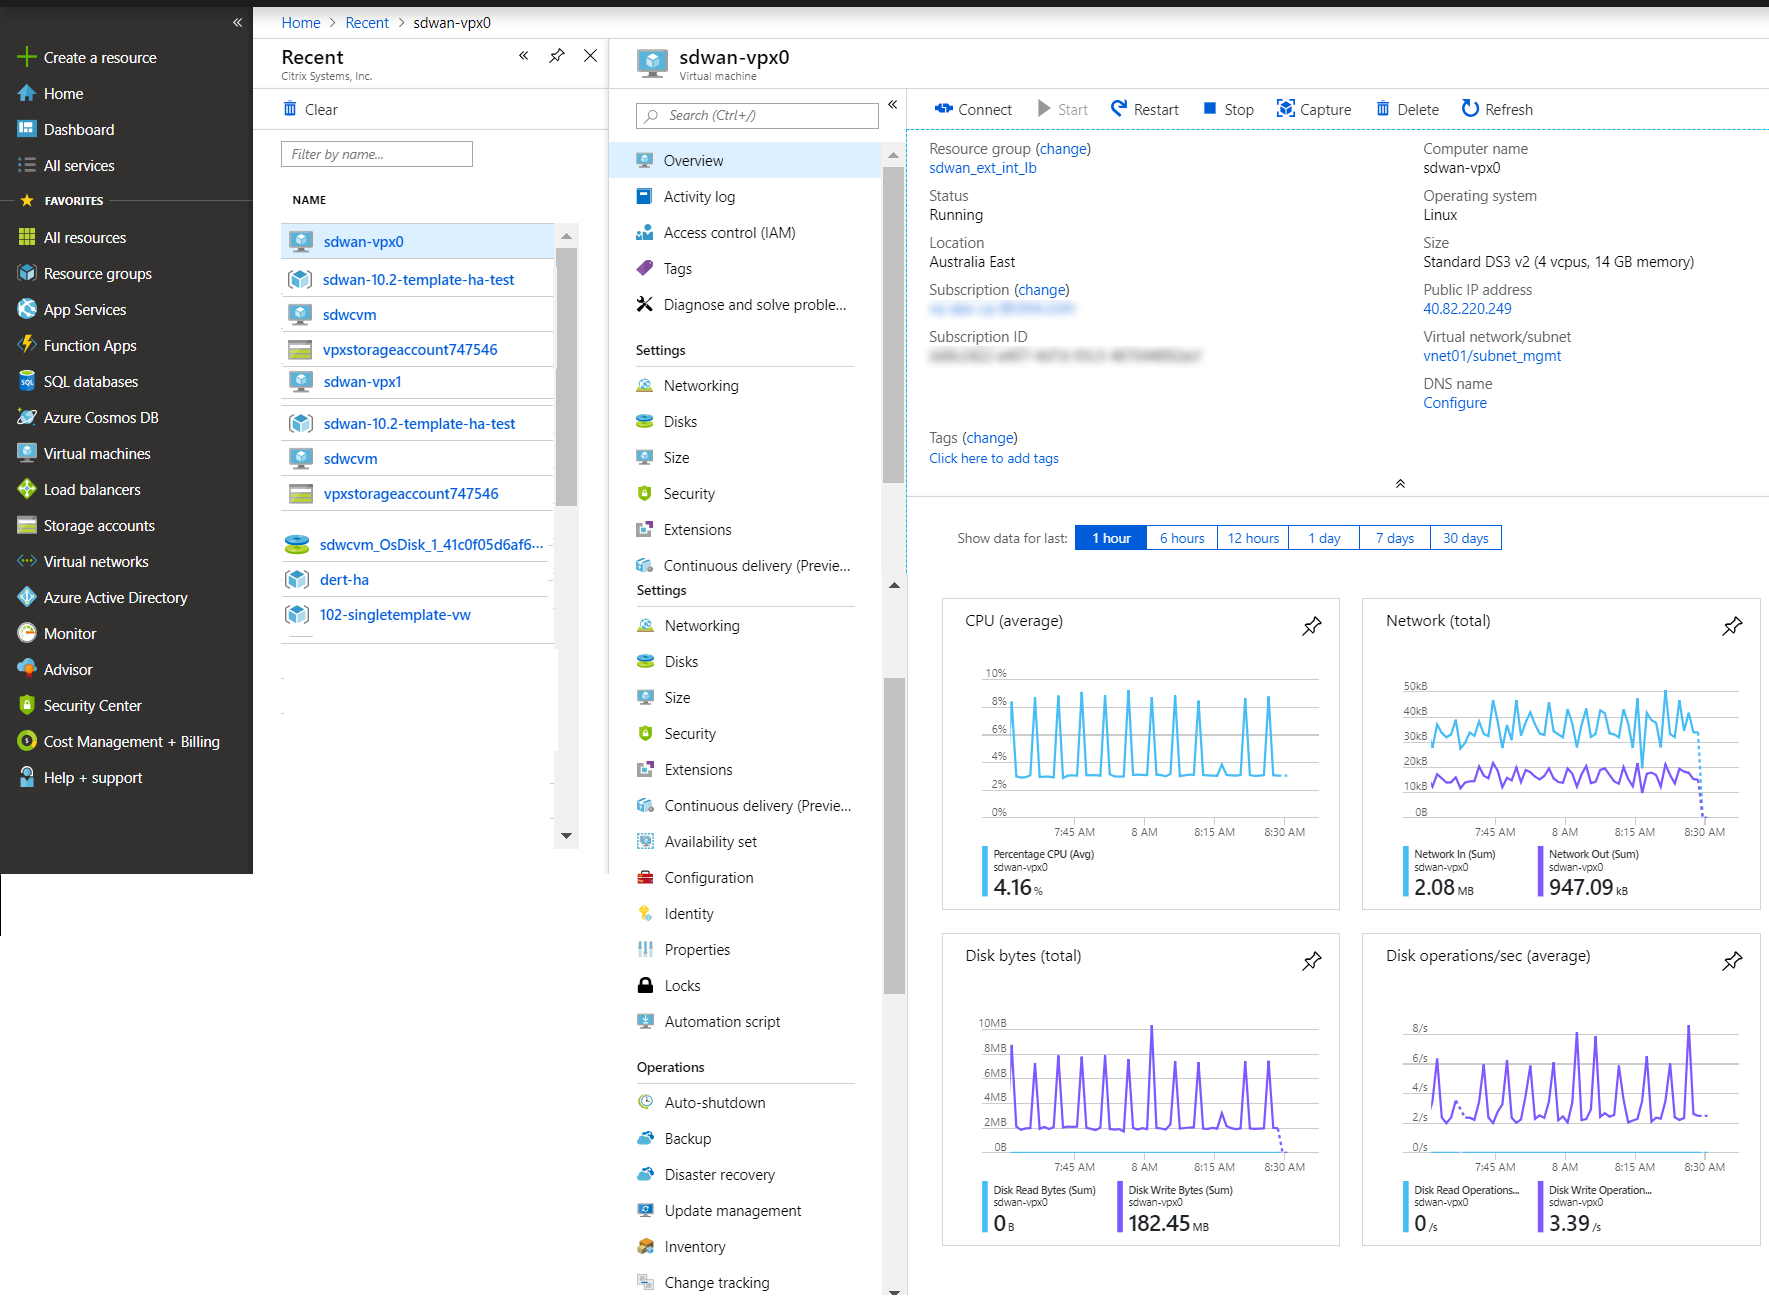
You can get more details of your deployment by going to the resource group in which you are creating the deployment.
-
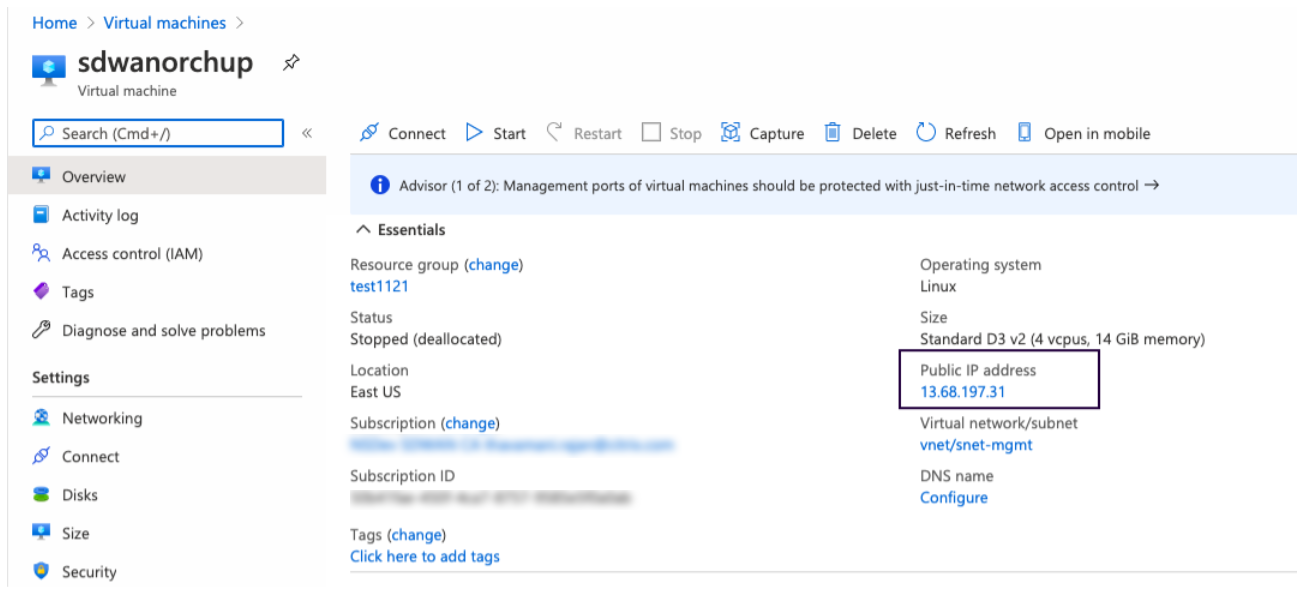
After provisioning, a public IP address for the management interface is auto created. Use the Public IP address to access the SD-WAN GUI.
-
To get admin access to the instance, use admin as the user name and the password created in the first step.
-
After you log into the GUI, notice that the virtual service is disabled because SD-WAN on Azure works on a BYOL (Bring Your Own License) model. Apply the license through the licensing tab, if you have the license already or order a new one by going to Citrix store.
- After the license is applied, you can apply configuration to the appliance and use it like any other branch. For more information on configuring the appliance, refer to: SD-WAN licensing
Troubleshooting
-
Issue: After logging in to a freshly provisioned Citrix SD-WAN VM created using the Azure deployment template for 11.2.3, the UI displays the following warning message:
Disk usage for the Active OS partition usage is at 70%
Resolution: Azure subscriptions can have a few default extensions enabled for security purposes. When an image is freshly created,
waagentinstalls these plug-ins in the default path which increases the Active OS partition usage. Upgrading the software to Citrix SD-WAN 11.3 or later releases removes the warning message from the UI. -
Issue: When logged into Citrix SD-WAN UI using the user name from the Azure deployment template, you get logged in as a read-only user. You can only view configuration and cannot modify any settings on the VM.
Resolution: If you use the user name created while provisioning the instance, you get read-only access. To get admin access after provisioning the instance, use admin as the user name and the password created while provisioning the instance.
Limitations - Microsoft Azure VMs
- After a VM is created and booted in Azure, the interfaces cannot be added or deleted. The VM profile (RAM/HD/CPUs) can be changed.
- Routes are added in the Virtual WAN configuration file directing all Virtual WAN data traffic coming from the WAN to the Client/Server LAN Subnet.
Microsoft Azure supports only gateway mode for deployments. For more information about gateway mode, see gateway mode.