-
-
Automate deployment of NetScaler agent on VMWare ESXi
-
Migrate NetScaler Console single-server deployment to a high availability deployment
-
Integrate NetScaler Console with Citrix Virtual Desktop Director
-
-
-
-
Scenarios for Flexed or Pooled license expiry and connectivity issues behavior
-
Configure NetScaler Console as the Flexed or Pooled license server
This content has been machine translated dynamically.
Dieser Inhalt ist eine maschinelle Übersetzung, die dynamisch erstellt wurde. (Haftungsausschluss)
Cet article a été traduit automatiquement de manière dynamique. (Clause de non responsabilité)
Este artículo lo ha traducido una máquina de forma dinámica. (Aviso legal)
此内容已经过机器动态翻译。 放弃
このコンテンツは動的に機械翻訳されています。免責事項
이 콘텐츠는 동적으로 기계 번역되었습니다. 책임 부인
Este texto foi traduzido automaticamente. (Aviso legal)
Questo contenuto è stato tradotto dinamicamente con traduzione automatica.(Esclusione di responsabilità))
This article has been machine translated.
Dieser Artikel wurde maschinell übersetzt. (Haftungsausschluss)
Ce article a été traduit automatiquement. (Clause de non responsabilité)
Este artículo ha sido traducido automáticamente. (Aviso legal)
この記事は機械翻訳されています.免責事項
이 기사는 기계 번역되었습니다.책임 부인
Este artigo foi traduzido automaticamente.(Aviso legal)
这篇文章已经过机器翻译.放弃
Questo articolo è stato tradotto automaticamente.(Esclusione di responsabilità))
Translation failed!
Automate deployment of NetScaler® agent on VMware ESXi
NetScaler Console allows you to automate the deployment of NetScaler agents on VMware ESXi.
As an admin, you can automate the following actions:
- Configure the NetScaler agent
- Register the NetScaler agent and change the default password of the agent.
Configure the NetScaler agent
To automate the configuration of the agent, add the values for the following parameters in the .ovf file:
IPAddressNetmaskGatewayNameserverHostname
Note:
The .ovf file is available in the agent image file. To download the NetScaler agent file, go to https://www.citrix.com/downloads/citrix-application-management/. The naming pattern of the agent image file is as follows, MASAGENT-ESX-releasenumber-buildnumber.zip
Register the NetScaler agent and change the default password
Note:
Before registering and changing the default password, make sure that you have added the parameters specified in Configure the NetScaler agent.
To automate the registering of the NetScaler agent and the changing of the default password, add the values for the following parameters in the same .ovf file:
NetScaler Console Server IPNetScaler Console UsernameNetScaler Console PasswordAgent New Password
Prerequisites
Before you begin installing a virtual appliance, make sure you:
- Install VMware vSphere 8.x on a management workstation that meets the minimum system requirements.
- Download the NetScaler Console setup files.
How to configure and register a NetScaler agent
Step 1: Download and edit the .OVF file
-
Extract the files from the MASAGENT-ESX-releasenumber-buildnumber.zip to the desired location. The following files are extracted:
- .ovf file
- .vmdk file
- .ova file
- .mf file
-
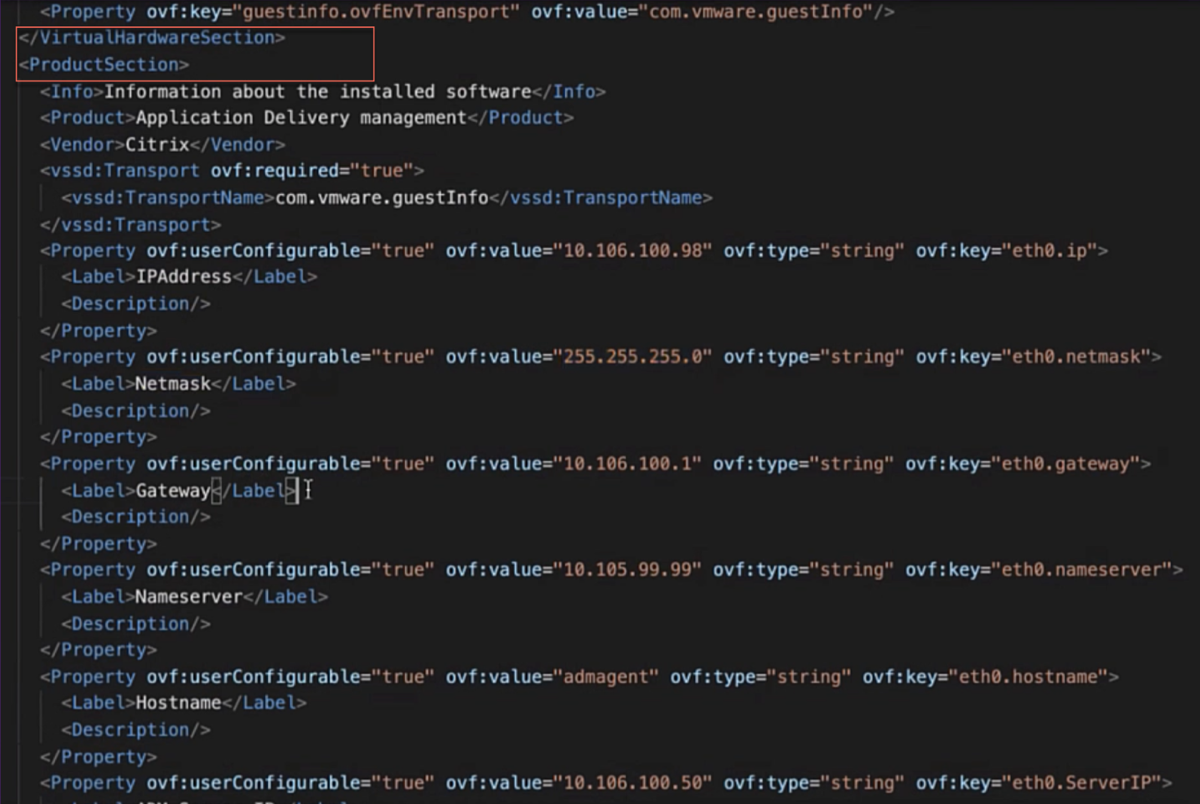
Open the .ovf file in any editor and add the following
<ProductSection>..</ProductSection>sample code after the</VirtualHardwareSection>tag<ProductSection> <Info>Information about the installed software</Info> <Product>Application Delivery management</Product> <Vendor>Citrix</Vendor> <Property ovf:userConfigurable="true" ovf:value="VALUE" ovf:type="string" ovf:key="eth0.ip"> <Label>IPAddress</Label> </Property> <Property ovf:userConfigurable="true" ovf:value="VALUE" ovf:type="string" ovf:key="eth0.netmask"> <Label>Netmask</Label> </Property> <Property ovf:userConfigurable="true" ovf:value="VALUE" ovf:type="string" ovf:key="eth0.gateway"> <Label>Gateway</Label> </Property> <Property ovf:userConfigurable="true" ovf:value="VALUE" ovf:type="string" ovf:key="eth0.nameserver"> <Label>Nameserver</Label> </Property> <Property ovf:userConfigurable="true" ovf:value="VALUE" ovf:type="string" ovf:key="eth0.hostname"> <Label>Hostname</Label> </Property> <Property ovf:userConfigurable="true" ovf:value="VALUE" ovf:type="string" ovf:key="eth0.ServerIP"> <Label>NetScaler Console Server IP</Label> </Property> <Property ovf:userConfigurable="true" ovf:value="VALUE" ovf:type="string" ovf:key="eth0.ServerUname"> <Label>NetScaler Console Username</Label> </Property> <Property ovf:userConfigurable="true" ovf:password="true" ovf:value="VALUE" ovf:type="string" ovf:key="eth0.ServerPassword"> <Label>NetScaler Console Password</Label> </Property> <Property ovf:userConfigurable="true" ovf:password="true" ovf:value="VALUE" ovf:type="string" ovf:key="eth0.NewPassword"> <Label>Agent New Password</Label> </Property> </ProductSection> <!--NeedCopy--> -
For the parameters which you want to configure, add their corresponding values in ovf:value=”VALUE”
-
To configure the NetScaler agent, add the values to the following parameters:
IPAddressNetmaskGatewayNameserverHostname
-
To register and change the default password of the NetScaler agent, add the values to the following parameters:
NetScaler Console Server IPNetScaler Console UsernameNetScaler Console PasswordAgent New Password
Note:
- You must configure the NetScaler agent before you register and change the default password of the agent.
- If you do not register and change the default password in the .ovf file, perform these actions manually after the VM is deployed.
-
-
After adding the parameters and their values, save the .ovf file.
Step 2: Install NetScaler Console virtual appliance on VMware ESXi
-
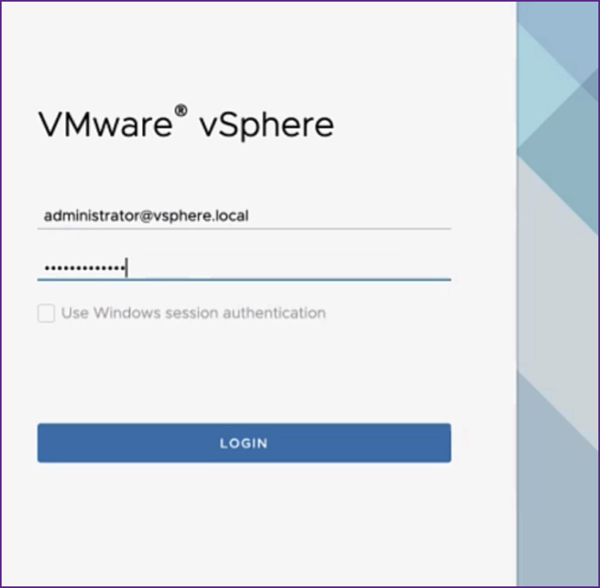
Log in to the VMWare vSphere Client and type the administrator credentials. Click Login.
-
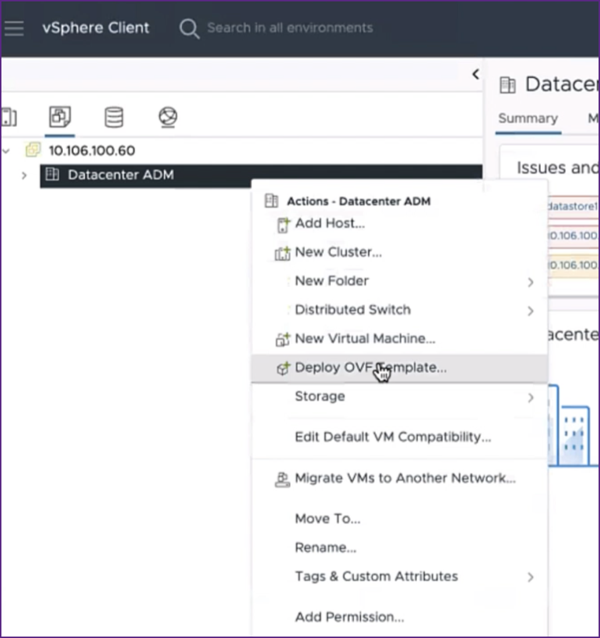
Select your ESXi server, and right-click to select Deploy OVF Template.
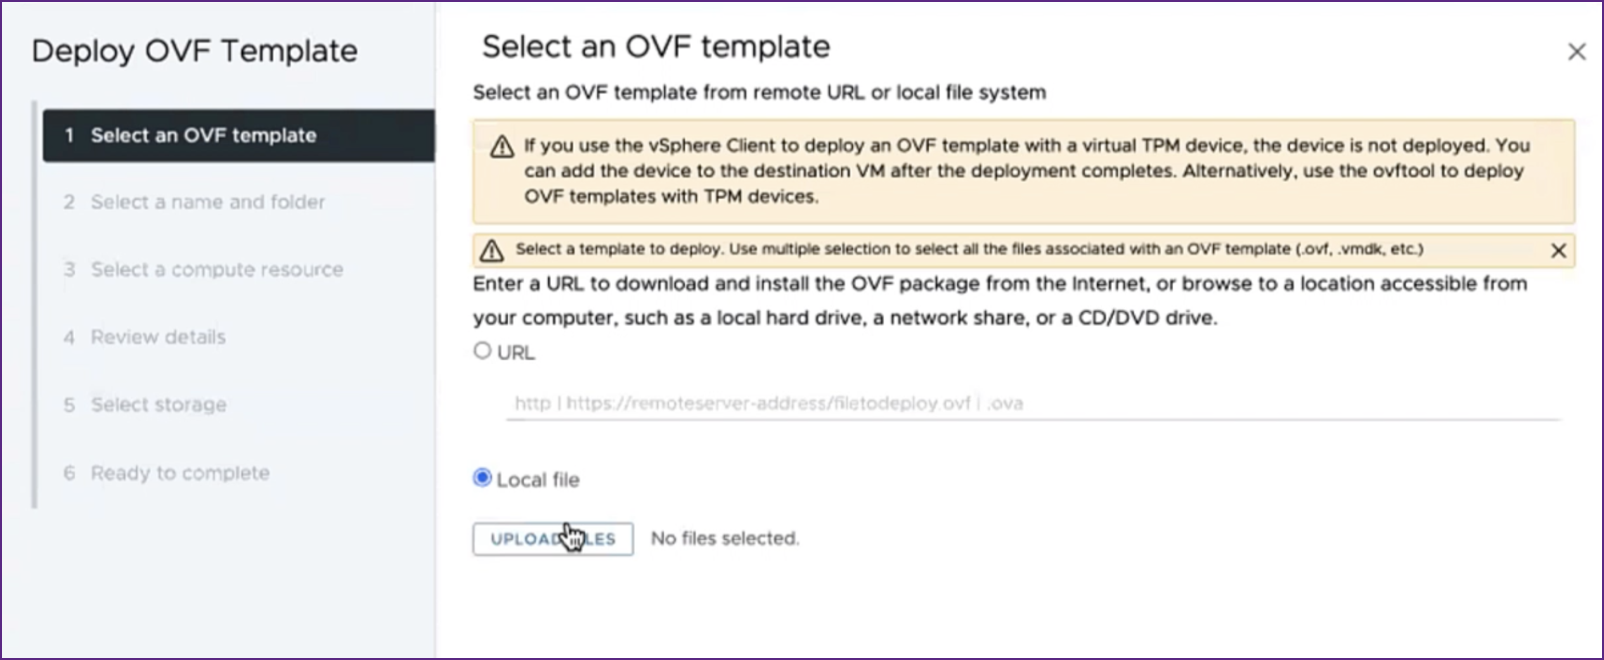
- In the Deploy OVF Template page:
-
Select an OVF template: Select Local file and navigate to where you have saved the edited .ovf file and the .vmdk file. Select the files and click Open to upload them. Click Next.
-
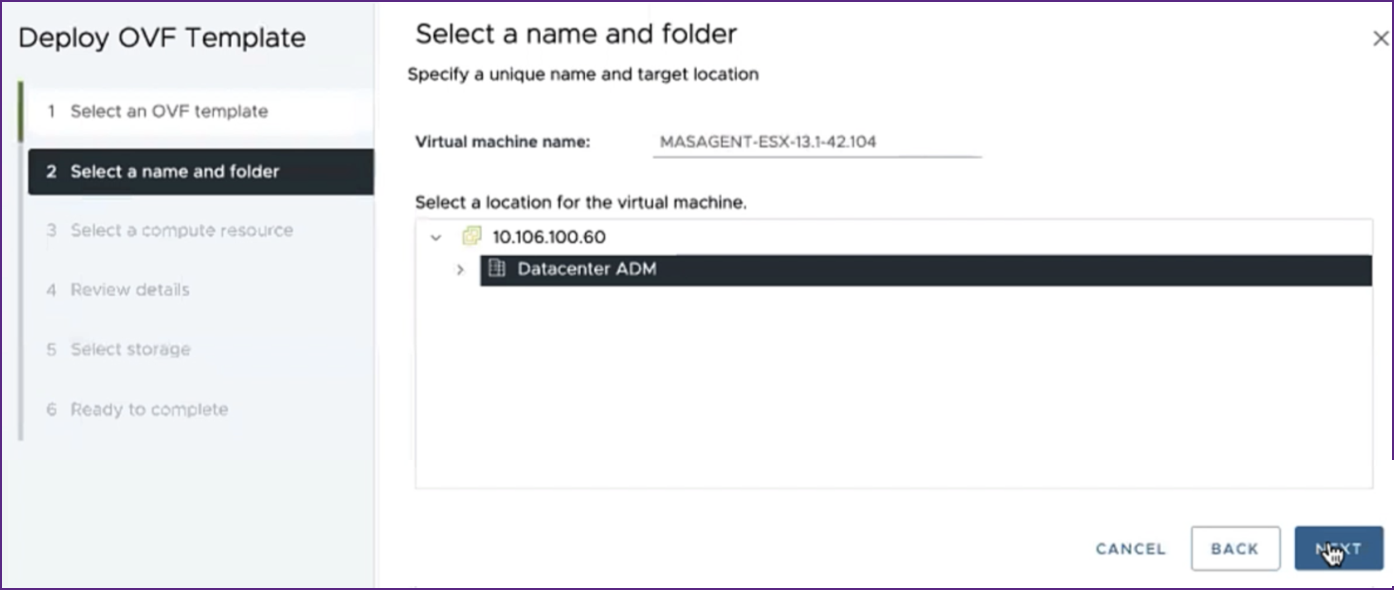
Select a name and folder: Add a name for the virtual appliance and select the location on the ESXi where you want to deploy the virtual machine. Click Next.
-
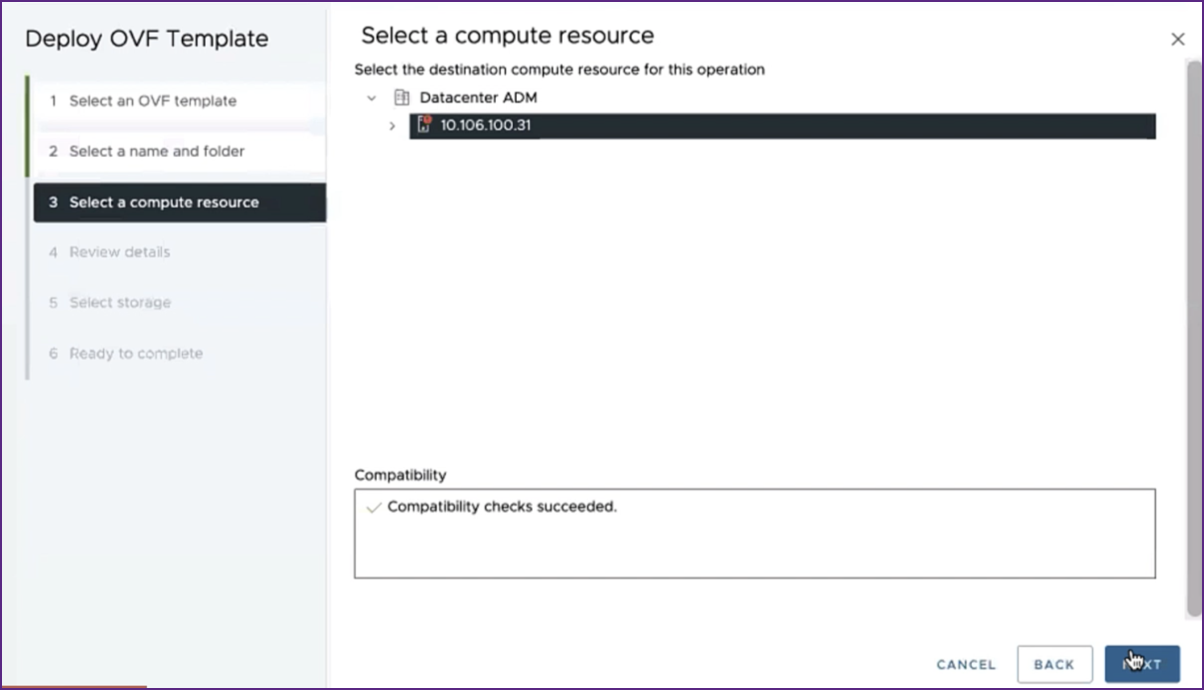
Select a compute resource: Select a resource on which to run the template after it is deployed. Click Next.
-
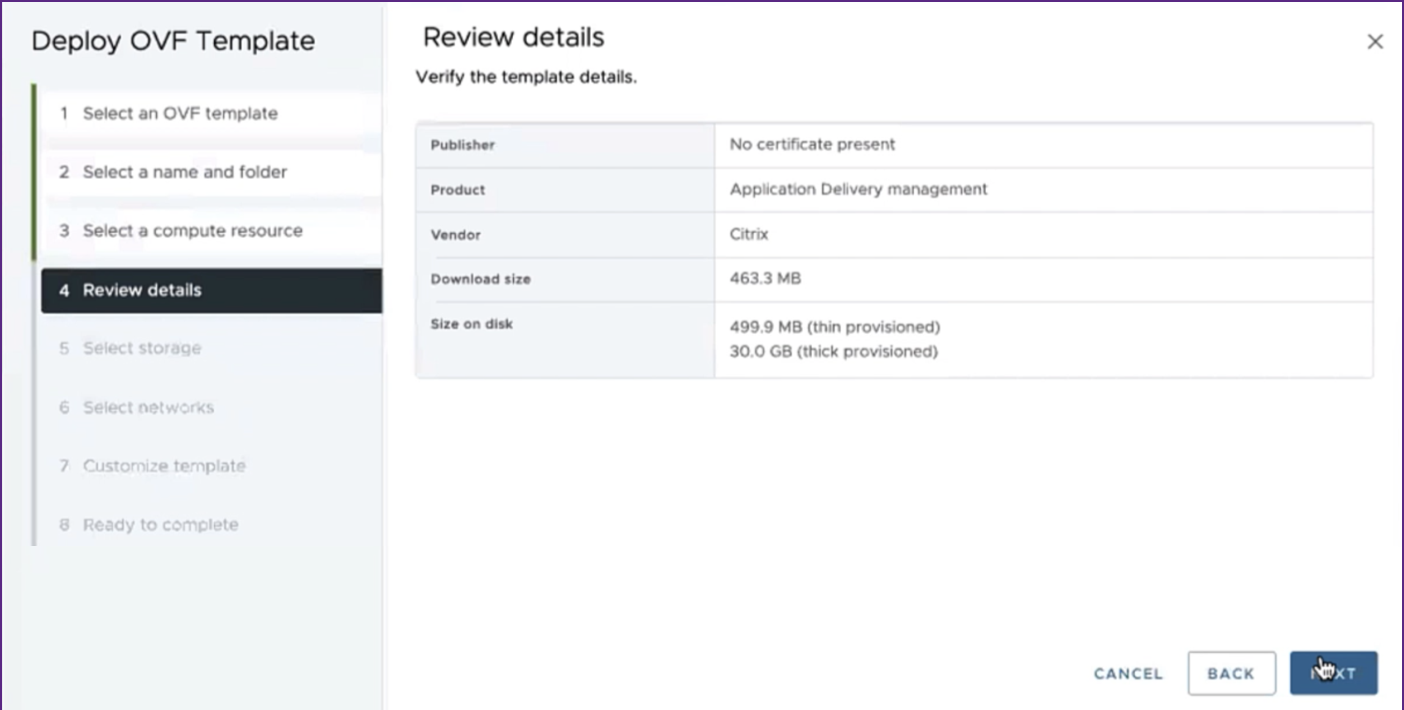
Review details: Verify the OVF template details. Click Next.
-
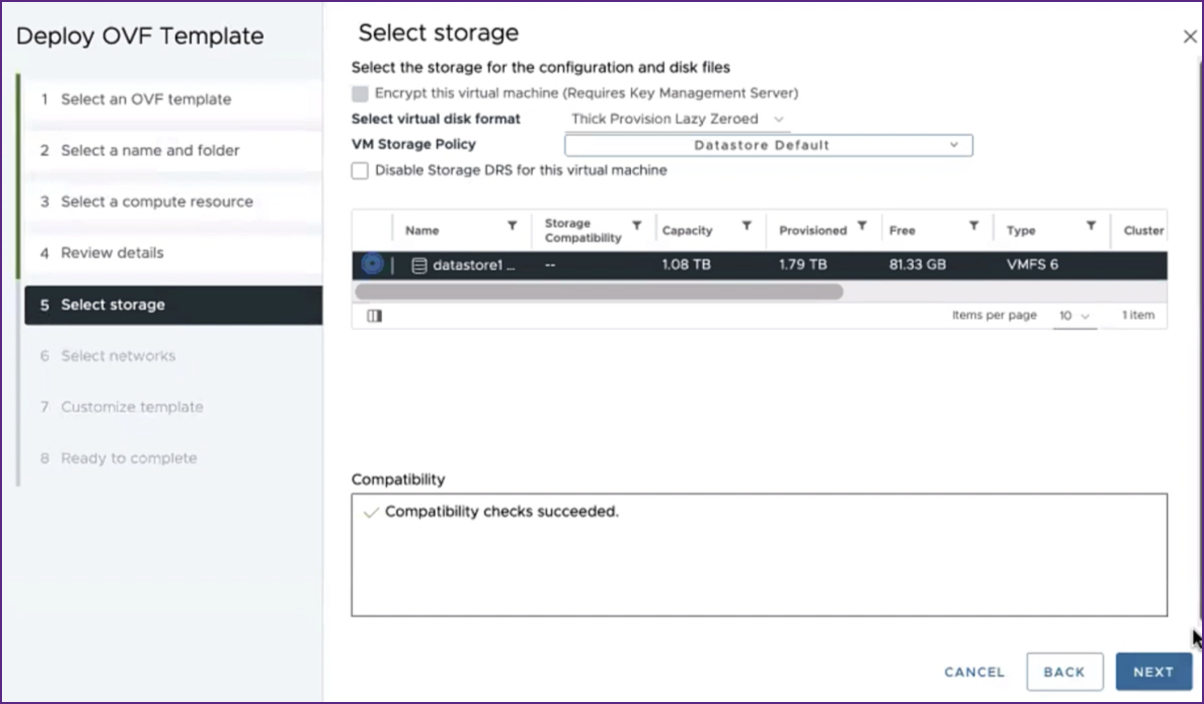
Select storage: Select a datastore to store the OVF template. Click Next.
-
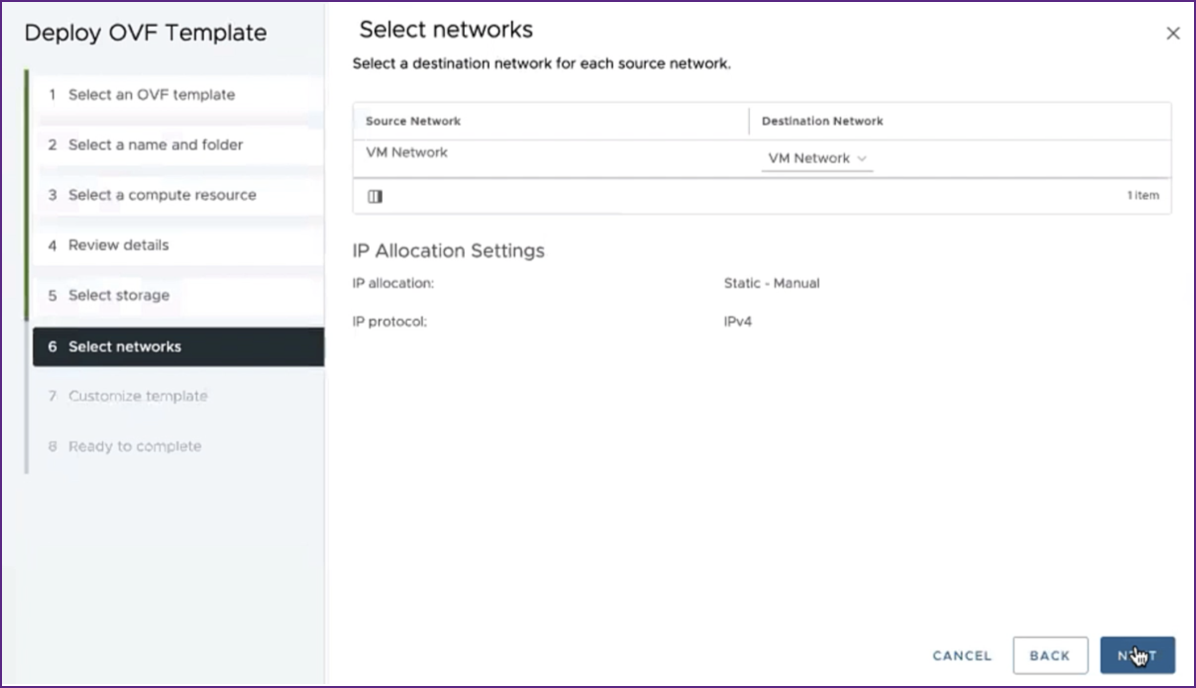
Select networks: Proceed with the default settings. Click Next.
-
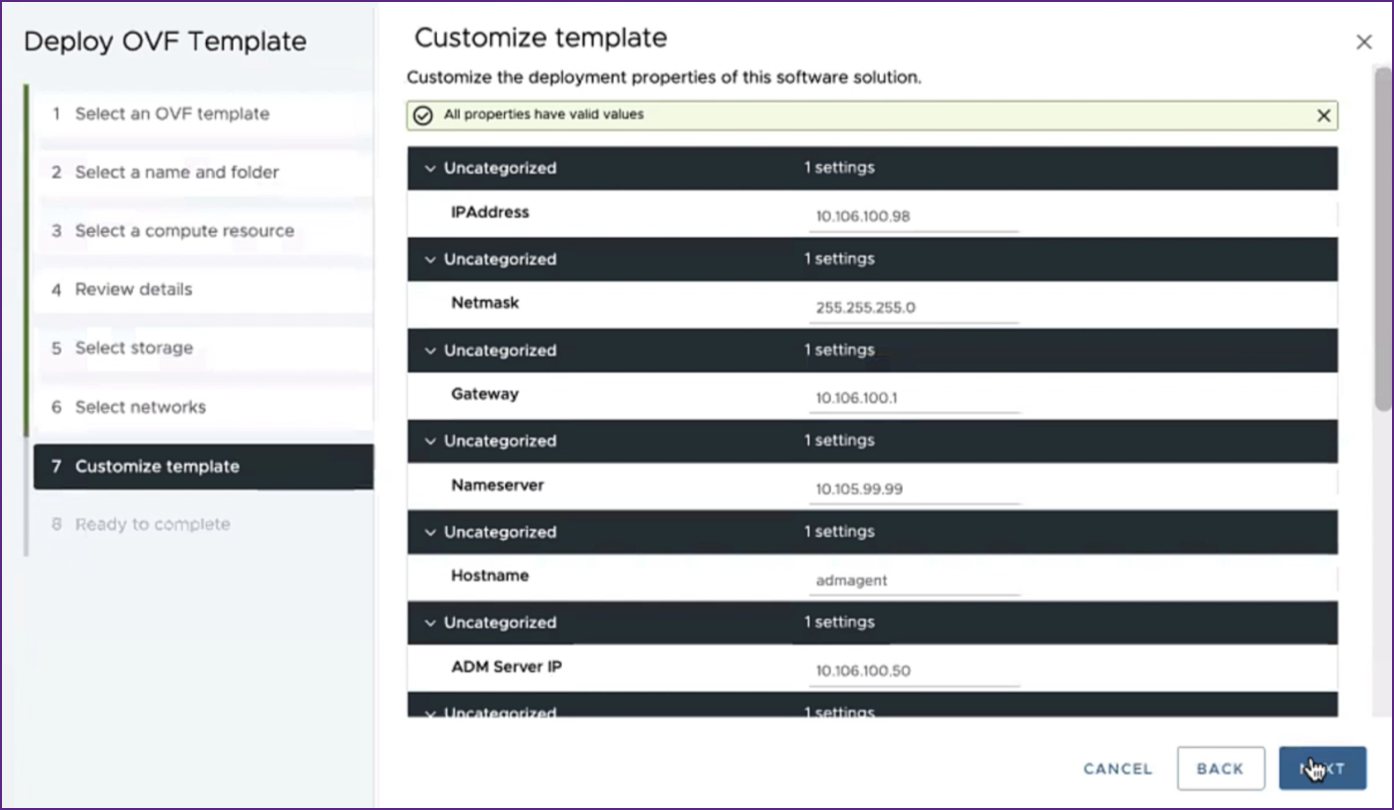
Customize template: Review all the properties of the OVF template. All the parameters and values you added in the .ovf file in the Download and edit the .OVF file section are displayed.
-
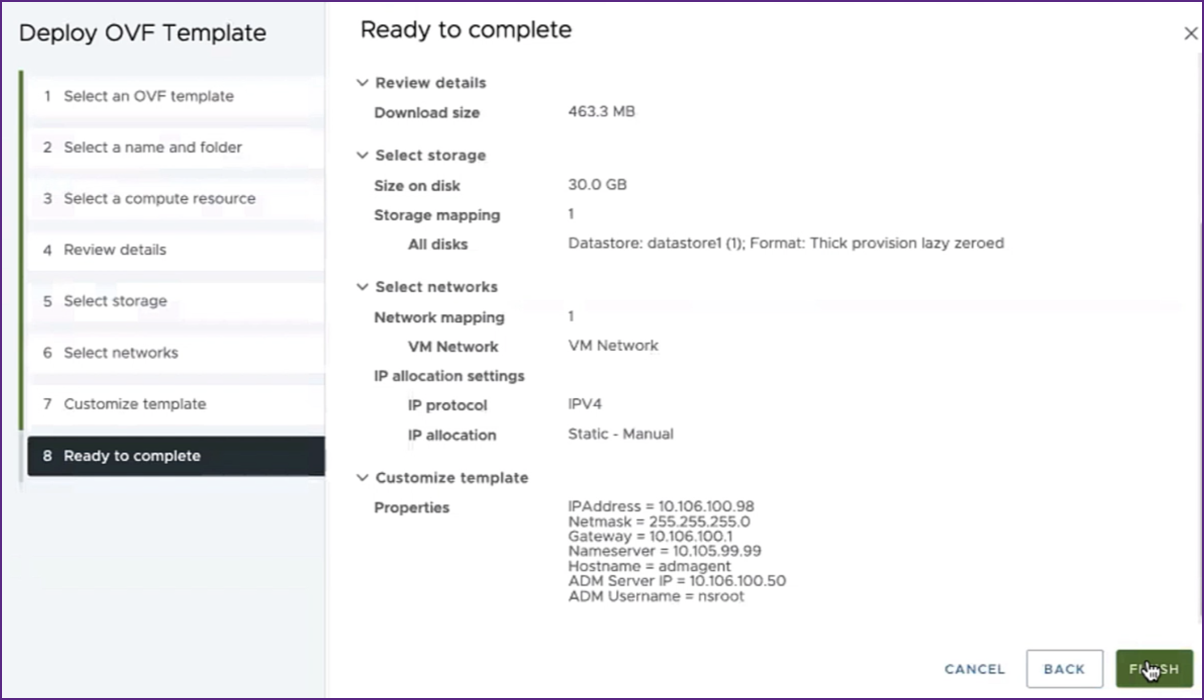
Ready to complete: To save the settings and start the deployment process, click Finish.
Wait for the deployment to complete. After the status of the Deploy OVF template operation is 100% complete, your agent is deployed.

Important:
Do not power on the virtual appliance before you edit the settings.
-
-
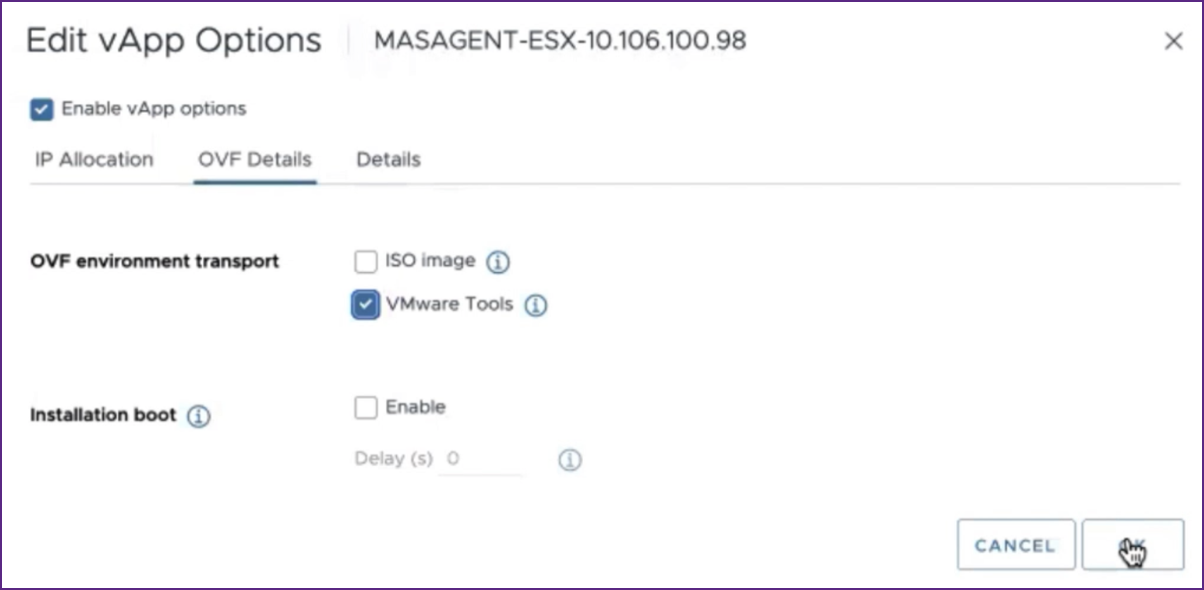
Click the new virtual appliance that you installed and navigate to Configure > Settings > vApp Options > Edit.
-
In the Edit vApp Options window, navigate to In OVF Details > OVF environment transport, and select VMware Tools. Click OK.
-
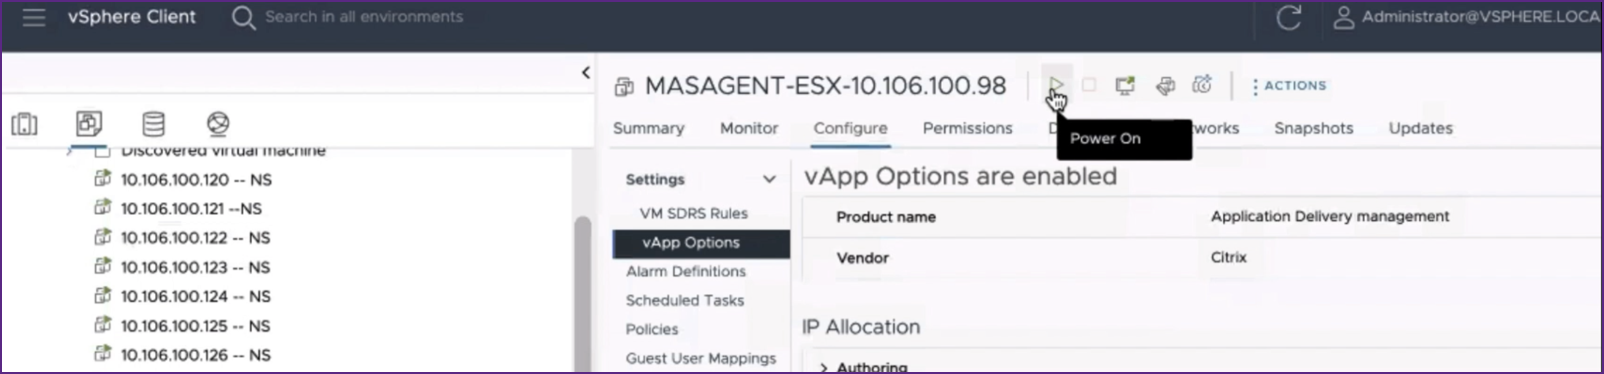
Right-click on the virtual machine and click Power On. As an alternative, you can select the virtual machine’s Summary tab and click Power On.
-
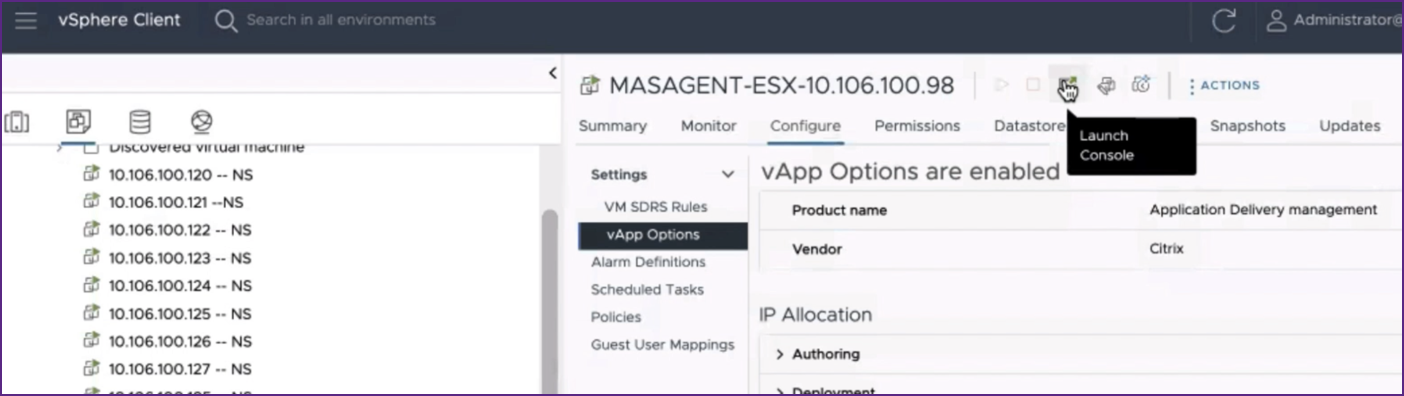
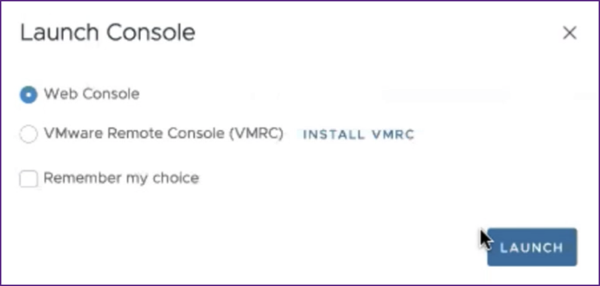
In the Summary tab, select Launch Web Console. In the Launch Console window, select Web Console. Click Launch.
-
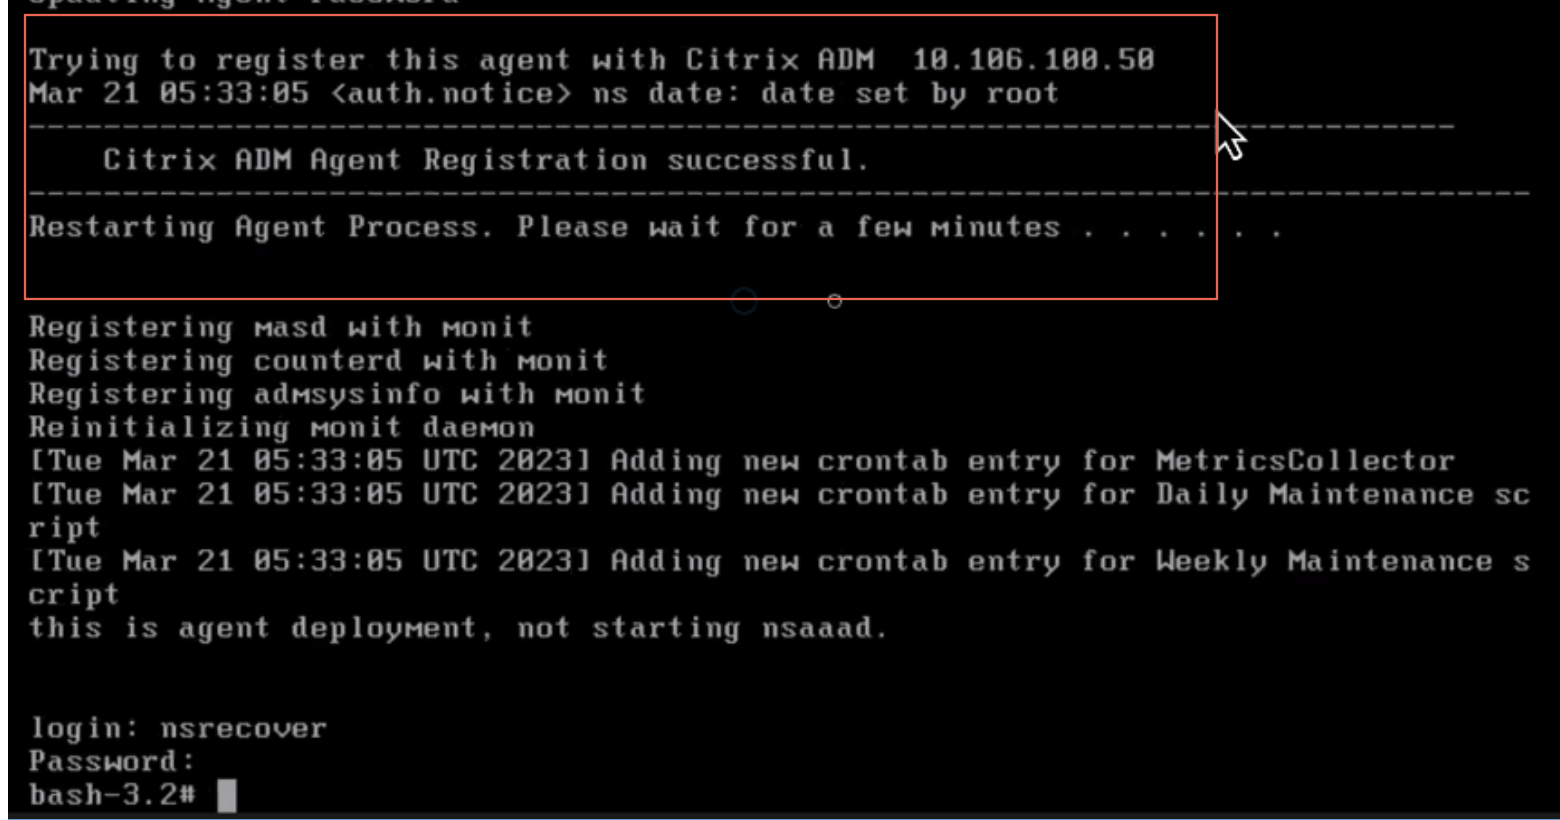
In the console, a successful registration message is displayed after the NetScaler agent is registered to the NetScaler Console server. To verify that the NetScaler agent has been deployed and the default password has been changed, log in with the NetScaler agent user name and the new password.
Step 3: Verify
To verify that the NetScaler agent is deployed:
- After the NetScaler agent is deployed, access the NetScaler Console GUI by typing the IP address of the NetScaler Console server in the browser.
- Log in to the server with your credentials.
- Navigate to Infrastructure > Instances > Agents. The newly deployed agent is displayed in the ESX Platform.
Share
Share
This Preview product documentation is Cloud Software Group Confidential.
You agree to hold this documentation confidential pursuant to the terms of your Cloud Software Group Beta/Tech Preview Agreement.
The development, release and timing of any features or functionality described in the Preview documentation remains at our sole discretion and are subject to change without notice or consultation.
The documentation is for informational purposes only and is not a commitment, promise or legal obligation to deliver any material, code or functionality and should not be relied upon in making Cloud Software Group product purchase decisions.
If you do not agree, select I DO NOT AGREE to exit.