-
-
-
For builds till 14.1-17.x
-
-
-
-
Scenarios for Flexed or Pooled license expiry and connectivity issues behavior
-
Configure NetScaler Console as the Flexed or Pooled license server
This content has been machine translated dynamically.
Dieser Inhalt ist eine maschinelle Übersetzung, die dynamisch erstellt wurde. (Haftungsausschluss)
Cet article a été traduit automatiquement de manière dynamique. (Clause de non responsabilité)
Este artículo lo ha traducido una máquina de forma dinámica. (Aviso legal)
此内容已经过机器动态翻译。 放弃
このコンテンツは動的に機械翻訳されています。免責事項
이 콘텐츠는 동적으로 기계 번역되었습니다. 책임 부인
Este texto foi traduzido automaticamente. (Aviso legal)
Questo contenuto è stato tradotto dinamicamente con traduzione automatica.(Esclusione di responsabilità))
This article has been machine translated.
Dieser Artikel wurde maschinell übersetzt. (Haftungsausschluss)
Ce article a été traduit automatiquement. (Clause de non responsabilité)
Este artículo ha sido traducido automáticamente. (Aviso legal)
この記事は機械翻訳されています.免責事項
이 기사는 기계 번역되었습니다.책임 부인
Este artigo foi traduzido automaticamente.(Aviso legal)
这篇文章已经过机器翻译.放弃
Questo articolo è stato tradotto automaticamente.(Esclusione di responsabilità))
Translation failed!
Manage licensing and enable analytics on virtual servers
Note
- By default, the Auto Licensed Virtual Servers option is enabled. You must ensure to have sufficient licenses to license the virtual servers. If you have limited licenses and want to license only the selective virtual servers based on your requirement, disable the Auto Licensed Virtual Servers option. Navigate to Settings > Licensing & Analytics Configuration and disable the Auto Licensed Virtual Servers option under Virtual Server License Allocation.
The process of enabling analytics is simplified. You can license the virtual server and enable analytics in a single workflow.
Navigate to Settings > Licensing & Analytics Configuration to:
-
View the Virtual Server Licence Summary
-
View the Virtual Server Analytics Summary

When you click Configure License or Configure Analytics, the All Virtual Servers page is displayed.
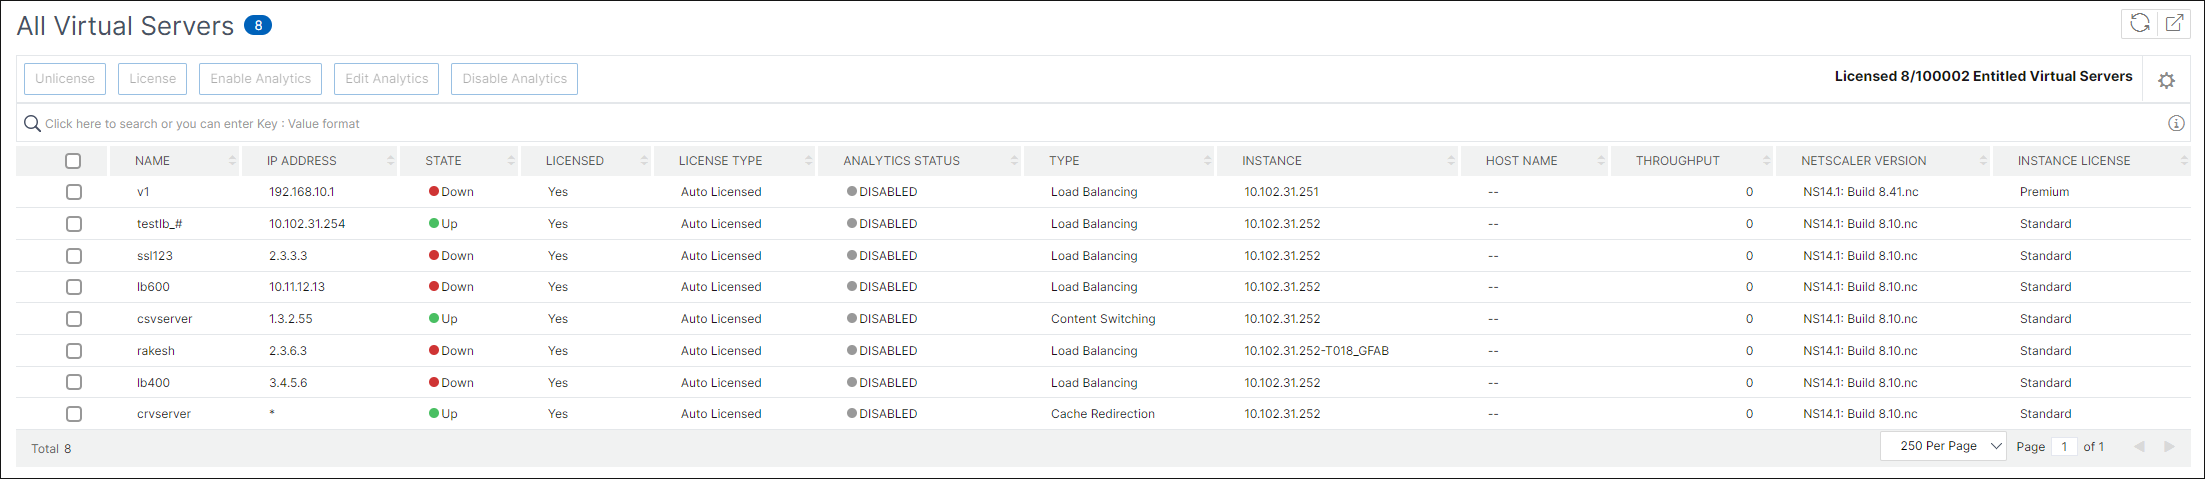
On the All Virtual Servers page, you can:
-
Apply license for unlicensed virtual servers
-
Remove license for licensed virtual servers
-
Enable analytics on licensed virtual servers
-
Edit analytics
-
Disable analytics
Note
The supported virtual servers to enable analytics are Load Balancing, Content Switching, and NetScaler Gateway.
Manage licensing on virtual servers
To license the virtual servers, from the All Virtual Servers page:
-
Click the search bar, select Licensed, and select No.
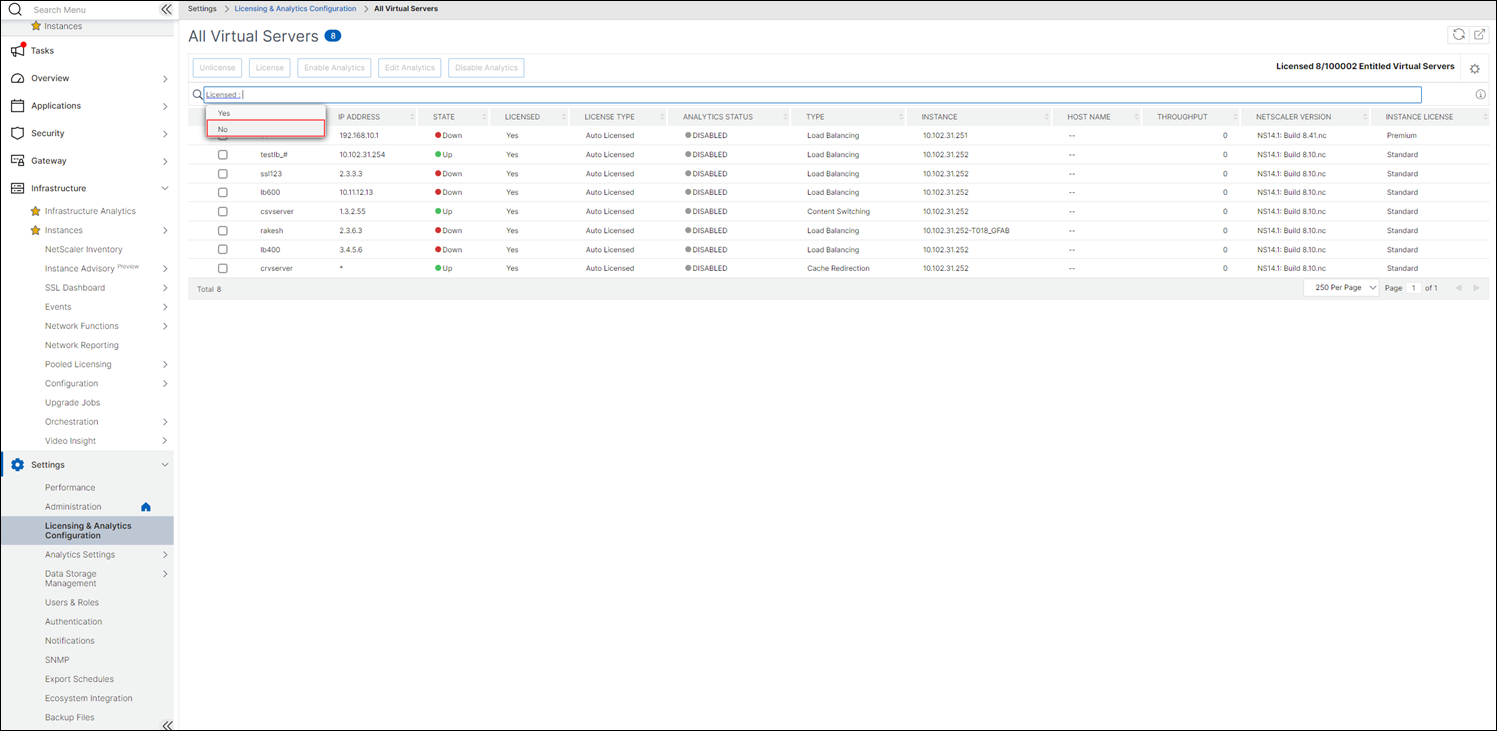
The filter is now applied and only the unlicensed virtual servers are displayed.
-
Select the virtual servers and then click License.

To unlicense the virtual servers, from the All Virtual Servers page:
-
Click the search bar, select Licensed, and select Yes.
-
Select the virtual servers and click Unlicense.
Enable analytics
The following are the prerequisites to enable analytics for virtual servers:
-
Ensure that virtual servers are licensed
-
Ensure that analytics status is Disabled
-
Ensure that virtual servers are in UP status
You can filter the results to identify the virtual servers that are mentioned in the prerequisites.
-
Click the search bar and select State and then select UP.
-
Click the search bar and select Licensed, and then select Yes.
-
Click the search bar and select Analytics Status, and then select Disabled.
-
After applying the filters, select the virtual servers, and then click Enable Analytics.

Note
Alternatively, you can enable analytics for a particular instance:
-
Navigate to Infrastructure > Instances > NetScaler and then select the instance type. For example, VPX.
-
Select the instance and from Select Action list, select Configure Analytics
-
On the Configure Analytics on Virtual Servers page, select the Virtual Server and click Enable Analytics.
-
-
On the Enable Analytics window:
-
Select the insight types (Web Insight or WAF Security Violations)
-
Select Logstream as Transport Mode
Note
For NetScaler 12.0 or earlier, IPFIX is the default option for Transport Mode. For NetScaler 12.0 or later, you can either select Logstream or IPFIX as Transport Mode.
For more information about IPFIX and Logstream, see Logstream overview.
-
Under Instance level options:
-
Enable HTTP X-Forwarded-For - Select this option to identify the IP address for the connection between client and application, through HTTP proxy or load balancer.
-
NetScaler Gateway - Select this option to view analytics for NetScaler Gateway.
-
-
The Expression is true by default
-
Click OK

Note
-
If you select virtual servers that are not licensed, then NetScaler Console first licenses those virtual servers and then enables analytics
-
For admin partitions, only Web Insight is supported
-
For virtual servers such as Cache Redirection, Authentication, and GSLB, you cannot enable analytics. An error message is displayed.
-
-
After you click OK, NetScaler Console processes to enable analytics on the selected virtual servers.
Note
NetScaler Console uses NetScaler SNIP for Logstream and NSIP for IPFIX. If there is a firewall enabled between NetScaler agent and NetScaler instance, ensure you open the following port to enable NetScaler Console to collect AppFlow traffic:
Transport Mode Source IP Type Port IPFIX NSIP UDP 4739 Logstream SNIP TCP 5557
Edit analytics
To edit analytics on the virtual servers:
-
Select the virtual servers
Note
Alternatively, you can also edit analytics for a particular instance:
-
Navigate to Infrastructure > Instances > NetScaler and then select the instance type. For example, VPX.
-
Select the instance and click Edit Analytics.
-
-
Click Edit Analytics
-
Edit the parameters that you want to apply on the Edit Analytics Configuration window
-
Click OK.
Disable analytics
To disable analytics on the selected virtual servers:
-
Select the virtual servers
-
Click Disable Analytics
NetScaler Console disables the analytics on the selected virtual servers
The following table describes the features of NetScaler Console that supports IPFIX and Logstream as the transport mode:
| Feature | IPFIX | Logstream |
|---|---|---|
| Web Insight | • | • |
| WAF Security Violations | • | • |
| Gateway Insight | • | • |
| HDX Insight | • | • |
| SSL Insight | Not supported | • |
| CR Insight | • | • |
| IP Reputation | • | • |
| AppFirewall | • | • |
| Client Side Measurement | • | • |
| Syslog/Auditlog | • | • |
Configure analytics globally
Apart from the existing process to enable analytics, you can also use a single-pane workflow to configure analytics on:
-
All the existing licensed virtual servers
-
The subsequent licensed virtual servers
After configuration, this feature eliminates the necessity to manually enable analytics on the existing and subsequent virtual servers.
Points to note:
Before you configure analytics, you must understand the following behaviors of NetScaler Console:
-
When you configure this feature for the first time, you must ensure that the prerequisites mentioned in this document are met.
-
Modify the analytics settings later.
Consider that you have configured the analytics settings for the first time by selecting Web Insight, HDX™ Insight, and Gateway Insight. If you want to modify the analytics settings later and deselect Gateway Insight, the changes do not impact the virtual servers that are already enabled with analytics.
-
The virtual servers that are already enabled with analytics.
Consider that you have 10 licensed virtual servers and two of them are already enabled with analytics. In this scenario, this feature enables analytics only for the remaining eight virtual servers.
-
The virtual servers that are manually disabled with analytics.
Consider that you have 10 licensed virtual servers and you have manually disabled analytics for two virtual servers. In this scenario, this feature enables analytics only for the remaining eight virtual servers and skips the virtual servers that are manually disabled with analytics.
-
Bot Security Violations and WAF Security Violations options are supported only in premium licensed virtual servers. If the virtual servers are not premium licensed, then Bot Security Violations and WAF Security Violations are not enabled.
Prerequisites
Ensure that:
-
All existing virtual servers are licensed.
-
Auto-licensed option is enabled to license all the subsequent virtual servers. Navigate to Settings > Licensing & Analytics Config and under Virtual Server License Allocation, turn on the Auto Licensed Virtual Servers option.
Enable analytics
-
Navigate to Settings > Licensing & Analytics Config.
-
Under Analytics Summary, click Global Analytics Configuration.

-
Select the analytics features that you want to enable analytics on the virtual servers.
-
To enable analytics on the subsequent virtual servers, select the Apply this analytics settings on the subsequent licensed virtual servers check box.
-
Click Submit.

Share
Share
This Preview product documentation is Cloud Software Group Confidential.
You agree to hold this documentation confidential pursuant to the terms of your Cloud Software Group Beta/Tech Preview Agreement.
The development, release and timing of any features or functionality described in the Preview documentation remains at our sole discretion and are subject to change without notice or consultation.
The documentation is for informational purposes only and is not a commitment, promise or legal obligation to deliver any material, code or functionality and should not be relied upon in making Cloud Software Group product purchase decisions.
If you do not agree, select I DO NOT AGREE to exit.