-
Low-touch onboarding of NetScaler instances using Console Advisory Connect
This content has been machine translated dynamically.
Dieser Inhalt ist eine maschinelle Übersetzung, die dynamisch erstellt wurde. (Haftungsausschluss)
Cet article a été traduit automatiquement de manière dynamique. (Clause de non responsabilité)
Este artículo lo ha traducido una máquina de forma dinámica. (Aviso legal)
此内容已经过机器动态翻译。 放弃
このコンテンツは動的に機械翻訳されています。免責事項
이 콘텐츠는 동적으로 기계 번역되었습니다. 책임 부인
Este texto foi traduzido automaticamente. (Aviso legal)
Questo contenuto è stato tradotto dinamicamente con traduzione automatica.(Esclusione di responsabilità))
This article has been machine translated.
Dieser Artikel wurde maschinell übersetzt. (Haftungsausschluss)
Ce article a été traduit automatiquement. (Clause de non responsabilité)
Este artículo ha sido traducido automáticamente. (Aviso legal)
この記事は機械翻訳されています.免責事項
이 기사는 기계 번역되었습니다.책임 부인
Este artigo foi traduzido automaticamente.(Aviso legal)
这篇文章已经过机器翻译.放弃
Questo articolo è stato tradotto automaticamente.(Esclusione di responsabilità))
Translation failed!
Enable data collection to monitor NetScalers deployed in LAN user mode
External users who access Citrix Virtual App or Desktop applications must authenticate themselves on the NetScaler Gateway. Internal users, however, might not require to be redirected to the NetScaler Gateway. Also, in a transparent mode deployment, the administrator must manually apply the routing policies, so that the requests are redirected to the NetScaler appliance.
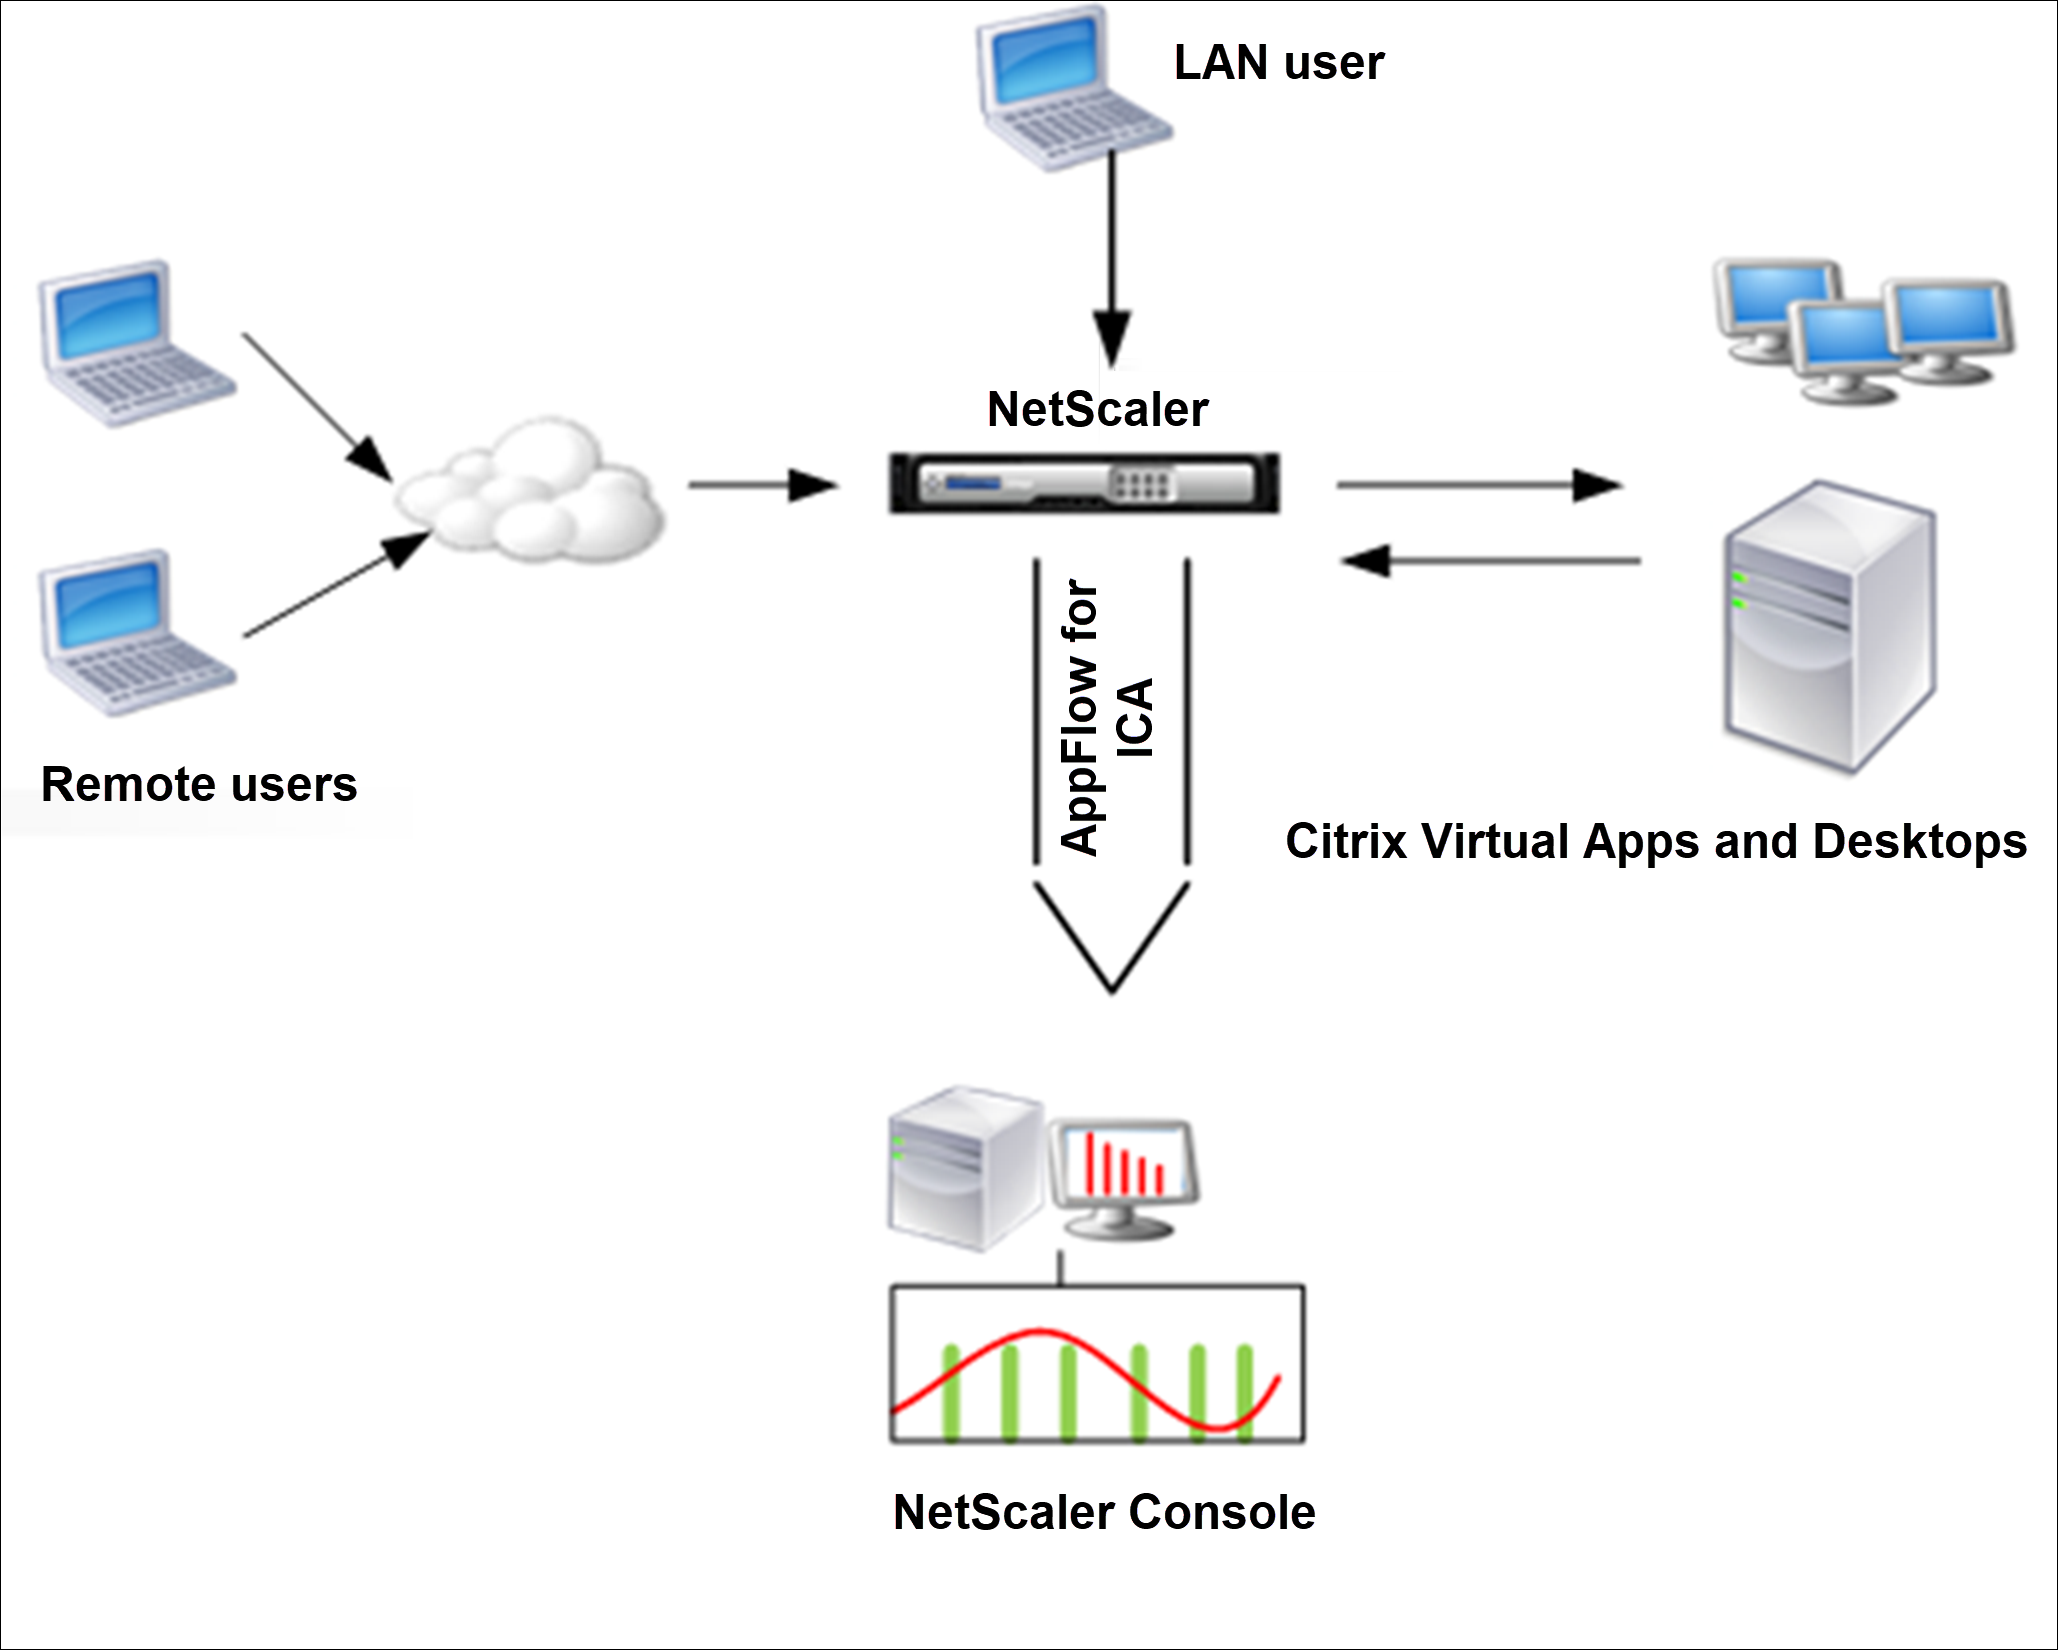
To overcome these challenges, and for LAN users to directly connect to Citrix Virtual Apps and Desktops applications, you can deploy the NetScaler appliance in a LAN user mode by configuring a cache redirection virtual server. The cache redirection virtual server acts as a SOCKS proxy on the NetScaler Gateway appliance.
The following image illustrates NetScaler Console deployed in LAN User Mode.

Note
NetScaler Gateway appliance must be able to reach the agent.
To monitor NetScaler appliances deployed in this mode, first add the NetScaler appliance to the NetScaler Insight inventory, enable AppFlow, and then view the reports on the dashboard.
After you add the NetScaler appliance to the NetScaler Console inventory, you must enable AppFlow for data collection.
Note
- You cannot enable data collection on a NetScaler deployed in LAN User mode by using the NetScaler Console configuration utility.
- For detailed information about the commands and their usage, see Command Reference.
- For information on policy expressions, see Policies and Expressions.
To configure data collection on a NetScaler appliance by using the command line interface:
At the command prompt, do the following:
-
Log on to NetScaler appliance.
-
Add a forward proxy cache redirection virtual server with the proxy IP and port, and specify the service type as HDX.
add cr vserver <name> <servicetype> [<ipaddress> <port>] [-cacheType <cachetype>] [ - cltTimeout <secs>]
<!--NeedCopy-->
Example:
add cr vserver cr1 HDX 10.12.2.2 443 –cacheType FORWARD –cltTimeout 180
<!--NeedCopy-->
Note
If you are accessing the LAN network by using a NetScaler Gateway appliance, add an action to apply a policy that matches the VPN traffic.
add vpn trafficAction** \<name\> \<qual\> \[-HDX ( ON | OFF )\]

add vpn trafficPolicy** \<name\> \<rule\> \<action\>
<!--NeedCopy-->
Example:
add vpn trafficAction act1 tcp -HDX ON add vpn trafficPolicy pol1 "REQ.IP.DESTIP == 10.102.69.17" act1 <!--NeedCopy--> -
Add NetScaler Console as an AppFlow collector on the NetScaler appliance.
add appflow collector** \<name\> **-IPAddress** \<ip\_addr\>
<!--NeedCopy-->
Example:
add appflow collector MyInsight -IPAddress 192.168.1.101 <!--NeedCopy--> -
Create an AppFlow® action and associate the collector with the action.
add appflow action** \<name\> **-collectors** \<string\> ...
<!--NeedCopy-->
Example:
add appflow action act -collectors MyInsight <!--NeedCopy--> -
Create an AppFlow policy to specify the rule for generating the traffic.
add appflow policy** \<policyname\> \<rule\> \<action\>
<!--NeedCopy-->
Example:
add appflow policy pol true act <!--NeedCopy--> -
Bind the AppFlow policy to a global bind point.
bind appflow global** \<policyname\> \<priority\> **-type** \<type\>
<!--NeedCopy-->
Example:
bind appflow global pol 1 -type ICA_REQ_DEFAULT
<!--NeedCopy-->
Note
The value of type must be ICA_REQ_OVERRIDE or ICA_REQ_DEFAULT to apply to ICA® traffic.
-
Set the value of the flowRecordInterval parameter for AppFlow to 60 seconds.
set appflow param -flowRecordInterval 60
<!--NeedCopy-->
Example:
set appflow param -flowRecordInterval 60 <!--NeedCopy--> -
Save the configuration.
save ns config
<!--NeedCopy-->
Share
Share
In this article
This Preview product documentation is Cloud Software Group Confidential.
You agree to hold this documentation confidential pursuant to the terms of your Cloud Software Group Beta/Tech Preview Agreement.
The development, release and timing of any features or functionality described in the Preview documentation remains at our sole discretion and are subject to change without notice or consultation.
The documentation is for informational purposes only and is not a commitment, promise or legal obligation to deliver any material, code or functionality and should not be relied upon in making Cloud Software Group product purchase decisions.
If you do not agree, select I DO NOT AGREE to exit.