Onboard NetScaler instances using Console Advisory Connect
This document provides a step-by-step guide to help you get started with NetScaler Console. Before you start, read how the NetScaler Console launches a new onboarding workflow, which provides you a faster way to get complete visibility into your hybrid multi-cloud (HMC) deployment. See Low-touch onboarding of NetScaler instances using NetScaler Console connect.
Step 1: Get started
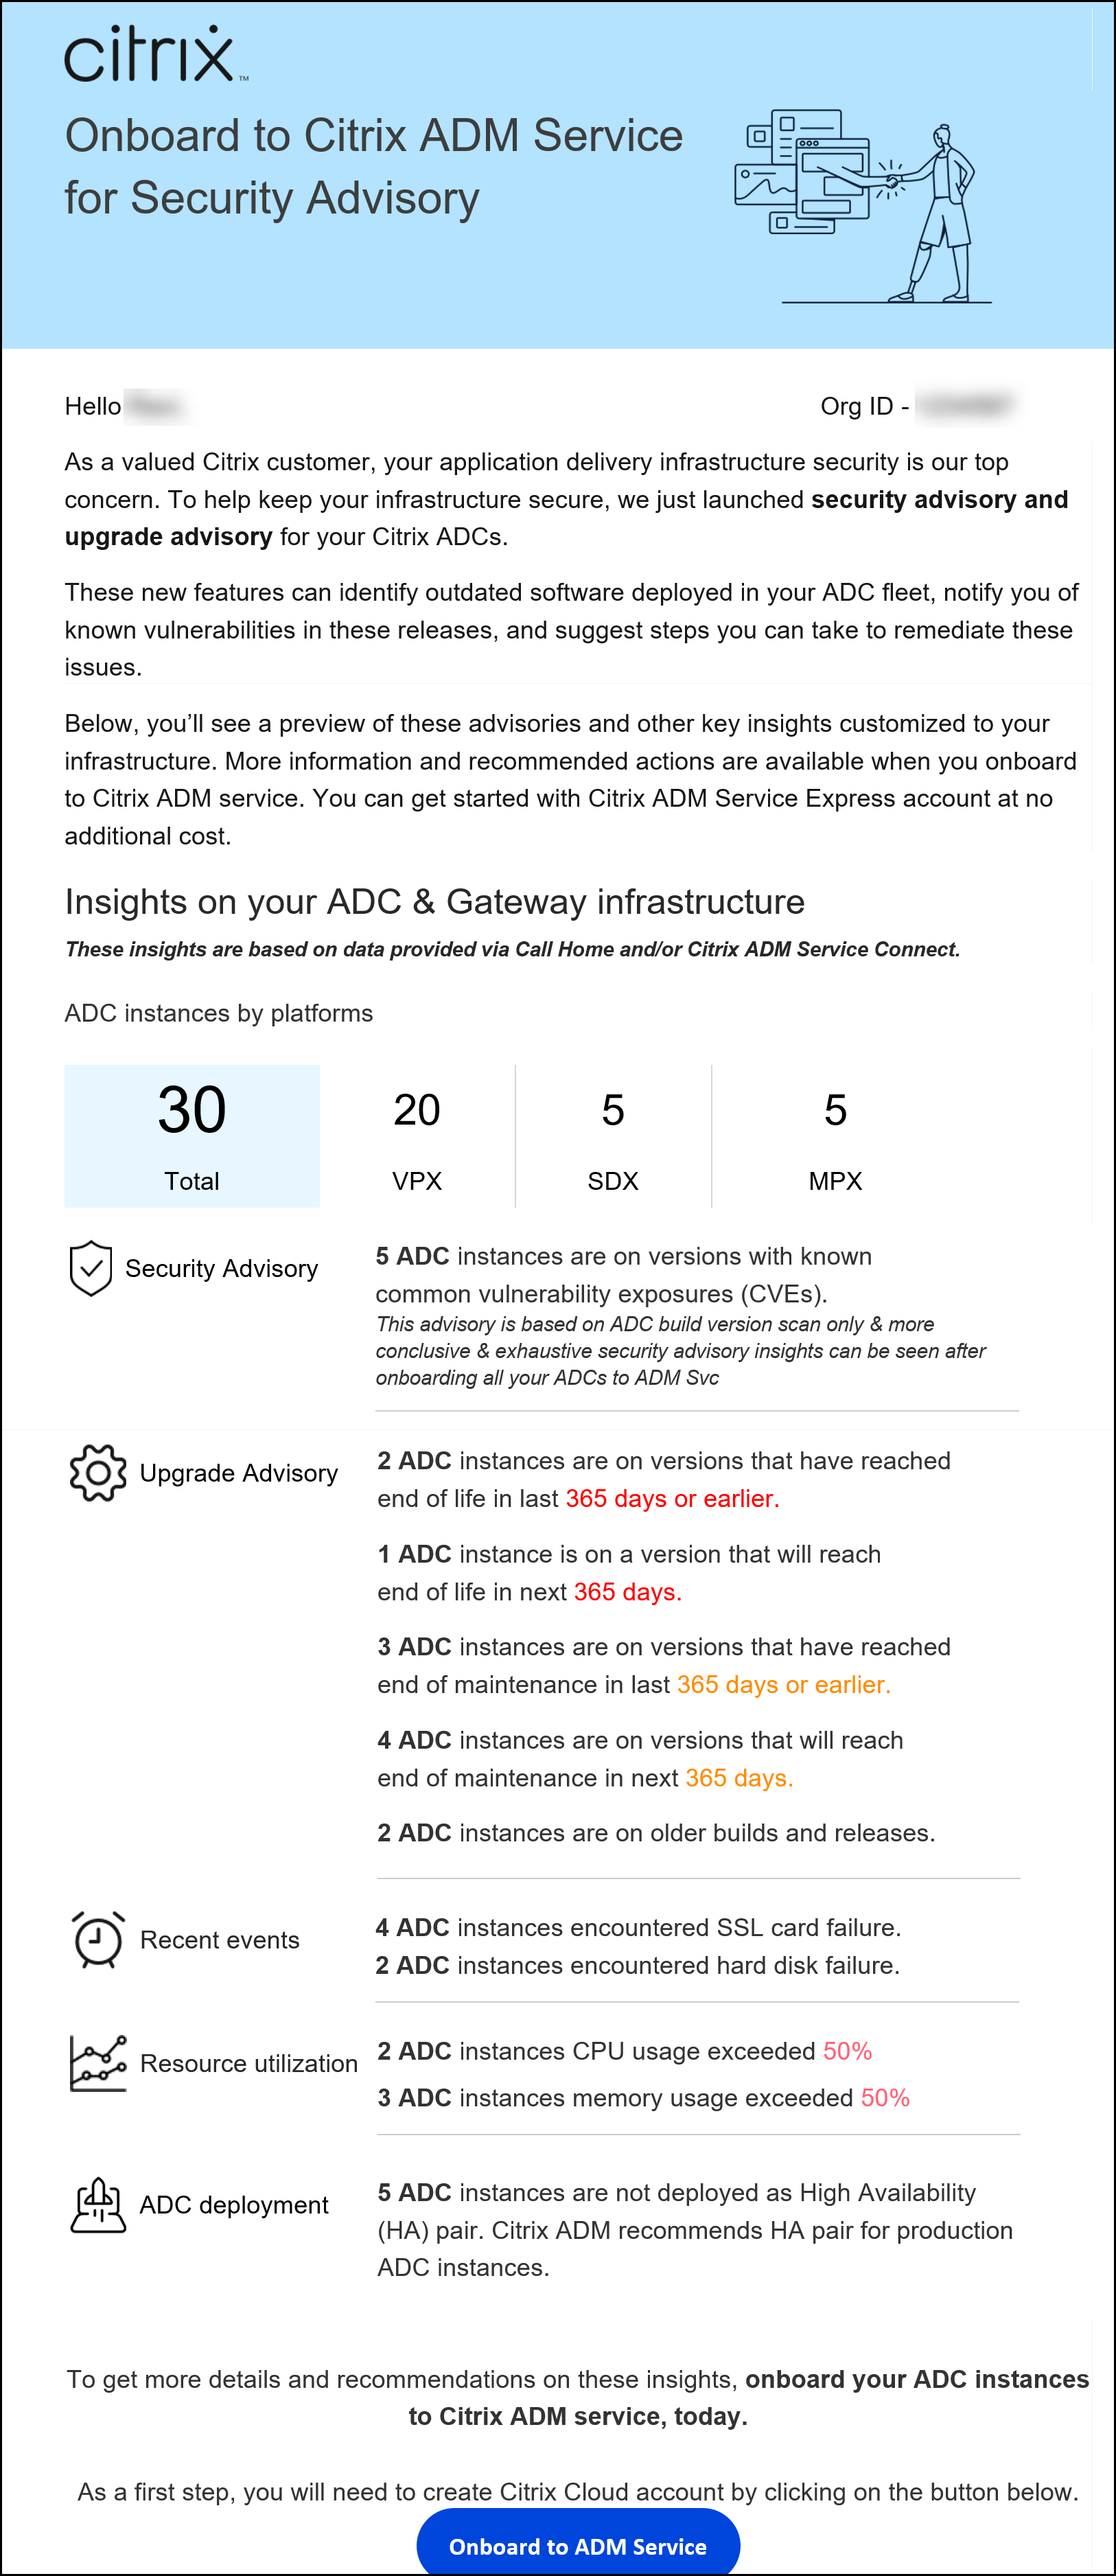
You receive an email from the NetScaler Console showing some key insights of your NetScaler infrastructure and inviting you to get started with the NetScaler Console.
-
In the email, click Onboard to ADM Service. The Citrix Cloud™ page appears.
-
In the Citrix Cloud login page:
-
If you are an existing Citrix Cloud customer, sign in to Citrix Cloud using your credentials of Citrix.com, My Citrix, or Citrix Cloud.
-
If you are not an existing Citrix Cloud customer, sign up to Citrix Cloud. For more information, see Signing Up for Citrix Cloud.
Notes
-
If you are part of multiple Org IDs and one of the Org IDs is in Citrix Cloud, sign in using your existing credentials. Then, complete the onboarding workflow for the new Org ID.
-
You can enable or disable the email notifications that you receive as part of Consolve Advisory Connect based low-touch onboarding workflow. For more information, see Email Settings.
-
-
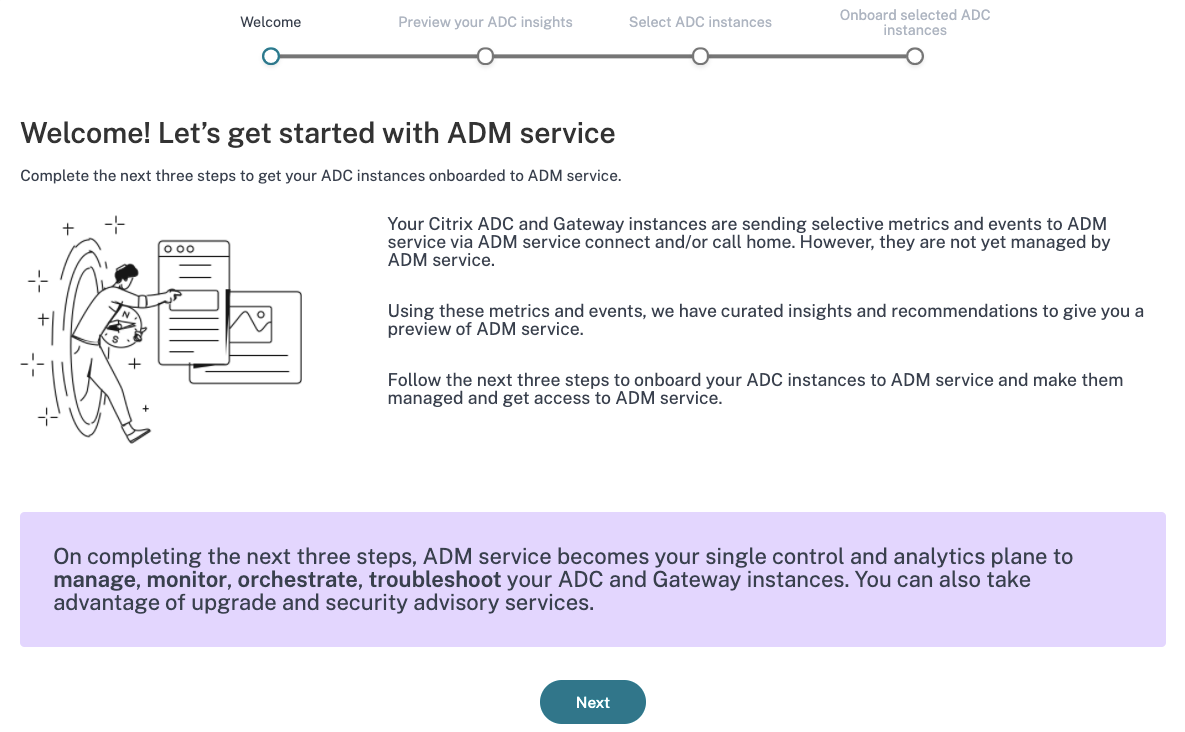
In the NetScaler Console landing page, take a moment to read why you are there and the benefits of using NetScaler Console.
Note
The security advisory insights in the email are based on NetScaler build version scan only. You can see more conclusive and exhaustive security advisory insights after onboarding your NetScaler instances to NetScaler Console.
- Click Next. The Insights on your NetScaler and Gateway instances page opens.
The next few steps act as a guided workflow to give you a preview into what NetScaler Console can offer and help you onboard your NetScaler instances onto NetScaler Console seamlessly.
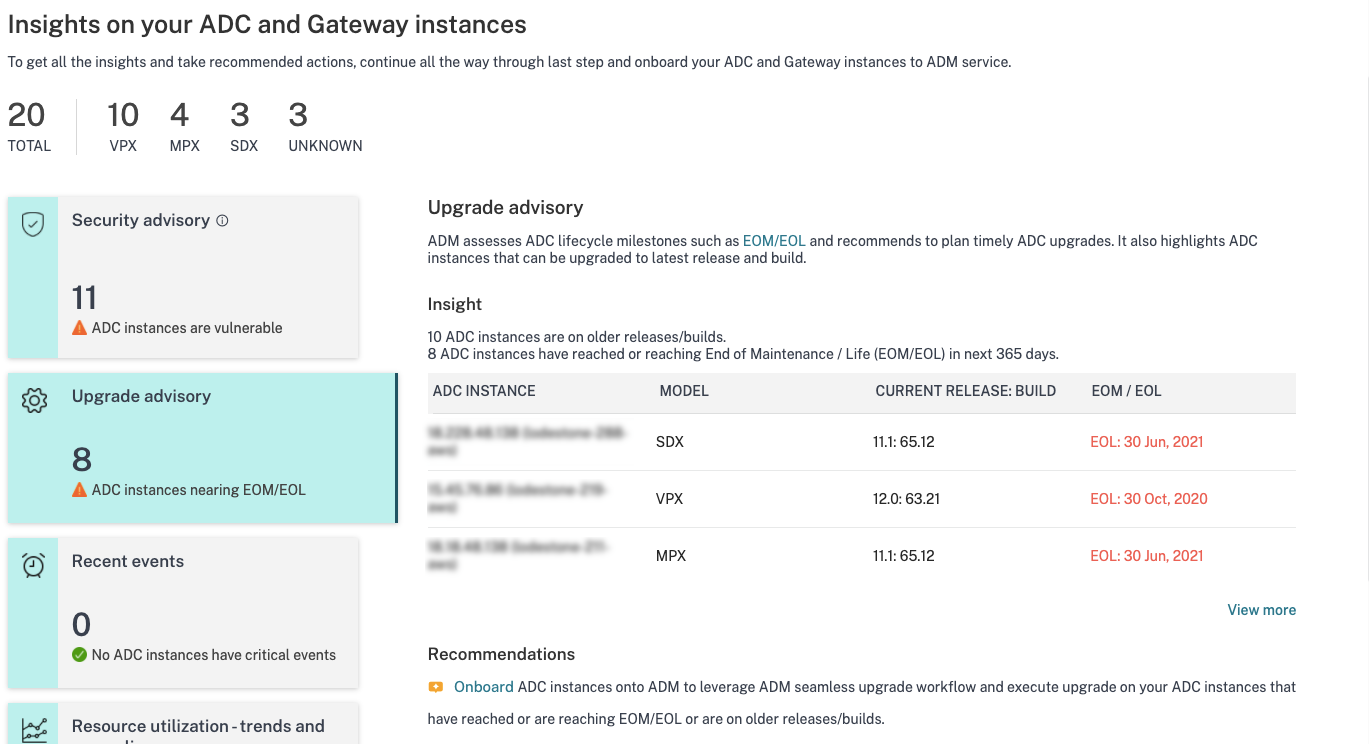
Step 2: Insights on your NetScaler and Gateway instances
This insights page uses the data collected through Call Home or NetScaler Console connect or both Call Home and NetScaler Console connect to provide insights on your NetScaler instances. This page gives you insights into your overall NetScaler infrastructure including security advisory (advice on current NetScaler CVEs), upgrade advisory (advice based on EOM/EOL timelines), key metrics, trends, and highlights the issues affecting NetScaler performance and health and recommends way to mitigate the issues. These insights and recommendations are only a small preview of the plethora of benefits and value-add that NetScaler Console has to offer. To get many more benefits, detailed insights and to be able to run the recommended actions, you must onboard the NetScaler instances onto NetScaler Console.
The insights and recommendations are categorized into the following types:
- Security advisory: onboard NetScaler instances to get the CVE impact details on your NetScaler instances and run the recommended remediations or mitigations.
- Upgrade advisory: onboard NetScaler instances onto NetScaler Console and upgrade your NetScaler instances that have reached or are reaching EOM/EOL or are on older releases/builds.
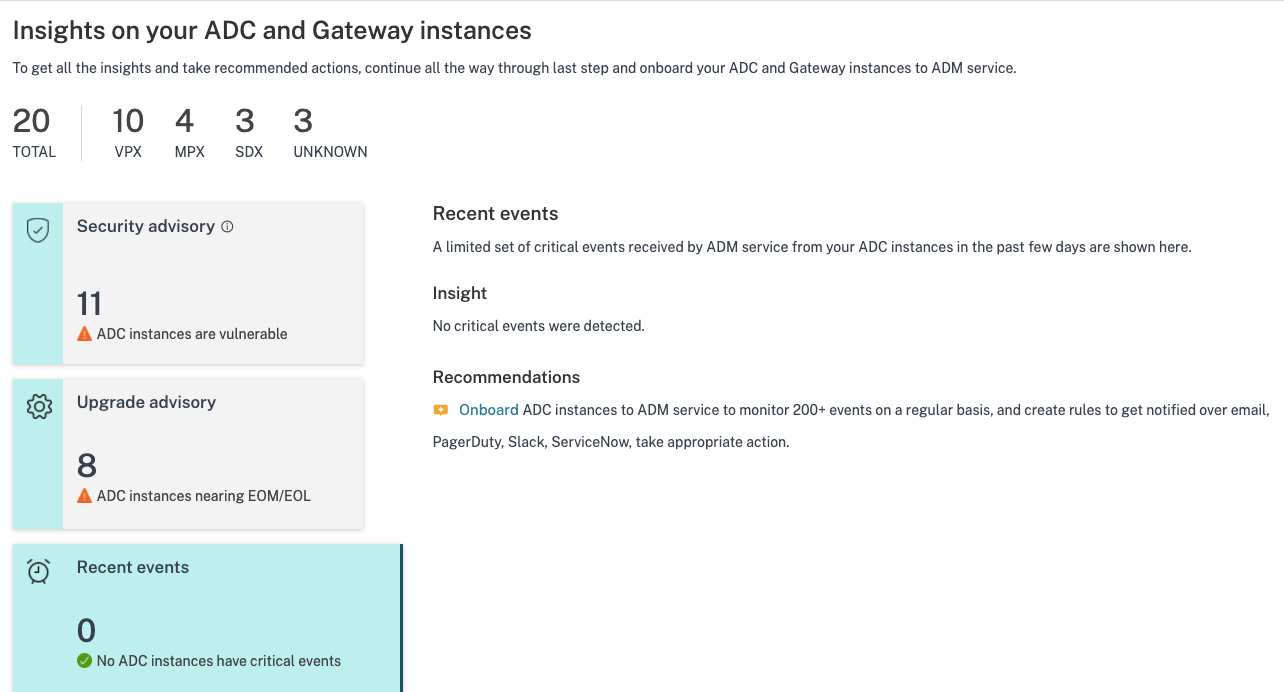
- Recent events: onboard NetScaler instances to NetScaler Console to monitor 200+ events regularly, and create rules to get notified over email, PagerDuty, Slack, ServiceNow, take appropriate action.
- Resource utilization - trends and anomalies: onboard NetScaler instances to NetScaler Console to get a comprehensive view of NetScaler instance health, performance issues, and recommendations to mitigate those issues. You can also assess predicted CPU and memory usage for your NetScaler instances.
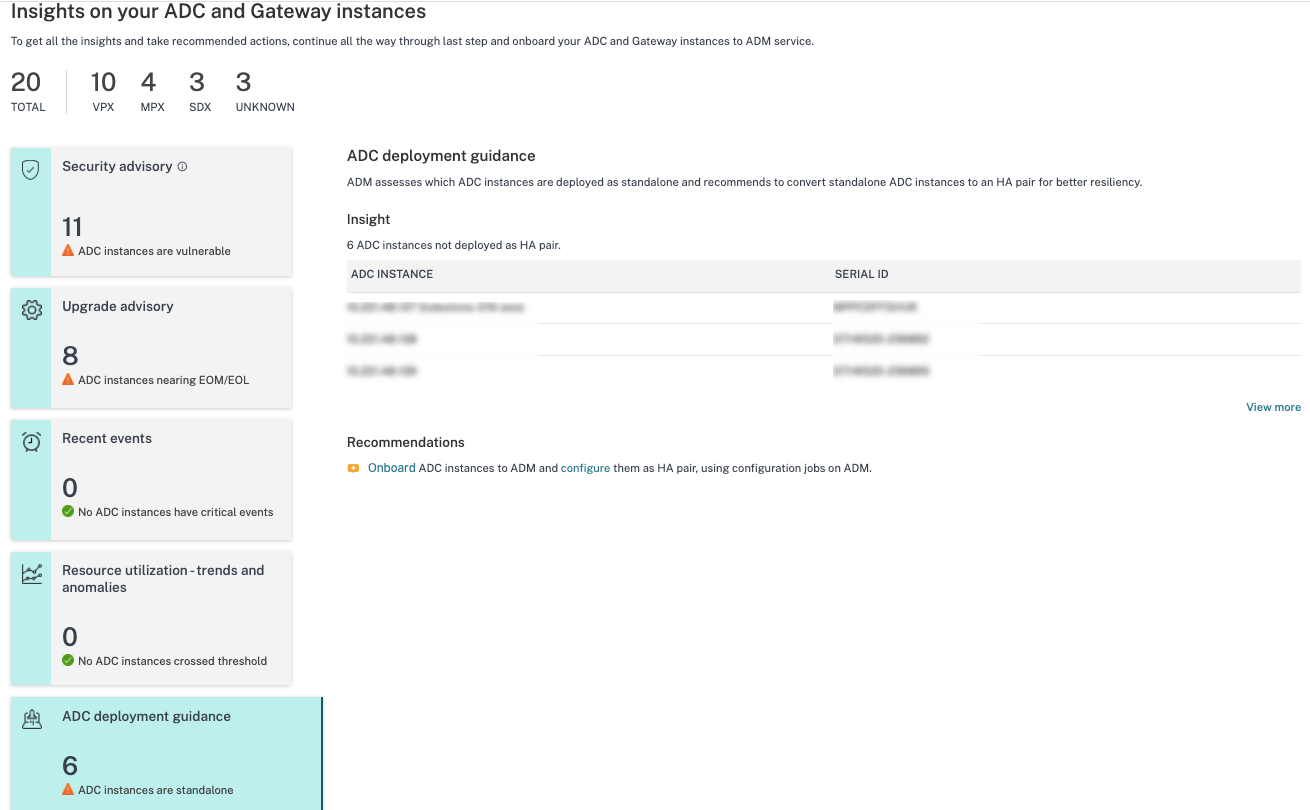
- NetScaler deployment guidance: onboard NetScaler instances to NetScaler Console and configure them as HA pair, using configuration jobs on NetScaler Console.
-
Security advisory: NetScaler Console Security Advisory alerts you about vulnerabilities putting your NetScaler instances at risk and recommends mitigations and remediations.
Note:
Security advisory insights in the onboarding email and guided workflow are based on NetScaler build version scan only. You can see conclusive and exhaustive security advisory insights after onboarding your NetScaler instances to NetScaler Console Example: If a CVE needs both version scan and config scan for vulnerability assessment, the onboarding email and guided workflow shows the results based on version scan. So, there might be false positives. To know a more conclusive and accurate assessment of the impact, onboard NetScaler to NetScaler Console. After onboarding, NetScaler Console security advisory shows the impact assessment, which vulnerable NetScaler assessment, based on versions scan and config scan.
You can check the CVE ID, vulnerability type, and affected NetScaler instances. The CVE ID link takes to the security bulletin article.
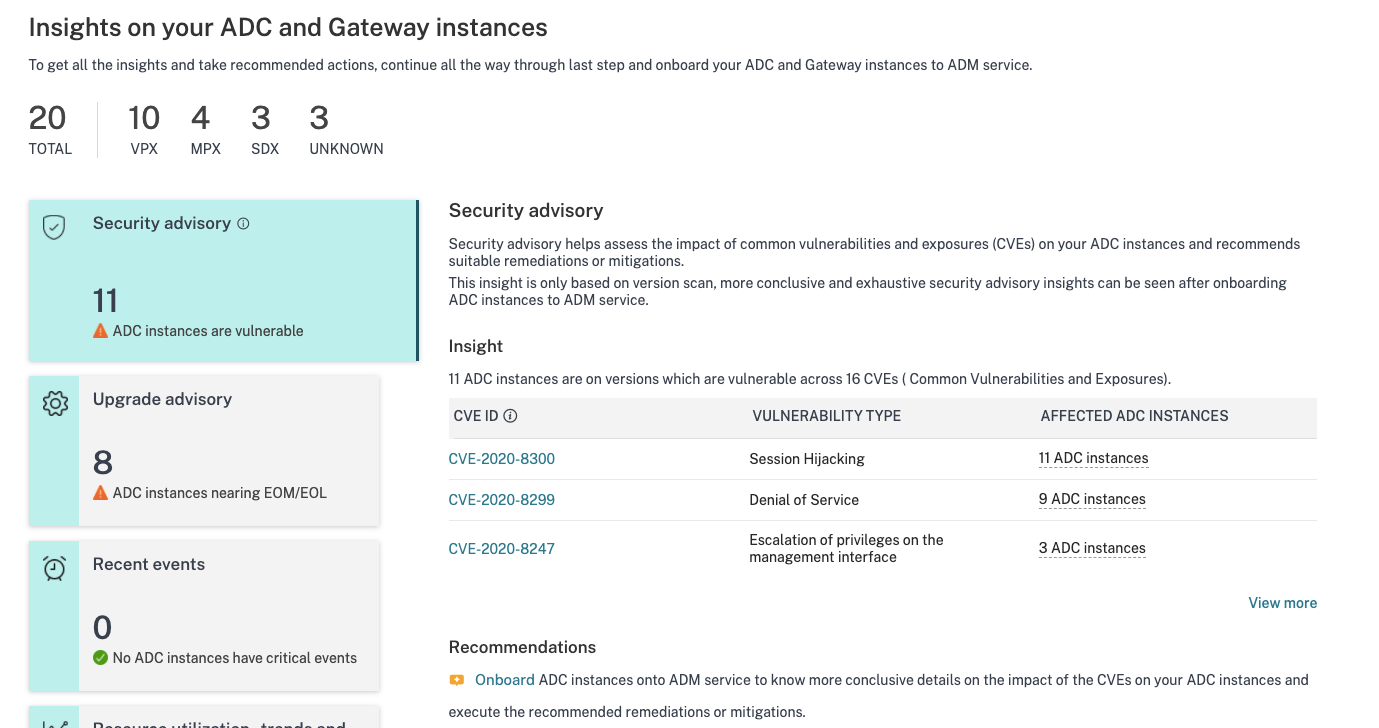
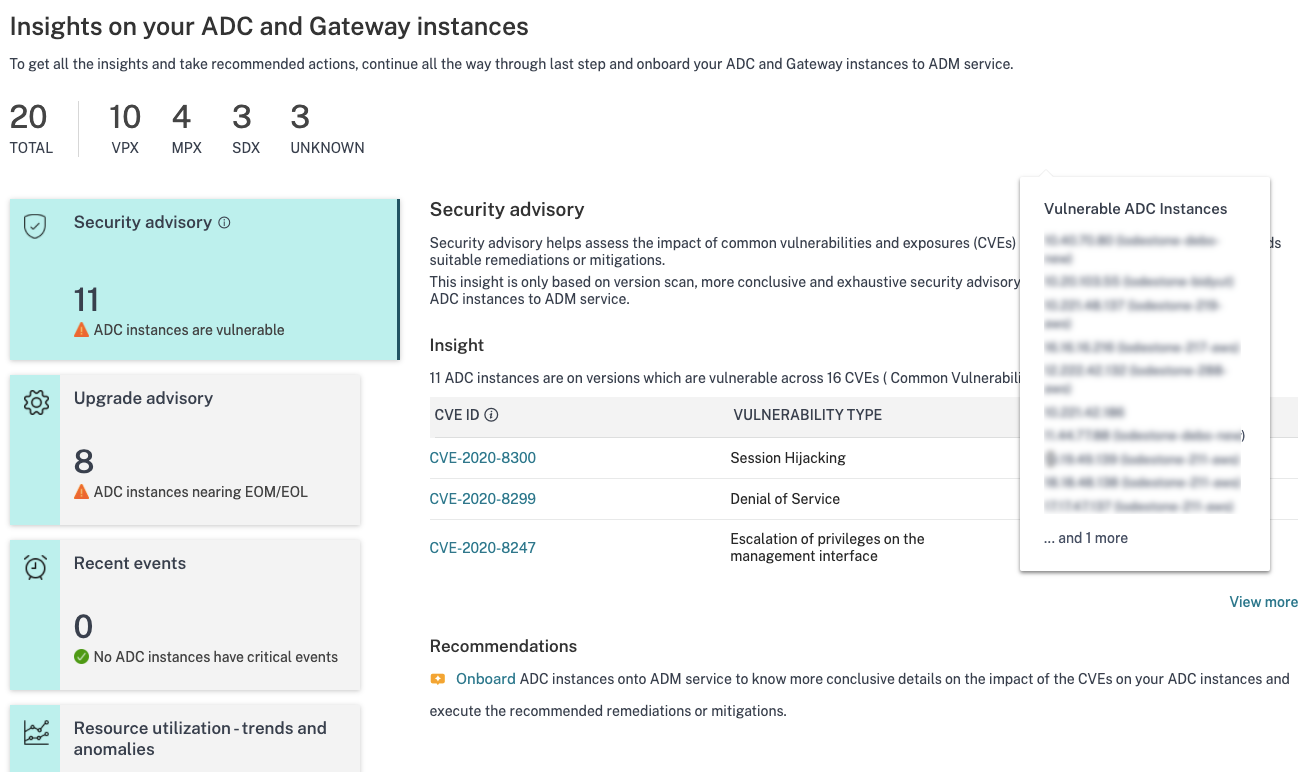
The recommendation guides you to onboard your NetScaler instances to NetScaler Console to get more details of the CVE impact on your NetScaler instances and run the recommended mitigation or remediation. Click the affected NetScaler instances to see the IP addresses of the impacted instances.
-
Upgrade advisory: Use this advisory to check which NetScaler instances are nearing EOM/EOL or are on older builds.
Based on these insights, NetScaler Console recommends you to plan a timely upgrade before EOM/EOL or to benefit from the latest features and fixes.
To perform the upgrade, you must onboard your NetScaler instances on to NetScaler Console.
-
Recent events: Get details of some critical errors that have happened on the NetScaler instances and a list of NetScaler instances on which the errors have occurred.
-
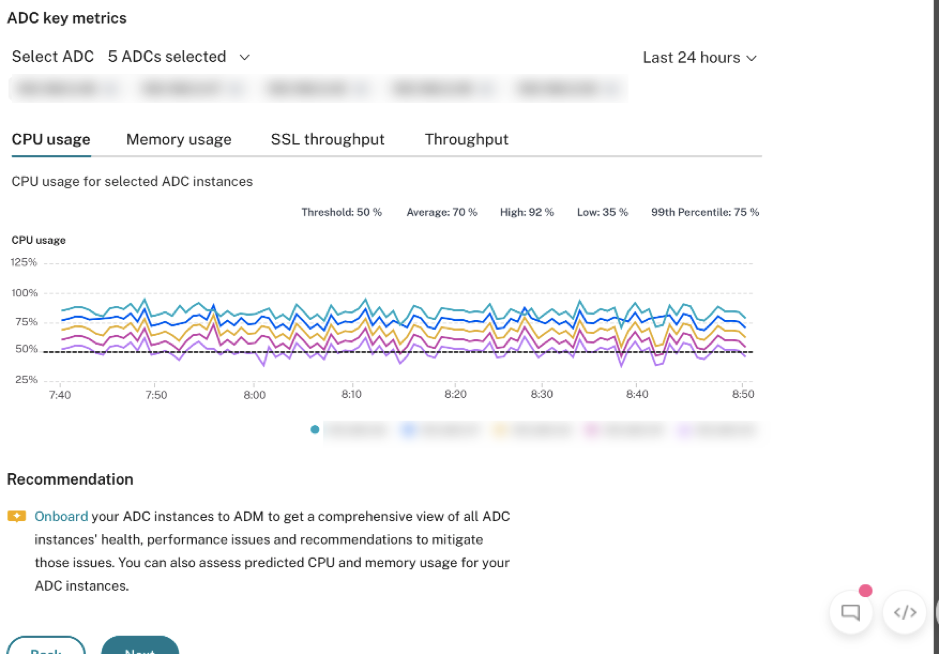
Resource utilization - trends and anomalies: Find insights about high resource utilization for CPU, memory, HTTP throughput, and SSL throughput. For each insight, NetScaler Console suggests recommended action. To have more visibility into these insights and recommendations, you must onboard your NetScaler instances onto NetScaler Console. Some benefits after onboarding are:
- CPU: Predict CPU utilization for the next 24 hours on NetScaler Console.
- Memory: Predict memory utilization for the next 24 hours on NetScaler Console.
- SSL throughput: View SSL real time optimization with intelligent App Analytics on NetScaler Console.
- HTTP Throughput: Troubleshoot NetScaler throughput capacity issues with Infrastructure Analytics.

- Key Metrics: Get details of key metrics related to CPU, memory, HTTP throughput, SSL throughput, and uncover anomalous trends in metrics.
-
Deployment guidance: Have visibility into NetScaler instances that are deployed as a standalone NetScaler. NetScaler Console gives the recommendation to configure these NetScaler instances as an HA pair for better resiliency. This requires you to onboard your NetScaler instances to NetScaler Console and then use maintenance jobs to configure the instances as an HA pair.
Step 3: Select NetScaler and Gateway instances to onboard
This page displays all the NetScaler and Gateway instances in your environment. View and select the NetScaler and Gateway instances you want to onboard to NetScaler Console and click Next.
-
View and select the NetScaler instances you want to onboard to NetScaler Console.
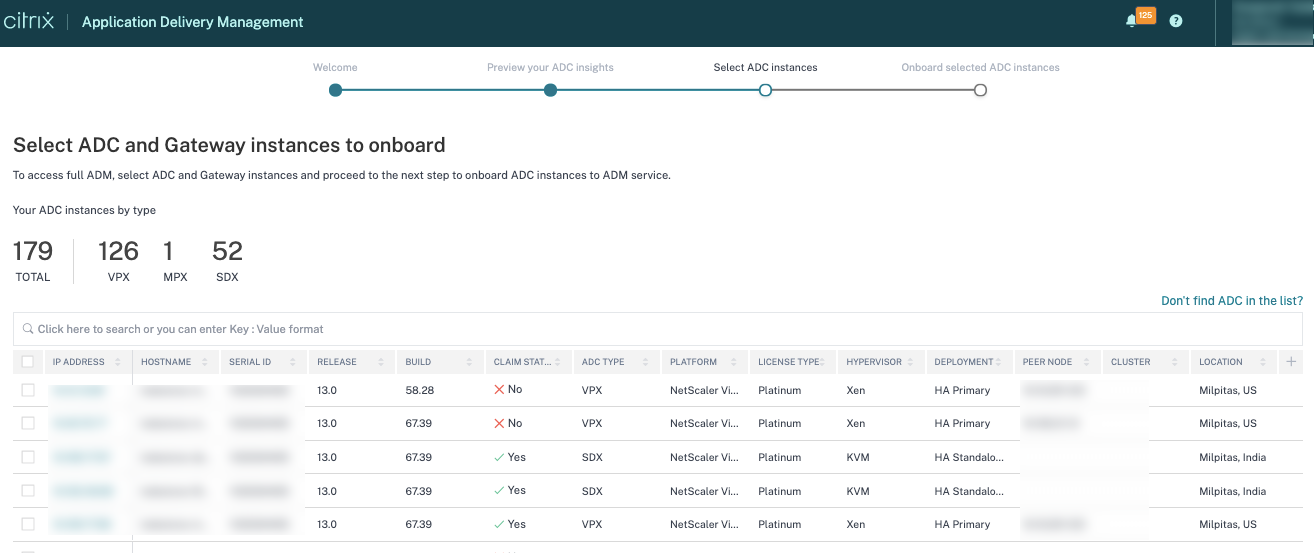
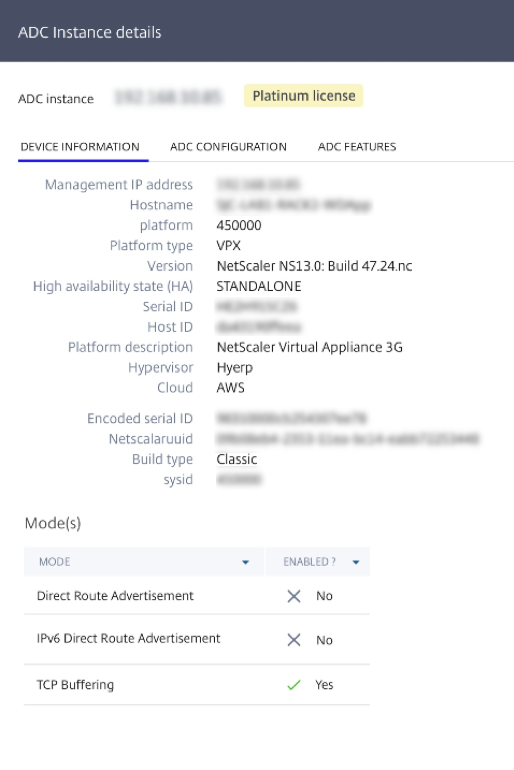
If you need details about any instance such as device information, NetScaler configuration, NetScaler features available, or license information, click the instance IP address under the NetScaler instance.
If your instance is not listed, use the Don’t find NetScaler in the list on the upper-right corner.
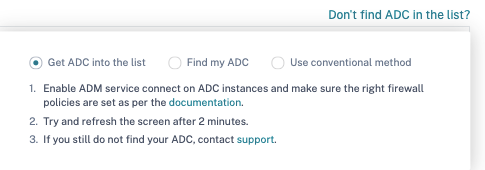
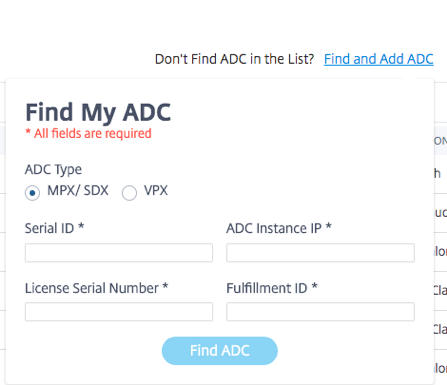
You can proceed in three ways: follow the steps given under Get NetScaler into the list or use the Find my NetScaler option. If these two steps do not help, click Use conventional method option, which skips the workflow and takes you through the traditional way of onboarding NetScaler instances.
For the Find my NetScaler option, enter the details in the mandatory fields (serial ID, NetScaler instance IP address, license serial number, and fulfillment ID) and search.
Step 4: Onboard NetScaler instances to NetScaler Console
You can onboard your instances using the built-agent (default option) or an external agent.

Onboard NetScaler instances using a built-in agent
Auto and script-based onboarding use the built-in agent, which is set by default.
Auto-onboarding: It is supported only on the following NetScaler versions:
- NetScaler MPX and VPX image version 12.1 57.18 and later and 13.0 61.48 and later
- SDX version image 13.0 61.48 and later and 12.1 58.14 and later
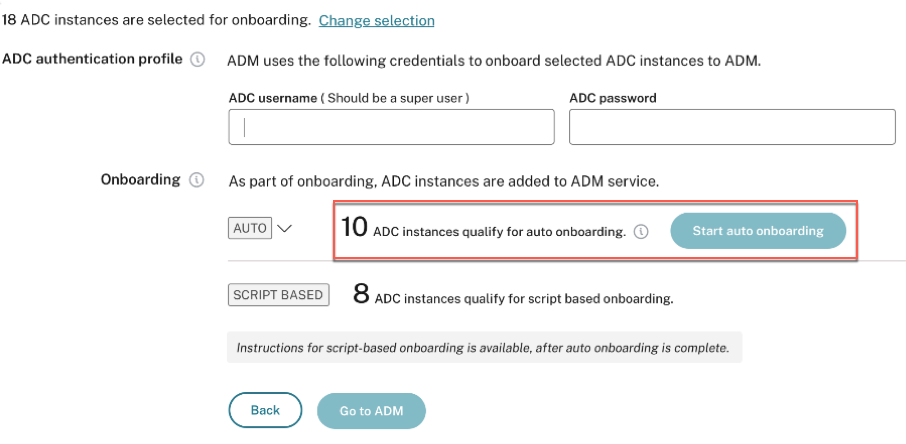
To select a different NetScaler instance, click Change selection.
Out of the total selected NetScaler instances, some instances might qualify for auto-onboarding (based on minimum version criteria). You can see the instances that qualify for auto-onboarding.
You can perform a test run of onboarding to ensure that the NetScaler instance is ready to onboard. Click Test to start the test run. For more information, see Test onboarding readiness of NetScaler instances.
If you want to onboard without the test run, enter the NetScaler user name and password. The credentials must be NetScaler user admin credentials, and NetScaler Console uses these credentials to onboard NetScaler. Click Start auto onboarding to onboard your NetScaler instances on NetScaler Console.
Note
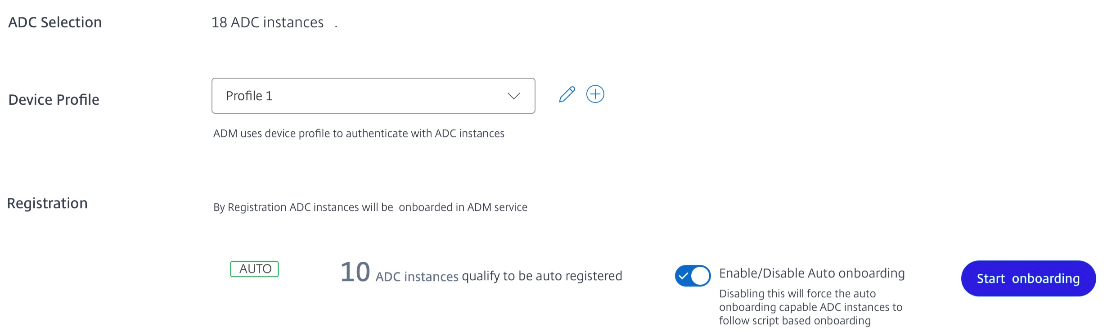
After you specify the NetScaler credentials and create the Device Profile, the ADM GUI will not prompt for the Username and Password again for each NetScaler instance. However, you can select the profile from the Device profile drop-down to authenticate the NetScaler instances.
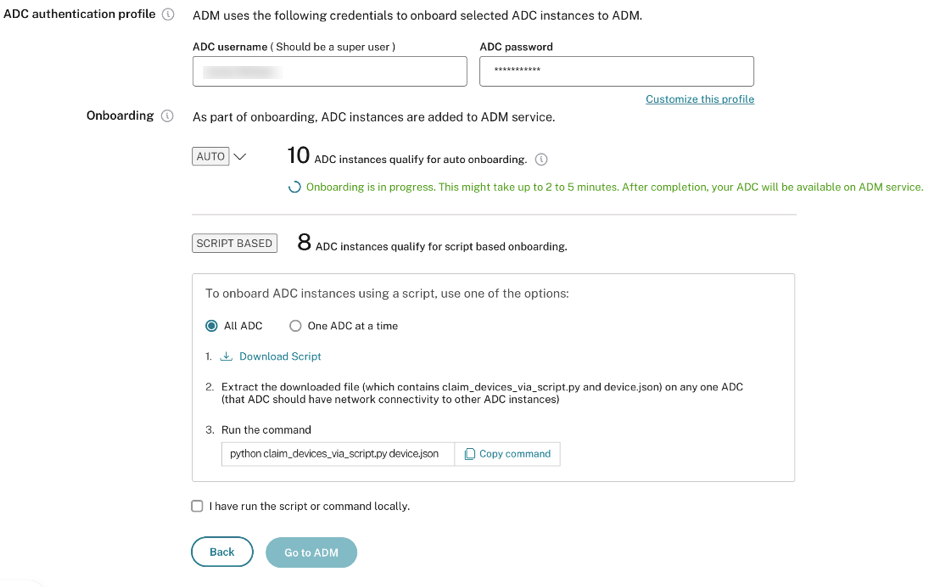
Auto-onboarding might take up to 2-5 minutes to complete.
Note:
If you don’t want the NetScaler instances to auto-onboard to NetScaler Console, you can disable auto-onboarding and you use the script-based option for on onboarding.
Script-based onboarding: after auto-onboarding completes, you can onboard the rest of the instances using the script-based onboarding. Use one of the following options:
-
Option 1: download the script, extract the tar file, and run it on any one of the NetScaler instances, using the command given on the UI. Ensure that the NetScaler instance on which you run this script has network connectivity to all the other selected NetScaler instances.
-
Option 2: Log in to the CLI console of each NetScaler instance and run the commands given on the UI. For more details, refer to step 7 in the doc Configure the NetScaler built-in agent to manage instances. Ensure that you generate a new unique activation code for each of the NetScaler instances.
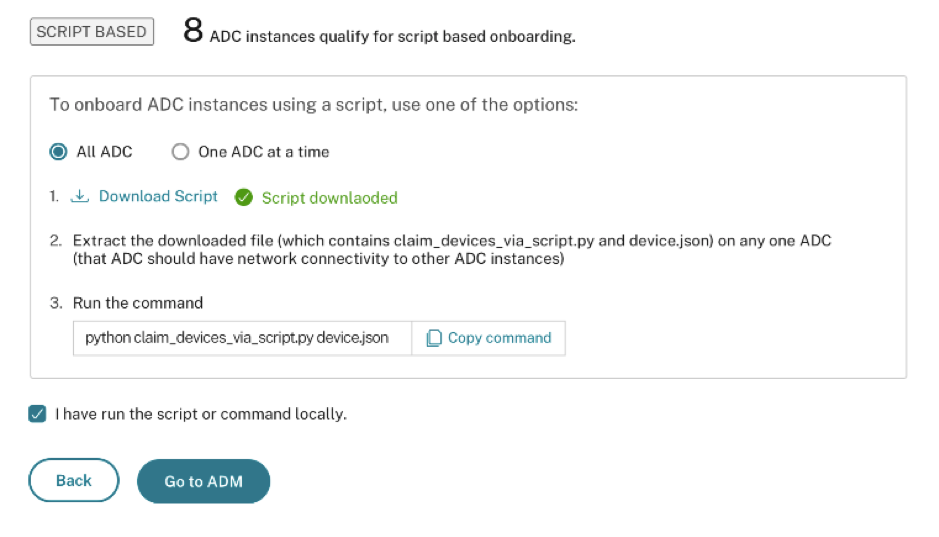
After you’ve onboarded all your instances, click Go to NetScaler Console to go to the NetScaler Console instance management UI dashboard and explore the different features.
Note
If you are a new customer on NetScaler Console without an NetScaler Console license, your Citrix service account by default is an Express account. For more information about the NetScaler Console account entitlement, see Manage NetScaler Console resources using Express account.
Onboard NetScaler instances using an external agent
You can use external agent-based onboarding if you want to use pooled licensing or the complete analytics suite in NetScaler Console or both use pooled licensing and the complete analytics suite.
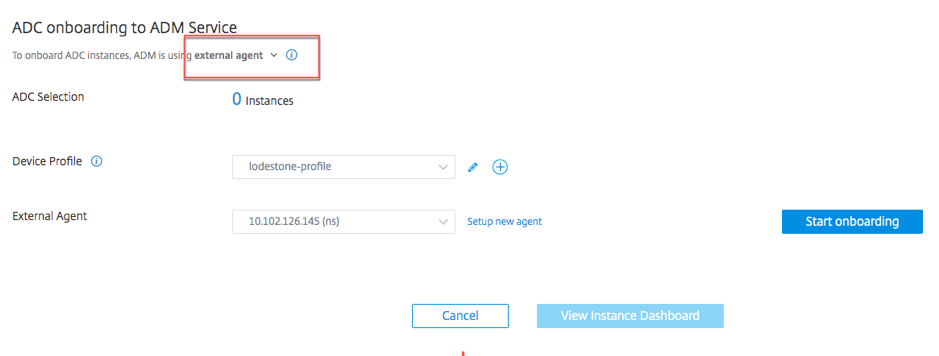
Complete the following steps:
-
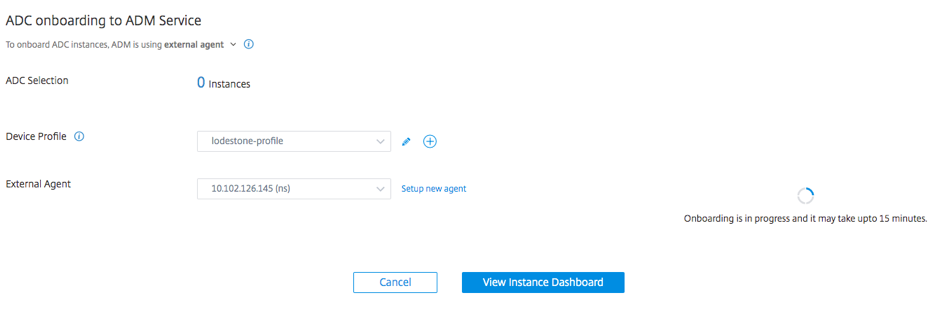
Select a device profile.
Note
For security reasons, you can’t use the default NetScaler credentials (nsroot/nsroot) for onboarding.
-
Select an external agent and click Setup new agent.
-
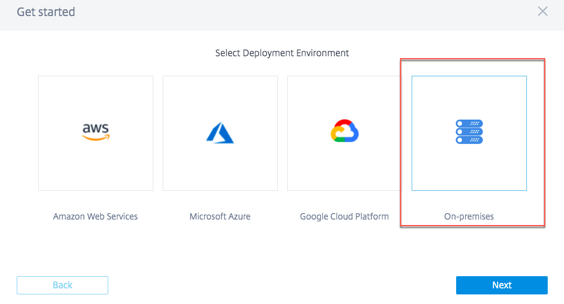
Select any of the following environments:
- Amazon Web Services
- Microsoft Azure
- Google Cloud Platform
- On-premises
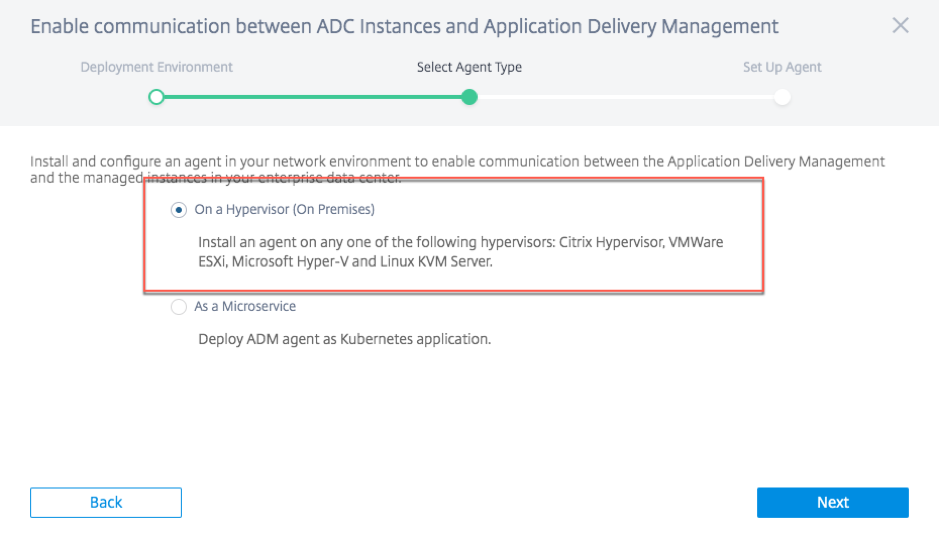
Install an agent on your on-premises hypervisor
If you select On-premises, you can install the agent on the following hypervisors: Citrix Hypervisor™, VMware ESXi, Microsoft Hyper-V, Linux KVM Server.
-
Select On a Hypervisor (On Premises) and click Next.
-
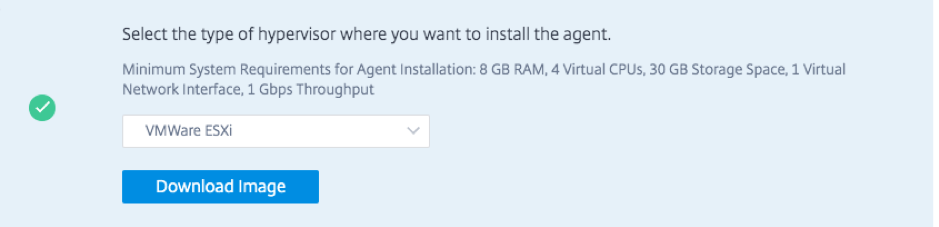
Select the hypervisor type and download the image, for example, VMware ESXi.
-
Use the service URL and activation code to configure the agent.
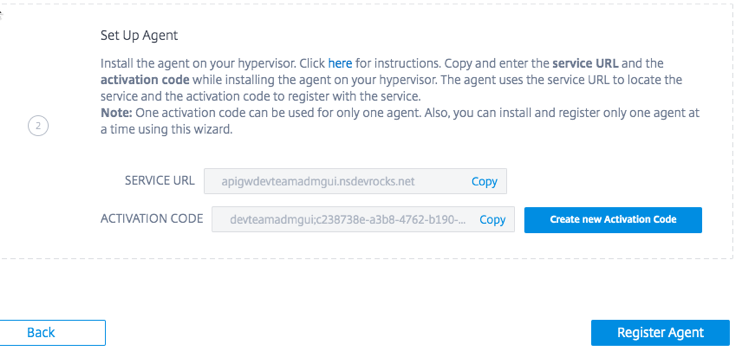
The agent uses the service URL to locate the service and the activation code to register with the service. For detailed instructions about installing an agent on your on-premises hypervisor, see Install a NetScaler agent on-premises
-
Click Register Agent. When completed, and click Done to return to the NetScaler onboarding NetScaler Console page.

-
Click Start onboarding. After you’ve onboarded all your instances, click View instance dashboard to go to the NetScaler Console instance management UI dashboard and explore the different features.
Install an agent on a public cloud
You can install the agent in one of the following cloud environments:
- Amazon Web Services
- Microsoft Azure
- Google Cloud Platform
For more information, see the following documents: