
在 VMware ESXi 上自动部署 NetScaler® 代理
NetScaler Console 允许您在 VMware ESXi 上自动部署 NetScaler 代理。
作为管理员,您可以自动执行以下操作:
-
配置 NetScaler 代理
-
注册 NetScaler 代理并更改代理的默认密码。
配置 NetScaler 代理
要自动配置代理,请在 .ovf 文件中添加以下参数的值:
-
IPAddress -
Netmask -
Gateway -
Nameserver -
Hostname
注意:
.ovf 文件在代理映像文件中。要下载 NetScaler 代理文件,请转到
<https://www.citrix.com/downloads/citrix-application-management/>。代理映像文件的命名模式如下:MASAGENT-ESX-releasenumber-buildnumber.zip
注册 NetScaler 代理并更改默认密码
注意:
在注册和更改默认密码之前,请确保您已添加 (#configure-the-netscaler-agent) 中指定的参数。
要自动注册 NetScaler 代理并更改默认密码,请在同一个 .ovf 文件中添加以下参数的值:
-
NetScaler Console Server IP -
NetScaler Console Username -
NetScaler Console Password -
Agent New Password
先决条件
在开始安装虚拟设备之前,请确保您已完成以下操作:
-
在满足最低系统要求管理工作站上安装 VMware vSphere 8.x。
-
下载 NetScaler Console 安装文件。
如何配置和注册 NetScaler 代理
步骤 1:下载并编辑 .OVF 文件
-
将文件从 MASAGENT-ESX-releasenumber-buildnumber.zip 解压到所需位置。将解压以下文件:
-
.ovf 文件
-
.vmdk 文件
-
.ova 文件
-
.mf 文件
-
-
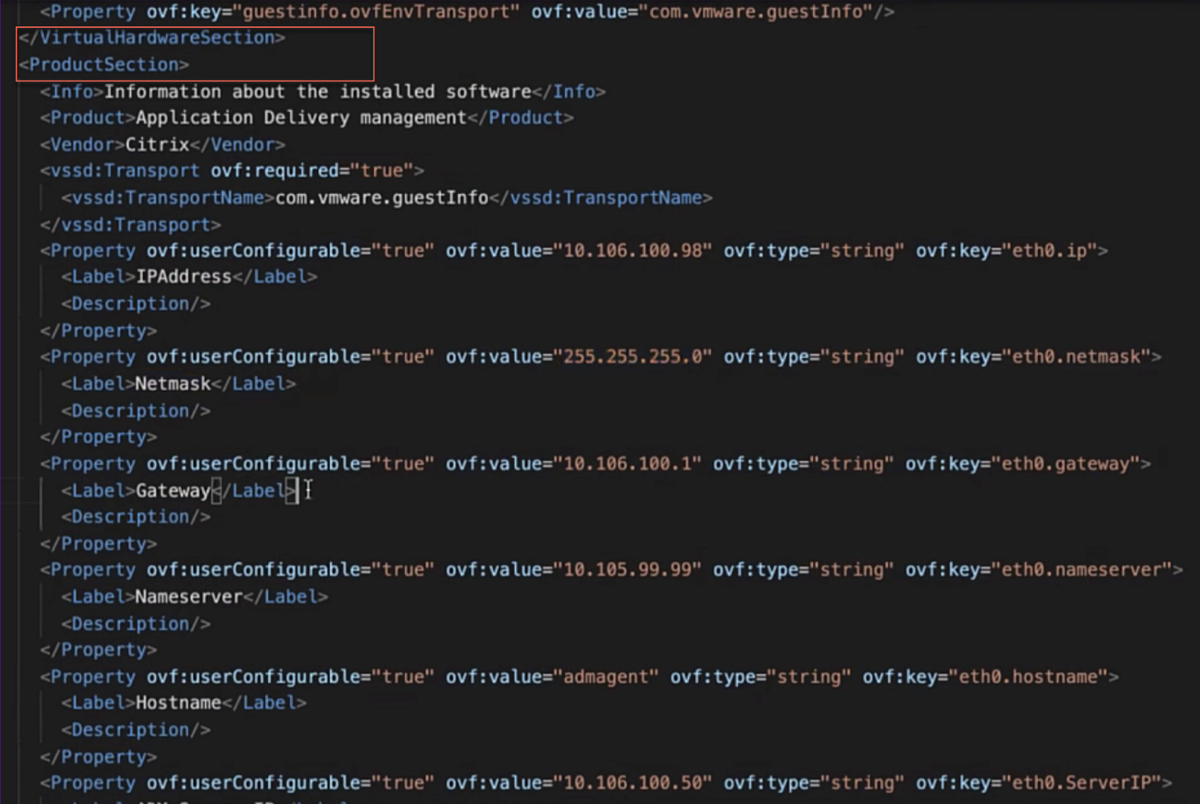
在任何编辑器中打开 .ovf 文件, 并在
</VirtualHardwareSection>标签后添加以下<ProductSection>..</ProductSection>示例代码<ProductSection>
<Info>Information about the installed software</Info>
<Product>Application Delivery management</Product>
<Vendor>Citrix</Vendor>
<Property ovf:userConfigurable="true" ovf:value="VALUE" ovf:type="string"
ovf:key="eth0.ip">
<Label>IPAddress</Label>
</Property>
<Property ovf:userConfigurable="true" ovf:value="VALUE" ovf:type="string"
ovf:key="eth0.netmask">
<Label>Netmask</Label>
</Property>
<Property ovf:userConfigurable="true" ovf:value="VALUE" ovf:type="string"
ovf:key="eth0.gateway">
<Label>Gateway</Label>
</Property>
<Property ovf:userConfigurable="true" ovf:value="VALUE" ovf:type="string"
ovf:key="eth0.nameserver">
<Label>Nameserver</Label>
</Property>
<Property ovf:userConfigurable="true" ovf:value="VALUE" ovf:type="string"
ovf:key="eth0.hostname">
<Label>Hostname</Label>
</Property>
<Property ovf:userConfigurable="true" ovf:value="VALUE" ovf:type="string"
ovf:key="eth0.ServerIP">
<Label>NetScaler Console Server IP</Label>
</Property>
<Property ovf:userConfigurable="true" ovf:value="VALUE" ovf:type="string"
ovf:key="eth0.ServerUname">
<Label>NetScaler Console Username</Label>
</Property>
<Property ovf:userConfigurable="true" ovf:password="true" ovf:value="VALUE"
ovf:type="string" ovf:key="eth0.ServerPassword">
<Label>NetScaler Console Password</Label>
</Property>
<Property ovf:userConfigurable="true" ovf:password="true" ovf:value="VALUE"
ovf:type="string" ovf:key="eth0.NewPassword">
<Label>Agent New Password</Label>
</Property>
</ProductSection> -
对于要配置的参数,请在 ovf:value="VALUE" 中添加其相应的值
-
要配置 NetScaler 代理,请将值添加到以下参数:
-
IPAddress -
Netmask -
Gateway -
Nameserver -
Hostname
-
-
要注册并更改 NetScaler 代理的默认密码,请将值添加到以下参数:
-
NetScaler Console Server IP -
NetScaler Console Username -
NetScaler Console Password -
Agent New Password
-
注意:-
在注册并更改代理的默认密码之前,必须配置 NetScaler 代理。
-
如果未在 .ovf 文件中注册并更改默认密码,请在部署 VM 后手动执行这些操作。
-
-
添加参数及其值后,保存 .ovf 文件。
步骤 2:在 VMware ESXi 上安装 NetScaler Console 虚拟设备
-
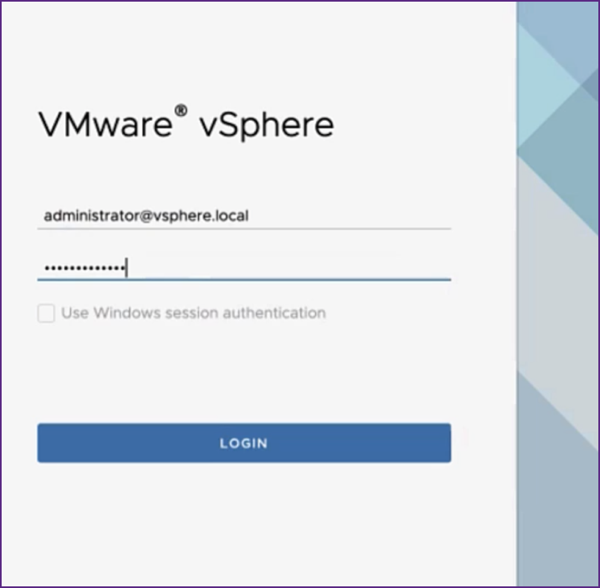
登录到 VMWare vSphere Client 并键入管理员凭据。单击 Login。
-
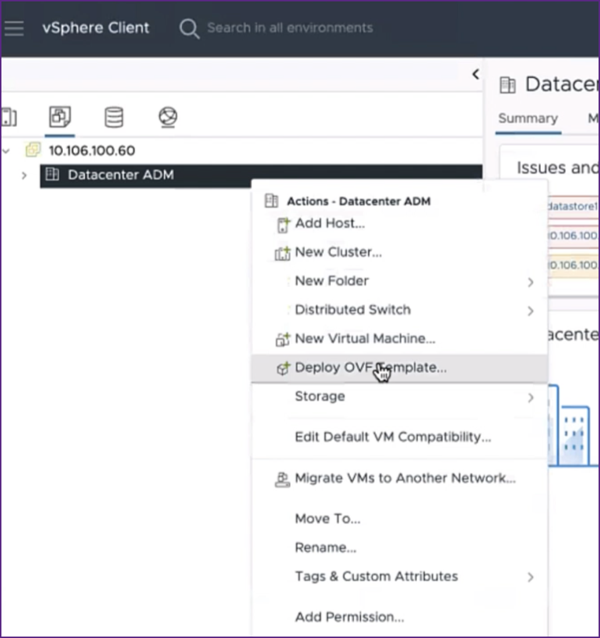
选择您的 ESXi 服务器,然后右键单击以选择 Deploy OVF Template。
-
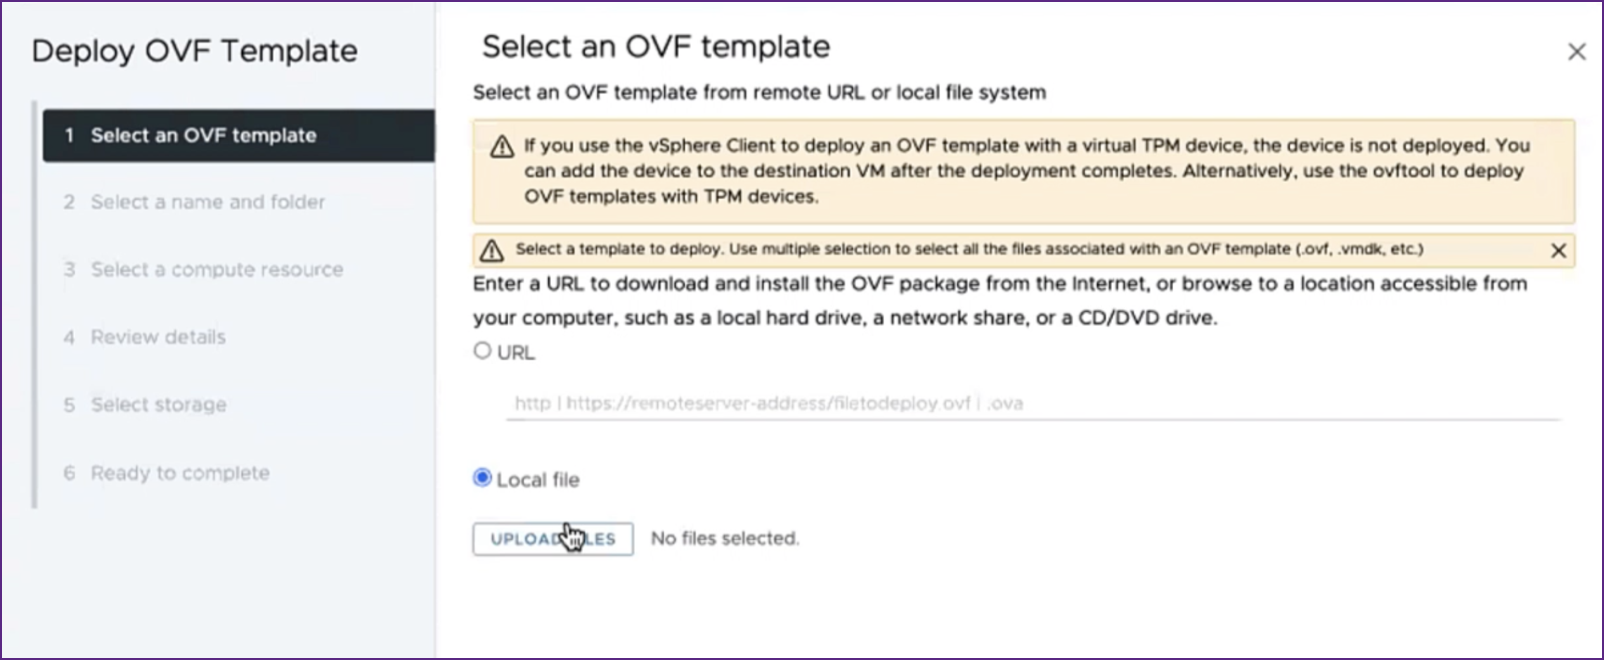
在 Deploy OVF Template 页面中:
-
选择 OVF 模板:选择本地文件,然后导航到您保存已编辑的 .ovf 文件和 .vmdk 文件的位置。选择这些文件,然后单击打开以上传它们。单击下一步。
-
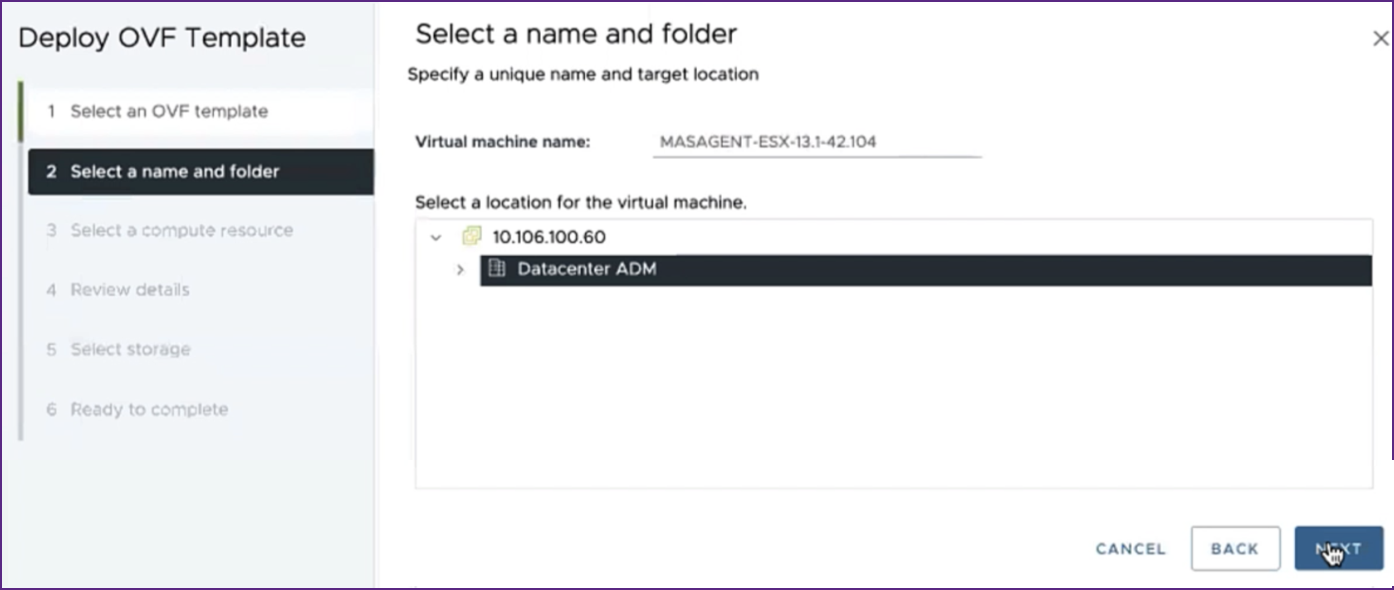
选择名称和文件夹:为虚拟设备添加名称,然后选择要在 ESXi 上部署虚拟机的位置。单击下一步。
-
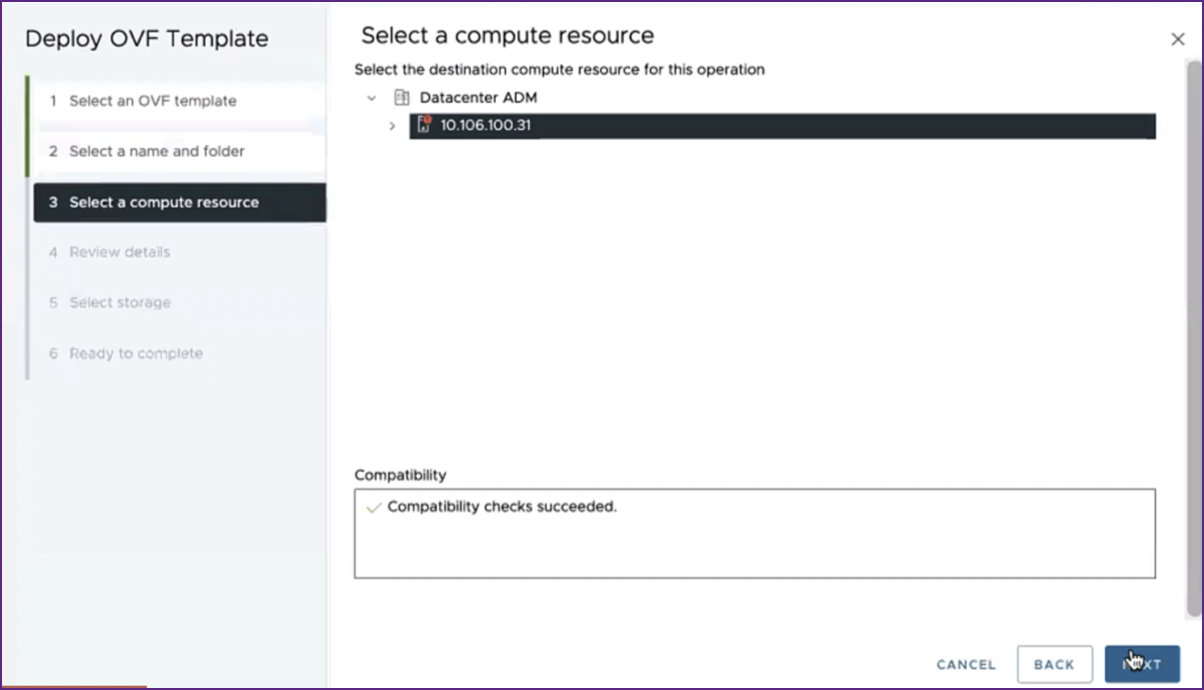
选择计算资源:选择部署模板后要在其上运行的资源。单击下一步。
-
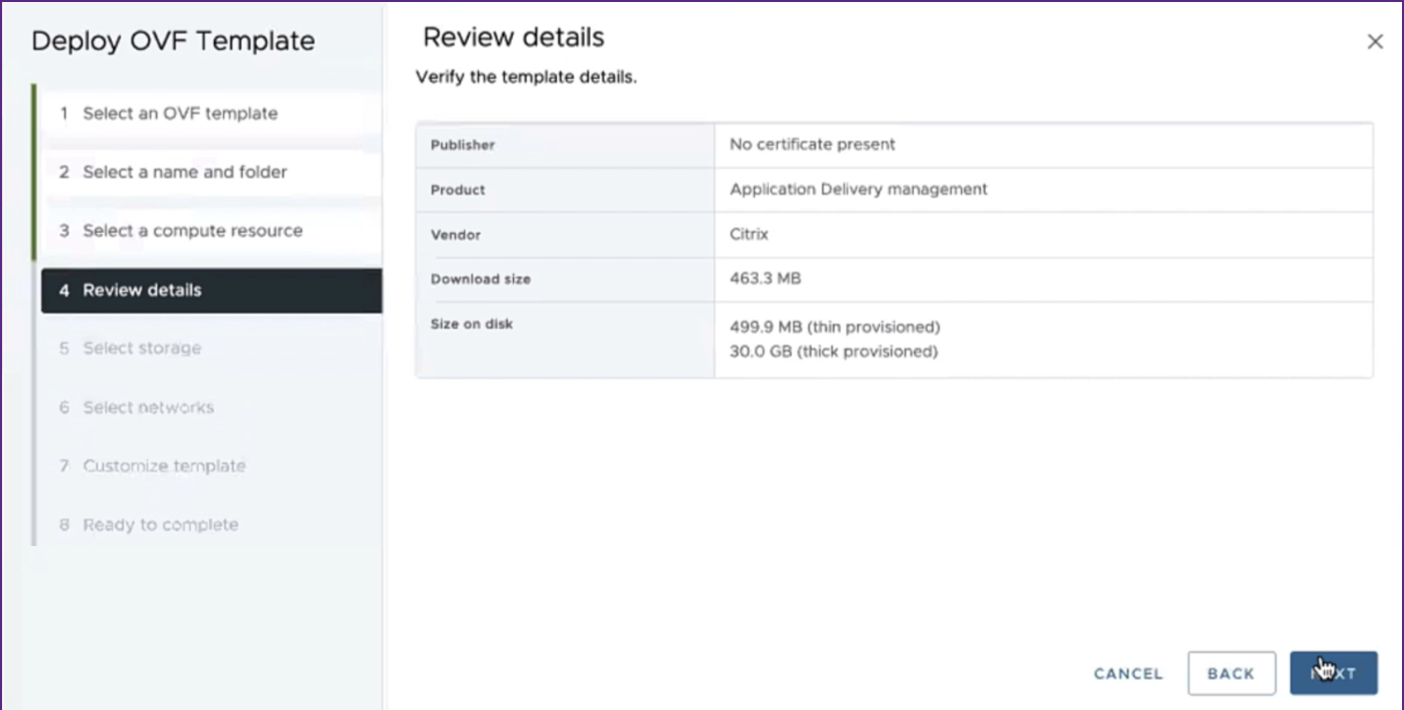
审查详细信息:验证 OVF 模板详细信息。单击下一步。
-
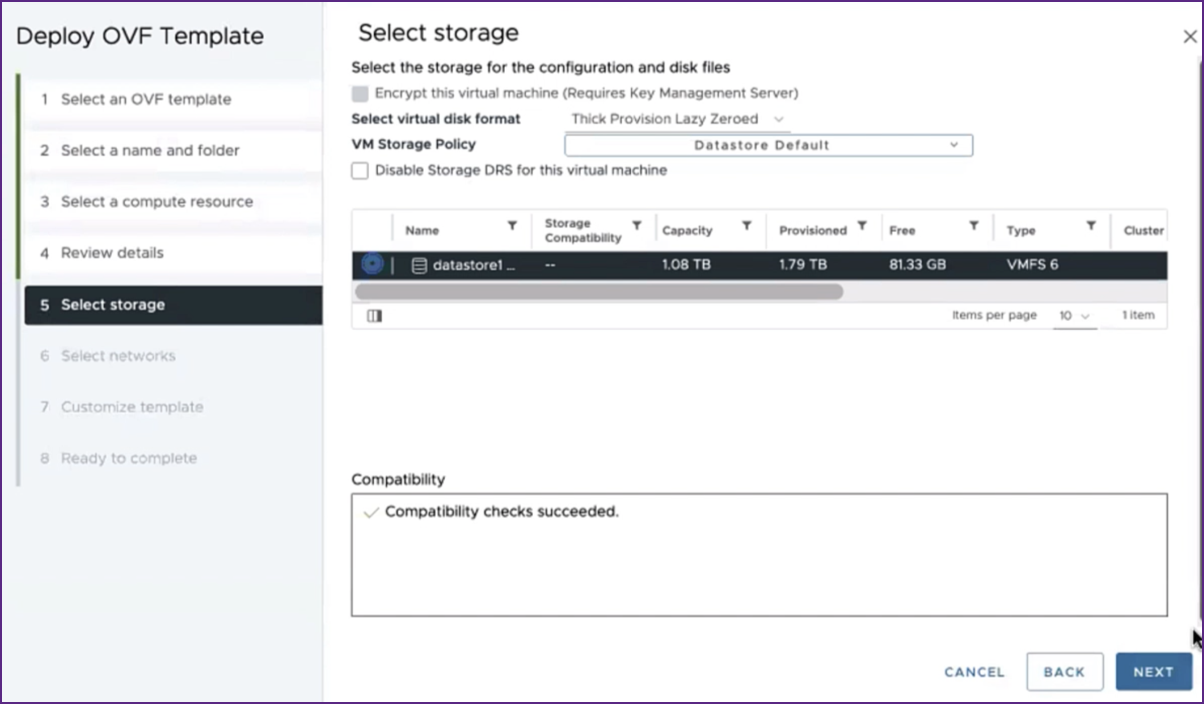
选择存储:选择一个数据存储来存储 OVF 模板。单击下一步。
-
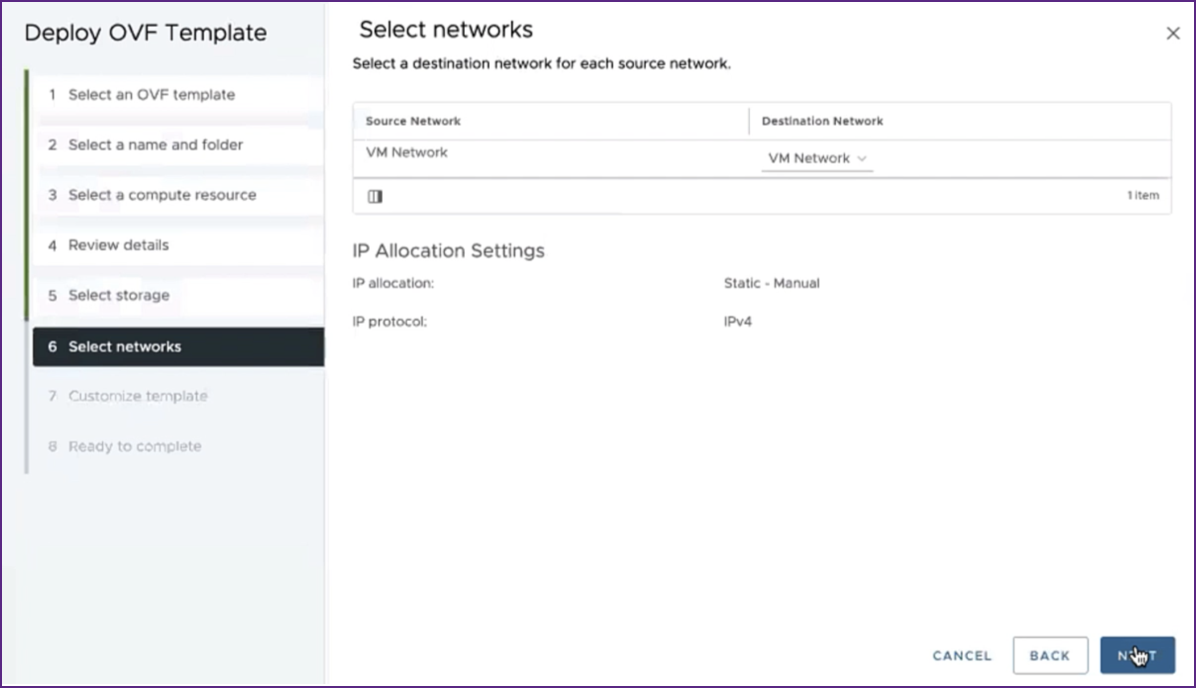
选择网络:继续使用默认设置。单击下一步。
-
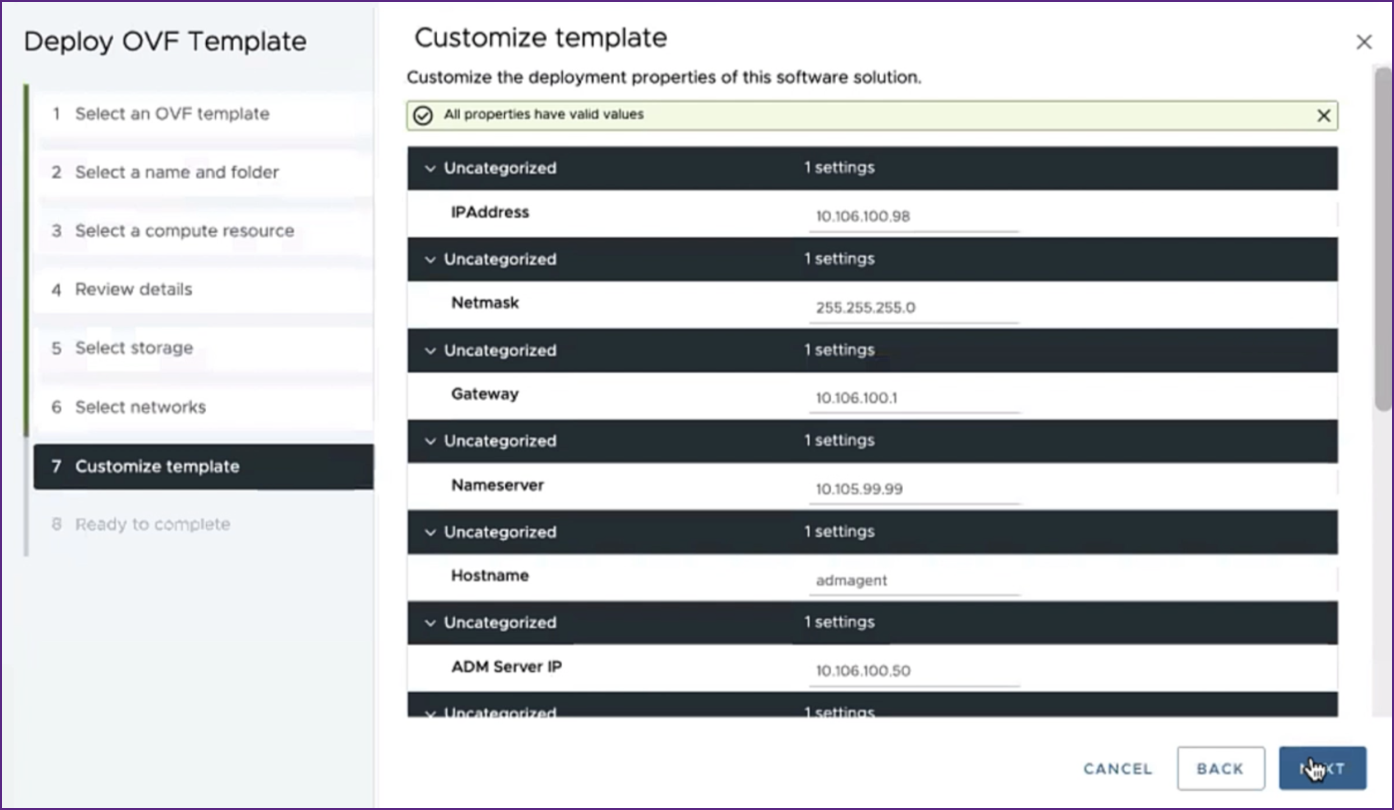
自定义模板:审查 OVF 模板的所有属性。在 下载并编辑 .OVF 文件 部分中,您在 .ovf 文件中添加的所有参数和值都将显示。
-
准备完成:要保存设置并开始部署过程,请单击完成。
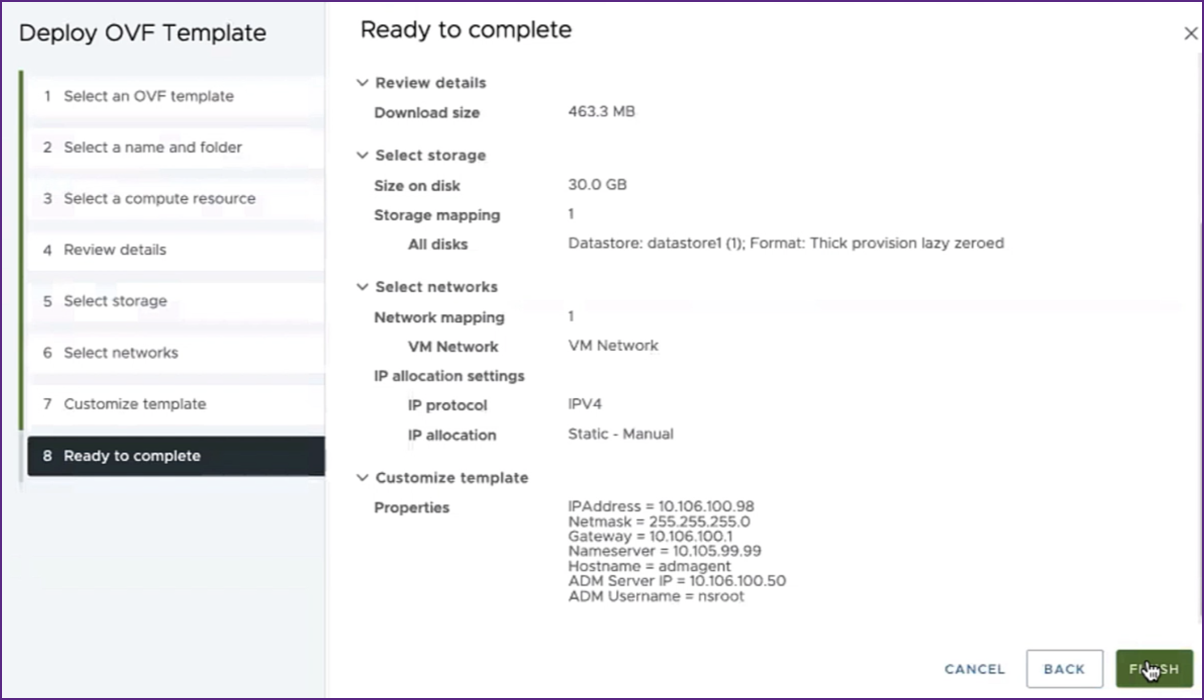
等待部署完成。在“部署 OVF 模板”操作状态为 100% 完成后,您的代理即已部署。 重要提示:在编辑设置之前,请勿启动虚拟设备。
 -
-
单击您安装的新虚拟设备,然后导航到“配置 > 设置 > vApp 选项 > 编辑”。
-
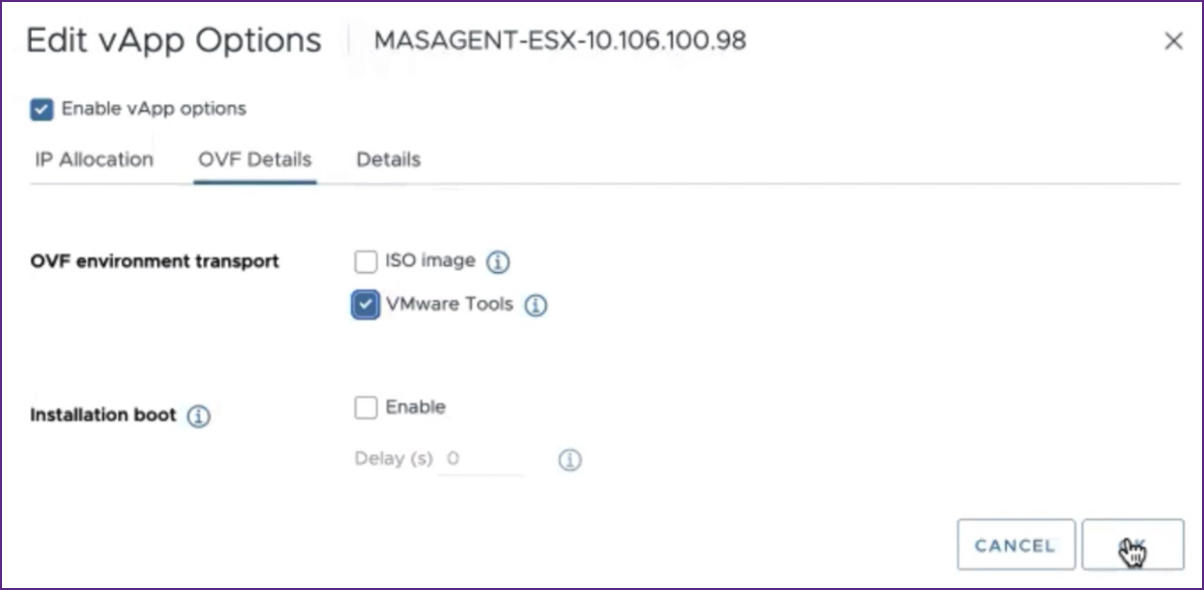
在“编辑 vApp 选项”窗口中,导航到“在 OVF 详细信息 > OVF 环境传输”,然后选择“VMware Tools”。单击“确定”。
-
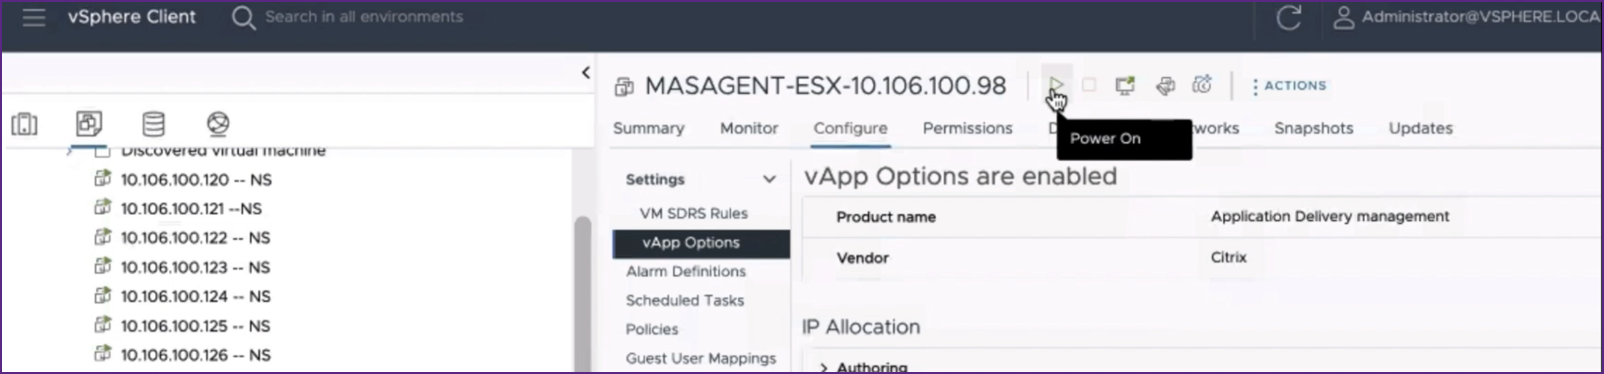
右键单击虚拟机,然后单击“启动”。或者,您可以选择虚拟机的“摘要”选项卡,然后单击“启动”。
-
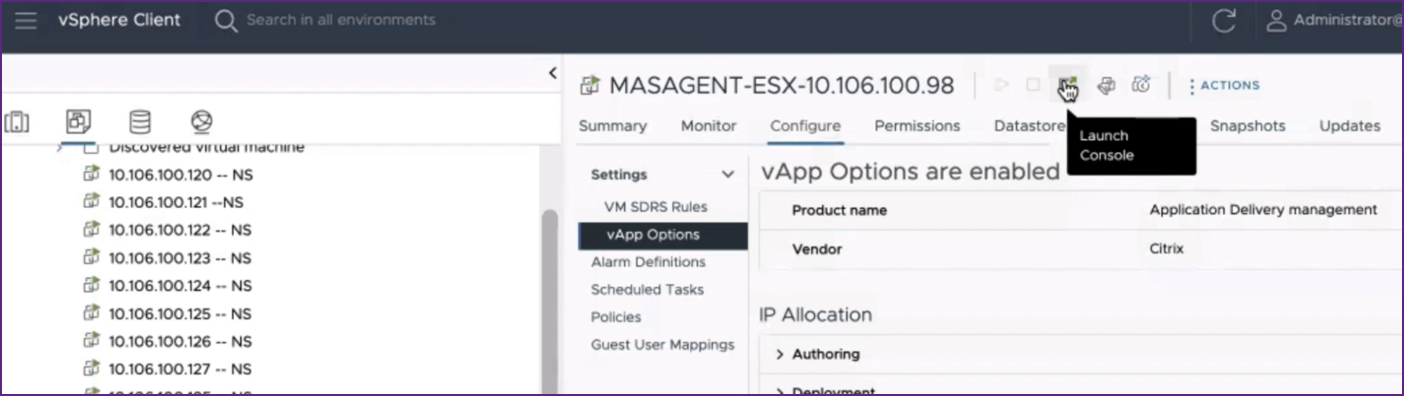
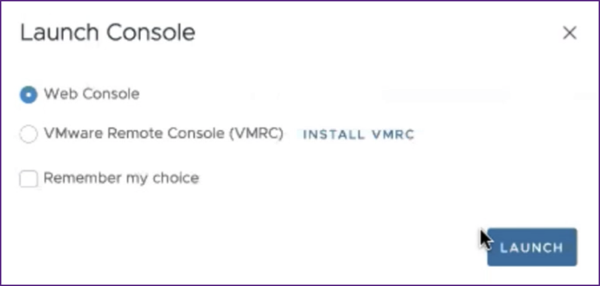
在“摘要”选项卡中,选择“启动 Web 控制台”。 在“启动控制台”窗口中,选择“Web 控制台”。单击“启动”。
-
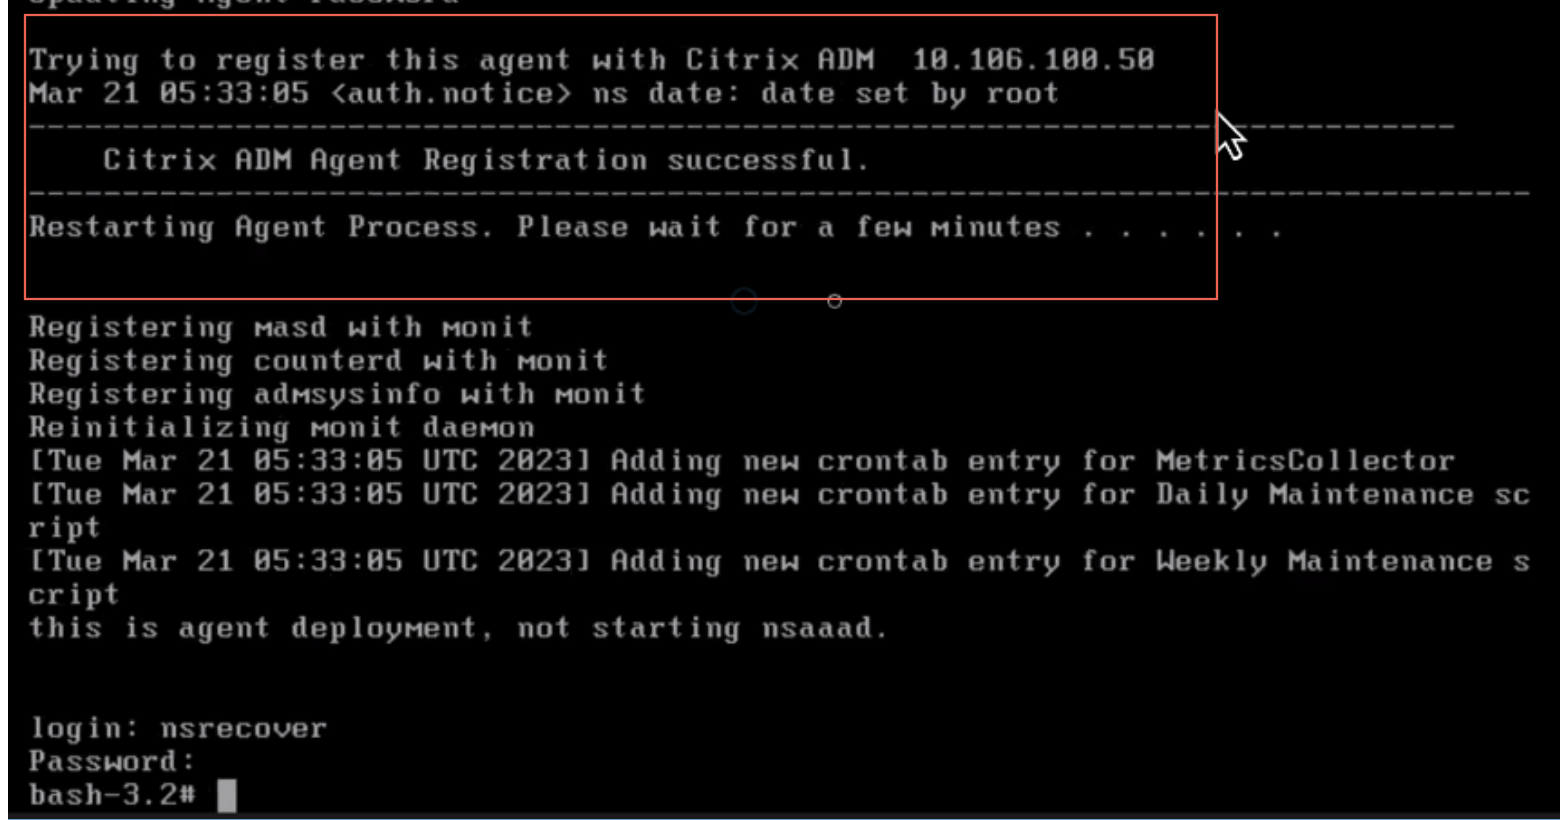
在控制台中,NetScaler 代理注册到 NetScaler Console 服务器后,将显示一条成功注册消息。要验证 NetScaler 代理是否已部署且默认密码已更改,请使用 NetScaler 代理 用户名和新密码登录。
步骤 3: 验证
要验证 NetScaler 代理已部署:
-
NetScaler 代理部署后,通过在浏览器中键入 NetScaler Console 服务器的 IP 地址来访问 NetScaler Console GUI。
-
使用您的凭据登录服务器。
-
导航到 Infrastructure > Instances > Agents。 新部署的代理将显示在 ESX 平台上。