
Amazon Web Services (AWS) に NetScaler エージェントをインストールする
NetScaler エージェントは、NetScaler Console と、データセンターまたはクラウドで検出されたインスタンスとの間の仲介役として機能します。
前提条件
Amazon GUI を使用して、Amazon Web Services (AWS) Virtual Private Cloud (VPC) 内で NetScaler エージェント AMI を起動するには、以下が必要です。
-
AWS アカウント
-
AWS 仮想プライベートクラウド (VPC)
-
IAM アカウント
-
エージェントが NetScaler Console サービスに接続するためのサービス URL とアクティベーションコード。NetScaler Console サービス GUI で、Infrastructure > Instances > Agents に移動し、Generate Activation Code をクリックして、サービス URL とアクティベーションコードを生成します。
注
-
NetScaler エージェント仮想マシンをプロビジョニングする前に、Citrix はセキュリティグループ、仮想プライベートネットワーク、キーペア、サブネット、およびその他のエンティティを作成することをお勧めします。これにより、プロビジョニング中にネットワーク情報が利用可能になります。
-
NetScaler エージェントが NetScaler Console および NetScaler インスタンスと通信できるように、推奨されるポートが開いていることを確認してください。NetScaler エージェントのポート要件の詳細については、「ポート」を参照してください。
AWS に NetScaler エージェントをインストールするには:
-
AWS 認証情報を使用して、AWS Marketplace にログオンします。
-
検索フィールドに「NetScaler agent」と入力して NetScaler エージェント AMI を検索し、Go をクリックします。
-
検索結果ページで、利用可能なリストから NetScaler Console External agent AMI をクリックします。
-
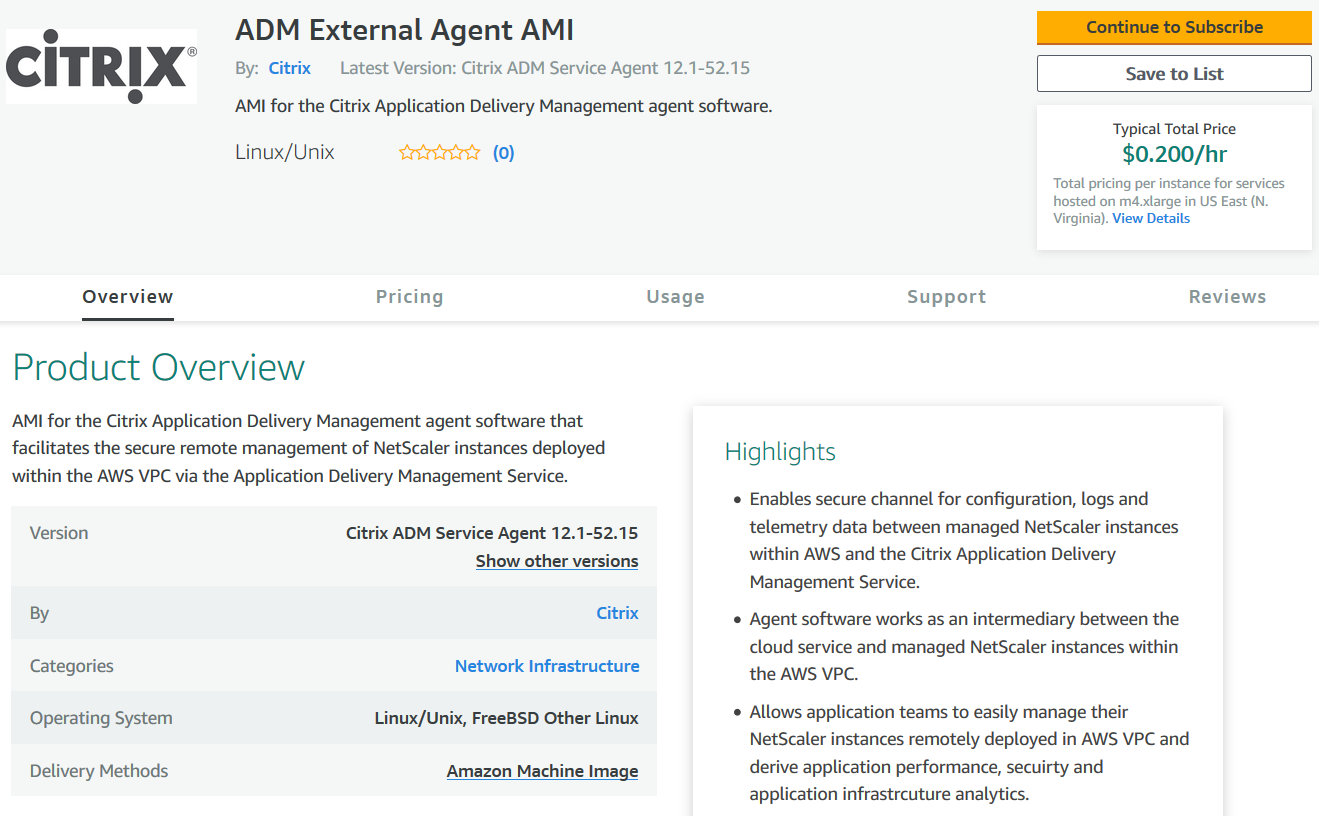
NetScaler Console External Agent AMIページで、Continue to Subscribeをクリックします。
-
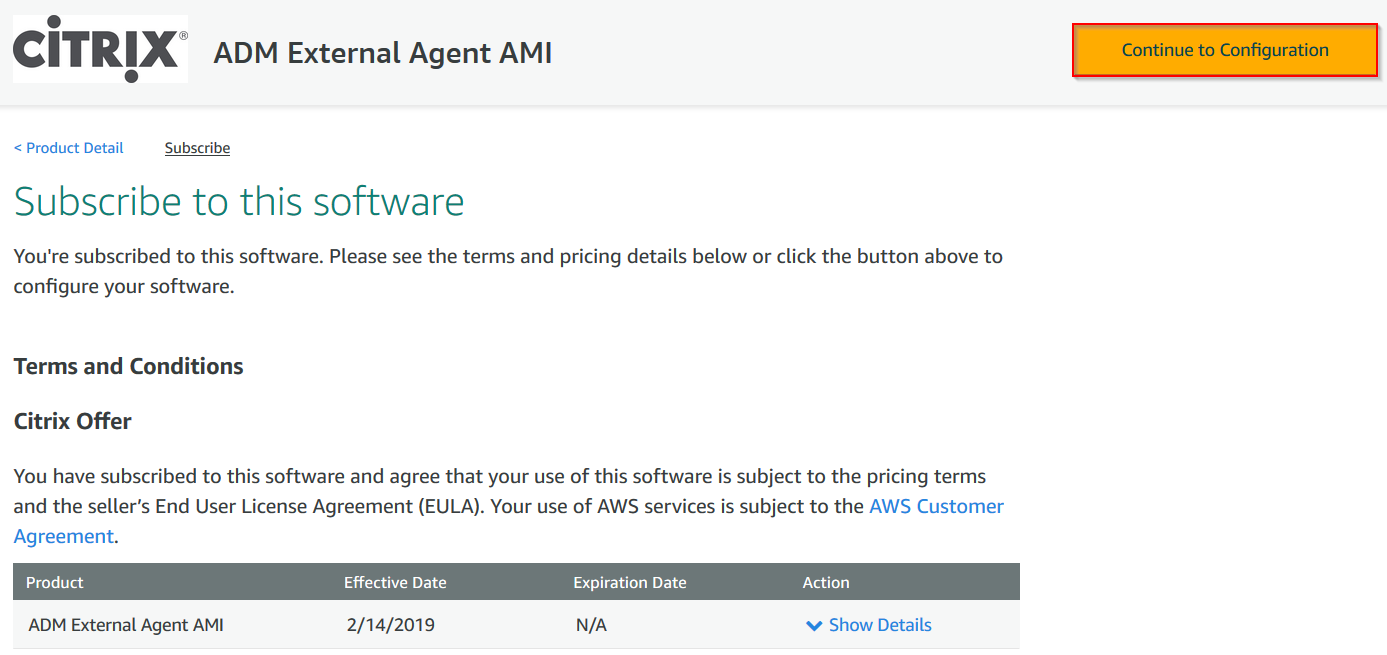
サブスクリプションが正常に完了したら、Continue to Configurationをクリックします。
-
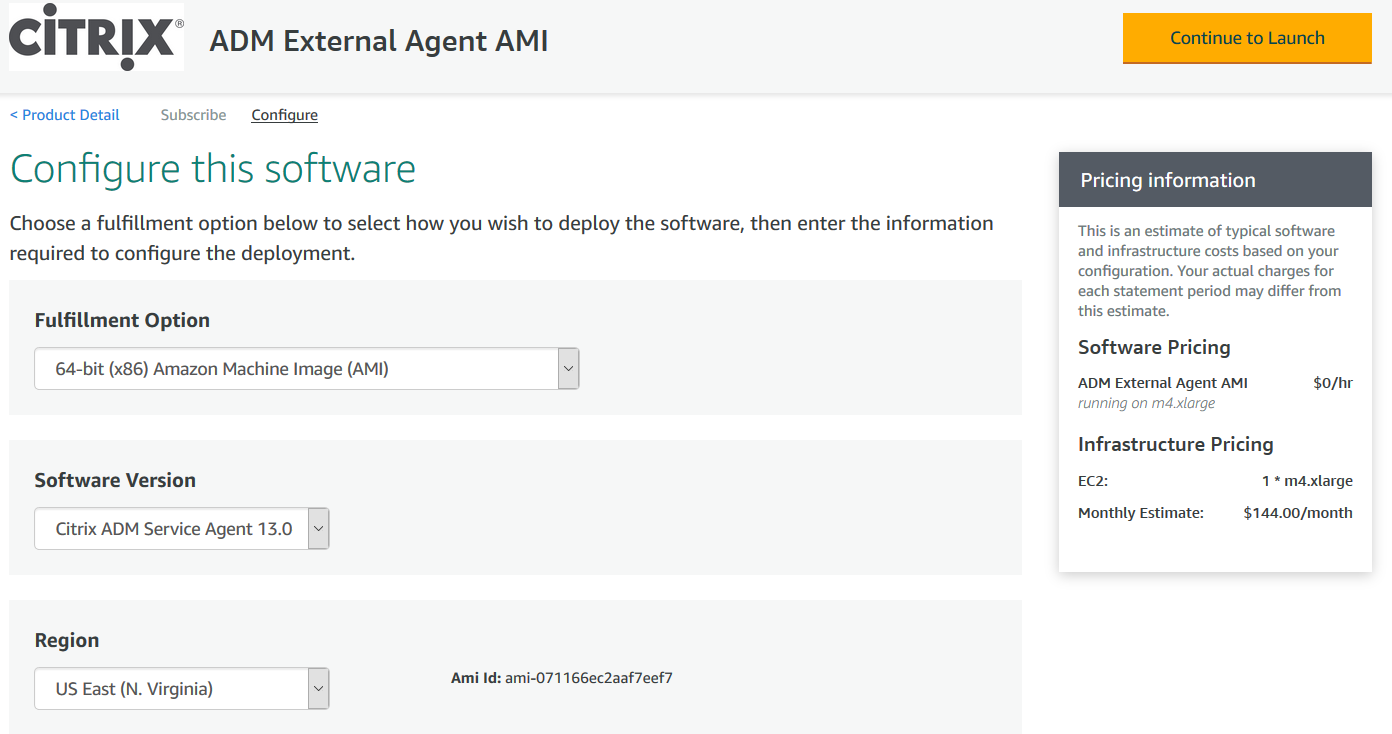
Configure this softwareページで、次の操作を行います。
-
Fulfillment optionリストからAMIを選択します。
-
Software Versionリストから最新のNetScalerエージェントバージョンを選択します。
-
Regionリストからお使いのリージョンを選択します。
-
Continue to Launchをクリックします
-
-
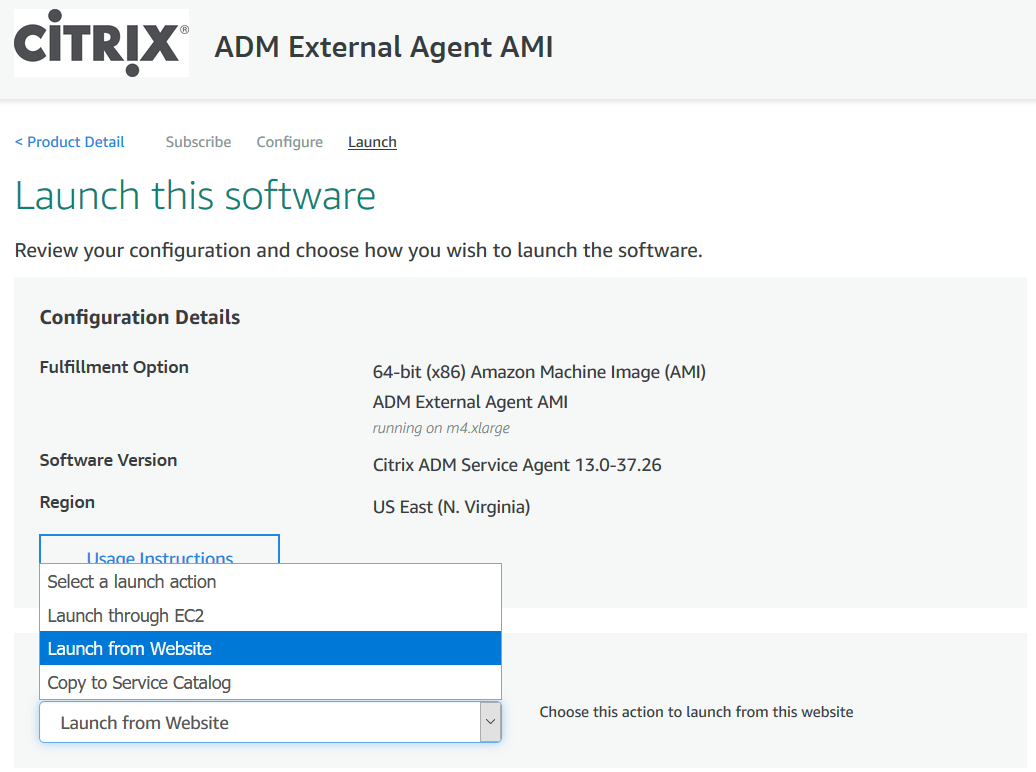
Launch this softwareページには、NetScalerエージェントを登録するための2つのオプションがあります。
-
Webサイトから起動
-
EC2で起動
-
Webサイトから起動
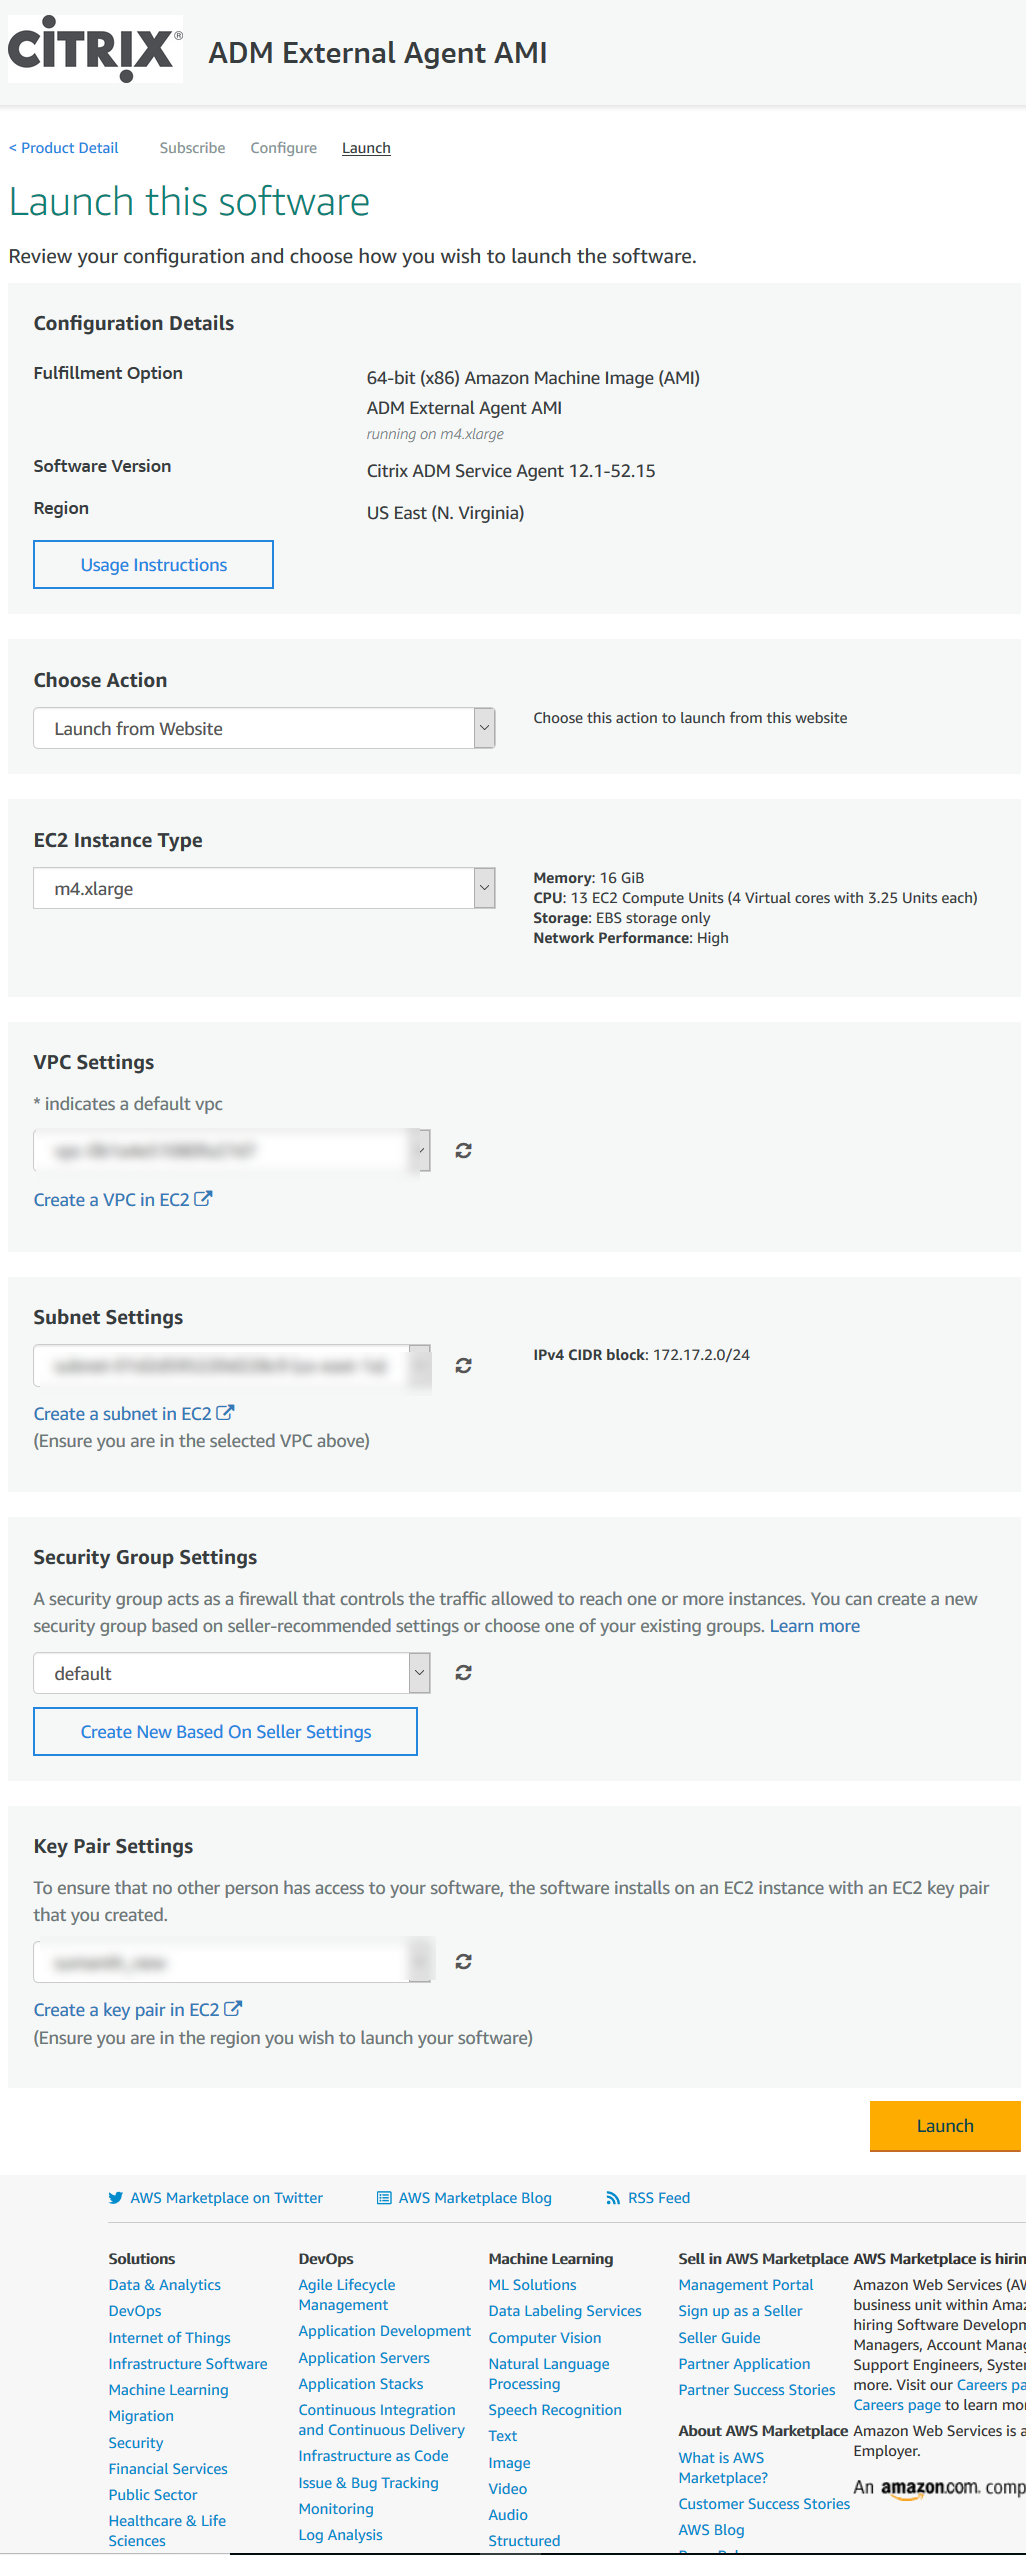
ウェブサイトから起動するには、以下を選択します。
-
EC2インスタンスタイプリストからEC2インスタンスタイプ
-
VPC設定リストからVPC。ソフトウェア用のVPCを作成するには、EC2でVPCを作成をクリックします。
-
サブネット設定リストからサブネット。VPCを選択した後、サブネットを作成するには、EC2でサブネットを作成をクリックします。
-
セキュリティグループ設定リストからファイアウォール用のセキュリティグループ。セキュリティグループを作成するには、販売者設定に基づいて新規作成をクリックします。
-
キーペア設定リストからアクセスセキュリティを確保するためのキーペア。ソフトウェア用のキーペアを作成するには、EC2でキーペアを作成をクリックします。
-
起動をクリックします
-
ウェブサイトからの起動が成功しました。
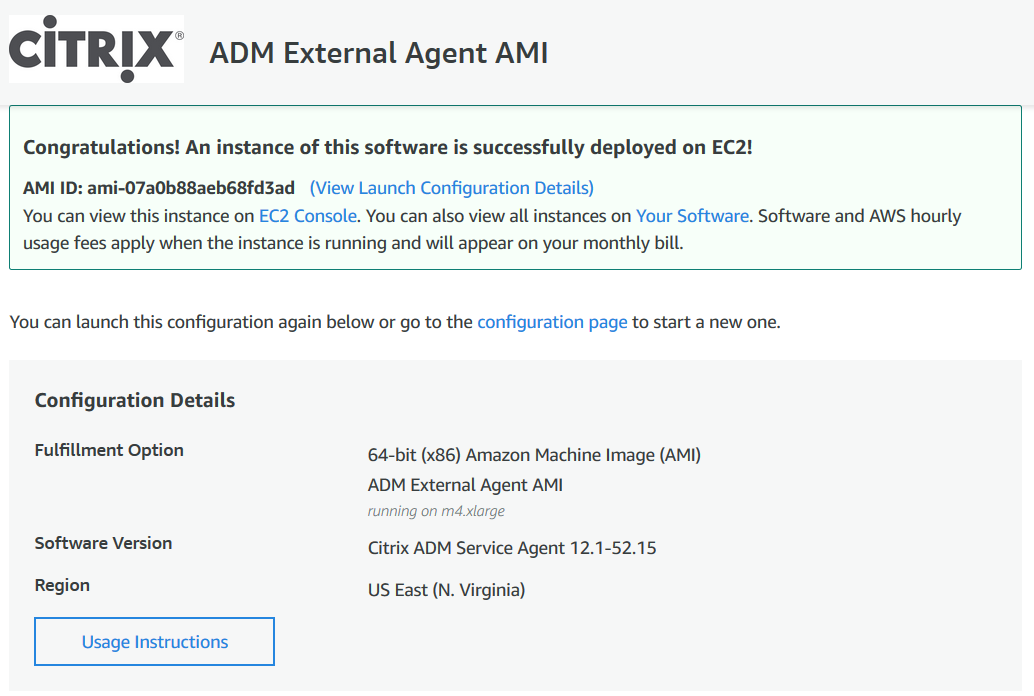 注デプロイプロセスには約10~15分かかる場合があります。デプロイが正常に完了すると、AWSアカウントでNetScalerエージェント仮想マシンを表示できます。
 -
エージェントがデプロイされたら、NetScalerエージェントに名前を割り当てます。
-
エージェントが稼働状態になったら、NetScalerエージェントにElastic IPアドレスを割り当てます。注Elastic IPアドレスは、NetScalerエージェントがNetScaler Consoleと通信できるようにします。ただし、NAT Gatewayを設定してインターネットにトラフィックをルーティングしている場合は、Elastic IPアドレスは必要ない場合があります。
-
SSHクライアントを使用して、NetScalerエージェントにログオンします。注NetScalerエージェントには、次のいずれかの方法でログオンできます。
-
nsrecoverをユーザー名として使用し、AWSインスタンスIDをパスワードとして使用します。 -
nsrootをユーザー名として使用し、有効なキーペアをパスワードとして使用します。
-
-
次のコマンドを入力して展開画面を呼び出します: deployment\_type.py
-
Getting Started で指示されているように、NetScaler Consoleの エージェントのセットアップ ページからコピーして保存した Service-URL と アクティベーションコード を入力します。エージェントはサービスURLを使用してサービスを特定し、アクティベーションコードを使用してサービスに登録します。

エージェントの登録が成功すると、エージェントが再起動してインストールプロセスを完了します。
エージェントが再起動したら、NetScaler Consoleにアクセスし、エージェントのセットアップ ページの 検出されたエージェント の下で、エージェントのステータスを確認します。
EC2で起動
EC2で起動するには、アクションの選択 リストから EC2経由で起動 を選択し、次に 起動 をクリックします。
-
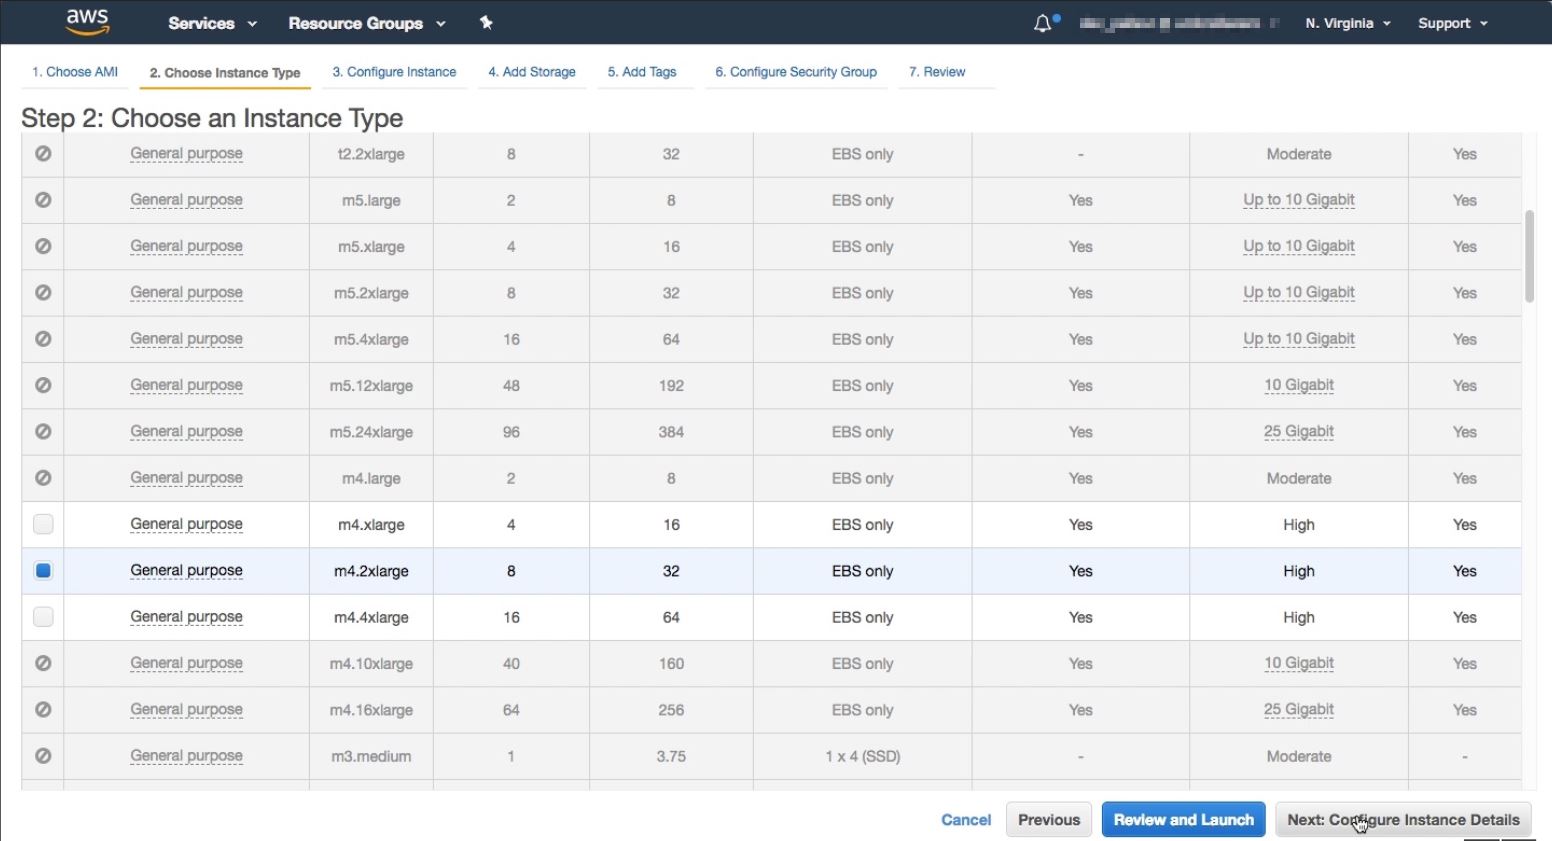
インスタンスタイプの選択 ページで、インスタンスを選択し、次へ: インスタンスの詳細を設定 をクリックします。
-
「インスタンスの詳細設定」ページで、必要なパラメータを指定します。「高度な詳細」セクションで、「ユーザーデータ」フィールドに認証の詳細またはスクリプトを指定することで、ゼロタッチエージェントを有効にできます。
-
認証の詳細 - Getting Startedで指示されているように、NetScaler Consoleの「エージェントのセットアップ」ページからコピーした「サービスURL」と「アクティベーションコード」を指定します。詳細を次の形式で入力します。
registeragent -serviceurl <apigatewayurl> -activationcode <activationcodevalue>エージェントは、この情報を使用して起動時にNetScaler Consoleに自動登録します。 -
スクリプト - エージェントの自動登録スクリプトをユーザーデータとして指定します。以下はスクリプトの例です。
#!/var/python/bin/python2.7
 import os
 import requests
 import json
 import time
 import re
 import logging
 import logging.handlers
 import boto3

 '''
 Overview of the Script:
 The script helps to register a NetScaler agent with NetScaler Console. Pass it in userdata to make NetScaler agent in AWS to autoregister on bootup. The workflow is as follows
 1)  Fetch the NetScaler Console API credentials (ID and secret) from AWS secret store (NOTE: you have to assign IAM role to the NetScaler agent that will give permission to fetch secrets from AWS secret store)
 2)  Login to NetScaler Console with credentials fetched in step 1
 3)  Call NetScaler Console to fetch credentials (serviceURL and token) for agent registration
 4)  Calls registration by using the credentials fetched in step 3
 '''

 '''
 These are the placeholders which you need to replace according to your setup configurations
 aws_secret_id: Id of the AWS secret where you have stored NetScaler Console Credentials
 The secrets value should be in the following json format
 { "adm_user_id_key": "YOUR_ID", " adm_user_secret_key": "YOUR_SECRET"}
 '''

 aws_secret_id = "<AWS_secret_id>"
 adm_ip_or_hostname = "<YOUR_ADM_POP>.adm.cloud.com"

 '''
 Set up a specific logger with your desired output level and log file name
 '''
 log_file_name_local = os.path.basename(__file__)
 LOG_FILENAME = '/var/log/' + 'bootstrap' + '.log'
 LOG_MAX_BYTE = 50*1024*1024
 LOG_BACKUP_COUNT = 20

 logger = logging.getLogger(__name__)
 logger.setLevel(logging.DEBUG)
 logger_handler = logging.handlers.RotatingFileHandler(LOG_FILENAME, maxBytes=LOG_MAX_BYTE, backupCount=LOG_BACKUP_COUNT)
 logger_fortmater = logging.Formatter(fmt='%(asctime)-2s:%(funcName)30s:%(lineno)4d: [%(levelname)s] %(message)s', datefmt="%Y-%m-%d %H:%M:%S")
 logger_handler.setFormatter(logger_fortmater)
 logger.addHandler(logger_handler)

 class APIHandlerException(Exception):
     def __init__(self, error_code, message):
         self.error_code = error_code
         self.message = message

     def __str__(self):
         return self.message + ". Error code '" + str(self.error_code) + "'"

 def parse_response(response, url, print_response=True):
     if not response.ok:
         if "reboot" in url:
             logger.debug('No response for url: reboot')
             resp = {"errorcode": "500", "message": "Error while reading response."}
             return resp

         if print_response:
             logger.debug('Response text for %s is %s' % (url, response.text))

         response = json.loads(response.text)
         logger.debug("ErrorCode - " + str(response['errorcode']) + ". Message -" + str(response['message']))
         raise APIHandlerException(response['errorcode'], str(response['message']))
     elif response.text:
         if print_response:
             logger.debug('Response text for %s is %s' % (url, response.text))

         result = json.loads(response.text)
         if 'errorcode' in result and result['errorcode'] > 0:
             raise APIHandlerException(result['errorcode'], str(result['message']))
         return result

 def _request(method, url, data=None, headers=None, retry=3, print_response=True):
     try:
         response = requests.request(method, url, data=data, headers=headers)
         result = parse_response(response, url, print_response=print_response)
         return result
     except [requests.exceptions.ConnectionError, requests.exceptions.ConnectTimeout]:
         if retry > 0:
             return _request(method, url, data, headers, retry-1, print_response=print_response)
         else:
             raise APIHandlerException(503, 'ConnectionError')
     except requests.exceptions.RequestException as e:
         logger.debug(str(e))
         raise APIHandlerException(500, str(e))
     except APIHandlerException as e:
         logger.debug("URL: %s, Error: %s, Message: %s" % (url, e.error_code, e.message))
         raise e
     except Exception as e:
         raise APIHandlerException(500, str(e))

 try:
     '''Get the AWS Region'''
     client = boto3.client('s3')
     my_region = client.meta.region_name
     logger.debug("The rgion is %s" % (my_region))

     '''Creating a Boto cleint session'''
     session = boto3.session.Session()
     client = session.client(
         service_name='secretsmanager',
         region_name=my_region
     )

     '''Getting the values stored in the secret with id: <aws_secret_id>'''
     get_id_value_response = client.get_secret_value(
         SecretId = aws_secret_id
     )
     adm_user_id = json.loads(get_id_value_response["SecretString"])["adm_user_id_key"]
     adm_user_secret = json.loads(get_id_value_response["SecretString"])["adm_user_secret_key"]

 except Exception as e:
     logger.debug("Fetching of NetScaler Console credentials from AWS secret failed with error: %s" % (str(e)))
     raise e

 '''
 Initializing common NetScaler Console API handlers
 '''
 mas_common_headers = {
     'Content-Type': "application/json",
     'Accept-type': "application/json",
     'Connection': "keep-alive",
     'isCloud': "true"
 }

 '''
 API to login to the NetScaler Console and fetch the Session ID and Tenant ID
 '''
 url = "https://" + str(adm_ip_or_hostname) + "/nitro/v1/config/login"
 payload = 'object={"login":{"ID":"' + adm_user_id + '","Secret":"' + adm_user_secret + '"}}'
 try:
     response = _request("POST", url, data=payload, headers=mas_common_headers)
     sessionid = response["login"][0]["sessionid"]
     tenant_id = response["login"][0]["tenant_name"]
 except Exception as e:
     logger.debug("Login call to the NetScaler Console failed with error: %s" % (str(e)))
     raise e

 '''
 API to fetch the service URL and Token to be used for registering the agent with the NetScaler Console
 '''
 mas_common_headers['Cookie'] = 'SESSID=' + str(sessionid)
 url = "https://" + str(adm_ip_or_hostname) + "/nitro/v1/config/trust_preauthtoken/" + tenant_id +"?customer="+ tenant_id
 logger.debug("Fetching Service URL and Token.")
 try:
     response = _request("GET", url, data=None, headers=mas_common_headers)
     service_name  = response["trust_preauthtoken"][0]["service_name"]
     token = response["trust_preauthtoken"][0]["token"]
     api_gateway_url = response["trust_preauthtoken"][0]["api_gateway_url"]
 except Exception as e:
     logger.debug("Fetching of the Service URL Passed with error. %s" % (str(e)))
     raise e

 '''
 Running the register agent command using the values we retrieved earlier
 '''
 try:
     registeragent_command = "registeragent -serviceurl "+api_gateway_url+" -activationcode "+service_name+"\;"+token
     file_run_command = "/var/python/bin/python2.7 /mps/register_agent_cloud.py "+registeragent_command
     logger.debug("Executing registeragent command: %s" % (file_run_command))
     os.system(file_run_command)
 except Exception as e:
     logger.debug("Agent Registeration failed with error: %s" % (str(e)))
         raise e
このスクリプトは、AWS Secrets Managerから認証の詳細を取得し、deployment.pyスクリプトを実行してエージェントをNetScaler Consoleに登録します。
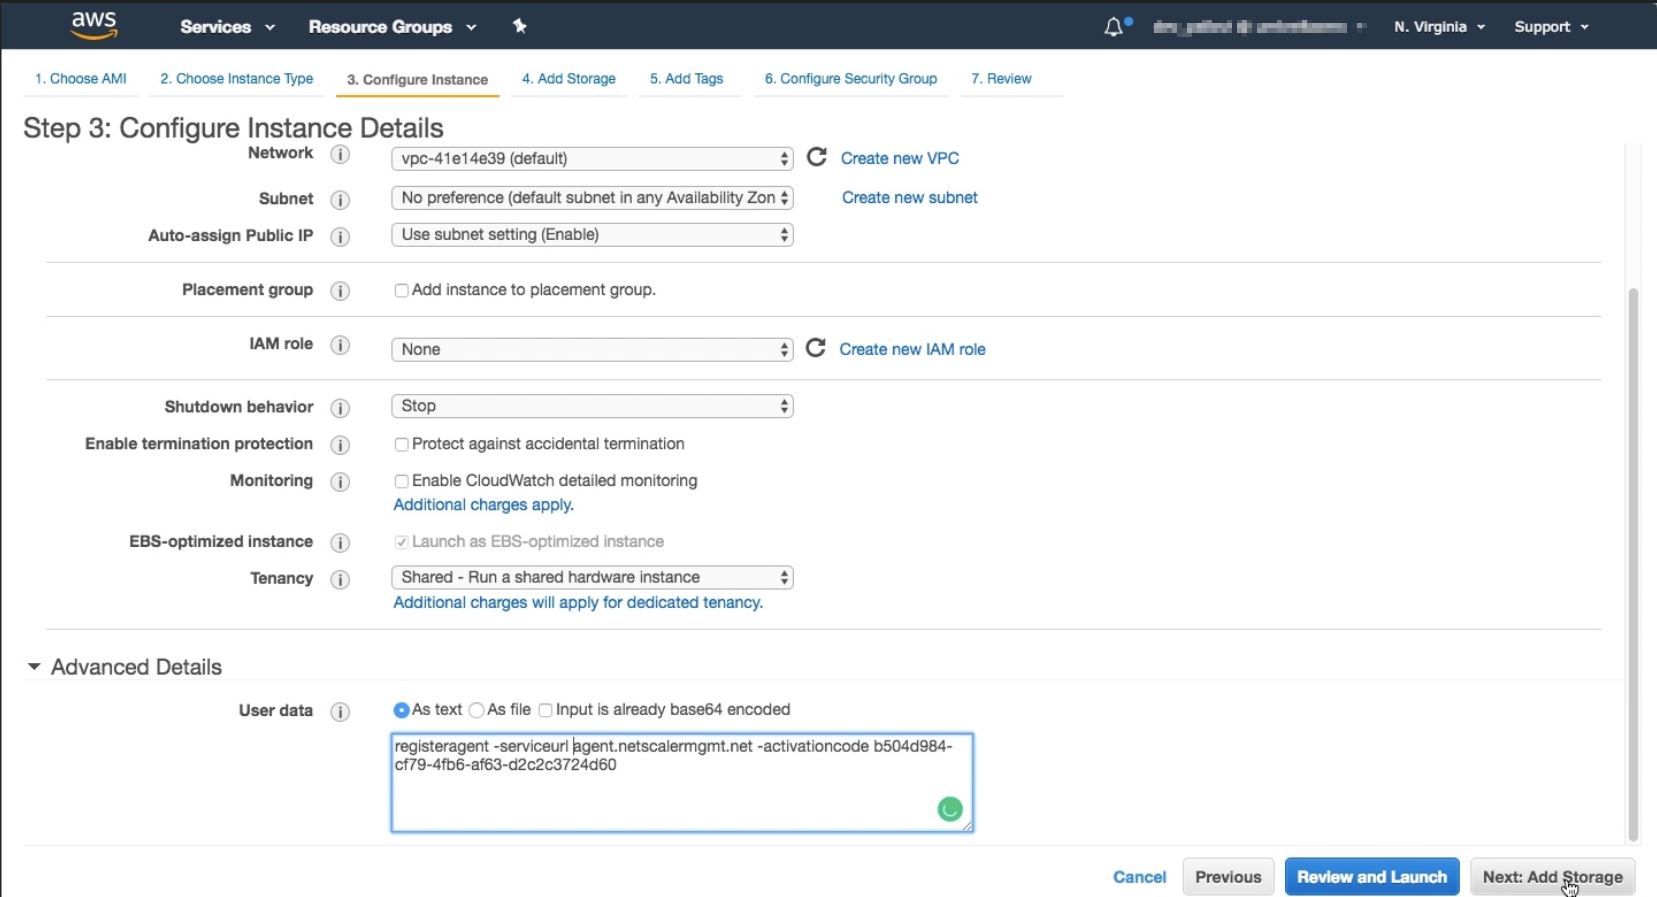 注パブリックIPアドレスを自動割り当てできますが、Elastic IPアドレスを割り当てることもできます。NAT Gatewayが設定されていない場合は、Elastic IPアドレスの割り当てが必要です。このステップでElastic IPアドレスが設定されていない場合でも、EC2コンソールで設定できます。新しいElastic IPアドレスを作成し、インスタンスIDまたはENI-IDを使用してNetScalerエージェントに関連付けることができます。「ストレージの追加」をクリックします。
 -
-
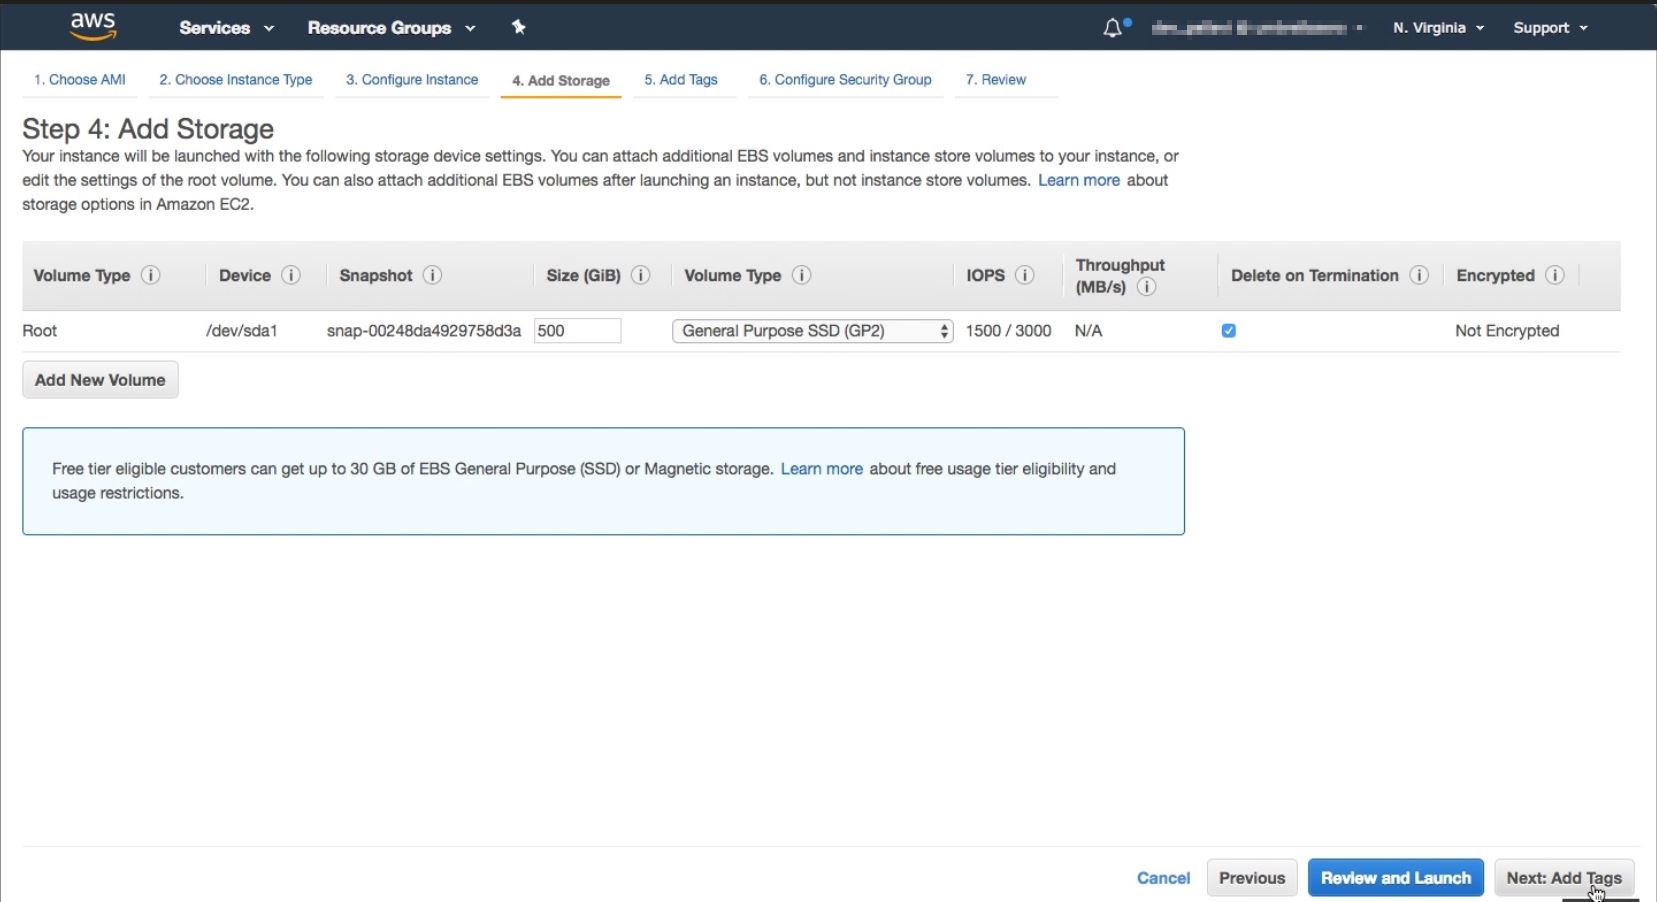
「ストレージの追加」ページで、インスタンスのストレージデバイス設定を構成し、「次へ: タグの追加」をクリックします。
-
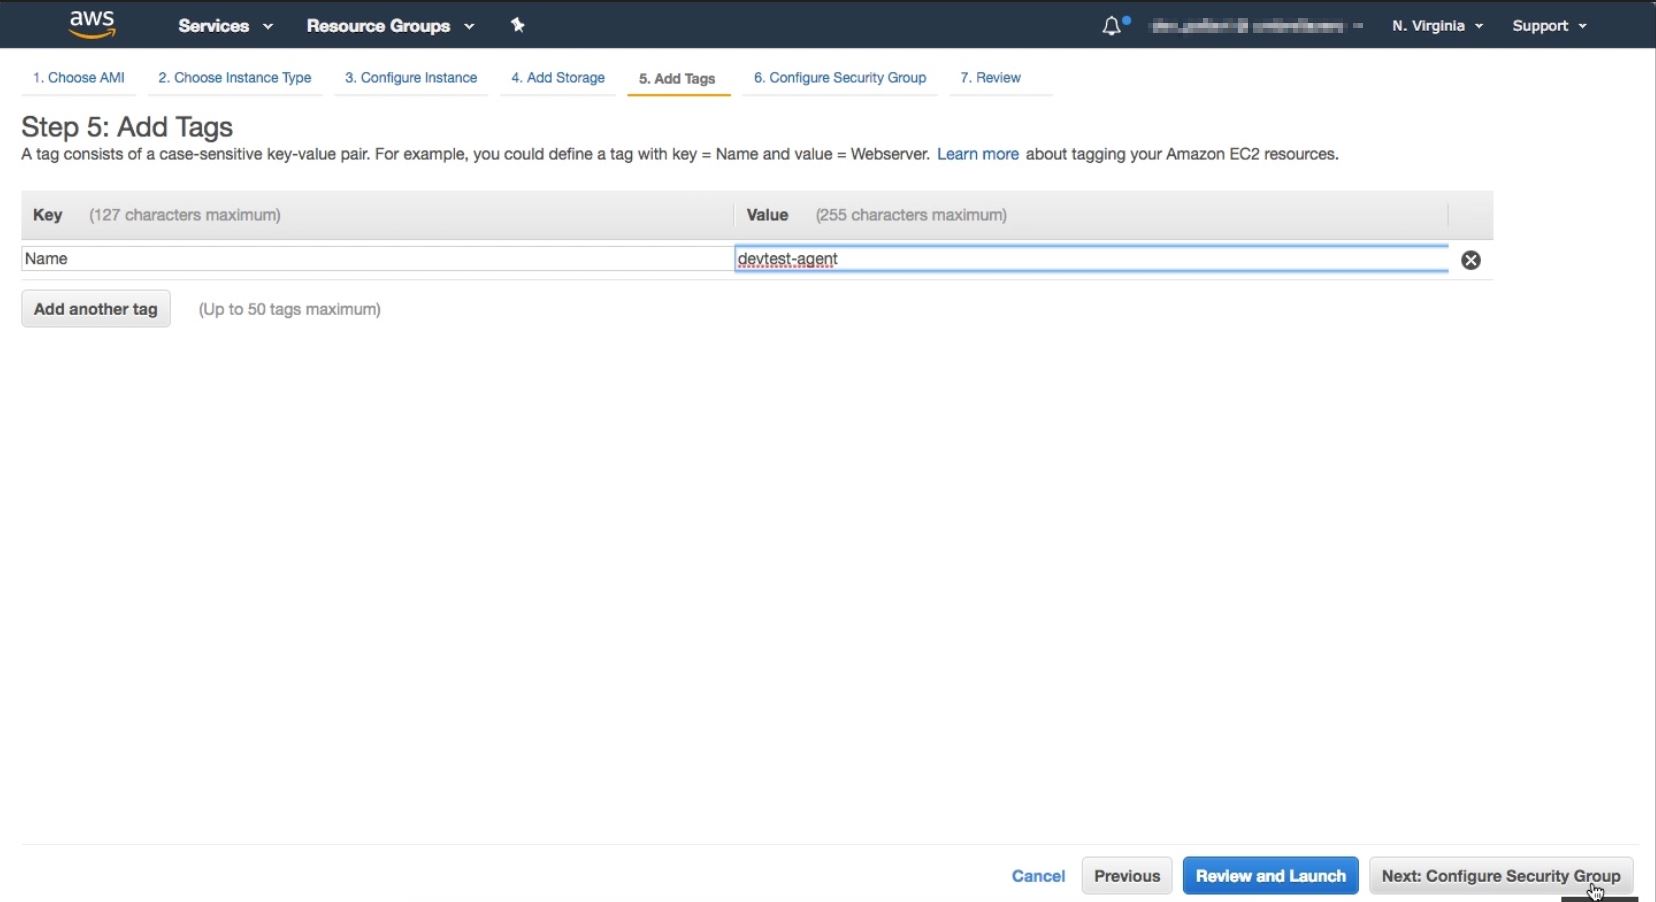
「タグの追加」ページで、インスタンスのタグを定義し、「次へ: セキュリティグループの設定」をクリックします。
-
「セキュリティグループの設定」ページで、インスタンスへの特定のトラフィックを許可するルールを追加し、「確認と起動」をクリックします。確認と起動(/en-us/netscaler-console-service/media/agent-aws-7.jpg)
-
「インスタンス起動の確認」ページで、インスタンス設定を確認し、「起動」をクリックします。
-
「既存のキーペアを選択するか、新しいキーペアを作成する」ダイアログボックスで、キーペアを作成します。既存のキーペアから選択することもできます。承認に同意し、「インスタンスの起動」をクリックします。インスタンスの起動(/en-us/netscaler-console-service/media/agent-aws-8.jpg)
デプロイプロセスには約10~15分かかる場合があります。デプロイが正常に完了すると、AWSアカウントでNetScalerエージェント仮想マシンを表示できます。